
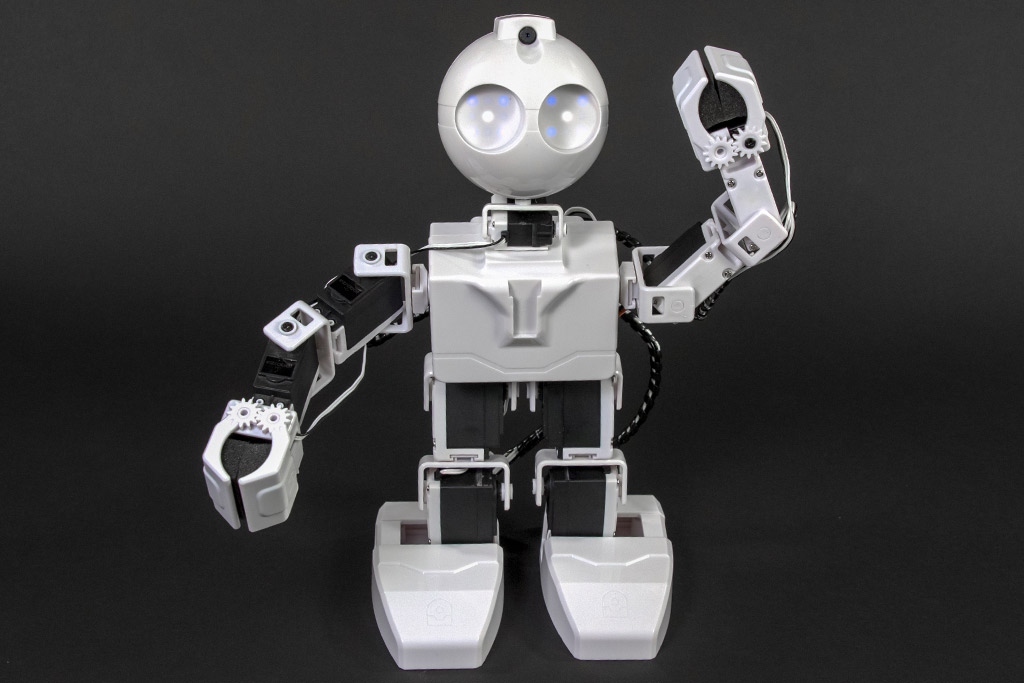
JD Humanoid by EZ-Robot


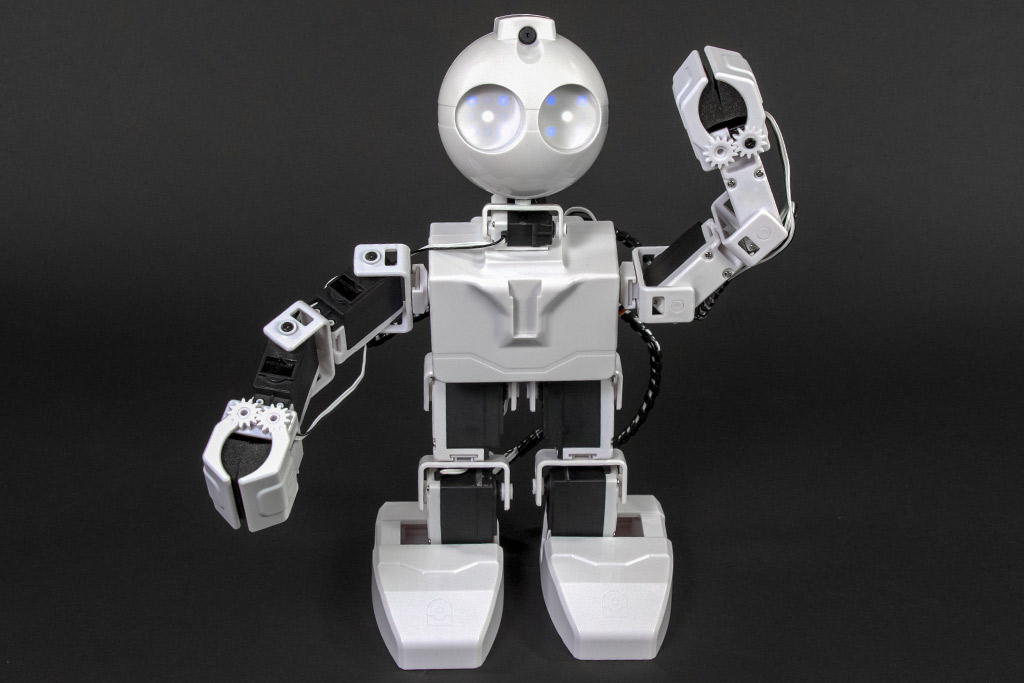
A humanoid that waves, dances and talks
JD is EZ-Robot's 16-joint humanoid robot kit, built around an EZ-B v4 controller with a camera in its head and LED eyes. In Synthiam ARCx you pose JD and save the poses as animations, record performances, walk it with a joystick, and give it a voice and vision, all from a web browser.
How JD works with Synthiam. JD's controller is an EZ-B v4, which runs EZB firmware out of the box. ARCx connects to it over Wi-Fi with the Ezb Connection robot skill. Then Auto Position (movement Panel) turns poses into gestures and walking, and every other ARCx skill (camera, speech, AI, Custom UI) works with JD straight away. We recommend ARCx: it runs on Windows, Linux and Raspberry Pi and is used from any web browser. ARC, Synthiam's Windows application, works with JD too.
What is JD Humanoid?
JD is a ready-to-build humanoid robot kit from EZ-Robot, originally invented in Canada. It is designed for people who are brand new to robotics and want a robot that is fun to build, easy to control and educational.
- 16 degrees of freedom (DOF): 16 joints that move independently, across the arms, legs and head.
- Metal-gear, heavy-duty servos: the motors that move each joint. Metal gears are stronger and more durable than plastic ones.
- Grippers for hands, a camera in the head and LED eyes that can show expressions.
- EZ-Bits construction: modular parts designed to fit together easily, which keeps the build simple for beginners.
- EZ-B v4 controller with Wi-Fi and a built-in speaker, plus a LiPo battery and charger.
JD at a glance
| Type | Humanoid robot kit |
|---|---|
| Maker | EZ-Robot |
| Controller | EZ-B v4 (EZB firmware) |
| Joints | 16 DOF, metal-gear servos |
| Head | Camera and LED eyes |
| Audio | Speaker built into the EZ-B v4 |
| Connection | Wi-Fi (USB/serial possible, see the EZ-B v4 page) |
| Power | LiPo battery in the torso, balancer charger included |
| Size | 15 × 13 × 33 cm, 1.33 kg |
| Synthiam uses it for | Gestures, dances, walking, vision, speech, AI, teaching |
| Website | ez-robot.com |
Beginner tip: most of robotics is “connect and test”. Build a section, connect its servos, then test the movement before moving on. This catches problems early, such as a servo turning the wrong way or a loose connection.
What you can do with JD in Synthiam
A humanoid is all about movement. Synthiam gives you three ways to make JD move, from simple to expressive, and they all work together with speech, vision and AI.
- Auto Position: pose JD, capture each pose as a frame, and string frames into named actions like Wave, Bow or Dance.
- Servo Animation: record JD's servos as they move, then polish the performance on a timeline with music and sound effects.
- Servo Pad: puppeteer the head or an arm by dragging a finger across a pad, and save favorite positions as poses.
Gestures and dances
Auto Position (movement Panel) plays named actions with smooth transitions, set per step with delay, steps and ramp. Run them from a button, a script, a voice command or an AI.
Walking
Auto Position (movement Panel) reserves Forward, Reverse, Left, Right and Stop actions. Fill them with gait frames and the Movement Joystick, a gamepad or a script walks JD like it would drive a wheeled robot.
Performances
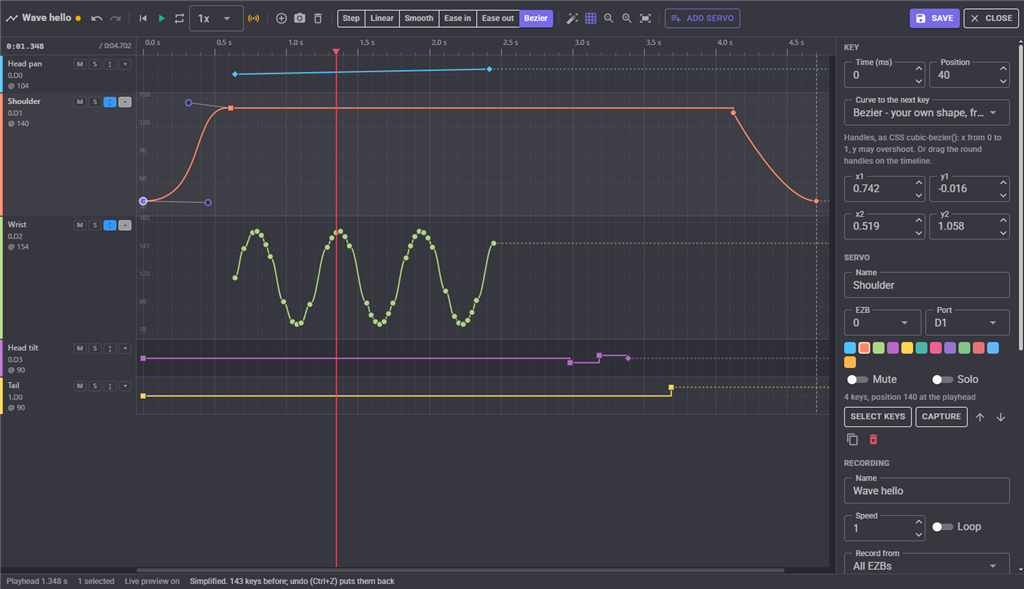
Servo Animation records whatever moves the servos, then lets you edit every joint as a curve, add script points that speak, and line it all up with WAV or MP3 audio lanes.
Puppeteering
Servo Pad drives the head's pan and tilt (or an arm) from a touch pad, with smoothing, saved poses and recorded takes.
Eyes and vision
Camera Source (ezb) streams the head camera. Face Tracking, Color Tracking and Glyph Recognition find things; Vision Detection Tracking Script turns JD's head to follow them.
Expressive LED eyes
Rgb Eyes Animator builds color animations for EZ-Robot's RGB eyes module, frame by frame, and plays them by name: Happy, Angry, Blink.
Voice
Text to speech plays through the EZ-B v4's speaker when Project audio is set to the EZB. Speech Phrase Recognition turns spoken commands into actions.
AI conversation
Autonomous AI, Chat GPT and Aimlbot let JD hold a conversation and run its actions. ARCx is also an MCP server for agents like Claude.
What you need to use JD
A computer
To run ARCx: a Windows 10/11 PC, an Ubuntu 24.04 computer, or a Raspberry Pi 4/5 running Ubuntu 24.04. Then use JD from any browser. ARC needs a Windows PC.
Wi-Fi
Either connect directly to the robot's own Wi-Fi network, or put the EZ-B v4 on your home network.
Enough power
Servos draw a lot of current, especially when many joints move at once, like walking. Always use the recommended, fully charged battery to avoid brownouts (random resets) and weak movement.
Connect JD to ARCx
- Build JD from the EZ-Bits parts and connect each servo to the EZ-B v4, following EZ-Robot's build guide. Test as you go.
- Power on and join the robot's Wi-Fi. Out of the box the EZ-B v4 makes its own Wi-Fi network (AP mode). Connect the computer that will run ARCx to it. The EZ-B v4 page explains how to switch to your home network instead.
- Install ARCx and open it in a web browser. Download ARCx.
-
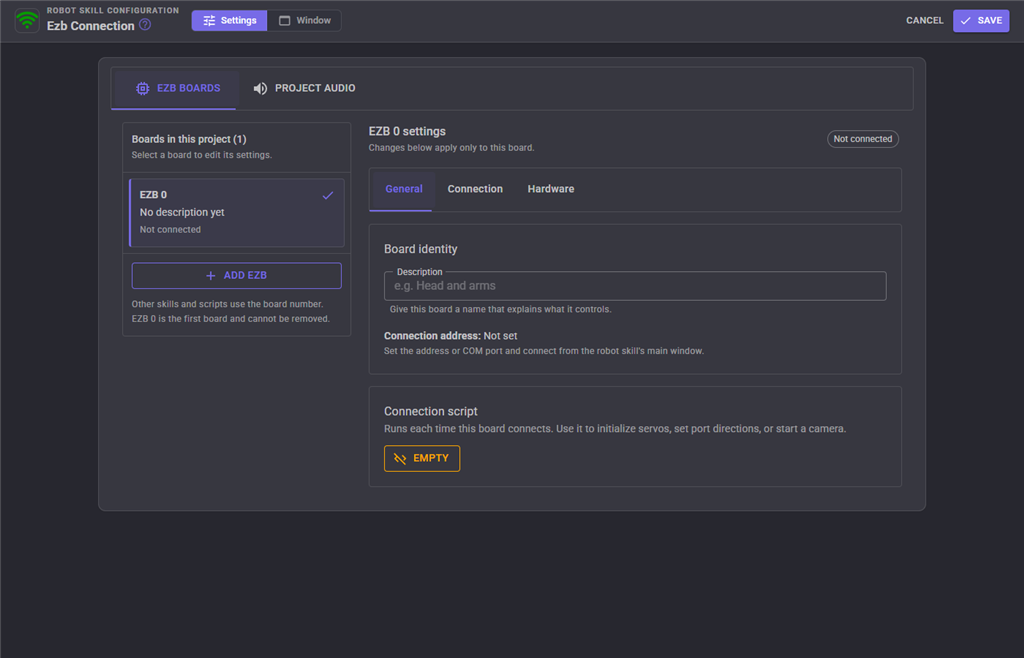
Connect. Add Ezb Connection (Communication category), pick JD from the address list
or type the address, and press the green connect button. In AP mode the address is normally:
192.168.1.1 - Check every servo. Add Auto Position (movement Panel) and add JD's 16 servos on its Servos tab with their ports and limits. With Realtime update on, move each slider gently to confirm it moves the right joint in the right direction. Invert a servo on the Servos tab if it runs backwards.
- Create a first action. Pose JD standing, press Capture and name the frame Stand. Pose an arm up for a Wave frame, then build a Wave action that moves Stand, Wave, Stand. Press Execute.
- Add the head camera. Add Camera Source (ezb), pick the camera and press Start. Save the project.
Already have a JD project in ARC?
Auto Position in ARCx can import an Auto Position configuration from an ARC project file on its Import/Export Utilities tab. Actions named Forward, Reverse, Left, Right and Stop become the walking actions, so frames and gaits you built in ARC carry over.
Using ARC instead?
Connect with ARC's EZB Connection and animate JD with Auto Position Movement Panel (Gait), Servo Recorder and RGB Animator.
Both work, ARCx is recommended
JD works with both of Synthiam's robot programming platforms, because both speak the EZ-B v4's EZB protocol. If you are starting today, choose ARCx.
| ARCx Recommended | ARC | |
|---|---|---|
| Runs on | Windows 10/11 x64, Ubuntu 24.04 x64 and ARM64, Raspberry Pi (Ubuntu 24.04) | Windows |
| User interface | Any web browser: laptop, tablet or phone, several people at once | Windows desktop application |
| Animation tools | Auto Position, Servo Animation timeline editor with audio lanes, Servo Pad | Auto Position, Servo Recorder, Servo Pad |
| AI agents through MCP | Yes | No |
| Connection skill | Ezb Connection | EZB Connection |
Troubleshooting
- Make sure the computer running ARCx is on JD's Wi-Fi network (AP mode) or on the same network JD joined (client mode).
- If JD does not appear in the address list, type the address by hand. On Windows the scanner only works when that network is set to Private.
- In AP mode the computer has no internet; that is normal. Cloud speech and AI skills need a second connection (Ethernet or the USB Wi-Fi dongle in the box), or put the EZ-B v4 on your home network.
The EZ-B v4 uses two circuit boards that work together during start-up. The top board holds the communication processor and Wi-Fi antenna. The bottom board holds the I/O processor, which handles hardware functions such as port control and the start-up sound. At power on, the communication processor starts first and sends start-up commands to the I/O processor; once the I/O processor answers, the EZ-B finishes starting up and plays the start-up sound.
No start-up sound usually does not mean the speaker is broken. More often it is a sign that the I/O processor is not responding. During connection, the communication processor accepts the connection and performs the first part of the EZB handshake, then hands over to the I/O processor, which must return its firmware ID. If the connection log stops at the firmware ID request and no ID comes back, the I/O processor is not responding, which strongly suggests the bottom board is damaged.
The camera may still work, because the top board's communication processor handles the video stream. A working camera only proves the top board is alive, not that the whole EZ-B is healthy.
The usual cause is electrical damage to the I/O system: ports that were shorted, overloaded, or given too much voltage or current. The EZ-B v4's I/O protection has limits and cannot prevent all damage.
Frequently asked questions
Teach JD its first dance
Install ARCx, connect with Ezb Connection, and turn poses into gestures, walks and performances from any browser.
Habe den Bausatz "JD Humanoid" erhalten und nach Anleitung aufgebaut. Funktioniert alles einwandfrei bis auf Port D7 (Rechter Oberarm). servo ist in Ordnung. Port D7 scheint defekt zu sein. Benutze das offizielle "JD example project" wie im Anleitungsvideo beschrieben. FRAGE: Kann ich einen anderen freien Port anstatt D7 nutzen? Wo kann ich das servo dem Port zuordnen?
ezrobot will be able to assist you for warranty replacement. But you’ll have to contact them through their website.
The JD robot project uses the Auto Position robot skill. To change any servo, you can edit the Auto Position configuration.
press the configuration (three little dots next to the ?)
in the configuration window, press the "show ports" checkbox
scroll through the list of "frames" and select "stand"
locate the servo that you wish to change and select it. A dialog window will appear with the servo selection option.
the project will have to be saved as a new project. You are unable to save to default projects.
@athena please translate this to German.
ezrobot wird in der Lage sein, Ihnen bei der Garantieersatz zu helfen. Aber Sie müssen sie über ihre Website kontaktieren.
Das JD-Roboterprojekt verwendet die Auto-Position-Roboterfähigkeit. Um einen servo zu ändern, können Sie die Auto-Position-Konfiguration bearbeiten.
Drücken Sie die Konfiguration (drei kleine Punkte neben dem ?)
Im Konfigurationsfenster aktivieren Sie das Kontrollkästchen "Ports anzeigen"
Scrollen Sie durch die Liste der Frames und wählen Sie "Stand"
Suchen Sie den Servo, den Sie ändern möchten, und wählen Sie ihn aus. Ein Dialogfenster wird mit der Servoauswahloption angezeigt.
Das Projekt muss als neues Projekt gespeichert werden. Sie können nicht in Standardprojekte speichern.
@DJ Sures: Vielen lieben Dank für die schnelle Hilfe. Das hat funktioniert. Jetzt habe ich den servo "rechter Oberarm" dem Port D11 zugeordnet und schon läuft alles einwandfrei . Der Port D7 an meinem EZ-B v4 ist definitiv defekt. @Athena bitte den Text ins englisch übersetzen
#DJ Sures Jetzt ist plötzlich ein weiterer Fehler aufgetreten. Plötzlich hat sich der Kopf des JD auf die rechte Endlage gedreht. Er bewegt sich beim Abspielen von Action's nur noch ruckartig. Das servo läßt sich auch mit Hilfe des Skills "Servo-Horizontal" nicht mehr sauber steuern. Kann es sein, dass das servo schon defekt ist? Wie gesagt, der JD ist ganz neu und einen Tag im Betrieb.
#Athena Text in Englisch übersetzen
That's unfortunate to hear that. I would recommend contacting the manufacturer for support for their product. It sounds like a hardware failure since the EZB controller was already experiencing issues out of the box.
@athena how do I rum humanoid from an ipad
To control a humanoid robot like JD from an iPad, you can use the Synthiam ARC software, which is compatible with iOS devices. Here's how you can get started:
Download Synthiam ARC: First, you need to download the Synthiam ARC app from the Apple App Store onto your iPad.
Connect to Your Robot: Open the Synthiam ARC app on your iPad and connect to your robot. The robot will need to be powered on and connected to the same Wi-Fi network as your iPad, or directly to the iPad via Wi-Fi.
Load a Project: Once connected, you can load an existing project or create a new one for your humanoid robot. If you're using JD Humanoid, you can load the default JD project or any other project you have created or modified.
Control Your Robot: Use the on-screen controls within the Synthiam ARC app to interact with your robot. You can move servos, play actions, and use other features available within the app to control your humanoid robot.
Auto Position Skill: If you want to create custom movements or actions for your humanoid robot, you can use the Auto Position robot skill within the Synthiam ARC app. This skill allows you to create frames and actions to animate the robot's servos.
Remember, the Synthiam ARC app provides a visual interface for controlling your robot, so you don't need to write any code. Just tap and interact with the controls on your iPad's screen to operate your humanoid robot.
If you need more detailed instructions or support, you can refer to the support section on the Synthiam website for articles and tutorials: https://synthiam.com/Support.