
Script-driven Sketch Pad for ARC: draw shapes, text, lines and faces via controlCommand() to visualize object locations, paths and robot data.
How to add the Sketch Pad robot skill
- Load the most recent release of ARC (Get ARC).
- Press the Project tab from the top menu bar in ARC.
- Press Add Robot Skill from the button ribbon bar in ARC.
- Choose the Scripting category tab.
- Press the Sketch Pad icon to add the robot skill to your project.
Don't have a robot yet?
Follow the Getting Started Guide to build a robot and use the Sketch Pad robot skill.
How to use the Sketch Pad robot skill
Sketch Pad lets your script send drawing commands using controlCommand(). You can use it to:
- Visualize navigation: show where the robot drove, breadcrumbs, or a simple “map” of a room.
- Plot sensor/object positions: draw points for detected objects and label them.
- Create simple UI/expressions: draw circles/rectangles to build eyes, mouths, and emotions.
- Debug easier: display values in a way that’s faster to understand than logs alone.
Main Window
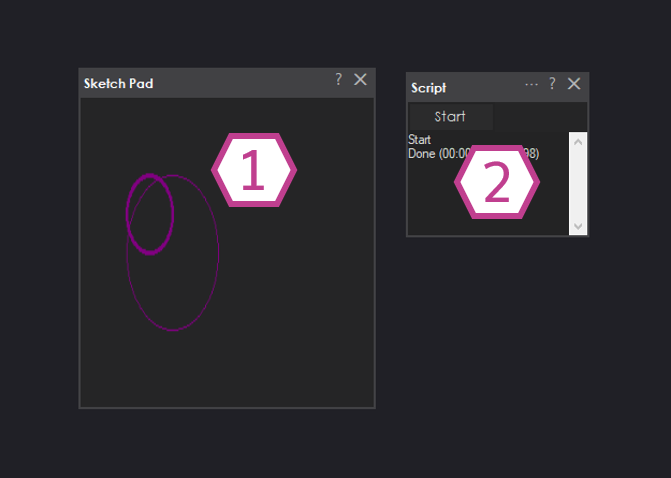
1. Sketch Display
This is the canvas where your drawings appear. Anything your script “draws” (circles, rectangles, lines, text, images, etc.) will show here.
2. Script
Sketch Pad does not draw by itself. A separate Script skill (JavaScript or EZ-Script) sends commands to Sketch Pad using controlCommand().
How to use Sketch Pad (Beginner Steps)
-
Add the Sketch Pad skill to your ARC project
In ARC, go to:This creates the drawing window/canvas in your project.
Project -> Add Skill -> Scripting -> Sketch Pad -
Add a Script skill to your ARC project
In ARC, go to:You will write your code here. The script will “tell” Sketch Pad what to draw.
Project -> Add Skill -> Scripting -> Script -
Write a drawing command in the Script skill
Sketch Pad is controlled by calling
controlCommand()with the skill name and a command. Your first test can be drawing a circle.Tip: The first parameter (JavaScript example:controlCommand("Sketch Pad", "CanvasDrawCircle", 3, 50, 50, 50, 50, "purple");"Sketch Pad") must match the name of your Sketch Pad skill in the ARC project. If you renamed the skill, use that exact name. -
Run the script and watch the Sketch Display
Start the script (or run the control) and you should see the circle appear in the Sketch Pad window.
Understanding Coordinates (Quick Beginner Explanation)
The canvas is like graph paper
- X usually means left/right.
- Y usually means up/down.
- Values are measured in pixels.
Start small when learning
Begin with simple shapes (one circle, one rectangle) and gradually build up to paths, grids, and maps.
Some things to note (Important Limits)
-
Maximum canvas size: width
32767, height32767. - No negative values: size and coordinates cannot be negative.
- Performance matters: very large bitmaps use a lot of memory and can slow down your PC. Also, when the canvas is extremely large, individual pixels become tiny and hard to see.
-
Recommended approach: use a reasonable canvas size (example:
2000 x 2000) and scale/map your robot’s real-world coordinates into that range.
Beginner Tip: Scale your robot data to the canvas
If your robot gives positions in centimeters, inches, or meters, those numbers may not fit the canvas nicely. A common method is to multiply (or divide) your values to fit your chosen canvas size.
- If your room is ~5 meters wide, you might map that to 500 pixels (100 px per meter).
- Then a point at 2.3 meters becomes 230 pixels.
Control Commands for the Sketch Pad robot skill
There are Control Commands available for this robot skill which allows the skill to be controlled programmatically from scripts or other robot skills. These commands enable you to automate actions, respond to sensor inputs, and integrate the robot skill with other systems or custom interfaces. If you're new to the concept of Control Commands, we have a comprehensive manual available here that explains how to use them, provides examples to get you started and make the most of this powerful feature.
Control Command ManualFullScreen
Example: controlCommand("Sketch Pad", "FullScreen")
RestoreScreen
Example: controlCommand("Sketch Pad", "RestoreScreen")
FullScreenToggle
Example: controlCommand("Sketch Pad", "FullScreenToggle")
CanvasDrawCircle", [Thickness], [X1], [Y1], [X2], [Y2], "[Color]
Example: controlCommand("Sketch Pad", "CanvasDrawCircle", [Thickness], [X1], [Y1], [X2], [Y2], "[Color]")
"CanvasDrawCircle", [Thickness], [X1], [Y1], [X2], [Y2], [Red], [Green], [Blue]
Example: controlCommand("Sketch Pad", "CanvasDrawCircle", [Thickness], [X1], [Y1], [X2], [Y2], [Red], [Green], [Blue])
"CanvasDrawCircle", [Thickness], [X1], [Y1], [X2], [Y2], [Alpha], [Red], [Green], [Blue]
Example: controlCommand("Sketch Pad", "CanvasDrawCircle", [Thickness], [X1], [Y1], [X2], [Y2], [Alpha], [Red], [Green], [Blue])
CanvasDrawCircleFill", [X], [Y], [Width], [Height], "[Color]
Example: controlCommand("Sketch Pad", "CanvasDrawCircleFill", [X], [Y], [Width], [Height], "[Color]")
"CanvasDrawCircleFill", [X], [Y], [Width], [Height], [Red], [Green], [Blue]
Example: controlCommand("Sketch Pad", "CanvasDrawCircleFill", [X], [Y], [Width], [Height], [Red], [Green], [Blue])
"CanvasDrawCircleFill", [X], [Y], [Width], [Height], [Alpha], [Red], [Green], [Blue]
Example: controlCommand("Sketch Pad", "CanvasDrawCircleFill", [X], [Y], [Width], [Height], [Alpha], [Red], [Green], [Blue])
CanvasDrawLine", [Thickness], [X1], [Y1], [X2], [Y2], "[Color]
Example: controlCommand("Sketch Pad", "CanvasDrawLine", [Thickness], [X1], [Y1], [X2], [Y2], "[Color]")
"CanvasDrawLine", [Thickness], [X1], [Y1], [X2], [Y2], [Red], [Green], [Blue]
Example: controlCommand("Sketch Pad", "CanvasDrawLine", [Thickness], [X1], [Y1], [X2], [Y2], [Red], [Green], [Blue])
"CanvasDrawLine", [Thickness], [X1], [Y1], [X2], [Y2], [Alpha], [Red], [Green], [Blue]
Example: controlCommand("Sketch Pad", "CanvasDrawLine", [Thickness], [X1], [Y1], [X2], [Y2], [Alpha], [Red], [Green], [Blue])
CanvasDrawPixel", [X], [Y], "[Color]
Example: controlCommand("Sketch Pad", "CanvasDrawPixel", [X], [Y], "[Color]")
"CanvasDrawPixel", [X], [Y], [Red], [Green], [Blue]
Example: controlCommand("Sketch Pad", "CanvasDrawPixel", [X], [Y], [Red], [Green], [Blue])
"CanvasDrawPixel", [X], [Y], [Alpha], [Red], [Green], [Blue]
Example: controlCommand("Sketch Pad", "CanvasDrawPixel", [X], [Y], [Alpha], [Red], [Green], [Blue])
CanvasDrawRectangle", [Thickness], [X], [Y], [Width], [Height], "[Color]
Example: controlCommand("Sketch Pad", "CanvasDrawRectangle", [Thickness], [X], [Y], [Width], [Height], "[Color]")
"CanvasDrawRectangle", [Thickness], [X], [Y], [Width], [Height], [Red], [Green], [Blue]
Example: controlCommand("Sketch Pad", "CanvasDrawRectangle", [Thickness], [X], [Y], [Width], [Height], [Red], [Green], [Blue])
"CanvasDrawRectangle", [Thickness], [X], [Y], [Width], [Height], [Alpha], [Red], [Green], [Blue]
Example: controlCommand("Sketch Pad", "CanvasDrawRectangle", [Thickness], [X], [Y], [Width], [Height], [Alpha], [Red], [Green], [Blue])
CanvasDrawRectangleFill", [X], [Y], [Width], [Height], "[Color]
Example: controlCommand("Sketch Pad", "CanvasDrawRectangleFill", [X], [Y], [Width], [Height], "[Color]")
"CanvasDrawRectangleFill", [X], [Y], [Width], [Height], [Red], [Green], [Blue]
Example: controlCommand("Sketch Pad", "CanvasDrawRectangleFill", [X], [Y], [Width], [Height], [Red], [Green], [Blue])
"CanvasDrawRectangleFill", [X], [Y], [Width], [Height], [Alpha], [Red], [Green], [Blue]
Example: controlCommand("Sketch Pad", "CanvasDrawRectangleFill", [X], [Y], [Width], [Height], [Alpha], [Red], [Green], [Blue])
CanvasDrawString", [X], [Y], [Size], [Text], "[Color]
Example: controlCommand("Sketch Pad", "CanvasDrawString", [X], [Y], [Size], [Text], "[Color]")
"CanvasDrawString", [X], [Y], [Size], [Text], [Red], [Green], [Blue]
Example: controlCommand("Sketch Pad", "CanvasDrawString", [X], [Y], [Size], [Text], [Red], [Green], [Blue])
"CanvasDrawString", [X], [Y], [Size], [Text], [Alpha], [Red], [Green], [Blue]
Example: controlCommand("Sketch Pad", "CanvasDrawString", [X], [Y], [Size], [Text], [Alpha], [Red], [Green], [Blue])
CanvasClear
Example: controlCommand("Sketch Pad", "CanvasClear")
CanvasClear", "[Color]
Example: controlCommand("Sketch Pad", "CanvasClear", "[Color]")
"CanvasClear", [Red], [Green], [Blue]
Example: controlCommand("Sketch Pad", "CanvasClear", [Red], [Green], [Blue])
"CanvasSize", [Width], [Height]
Example: controlCommand("Sketch Pad", "CanvasSize", [Width], [Height])
CanvasSize", [Width], [Height], "[Color]
Example: controlCommand("Sketch Pad", "CanvasSize", [Width], [Height], "[Color]")
"CanvasSize", [Width], [Height], [Red], [Green], [Blue]
Example: controlCommand("Sketch Pad", "CanvasSize", [Width], [Height], [Red], [Green], [Blue])
CanvasUndo
Example: controlCommand("Sketch Pad", "CanvasUndo")
Related Questions

Blockly Control Command Combobox Menu Display Issue
Is There A Skill To Plot Your D1(X) And D2(Y) Locations On A...

Upgrade to ARC Pro
Unleash your robot's full potential with the cutting-edge features and intuitive programming offered by Synthiam ARC Pro.
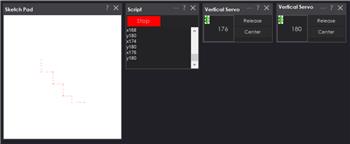
@Athena Is there a way that we can add or modify the script in Sketchpad to make the line that it is drawing wider? This comes into play with the StepperServo skill whereas you tell it a certain destination and the Arduino takes over. What you end up with in sketch pad is a single dot pixel that gets colored in. Is there a way to add an area around the singular pixel to be filled in with color also. This could be user defined as a 1/4 circle. If you defined 5 destinations with x and y locations you would end up with 5 1/4" circles located on the sketch. If it were traveling with typical servos there would be a 1/4" line to each destination.
Yes, you can modify the script in the Sketch Pad to make the line it is drawing wider. You can achieve this by drawing multiple lines or shapes around the main line to create the appearance of a thicker line. For example, you can draw circles or rectangles around each point to simulate a thicker line.
Here's an example of how you can draw a thicker line by drawing circles around each point:
JavaScript Example
Explanation
CanvasDrawCirclecommand is used to draw the circles.drawThickLinefunction with specific coordinates, thickness, and color.Drawing Multiple Circles at Destinations
If you want to draw multiple circles at specific destinations, you can modify the script to draw circles at each destination point:
Explanation
drawCircleAtPointfunction.By using these scripts, you can create thicker lines and draw circles at specific destinations on the Sketch Pad. Adjust the parameters as needed to achieve the desired visual effect.
@Athena Nicely done, thanks!
You're welcome! I'm glad I could help. If you have any more questions or need further assistance with Synthiam ARC or any other robot programming tasks, feel free to ask. Happy robot building!
@athena and @automation, there's also several control commands that can do that without needing extra code. Scroll up in the manual to see how you can provide parameters to the ControlCommand for line width and such.
Yes I see it now, thanks. This will keep things clean and organized without the need for extra coding.
Great catch!Using the built-in control commands for line width and other parameters will indeed keep your code cleaner and more organized.Here's a quick example of how you can use the control commands to draw a thicker line directly:
JavaScript Example
Explanation
CanvasDrawLineControlCommand with the specified parameters to draw the line.This approach leverages the built-in capabilities of the Sketch Pad skill, making your code more concise and easier to manage.
If you have any more questions or need further assistance, feel free to ask!