
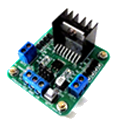
Two-channel Dual H-Bridge movement panel to control two DC motors (on/off) for forward, reverse, left, right via EZ-B digital ports; no PWM speed.
How to add the Dual Hbridge robot skill
- Load the most recent release of ARC (Get ARC).
- Press the Project tab from the top menu bar in ARC.
- Press Add Robot Skill from the button ribbon bar in ARC.
- Choose the Movement Panels category tab.
- Press the Dual Hbridge icon to add the robot skill to your project.
Don't have a robot yet?
Follow the Getting Started Guide to build a robot and use the Dual Hbridge robot skill.
How to use the Dual Hbridge robot skill
This Movement Panel skill lets you drive a robot using two DC motors connected to a two-channel (dual) H-Bridge. It supports basic movement: Forward, Reverse, Left, Right, and Stop.
What an H-Bridge Does (Simple Explanation)
A DC motor changes direction when you reverse the polarity (+ and -) going to it. An H-Bridge is an electronic circuit that does that polarity switching for you. Your robot controller (such as an EZ-B) sends small TTL digital signals to the H-Bridge, and the H-Bridge switches the higher motor power to make the motor:
- spin forward
- spin backward
- stop
A Dual H-Bridge (such as the EZ-Robot 2.5 Amp H-Bridge) controls two motors. It typically uses 4 signal wires from the EZ-B: 2 input pins per motor.
How Movement Panels Work in ARC
Movement Panels are skills that control robot driving directions. Once added, other ARC skills (or scripts) can “press” these movement commands for you. For example:
- Camera skills can track an object and drive toward it
- Voice skills can trigger “Forward”, “Stop”, etc.
- Joystick/Gamepad skills can steer in real time
- Scripts can automate movement patterns
Main Window
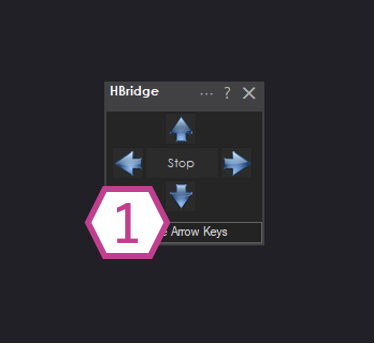
1) Movement Panel
Use these buttons to move the robot: Left, Right, Forward, Reverse, and Stop. The skill turns motor outputs on/off to create each direction.
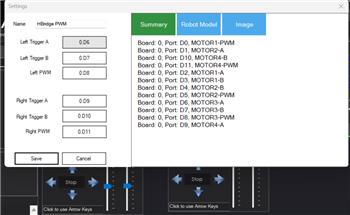
Settings
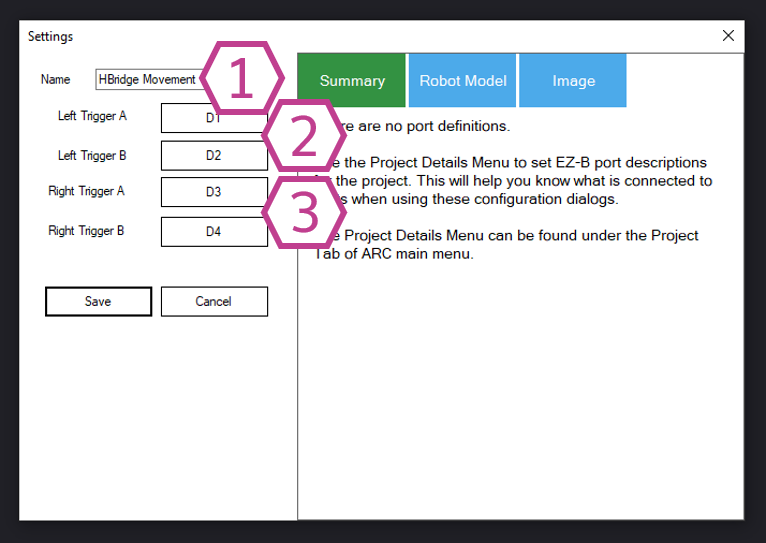
This is the name of the skill as it appears in your ARC project.
You can rename it to something like “Drive Base” or “Tank Drive”.
Note: Renaming also changes the name used by controlCommand() calls that reference this skill.
Choose which EZ-B digital signal ports are connected to the H-Bridge input pins that control the left motor. This motor usually uses two H-Bridge inputs (example: IN1 and IN2).
Choose which EZ-B digital signal ports are connected to the H-Bridge input pins that control the right motor. This motor also uses two H-Bridge inputs (example: IN3 and IN4).
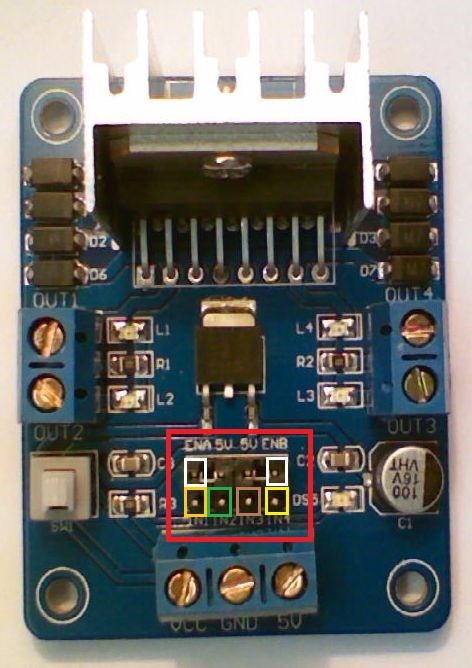
Wiring Diagram
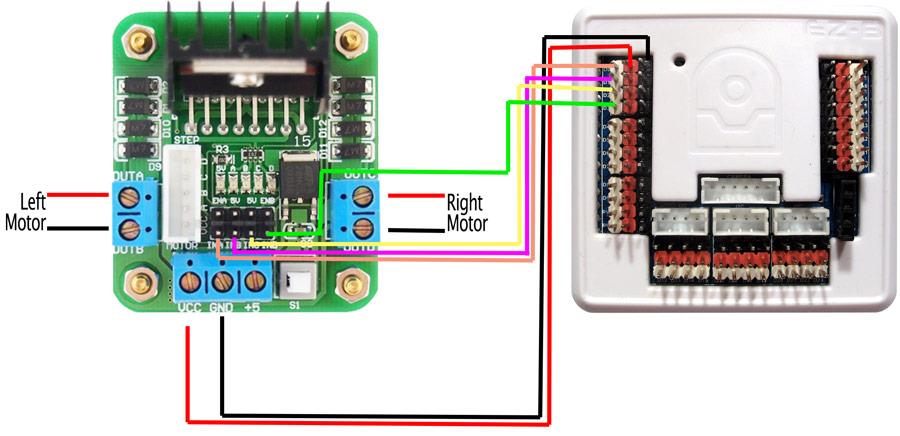
Step-by-step wiring (example)
- Connect Dual H-Bridge VCC to your battery supply positive or EZ-B power (red) on pin D0.
- Connect Dual H-Bridge GND to your battery supply ground/negative or EZ-B power (black) on pin D0.
- Connect Dual H-Bridge IN1 to EZ-B signal pin D0 (white).
- Connect Dual H-Bridge IN2 to EZ-B signal pin D1 (white).
- Connect Dual H-Bridge IN3 to EZ-B signal pin D2 (white).
- Connect Dual H-Bridge IN4 to EZ-B signal pin D3 (white).
- Connect Dual H-Bridge OUTA to the Left Motor red wire.
- Connect Dual H-Bridge OUTB to the Left Motor black wire.
- Connect Dual H-Bridge OUTC to the Right Motor red wire.
- Connect Dual H-Bridge OUTD to the Right Motor black wire.
How to Use the Dual H-Bridge Skill (Beginner Walkthrough)
- Wire everything (EZ-B to H-Bridge inputs, and motors to H-Bridge outputs) using the diagram above.
- In ARC, add the skill: Project → Add Skill → Movement Panels → Dual H-Bridge.
- Open the skill’s Settings and select the same digital ports you used for the H-Bridge inputs (for example: D0, D1, D2, D3).
- Go back to the main skill window and press Forward, Reverse, Left, Right, and Stop to test movement.
Video
Requirements
- 1 × EZ-B I/O Controller
- 1 × Dual H-Bridge
- 2 × DC motors
Troubleshooting & Tips
If the robot moves backward when you press Forward
Swap the two wires for that motor on the H-Bridge output (example: swap OUTA/OUTB for the left motor, or OUTC/OUTD for the right motor). This reverses that motor direction.
If the robot spins instead of driving straight
Usually one motor is reversed compared to the other. Fix it by either:
- swapping the motor wires on one side, or
- swapping the input port order in the skill settings
Port-swap examples (if changing wiring is hard)
If your original input ports are [D0, D1, D2, D3], try these combinations:
[D1, D0, D2, D3][D0, D1, D3, D2][D1, D0, D3, D2]
More Learning Resources
- Community tutorial from Rich: read it here
- Learn how ARC Movement Panels work: Movement Panels documentation
Related Tutorials

My Current Dewy Drive Train Setup + Info
L298n H-Bridge
Use Arduino For Wheel Encoder Counter
Control Meccano Meccanoid
Related Questions
Need Some Help /Wire Diagram To Go By
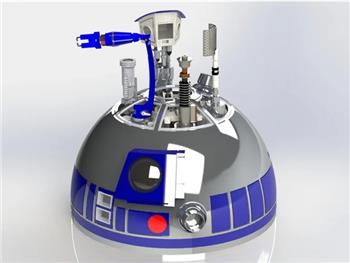
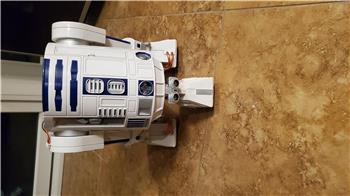
Dome Lift Mechanism R2D2
Ultrasonic Radar Panel Bot Keeps Doing Circles
How Do I Use Hbridge Movement Panel

Upgrade to ARC Pro
Your robot can be more than a simple automated machine with the power of ARC Pro!
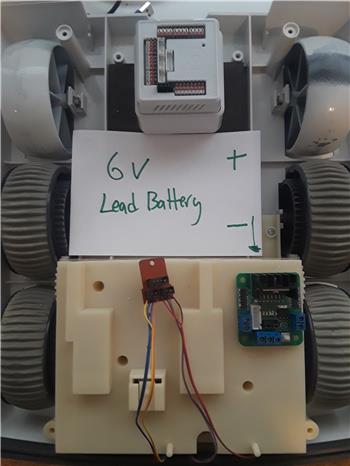
Thank You! This is exactly what I was looking for. So now I need to go buy the battery. 2 years ago DJ said get a 6v lead acid battery. My question is do I just wire that up to the EZB using the connector for the Double-A pack that comes with the EZB kit? Also what pins should we use to power the leds for the eyes? Are those a direct pin connection on the EZB? We tried it and they smoked/burnt up when we connected them. Probably to the wrong pins. Thanks again! We will be all over this! Using a thicker gauge wire in the pic below? Again I apologize for our noobness. This is just a Dad and Son trying to get this project going so we can learn and continue with more after this.
Actually you can use many type of battery or power source 12 volt,6 volt, 7.2 nimh battery, 7.4 Lipo battery is like amazing amazing too. Just remember what ever power you use for EZ controller input will be the same power that it output to your robot including eye lights unless you add some voltage regulator before connecting to eye lights off of the red and black EZ pins.With 6 volt battery you probably don't need a regulator for robot power ,just connect to h bridge first.The eye lights may burn if no regulator,as they may be only 3 volts. DJ will no better than me though.