Introduction To Servo Motors
This tutorial will provide technical information about servo-motors and how they work. We made it easy to get a robot up and running. However, there are many fun and exciting things to learn about how the robot works. The more you know, the more you can get your robot to do!
Table of Contents
- How To Move Servos In ARC
- What is a servo motor?
- Servo vs. PWM
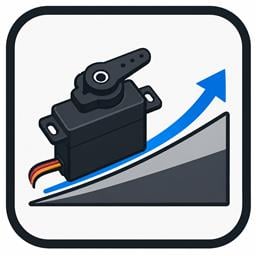
- How does a servo motor work?
- Types of servo motors
- Controlling a servo motor
- How Does Continuous Rotation Servo Work?
- How is torque measured?
- PWM (hobby servos) vs. Serial (smart) Servos
- ARC Servo Robot Skills
How To Move Servos in ARC
We provided this support document for those who wish to learn how a servo works; however, press this button to learn how to move servos in ARC.
Learn how to move servos in ARCWhat is a servo motor?
A Servo motor (or servo) is a rotary actuator that allows precise angular position, velocity, and acceleration. Servos are found in many places: toys, home electronics, cars, and airplanes. If you have a radio-controlled model car, airplane, or helicopter, you are using at least a few servos. Servos also appear behind the scenes in devices we use every day. Electronic devices such as DVD and Blu-ray discPWMTM players use servos to extend or retract the disc trays.
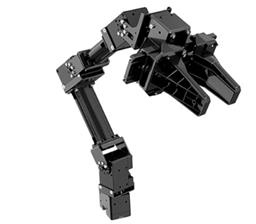
Synthiam uses servos that manage the movement of joints, pan & tilt, and continuous rotational movement. For PWM Servos, the EZB sends an electrical signal that tells the servo what position to reach and how quickly to get there. Smart serial servos receive a protocol command by the EZB and the respective robot skill. Servos come in a variety of shapes and sizes for different applications. You may want a large, powerful one for moving the arm of a giant robot or a tiny one to make a robot's eyebrows go up and down. By linking many of these servos together, you can very easily create robots that perform complex real-world operations.
Hobby PWM Servo vs. PWM
PWM stands for Pulse Width Modulation. PWM is the process of turning ON and OFF digital voltage quickly to simulate a range of voltage. For example... If the digital output pin of a 5v micro is 2.5v, then the PWM is set for a 50% duty cycle. If the digital output of a 3.3v pin is 1.65v, then the PWM is set for a 50% duty cycle. The microcontroller turns the digital 3.3v pin on and off quickly, producing a simulated lower voltage. You can use PWM to vary the brightness of an LED, for example.
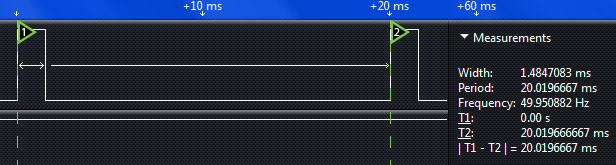
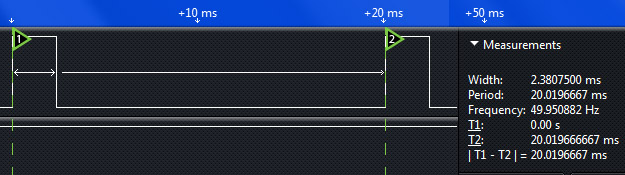
A hobby servo uses PWM as well. The "frame" of a servo PWM signal is 20ms. This means the signal frame repeats every 20ms. The signal is only 2ms, where the rest of the frame is empty (low). Many controllers, such as Arduino libraries, do not maintain the 20ms specification defined for servos. Because of this, challenges have been introduced to servo manufacturers when decoding incoming PWM signals. This has caused the need for servos to be "Smarter" by adapting to the unusual PWM transmitted by poorly written libraries that do not adhere to the servo PWM Standard. The EZ-B does adhere to servo PWM standards.
How does a servo motor work?
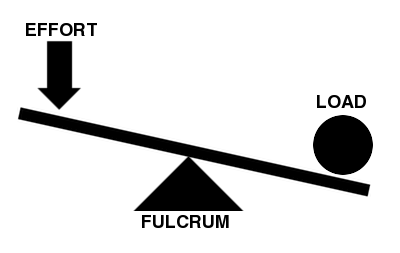
The simplicity of a servo is among the features that make them so reliable. The heart of a servo is a small direct current (DC) motor, similar to what you might find in an inexpensive toy. These motors run on electricity from a battery and spin at high RPM (rotations per minute) but put out very low torque (a twisting force used to do work — you apply torque when you open a jar). An arrangement of gears takes the high speed of the motor and slows it down while at the same time increasing the torque. (Basic law of physics: work = force x distance.) A tiny electric motor does not have much torque, but it can spin fast (small force, considerable distance). The gear design inside the servo case converts the output to a much slower rotation speed but with more torque (significant force, little distance). The amount of actual work is the same, just more practical. Gears in an inexpensive servo motor are generally made of plastic to keep them lighter and less costly. On a servo designed to provide more torque for heavier work, the gears are made of metal (such as with Synthiam Servos) and are harder to damage.
You apply power from a battery with a small DC motor, and the motor spins. However, unlike a simple DC motor, a servo's spinning motor shaft is slowed way down with gears. A positional sensor on the final gear is connected to a small circuit board. The sensor tells this circuit board how far the servo output shaft has rotated. The electronic input signal from the computer or the radio in a remote-controlled vehicle also feeds into that circuit board. The electronics on the circuit board decode the signals to determine how far the user wants the servo to rotate. It then compares the desired position to the actual position and decides which direction to rotate the shaft to get to the desired position.
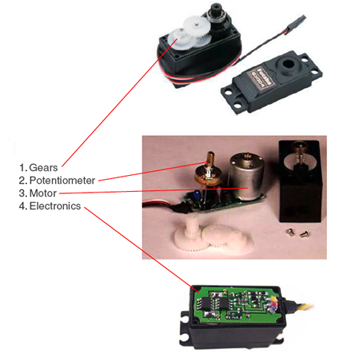 |
| Figure 5. The circuit board and DC motor are in a high-power servo. Did you notice how few parts are on the circuit board? Servos have evolved to a very efficient design over many years. |
Types of servo motors
Servos come in many sizes and three basic types: positional rotation, continuous rotation, and linear. Regardless of the type of servo between PWM Hobby and Smart serial, the servo form factor can be in various configurations.
- Positional rotation servo: This is the most common type of servo motor. The output shaft rotates in about half of a circle or 180 degrees. It has physical stops placed in the gear mechanism to prevent turning beyond these limits to protect the rotational sensor. These common servos are found in Synthiam 's arms, legs, limbs, etc. For example, the JD or Six robots use these servos. Some servos, such as winch servos, will rotate their output shaft in multiple rotations (i.e., 270 degrees). The same signal (pulse width) is used for any servo regardless of the output shaft rotation. This means a servo of 270 degrees would have less resolution than a servo with a 180-degree range/
- Continuous rotation servo: This is quite similar to the common positional rotation servo motor, except it can turn in either direction indefinitely without any positioning ability. This means the servo does not know its position because it operates as a motor and spins continuously in either direction. There is no way to specify the position of a continuous rotation servo because they lack the hardware to do so. The control signal, rather than setting the static position of the servo, is interpreted as the direction and speed of rotation. The range of possible commands causes the servo to rotate clockwise or counterclockwise as desired, at varying speeds, depending on the command signal. If you mounted one on a robot, you might use a servo of this type on a radar dish. Or you could use one as a drive motor on a mobile robot. The Synthiam AdventureBot uses two continuous rotation servos with wheels. The center (90 degrees) is the center of a continuous rotation's STOP position. The further you move away from 90 degrees in either direction controls the speed of the continuous rotation servo in that direction.
- Linear servo: This is also like the positional rotation servo motor described above, but with additional gears (usually a rack and pinion mechanism) to change the output from circular to back-and-forth. These servos are not easy to find, but you can sometimes find them at hobby stores, used as actuators in larger model airplanes.
Controlling a PWM servo motor
A standard servo is what you usually find in R/C Hobby Toys. They are high-precision devices that can rotate a shaft up to 180 degrees. With the EZB and a Standard Servo, you can easily configure how many degrees to rotate the output shaft.ARC takes care of the electrical communication with the servo for you, whether PWM or Smart serial. You can use standard servos for the head or arms of your robot.
However, here is some technical information on how hobby PWM servos work. The servo is controlled using pulse control. The control pulse is a positive voltage with a length of 1 to 2 ms, which determines the angle of the shaft. The control pulse is repeated every 18-25 ms.
TO ACCOMMODATE ALL SERVO TYPES, the EZ-B has timing below 1ms and above 2ms. Some servos do not fall within the specifications and require unusual timing. When testing with your servo, make sure you recognize the max and min values and set them in the robot skill settings. If a servo attempts to move further than its maximum position, it may be damaged. Additionally, if a servo is rotated too far, it will consume a high current, and the EZ-B may reset.
Here are the timings for the EZ-B...
Position 1 on v4, Position 1 on v3

Position 90 on v4, Position 50 on v3
Position 180 on v4, Position 100 on v3
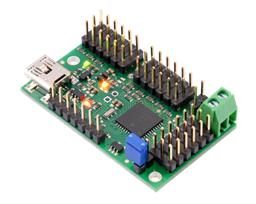
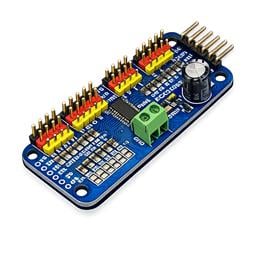
For example, the EZ-Robot EZ-B v4 has high accuracy, which results in 180 servo positions. The EZ-B v4 can control 24 servos simultaneously while performing other user-specified tasks. If your servos draw more current than our specification sheet defines, the EZ-B may run out of power and reboot itself. This is called a Brown-Out. To prevent brownout with many servos, provide alternate power. Check the manual on how to do that.
ARC handles the technical work for you. Merely specify the servo position, and voila!
How Does Continuous Rotation Servo Work?
As mentioned earlier in this lesson, a continuous rotation servo will spin the rotation shaft continuously in either direction. The continuous rotation servo will stop spinning when the servo receives a 90-degree position centered on a standard servo. The center (90 degrees) is the center of a continuous rotation's STOP position. The further you move away from 90 degrees in either direction controls the speed of the continuous rotation servo in that direction. The continuous rotation servo will have a POT (potentiometer) exposed, allowing you to fine-tune the STOP position with a small screwdriver. Click here to view a tutorial on calibrating a continuous rotation servo.100 < - Turning left faster
99
98
97
96
95
94
93
92
91 < - Turning left slower
90 <- Stopped
89 <- Turning right slower
88
87
86
85
84
83
82
81
80 < - Turning right faster
How Is Torque Measured?
Now that we covered the basics of how-a-servo-works, the next question is torque. Torque is how much power the servo has. Different applications will require higher or lower torque. In most cases, you can get away with using a regular average torque servo. The average torque of a plastic servo is 2-3kg/cm @ 5 volts, and the Synthiam Heavy Duty servos are much more (consult the servo product information).Something that is often overlooked is energy consumption. Consider this: there is no free energy. Torque equals energy and vice-versa. The Synthiam Heavy Duty servos will require more energy to move than cheaper plastic ones. Suppose too many high torque servos are connected to the EZ-B without a sufficient power source. In that case, it will "brownout" Browning-out means the voltage regulator could not keep up with the current draw, so the microchip rebooted itself due to low current. Do not worry; the Revolution Robots are powered by a strong LiPo battery and support up to 24 servos!
So what do the torque numbers mean? Let's speculate the torque value of a servo was 50 Ounces per Inch.
Well, if you had a servo arm that was one inch long on your servo, it would be able to produce 50 ounces of pull or push force at the end of the servo arm before stalling. What do you think the force would be if you had a 1/2 inch servo arm? Yup, 100 ounces of force. How about a 2-inch arm, 25 ounces of force - easy, huh?
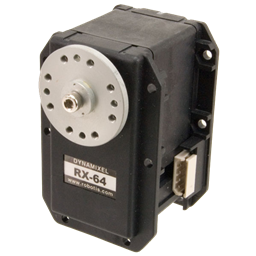
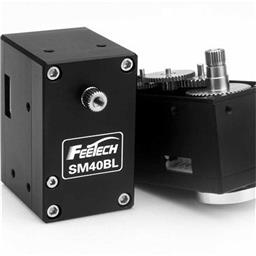
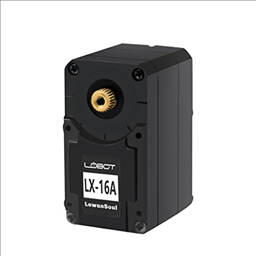
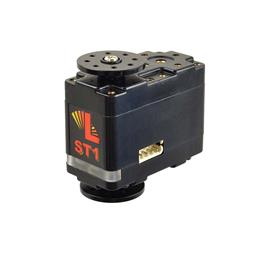
PWM (hobby servos) vs. Serial (Smart) Servos
The most common servos in robotics are three-wire PWM Hobby Style (power, GND, PWM signal). These servos have been around for decades and are the most cost-effective solution. The shortcoming of these servo types is they have only one direction of communication from EZB to the servo. This means the servo only knows its position when instructed to move. When these servos are first initialized, they will jump from whatever position is currently into the specified position. It will not transition slowly during initialization because it does not know the starting position before initialization. When robots use these servos, they will jump and sometimes cause damage preparation is not considered. The solution to avoid jumping is to manually move the robot joints into a position close to the initialization position so the servos don't jump. This is more effort than using Smart Servos, which will report their position to the software.
Smart serial servos use a communication protocol that allows the servos to transmit position data to the EZB. These smart servos have bi-directional communication to query the position when initialized and transition to the new position at specified speeds. This prevents jolting/jumping of joints that are experienced with hobby PWM servos.
When a robot is powered on, it is recommended to create an initialization script launched from the connection control. The initialization script will accommodate the type of servos being used. If the servos are PWM style, it is recommended to move the robot joints before executing the initialization script manually. With a smart serial servo, you can query the position. Therefore ARC will know the position, and your script can calmly move the servos into a pre-defined position.
ARC Servo Skills
ARC supports several servo robot skills.