
Display robot image with real-time servo position readouts and basic servo management including servo deletion
Compatible with:
 Windows
How to add the Virtual Robot robot skill
- Load the most recent release of ARC (Get ARC).
- Press the Project tab from the top menu bar in ARC.
- Press Add Robot Skill from the button ribbon bar in ARC.
- Choose the Misc category tab.
- Press the Virtual Robot icon to add the robot skill to your project.
Don't have a robot yet?
Follow the Getting Started Guide to build a robot and use the Virtual Robot robot skill.
How to use the Virtual Robot robot skill
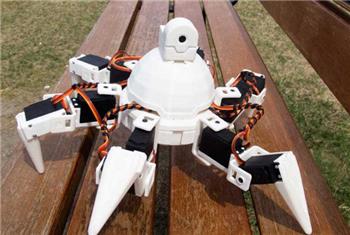
The Virtual Robot skill lets you place a picture of your robot inside Synthiam ARC and visually track what your servos are doing. This is helpful for beginners because you can confirm servo movement and positions on-screen before (or while) you move real hardware.
What you’ll use it for:
- Show a robot image (front, side, or any view you prefer).
- Add servos on top of the image to match where they exist on the real robot.
- See each servo’s current position as ARC moves it.
Getting Started
- Add the Virtual Robot skill to your ARC project (the same way you add other skills).
-
Choose an image of your robot.
Use a clear photo or diagram so it’s easy to place servos in the correct spots.
Tip: A straight-on view works best (for example: front view for face servos, side view for arm servos).
- Add servos to the image. Create servo markers and place them where the real servos are located (neck, shoulder, elbow, etc.).
-
Link each virtual servo to a real servo control in ARC.
Make sure the servo name/port matches how you configured your servo(s) in your servo controller skill.
Example: If your real servo is configured as “HeadPan,” make the virtual servo refer to that same servo name (or matching configuration).
Understanding What You See
- Robot image: the background picture you selected.
- Servo markers: the clickable points placed on the robot image that represent each servo.
- Position display: as ARC commands a servo to move, the virtual display updates to show the current servo position (typically in degrees).
Editing and Managing Servos
- Select a servo: click the servo marker on the robot image.
- Move or adjust a servo marker: click and reposition it (if enabled by the skill’s editor).
- Delete a servo: click the servo marker to select it, then press the DEL key on your keyboard.
Beginner Tips
- Start small: add 1–2 servos first (like head pan/tilt) and confirm they update correctly.
- Use consistent naming: the most common setup issues come from servo names that don’t match between your servo controller skill and the virtual robot servo entry.
- Test with simple movements: run a basic script or use a servo control panel to move a servo and confirm the virtual position changes.
Note: The Virtual Robot skill is a visual tool. If a servo doesn’t appear to move on the image, confirm your servo controller is configured correctly and that the servo mapping/name matches.