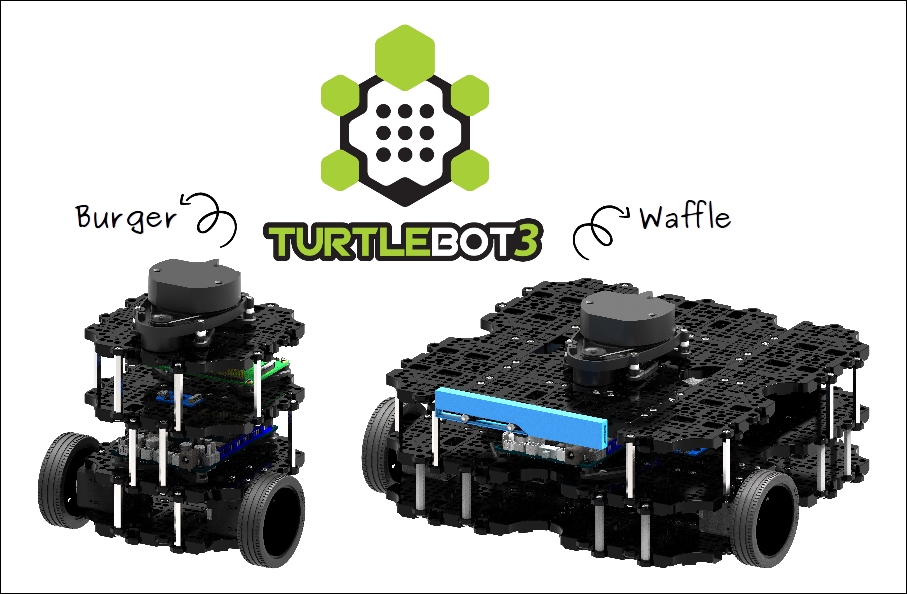
Turtlebot 3 by Robotis
TurtleBot is inspired by the original “turtle robot” used with the Logo programming language (created in 1967). The idea was simple: a small robot that helps beginners learn programming by giving instant, real-world feedback (the robot moves when your code runs).
TurtleBot3 continues that tradition as a small, affordable, expandable mobile robot used in education, research, hobbies, and prototyping. With Synthiam ARC (Autonomous Robot Control), you can program TurtleBot3 using beginner-friendly tools like Blockly and RoboScratch, or more advanced languages like JavaScript and Python.
If you’d like to add capabilities without building everything from scratch, ARC also includes the Robot Skill Store, which has 600+ plug-in skills (for example: camera vision, telepresence, chatbots, speech recognition, object tracking, and more).
What You Need to Know Before You Start
TurtleBot3 includes multiple parts working together:
- Onboard computer (SBC) – the “brain” that runs Windows and ARC (this is where your ARC project runs).
- Microcontroller (OpenCR) – handles low-level motor and sensor tasks and communicates with the SBC over USB.
- Distance sensor (Lidar) – scans the room so the robot can detect objects and map/avoid obstacles.
- Power system (battery) – powers the robot and (depending on your setup) may also power the SBC.
ARC runs on the onboard computer. The computer sends commands to the OpenCR controller, and the OpenCR drives the motors and reads sensors.
Using TurtleBot3 With ARC
TurtleBot3 often ships with a Raspberry Pi. For ARC, most users switch to a more capable x86-based single board computer (SBC) so they can run Windows 10 and get the best ARC experience and compatibility.
The good news: many x86 SBCs share the same mounting footprint as a Raspberry Pi, so the physical swap is usually straightforward.
Recommended Supported SBCs
Get Started (Step-by-Step)
Follow these steps to get TurtleBot3 running with ARC. Take your time—beginner robotics is much easier when you change one thing at a time and test as you go.
-
Install an x86 SBC onto TurtleBot3
Choose one of the supported SBCs listed above. Mount it securely and confirm you can connect keyboard/mouse/monitor (or use headless access later). -
Install Windows 10
Windows 10 (including the free/unactivated version) works well for robotics projects. For best results on small computers, review these tips: -
Connect TurtleBot3 electronics to the SBC
Plug the following USB cables into your SBC:- OpenCR USB (motor/sensor controller)
- Lidar USB (distance scanning sensor)
-
Provide adequate power
Make sure your battery and power wiring can supply enough current for the SBC, sensors, and motors. If the robot randomly reboots, disconnects, or behaves inconsistently, insufficient power is often the cause. -
Install Synthiam ARC
Install ARC on Windows, then launch it and confirm it opens successfully on your SBC. -
Run the TurtleBot3 ARC project / follow the video
Use the video above to configure the project and get basic movement working (drive, turn, and sensor feedback). Start with simple tests (slow movement, short distances) before trying autonomy features.
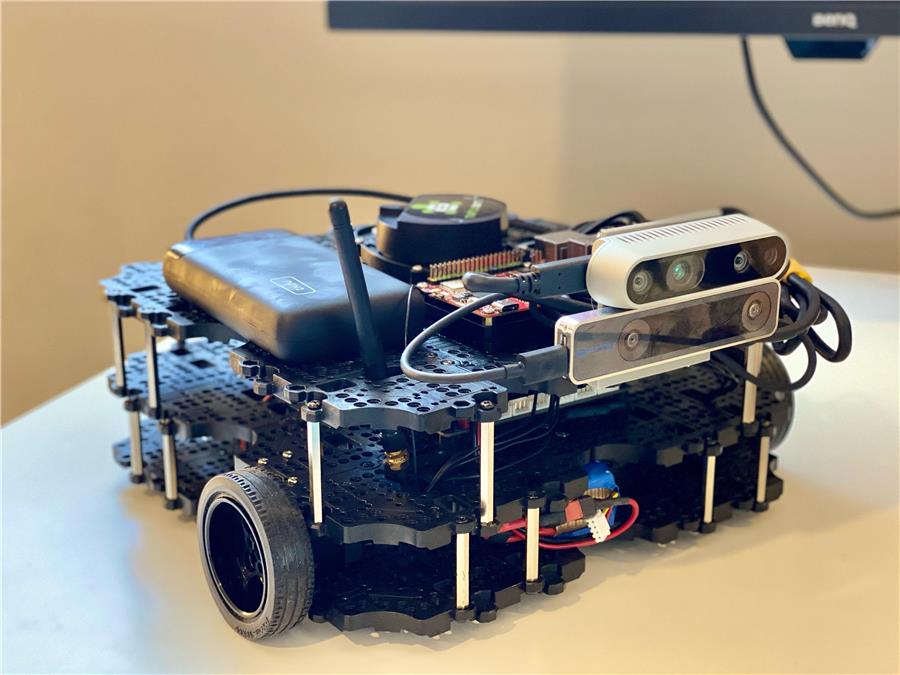
TurtleBot3 With Intel RealSense (Optional Upgrade)
You can upgrade TurtleBot3 beyond Lidar by adding Intel RealSense cameras. In the example configuration shown below, a Rock Pi/X and a 25A LiPo battery are used, along with two RealSense cameras:
- Intel RealSense D435i – a depth camera that can be used for obstacle detection and 3D depth sensing (in this setup, it can replace the Lidar for certain use cases).
- Intel RealSense T265 – a tracking camera that estimates motion/position over time (in this setup, it can replace SLAM components for pose localization in some workflows).