
Micro:Bit by BBC
The BBC micro:bit is a small, beginner-friendly microcontroller board (a tiny computer on a circuit board) that was created for teaching programming and electronics. You can connect a micro:bit to Synthiam ARC using a USB cable, and ARC can then read sensors and control outputs on the board.
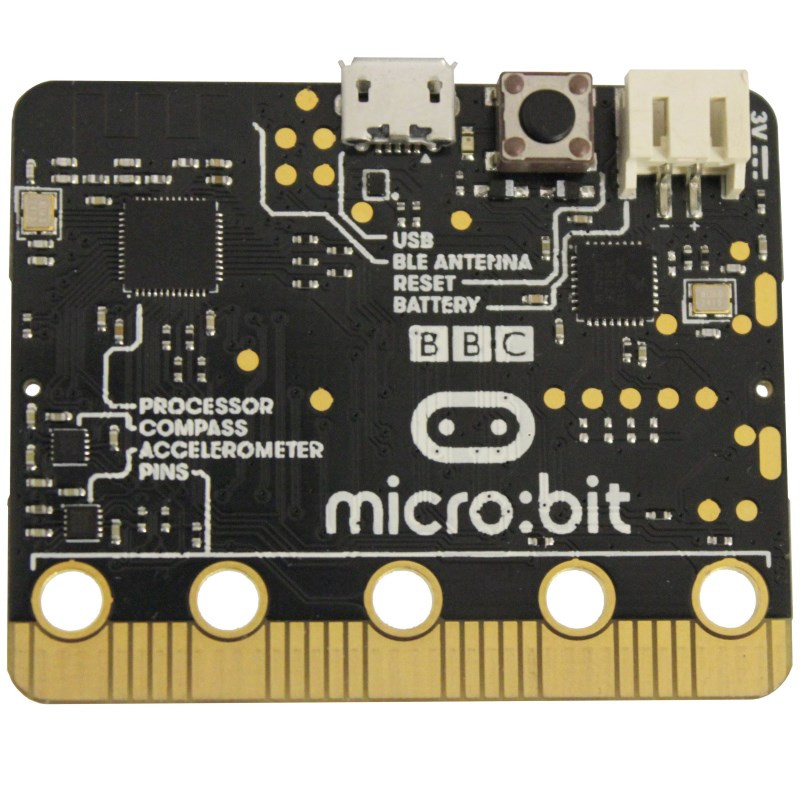
The micro:bit is about half the size of a credit card and typically includes:
- ARM Cortex-M0 processor (runs your program/firmware)
- 25-LED display (a 5x5 LED matrix you can light up)
- Two buttons (Button A and Button B)
- Motion sensors (accelerometer) and compass (magnetometer)
- USB (for power + programming + communicating with ARC)
- Bluetooth (wireless features, depending on your project)
- Power options: USB or an external battery pack
- GPIO pins (inputs/outputs for connecting electronics)
What “GPIO” Means (Inputs and Outputs)
GPIO stands for General Purpose Input/Output. These are the pins on the edge of the micro:bit that let you connect things like: LEDs, buttons, sensors, servos (with extra hardware), buzzers, and more.
The easiest pins to use are the three large ring pads labeled P0, P1, and P2. These are designed so you can clip on alligator clips without needing soldering.
If you use a micro:bit breakout board (an accessory that expands the edge connector into easy-to-use pins), you can access the other GPIO pins more conveniently.
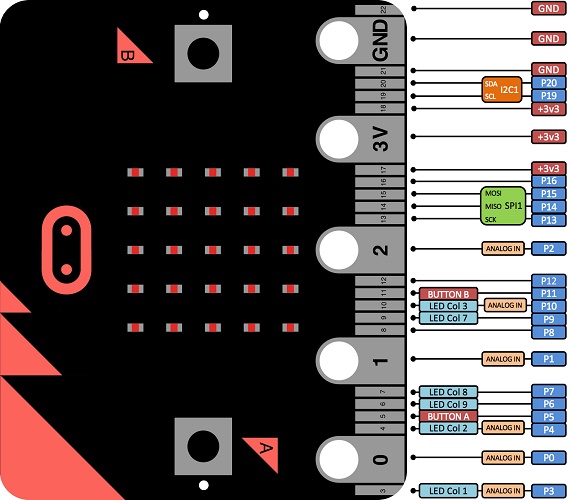
GPIO Pin List
Below is a reference list of micro:bit pins and common shared functions:
- Pin #0 - large pad - analog in
- Pin #1 - large pad - analog in
- Pin #2 - large pad - analog in
- Pin #3 - analog in, also used for LED matrix
- Pin #4 - analog in, also used for LED matrix
- Pin #5 - also used for Button A
- Pin #6 - also used for LED matrix
- Pin #7 - also used for LED matrix
- Pin #8
- Pin #9 - also used for LED matrix
- Pin #10 - analog in, also used for LED matrix
- Pin #11 - also used for Button B
- Pin #12
- Pin #13 - also available as SPI clock
- Pin #14 - also available as SPI MISO
- Pin #15 - also available as SPI MOSI
- Pin #16
- Pin #19 - also available as I2C clock
- Pin #20 - also available as I2C data
Recommended Pins (Beginner Friendly)
If you want to use the onboard buttons and LED display while also connecting external devices, it’s best to choose pins that are less likely to conflict. A commonly recommended set is: #0, #1, #2, #8, #12, #13, #14, #15, #16, #19, and #20.
Before You Start: What “Firmware” Is
ARC does not use the micro:bit’s default programs. Instead, ARC expects the micro:bit to run a specific program called firmware. Firmware is simply a program that lives on the micro:bit and tells it how to communicate with ARC and how to respond to commands (like reading a pin or setting an output).
Programming the micro:bit Firmware Using Arduino IDE
The ARC-compatible firmware for the micro:bit is provided as an Arduino sketch. To load it onto the micro:bit, you will:
- Install the Arduino IDE on your computer.
- Add the required micro:bit board support to the Arduino IDE (so Arduino knows how to compile for the micro:bit).
- Open the downloaded ARC firmware sketch/source code.
- Compile the sketch and upload it to the micro:bit using USB.
- After uploading, connect in ARC to start using the micro:bit.
Download Firmware Source Code and Setup Links
Use the resources below to set up Arduino support for the micro:bit and to download the ARC firmware source code:
-
Visit Adafruit micro:bit with Arduino setup page
Follow this guide to install the micro:bit tools and board support in the Arduino IDE.
-
Download DJ's Microbit v1 Firmware Sourcecode
(Feb 7, 2019) Download the Arduino sketch/source used to connect the micro:bit to ARC.
-
Tutorial to compile and upload the firmware
Step-by-step instructions for building the sketch in Arduino and uploading it to the micro:bit.
