
Connects ARCx to EZ-B boards over serial, network, or TCP listener, with multi-board control, connection scripts, and project audio routing
 Windows
 ARM
 Linux
 MacOS
How to add the Ezb Connection robot skill
- Load the most recent release of ARCx on a compatible operating system (Get ARCx).
- Press the + Skills menu from the top menu bar in ARCx.
- Choose the Communication category tab.
- Press the Ezb Connection icon to add the robot skill to your project.
Don't have a robot yet?
Follow the Getting Started Guide to build a robot and use the Ezb Connection robot skill.
How to use the Ezb Connection robot skill
Connects ARCx to microcontrollers running EZB firmware - an EZ-B v4, an IoTiny, an Arduino or ESP with EZB firmware, or anything else that speaks the EZB protocol - over USB/serial, over the network, or by waiting for the board to call in.
Use this skill to configure board connections, run a script when a board connects, and choose where the project's speech and sounds play. Once connected, the board's ports are available to other robot skills and scripts.
A project can hold several boards. Each row in this skill is one board, numbered from 0, and that number is the EZB index every other skill and script uses (Servo.SetPosition(port, value, 1) means board 1).
Only one instance of this skill per project - add more rows rather than more skills.
Adding it to a project
- Add the skill (Communication category).
- For a serial connection, open the configuration, select EZB 0, and set the Baud rate and any required DTR/RTS options under Connection. Save the settings.
- In the main window, type or pick the Address / port for EZB 0.
- Press the green connect button beside it. The button turns red when connected; press it again to disconnect.
- To add another board, open EZB boards in the configuration, choose Add EZB, configure the new board, and save. Enter its address in the new main-window row.
Save the project to retain its addresses, board settings, and audio output selection.
Address formats
| Form | Meaning |
|---|---|
COM3, /dev/ttyUSB0 |
A serial port. The Baud rate setting applies. |
192.168.1.1 |
Network, using the default EZB port. |
192.168.1.1:23 |
Network, on a specific port. |
The address box is an autocomplete: ARCx's scanner offers the boards it found on the network and the serial ports it can see, and you can always type something yourself. The box is disabled while that board is connected. Scanner entries may include a friendly name after the address; the skill uses the address portion when connecting.
The window
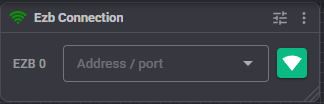
One row per board:
- the index (EZB 0, EZB 1, EZB 2, ...) - this is the number scripts use. Hover over it to see the board's description;
- the address box;
- a connect / disconnect button, green when disconnected and red when connected.
When Project audio explicitly selects computer speakers or an EZB speaker, a line below the rows shows the configured audio destination. It continues to show the selected EZB even while that board is disconnected and audio falls back to the computer. No reminder is shown when using this computer's preference.
Configuration
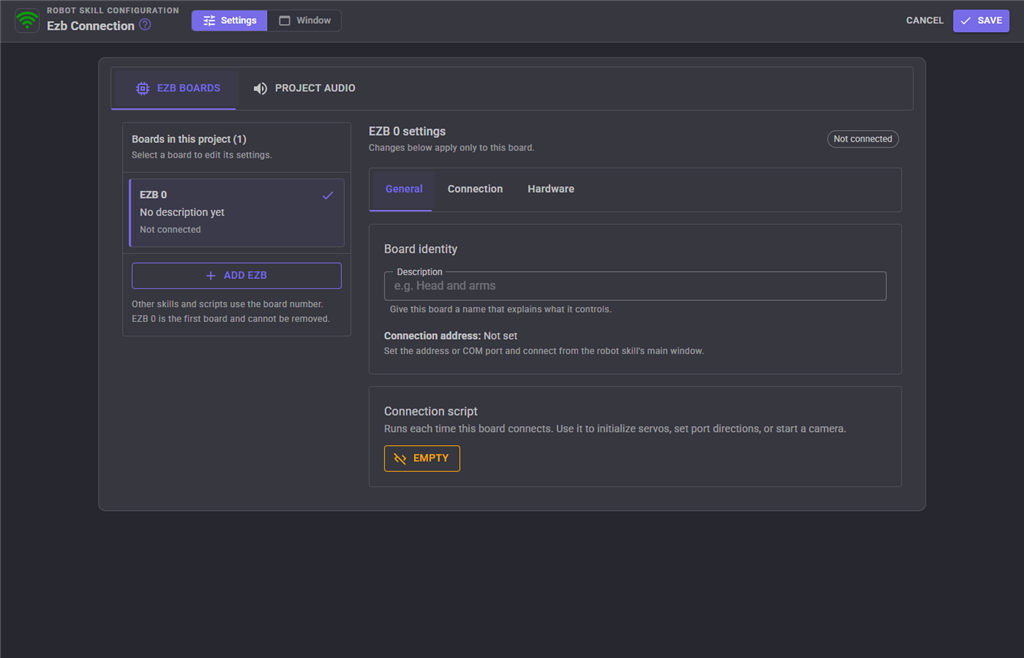
The configuration has two tabs: EZB boards and Project audio.
In EZB boards, select a board from the list, or use Add EZB to create one. The list shows each board's number, description, and connection status. The selected board's settings are organized into three tabs:
- General: description, a read-only display of the connection address, and the connection script.
- Connection: incoming TCP connections and serial / USB settings.
- Hardware: battery monitoring and I2C bus speed.
Set the address and connect from the robot skill's main window. To remove a board, use Remove EZB beside its settings heading. Removing a board shifts the numbers of the boards after it; check any skills and scripts that use those numbers. EZB 0 cannot be removed. Also review Project audio > Speaker board after removing a board, because the audio destination is selected by number.
Board settings
| Setting | Meaning | Default |
|---|---|---|
| Description | A name explaining what the board controls, such as "head and arms" or "base and drive motors". | empty |
| Connection script | Runs every time this board connects. Use it to put the board into a known state - initialize servos, set port directions, start a camera. | empty |
| Listen for this EZB to connect | Starts a TCP listener so a board configured for outgoing connections can connect to ARCx. | off |
| Listening TCP port | The port ARCx listens on in that mode. The board must be configured to connect to this computer on the same port. | 4244 |
| Enable battery monitor | Enables the board's low-voltage protection where supported by its firmware. | on |
| Warning voltage | The voltage at or below which the monitor triggers. Set it appropriately for the board's battery. | 7 V |
| Baud rate | Speed of the serial connection. It must match what the board's firmware uses. | 9600 |
| Enable DTR (Data Terminal Ready) | Sets the serial port's DTR signal. Use the setting required by the board. | off |
| Enable RTS (Request To Send) | Sets the serial port's RTS signal. Use the setting required by the board. | on |
| I2C speed | Clock speed of the board's I2C bus in hertz, where the firmware supports changing it. 100000 is standard mode, 400000 is fast mode. | 100000 |
Serial settings apply only to USB/serial connections, not to Wi-Fi or TCP connections. Save them before connecting; disconnect and reconnect when changing serial settings. Saving also starts, stops, or restarts the TCP listener as needed.
The I2C speed and battery monitor settings are applied on connection and when saving configuration for an already connected board. Each requires support from the firmware.
Incoming TCP connections
Use this mode only with firmware configured to initiate a connection to ARCx.
- Select the board under EZB boards and open Connection.
- Enable Listen for this EZB to connect and set Listening TCP port (default 4244).
- Save the configuration to start listening.
- Configure the board to connect to the computer running ARCx, using that computer's reachable network address and the same TCP port. Allow incoming connections on that port through the computer's firewall if needed.
The board initiates the connection; there is no need to press the main-window connect button for this mode. Use a different listening port for each board with a listener. Listener settings are restored when the project loads. Disabling the listener and saving stops it; changing its port and saving restarts it on the new port.
Project audio
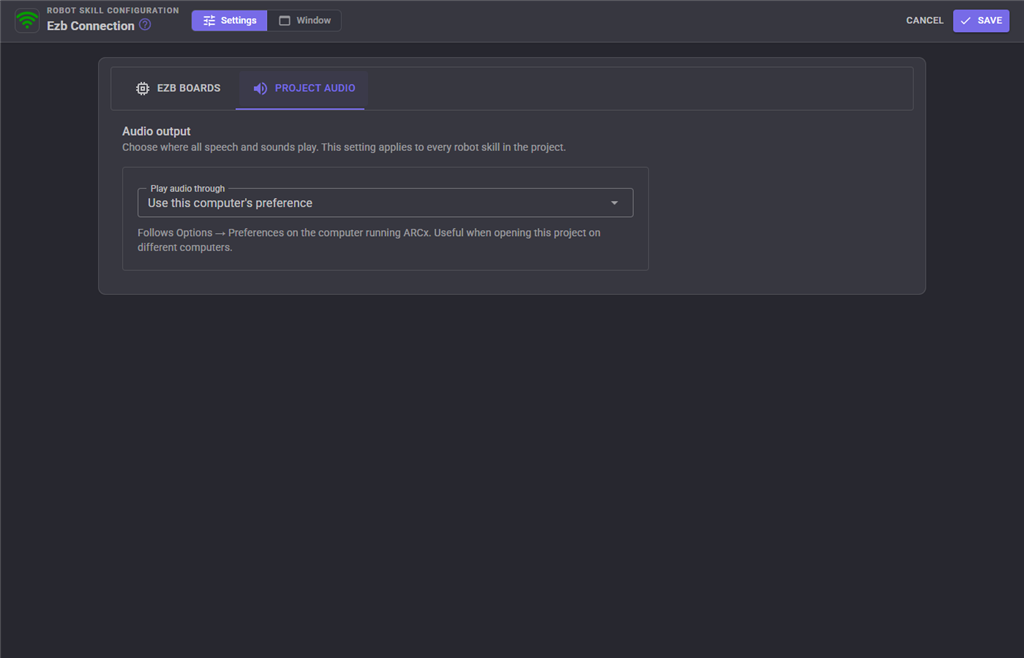
The Project audio tab controls speech and sound output across the project.
| Play audio through | Behavior |
|---|---|
| Use this computer's preference (default) | Follows Options > Preferences on the computer running ARCx. |
| Computer speakers | Sends project audio to the computer's audio output. |
| EZB speaker | Sends project audio to the selected Speaker board. The default board selection is EZB 0. |
For EZB speaker, choose the board with the speaker attached. If the board is missing, disconnected, or its firmware does not support audio, sound plays through the computer instead. The selected destination remains saved with the project. Removing this skill returns project audio to the computer's preference.
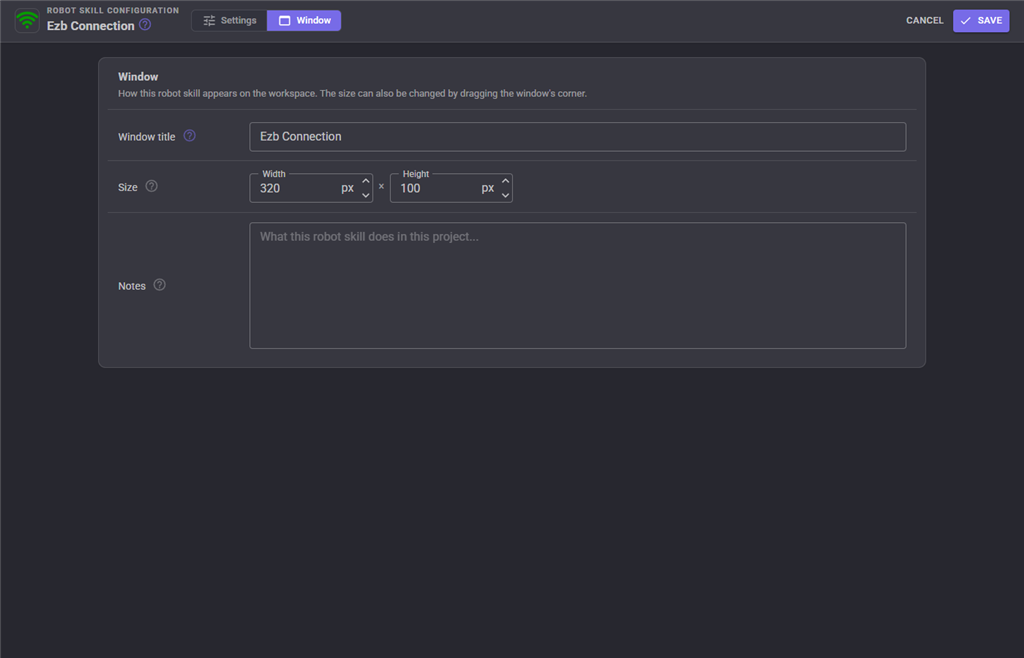
The Window tab sets the robot skill's window title, its size on the workspace and notes about what it does in this project.
What happens on connect
- The board's I2C speed and battery protection are applied, if supported.
- The board's Connection script runs, in the background.
This applies to outgoing connections and connections accepted by a listener. Connection handling is skipped while all robot skill workers are paused. The connection script only runs for board indexes configured in this skill; connections outside that range do not trigger it. Saving settings for an already connected board does not rerun the script.
Several boards
- Boards are claimed by index, so board 1 is always the second row here regardless of which skill loaded first.
- Ports on other boards are addressed by passing the index:
Servo.SetPosition(D0, 90, 1). - This skill configures the consecutive board indexes starting at 0. When using other communication skills, avoid assigning them to those same indexes.
Troubleshooting
| Symptom | What to check |
|---|---|
| The address box is greyed out | That board is connected. Disconnect first. |
| Serial connects but nothing responds | Confirm that EZB firmware is installed and that Baud rate, DTR, and RTS match the board's requirements. |
| An Arduino resets or never answers | Try toggling DTR and RTS - some clones need one, some the other. |
| Network connection times out | Check the address, port, network reachability, and firewall. Incoming TCP mode requires the board to initiate a connection; enabling it alone does not fix an outgoing connection. |
| An incoming connection never arrives | Save the listener settings, check that its port is not already in use, and verify that the board targets the ARCx computer's address and listening port. |
| The scanner shows nothing | The board is not on the same network segment, or its broadcast is blocked. Type the address by hand. |
| The battery monitor never triggers | The firmware does not report the lipo protection capability. |
| I2C devices misbehave at 400000 | Not every device or cable run survives fast mode; go back to 100000. |
| Removing a board broke other skills | Skills refer to boards by index. Remove only the last board, or fix the indexes afterwards. |
| Audio plays through the computer instead of the EZB | Check Project audio > Speaker board, its connection status, and whether its firmware supports audio. The main-window reminder shows the configured destination even during fallback. |
| The connection script does not run | Check the selected board's script and whether all robot skill workers are paused. Check the ARCx log for connection setup or script errors. |
| An EZB on the network is not displayed in the drop-down | If on Windows, the EZB network must be set to Private for the broadcast to work. |
See also
- Control commands
- Camera Source (ezb) - the camera on the same board, connected separately
- Sound Board (ezb), Microphone Playback (ezb) - audio through the board
Control Commands for the Ezb Connection robot skill
There are Control Commands available for this robot skill which allows the skill to be controlled programmatically from scripts or other robot skills. These commands enable you to automate actions, respond to sensor inputs, and integrate the robot skill with other systems or custom interfaces. If you're new to the concept of Control Commands, we have a comprehensive manual available here that explains how to use them, provides examples to get you started and make the most of this powerful feature.
Control Command ManualThis robot skill has 5 control commands, listed below. Send them from a JavaScript or Python script, from Blockly, or from another robot skill.
The first value is always the window title, which is the name in the title bar of the robot skill on your workspace. It starts out as Ezb Connection, which is what every example below uses. If you rename the robot skill, or add a second copy of it to the project, use the title as it appears on that window instead.
ControlCommand() can be shortened to CC(), and both spellings work in JavaScript and in Python. The examples are JavaScript; Python is the same call, except that true and false are written True and False.
Connect
Connect to the EZB on index #0
Syntax
ControlCommand("Ezb Connection", "Connect", 0)
Parameters
| # | Name | Type | What to pass |
|---|---|---|---|
| 1 | EZB Index # | Number | The fixed value 0. Leave it as it is. |
Returns: Boolean [true or false]
Example
var result = ControlCommand("Ezb Connection", "Connect", 0);
Disconnect
Disconnect from the EZB on index #0
Syntax
ControlCommand("Ezb Connection", "Disconnect", 0)
Parameters
| # | Name | Type | What to pass |
|---|---|---|---|
| 1 | EZB Index # | Number | The fixed value 0. Leave it as it is. |
Returns: Boolean [true or false]
Example
var result = ControlCommand("Ezb Connection", "Disconnect", 0);
GetAddress
Get the address of EZB index #0
Syntax
ControlCommand("Ezb Connection", "GetAddress", 0)
Parameters
| # | Name | Type | What to pass |
|---|---|---|---|
| 1 | EZB Index # | Number | The fixed value 0. Leave it as it is. |
Returns: String
Example
var result = ControlCommand("Ezb Connection", "GetAddress", 0);
IsConnected
Return connection status of the EZB on index #0
Syntax
ControlCommand("Ezb Connection", "IsConnected", 0)
Parameters
| # | Name | Type | What to pass |
|---|---|---|---|
| 1 | EZB Index # | Number | The fixed value 0. Leave it as it is. |
Returns: Boolean [true or false]
Example
var result = ControlCommand("Ezb Connection", "IsConnected", 0);
SetAddress
Specify the address for EZB index #0
Syntax
ControlCommand("Ezb Connection", "SetAddress", 0, "")
Parameters
| # | Name | Type | What to pass |
|---|---|---|---|
| 1 | EZB Index # | Number | The fixed value 0. Leave it as it is. |
| 2 | Address (COMx or IP:PORT) | Text | The fixed value "". Leave it as it is. |
Returns: Boolean [true or false]
Example
var result = ControlCommand("Ezb Connection", "SetAddress", 0, "");
This list is read out of the robot skill itself each time its package is uploaded, so it matches the published version (v8).


This robot skill has been updated to v1.
This robot skill has been updated to v2.
This robot skill has been updated to v3.
This robot skill has been updated to v4.
This robot skill has been updated to v5.
This robot skill has been updated to v7.
This robot skill has been updated to v8.
What has changed
compatible with the latest ARCx v2026.09.27.01