Robot Skills for Synthiam ARC
Discover how Synthiam ARC Robot Skills give your robot advanced capabilities, including vision, navigation, speech recognition, hardware control, and more. Browse skill categories, watch the overview video, and learn how to add the right behaviors to your ARC project.
Robot apps are built from Robot Skill Controls. Each skill represents a specific behavior or capability for your robot, running as a process (or node). There are skills for controllers, cameras, sensors, navigation, speech recognition, and hundreds more.
Add Robot Skills to your ARC robot project from the Add Skill menu to quickly integrate powerful features without writing low-level code.
Robot Skill Categories
ADC Robot Skills
The ADC (Analog-to-Digital Converter) category in Synthiam ARC provides the capability to read analog signals from sensors, converting real-world signals into digital data. This is essential for interfacing with analog sensors and devices, allowing robots to gather precise data from the physical environment.

ADC Graph
by Synthiam
Historical ADC graph and numeric readout (0-255) for 0-3.3/5V inputs; configurable board/port, sample interval, color, and pause for ezb controllers.

ADC Meter
by Synthiam
ADC VU meter displaying 0-3.3/5V as a 0-255 linear meter; configurable board/port, sampling interval and color; pausable real-time readings.

ADC Value
by Synthiam
Display ADC port voltage and 0-255 linear values (0-3.3/5V); configurable board/port, units, multiplier and sample interval.

Arcx Test Robot Skill
by Synthiam Inc.
Placeholder ARCx development skill compatible with Windows, Linux, Raspberry Pi and macOS; provides functionality during ARCx platform rollout
Requires ARCx
v21
Artificial Intelligence Robot Skills
The Artificial Intelligence category in Synthiam ARC empowers robots with advanced cognitive abilities. Through integration with AI services, robots can recognize objects, understand speech, and make intelligent decisions. This skill category opens up a realm of possibilities for creating smart and responsive robotic systems.

Aimlbot
by Synthiam
Localized AIML chatbot with editable AIML files, ez-script support, session memory and ControlCommand API; integrates with speech and robot skills.
Requires ARC
v22

Autonomous AI
by Synthiam Inc.
Autonomous AI robot agent with vision, speech, motion, animations, memory, and multi-step task execution driven by LLMs.
Requires ARC
v19

Bot Libre
by Bot Libre
AIML2 chatbot client for ARC connecting robots to Bot Libre cloud for customizable, private chatbots and personalities.
Requires ARC
v8

Cognitive Sentiment
by Microsoft
Detects positive sentiment percentage of input text using cognitive ML; returns $SentimentPercentage, shows face, graph, and status for analysis.

Dialogflow
by Google
Add Google DialogFlow NLP to ARC: conversational intents, parameter prompts, scripted responses, service-account setup and programmatic robot control.
Requires ARC
v23

Openai Chatgpt
by OpenAI
ChatGPT conversational AI for ARC robots-configurable personality, memory, image description, script execution, speech and API integration.
Requires ARC
v35

Pandorabot AIML2
by Synthiam
Connect ARC to Pandorabots AIML2 to run AI-driven virtual personalities for human-like text or voice chat, using API keys and script hooks.
Requires ARC
v2

Pandorabots
by PandoraBots
Connects ARC to Pandorabots for AI chat, sends text and gets replies (executes [EZ-Script]), integrates with speech recognition and custom bots

Personality Forge
by Personality Forge
Adds a Personality Forge chatbot to ARC, giving memory, emotions, AIScript dialogue, persistent conversation IDs and speech/chat integration via API.
Requires ARC
v3

Synbot Plugin
by Jlucben
Synbot plugin for ARC: local Bot Server chatbot integration with SIML dialogs, ControlCommand API, multi-language, learning and emotion support.
Requires ARC
v14

Translate
by Jlucben
Translate text via Microsoft Translator (auto-detect); EZ-B plugin stores translated and detected language variables. Requires Azure key.
Requires ARC
v2

Vader Sentiment Analysis
by Synthiam
VADER sentiment analyzer for ARC returns positive, neutral, negative percents and a compound score from text; enables emotion-driven behaviors.
Requires ARC
v5

ZAMA Emotion Model
by University of Glasgow - AZRAM Project
Valence-arousal emotion engine generating persistent, configurable robot moods and event-driven emotional outputs for expressive behaviors.
Requires ARC
v1
Audio Robot Skills
The Audio category in Synthiam ARC enables robots to interact with their surroundings through sound. It includes features such as speech synthesis, audio playback, and voice recognition. This skill set is crucial for creating robots that can communicate effectively using auditory cues.

Advanced Speech Recognition
by Microsoft
Azure Cognitive Speech recognition for ARC with custom API credentials, scripting, language control, and text output for detected phrases
Requires ARC
v43

Advanced Speech Synthesis
by Synthiam Inc.
Advanced multilingual speech synthesis using Azure's natural voices for lifelike robot speech.

Audio File Out EZB
by Synthiam Inc
Stream MP3 or WAV files from your PC to the primary EZ-B speaker for robot audio playback, alerts, music, and voice clips.
Requires ARC
v1

Audiotoolbox Plugin
by ptp
Enable UWP voices, change default audio devices, capture audio and route it to EZB controllers with session tracking and device control.
Requires ARC
v15

Azure Speech To Text Engine
by Microsoft
Azure speech recognition for ARC using your custom subscription key for speech-to-text, billed to your Azure account.

Azure Text To Speech
by Microsoft
Azure TTS for ARC robots: generate natural, customizable neural voices for companion, educational, assistive, and entertainment applications.
Requires ARC
v11

Basic Speech Synthesis
by Synthiam Inc.
English-only speech synthesis using a remote server to generate audio.

Bing Speech Recognition
by Microsoft
Accurate Bing cloud speech-to-text for ARC: wake-word, programmable control, $BingSpeech output, Windows language support, headset compatible

Conversational Menu
by Synthiam
Voice menu tree to navigate options and run scripts on ARC robots. Multi-level, customizable prompts, speech I/O, timeout and repeat/back.
Requires ARC
v10

Frequency Detector
by Synthiam
Detect audio frequencies via PC microphone (FFT), output a variable and drive servos within configurable min/max ranges with waveform feedback.
Requires ARC
v7

Google Speech Recognition
by Google
Google Speech for ARC: cloud speech recognition with waveform, configurable response scripts and PandoraBot support
Requires ARC
v10

Microphone
by Synthiam
Record audio from your PC mic, auto-trigger and edit sample rate/effects, then play or export recordings to an EZ-B v4 SoundBoard for robot playback.

Midi Control
by Synthiam
MIDI I/O for ARC: send/receive notes, run per-note scripts, control PC or external instruments, with panic to stop stuck notes.
Requires ARC
v14
MP3 Trigger
by SparkFun Electronics
Serial MP3 Trigger for EZ-B: plays MP3s from mini‑SD; configurable port/baud. Deprecated-replaced by EZB v4 streaming audio. 3rd‑party.

Openai Text To Speech
by OpenAI
Convert text to dynamic, real-time speech with nine expressive OpenAI voices-natural, varied, accessible robot communication.
Requires ARC
v4

Output Audio From EZ-B
by Synthiam
Example ARC skill demonstrating converting, compressing and streaming MP3/WAV to an EZ-B speaker, with play/stop commands and TTS examples.
Requires ARC
v11

Sound Movement
by Synthiam
Stereo mic sound localization triggers left/right scripts to control robot movement, enabling directional responses (turn/move) to audio.

Sound Script (Ezb)
by Synthiam
Trigger a script when EZB audio plays, exposing live Min, Max and Avg audio-level variables for looped monitoring; stops when audio ends.
Requires ARC
v3

Sound Servo (EZB)
by Synthiam
Map EZ-B audio volume to servos; multi-servo mirroring, scalar range control, invert/min-max, waveform feedback to sync mouth motion.

Sound Servo (PC Mic)
by Synthiam
Maps PC microphone volume to servo positions - control multiple servos (e.g., robotic mouth) with scalar, min/max and invert options.

Sound Servo (PC Speaker)
by Synthiam
Maps PC audio volume to servos in real time with scalar, min/max, invert & multi-servo options-ideal for syncing robot mouth to sound

Soundboard (EZB)
by Synthiam
Play WAV/MP3 via EZ-B v4, manage tracks, add timed scripts for synced robot actions, control via ControlCommand(), volume and clipping indicators.

Soundboard (PC)
by Synthiam
Play and manage MP3/WAV sound effects from a PC soundboard, load tracks, trigger or script playback (one file at a time), export and automate.

Soundboard V2 (PC)
by Synthiam
Play MP3/WAV via PC sound output with timeline scripts to trigger movements, auto-position actions, and optional looping for synced routines
Requires ARC
v6

Speech Phrase Recognition
by Synthiam Inc.
Run ARC scripts from any speech-to-text source for voice-controlled automation, command parsing and script triggering.

Speech Recognition
by Synthiam
Windows Speech Recognition skill: detect custom phrases via PC mic, trigger configurable scripts/actions with adjustable confidence.

Speech Script
by Synthiam
Run custom scripts when speech starts/ends to sync servos and LEDs to spoken $SpeechTxt, with loop support, stop button and logs.
Requires ARC
v4

Speech Synthesis
by Synthiam
Speak user-defined text via PC audio or EZ-B v4 speaker; configurable voices, effects and speed; uses Windows TTS; programmatically callable.
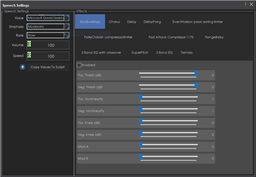
Speech Synthesis Settings
by Synthiam
Configure Windows Audio.say()/Audio.sayEZB() TTS on EZB#0: voice, emphasis, rate, volume, speed/stretch and audio effects; copy control script.

Talk Servo V2
by Synthiam
Animate servos to simulate jaw/mouth with ARC text-to-speech; configurable vowel/consonant timing, start sync, multi-servo control, pause/stop.
Requires ARC
v5

Total Speech Recognition
by Synthiam
Offline open-vocabulary speech recognition for Windows 10/11 - low-accuracy open-dictionary voice input with confidence & scripting, headset use.
Requires ARC
v8

Voice Activity Detection
by Synthiam
Real-time microphone VAD using FFT to detect speech start/end and trigger scripts, with live level graph and sensitivity tuning
Requires ARC
v9

Watson Speech To Text
by ptp
Watson Speech-to-Text ARC plugin: cloud AI transcription with configurable models, selectable VAD (Windows/WebRTC), audio capture and visualization.
Requires ARC
v11

Watson Text To Speech
by ptp
Human-like audio via IBM Watson Text-to-Speech: multi-language, selectable voices for accessibility and automated interactions. IBM Cloud required.
Requires ARC
v4

Windows Speech Engine
by Microsoft
Microsoft Windows built-in speech synthesis and recognition for TTS and speech-to-text input in ARC robot projects.
Camera Robot Skills
The Camera category in Synthiam ARC facilitates visual perception for robots. With camera-related functionalities, robots can capture images, process visual data, and perform tasks such as object recognition and tracking. This category is fundamental for developing vision-based robotic applications.

Augmented Reality
by Synthiam
Overlay PNG/JPG images in real-time onto detected objects, faces, colors or glyphs using ARC Camera tracking; attach, preview, detach.
Requires ARC
v9

Camera Click Servo
by Synthiam
Interactive camera control for ARC: click-to-center and edge hotspots to pan/tilt servos, adjustable fine-tune and multi-camera support.
Requires ARC
v12

Camera Device
by Synthiam
Use PC or robot cameras for vision tracking: color, QR, glyph, face, object, motion; record video/data, control servos and movement, run scripts

Camera Overlay
by Synthiam
Displays trained object names as overlays on the Camera Device video stream using Camera Device's object-tracking (shows $CameraObjectName).
Requires ARC
v9

Camera Snapshot
by Synthiam
Save camera snapshots to 'My Robot Pictures' (Pictures folder), manual or timed (0-100s), and trigger programmatically via controlCommand.

Camera Source (Ezb)
by Synthiam Inc.
Enable an EZB video camera as ARC's camera source for video recording, vision recognition and other robot vision features.

Camera Source (Usb)
by Synthiam Inc.
USB camera video source for recognition, recording and other vision tasks in ARC.

Camera Variable Overlay
by James Graham Hu
Overlay image packs onto camera feed and map images to control-variable ranges with auto/manual assignment, position and sizing options.
Requires ARC
v5

Cognitive Emotion
by Microsoft
Uses Microsoft Cognitive Emotion cloud to analyze camera images, returning emotion descriptions and confidence for speech/output (requires internet).

Cognitive Vision
by Microsoft
Microsoft Cognitive Vision integration for ARC: real-time object, face, emotion detection, OCR, confidence data and script-triggered robot actions.

Darknet YOLO (Obj Detection)
by ptp
Tiny YOLOv3 CPU-only real-time object detection using a camera; offline detection, script-triggered on-changes or on-demand results with class/scores.
Requires ARC
v5

Face Tracking
by Synthiam Inc.
Detects and tracks faces from any ARC video source, providing real-time face localization for robot applications.

Kinect Body Control
by Microsoft
Control robot servos with Microsoft Xbox 360 Kinect body tracking; map joints to upper/lower body servos with smoothing and pause control.
Requires ARC
v12

Live Stream Broadcast
by Amin
Broadcast live audio and video from ARC camera to the web via HLS; cross-browser streaming. Requires router configuration for external access.
Requires ARC
v9

Live Stream Receiver
by Amin
Play live web video and audio streams inside ARC from Chrome/Firefox, streaming directly to ARC camera control; network configuration may be needed.
Requires ARC
v7
Omron HVC-P
by CochranRobotics
Omron HVC-P ARC plugin: real-time body, hand, face, gaze, gender, age, expression and eye estimation; facial recognition via Omron software
Requires ARC
v7
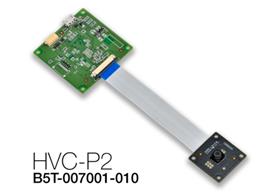
Omron HVC-P2
by JustinRatliff
Omron HVC-P/HVC-P2 ARC plugin: Python-based camera integration for body, hand and face detection, gaze, age/gender, expressions and face recognition.
Requires ARC
v6
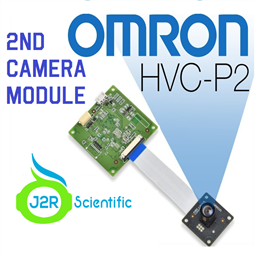
Omron HVC-P2 (Second Camera)
by JustinRatliff
Windows ARC plugin for Omron HVC-P/HVC-P2: Python-based face/body/hand detection, gaze, age/gender, expressions and recognition; dual-camera support.
Requires ARC
v7

Openai Dall-E Image
by OpenAI
Generate or edit images with OpenAI GPT Image from text or camera frames, with save and programmatic control commands.
Requires ARC
v5

Picture In Picture
by Synthiam
Picture-in-picture camera overlay: superimpose one camera onto another; configure source/destination, position, size, border, processed frames, and swap
Requires ARC
v8

Programming With Pictures
by Synthiam
Use camera-detected printed cue cards (direction, pause, start) to record and run stored movement sequences for ARC robots.
Requires ARC
v9

QR Code Generator
by Synthiam
Create customizable QR codes for ARC, display/scan via Camera Control, trigger scripts on recognition and save decoded text to variables.

Robot Skill To Camera
by Synthiam Inc.
Capture a robot skill's display and stream selected area as video to a configured camera device with FPS and live preview crop.
Requires ARC
v5

Rubik's Cube Solving Robot
by ptp
Control a custom ARC robot to manipulate and solve a Rubik's Cube using calibrated arms and grippers; integrates with Thingiverse build.
Requires ARC
v5

Screen To Camera
by Synthiam Inc.
Capture any screen area and stream video to a configured camera device; requires a Custom device and 100% display scaling.
Requires ARC
v7

Sighthound Cloud API
by SightHound
Cloud-based detection of people and faces in robot camera video; returns locations, gender, age, pose, emotion, plus 68-point facial landmarks.
Requires ARC
v12

Stream All The Video Sources
by Synthiam
Stream video from any URI/protocol (RTMP, RTSP, HTTP, UDP, etc.) to a selected ARC camera device for real-time network feed playback.
Requires ARC
v3

Target Overlay
by Synthiam
Overlay translucent PNG targets onto a camera stream with loadable templates, attach/detach control, preview and status for visual alignment.
Requires ARC
v8

Text Overlay
by Synthiam
Overlay a variable on a processed camera image at X/Y coordinates; name the variable and attach to a specific or any available camera
Requires ARC
v2

Tiny Yolo2
by Synthiam
Real-time TinyYolo object detection for ARC Camera Device: tracks 20 classes, populates camera variables, triggers tracking scripts, 30+ FPS in HD.
Requires ARC
v13

Train Vision Object By Script
by Synthiam
Train camera vision objects via controlcommand(), attach camera, start learning, monitor progress, and return object name for scripts.
Requires ARC
v6

Video Recorder
by Synthiam Inc.
Record any video source to a local file for playback, archiving, and processing.

Vuzix Augmented Reality
by Vuzix
Connect Vuzix 920VR AR headset to ARC to map head movement to robot servos or drive, control camera pan/tilt; deprecated 920VR support only.
Communication Robot Skills
The Communication category in Synthiam ARC focuses on enabling robots to interact and exchange information with other devices. This includes communication protocols, data sharing, and network connectivity. It is crucial for building robots that can collaborate and communicate in various environments.

Com Port Manager
by Synthiam
Displays local PC COM/Serial ports opened by scripts, showing open/closed status (no communication logs); not the EZ-B UART.

Comm Expansion Configuration
by Synthiam
Configure EZ-B v4/2 Comm Expansion: switch between UART transparent proxy and USB direct PC link (avoids WiFi); EZ-B needs separate power.

Command Duplicator
by Synthiam
Duplicate and synchronize commands from one master EZ-B to multiple slave EZ-Bs for simultaneous, mirrored robot actions.
Requires ARC
v7

Connection Diagnostic
by Synthiam
Diagnose EZ-B Wi-Fi connection issues with verbose EZ-B communication logging, ping tests, log export and diagnostic reports for Synthiam support.
Requires ARC
v6

Ezb Connection
by Synthiam Inc.
Integrate ARCx with microcontrollers running EZB firmware to enable communication and control of EZB-equipped hardware.

EZB Connection
by Synthiam
Connects EZ-B I/O controllers to ARC via COM or IP (5 connections). Supports init scripts, battery monitoring, TCP/EZ-Script server and serial/I2C.

EZB Connections
by Synthiam
Add and manage up to 255 EZ-B I/O controller connections in ARC, select COM/IP ports or device addresses to connect or remove devices.

EZMQTT Broker
by Synthiam
Local MQTT broker for ARC: host pub/sub messaging on TCP port 1883, relay topics between publisher and subscriber clients.
Requires ARC
v8

EZMQTT Client
by Synthiam
MQTT client for ARC: connect to brokers, publish/subscribe topics, map incoming messages to variables (incl. binary arrays) and run scripts.
Requires ARC
v10

Getrss
by Synthiam
Fetch RSS via GetRSS command; populates $RSSSuccess, $RSSErrorMsg and arrays $RSSTitles, $RSSDescriptions, $RSSLinks, $RSSDates for scripts.
Requires ARC
v1

Network Change
by Synthiam
Execute scripts on WiFi/network connect or disconnect; monitor adapter, store status in a variable and trigger custom scripts for headless SBC robots.
Requires ARC
v2

Pushover
by PushOver LLC
Send robot status alerts to iOS, Android and Windows via Pushover.net. Configure User/App keys to notify on low battery, stuck or task events.
Requires ARC
v3

Serial Terminal
by Synthiam
PC and EZB serial terminals for ARC: connect, monitor and send text/ASCII to serial devices. Supports COM, flow control, baud, DTR/RTS, hex

SMTP Client
by Synthiam
Send SMTP email (text or camera images) from ARC robots via ControlCommand; configure SMTP/auth and sender; saves credentials in project.
Requires ARC
v11

TCP Client
by Synthiam
Telnet-like ASCII TCP client for ARC: connect to IP:port, send ASCII, view raw or HEX server responses with local echo
Requires ARC
v8

TCP Clients
by Synthiam
Monitor incoming TCP Server connections when TCP Server is enabled under Connection > Config; view and track live connections.

TCP Script Server Raw
by Synthiam
TCP server for ARC accepting EZ-Script, JavaScript or Python commands, letting controllers send commands and receive line-terminated responses
Requires ARC
v8

Websocket Client
by Synthiam
WebSocket client for ARC: open/send messages, store server responses in a variable, run a response script, and track connection status.
Requires ARC
v6

Websocket Server
by Synthiam
WebSocket server for ARC: accepts clients, stores messages, runs per-message scripts, tracks connection status, supports debug, needs Windows admin
Requires ARC
v3
Digital Robot Skills
The Digital category in Synthiam ARC deals with digital signal processing and manipulation. It includes functions for working with digital sensors, logic operations, and data processing. This skill set is essential for handling digital information in robotic applications.

Read Digital
by Synthiam
Read TTL digital input from an ARC I/O port; real-time red/green status for low (0V) or high (+3.3/5V), selectable board/port and read interval.

Set Digital
by Synthiam
Toggle a digital I/O port between TTL low (0V) and high (3.3V/5V) in ARC; select board and port, simple on/off control-signal only.
Display Robot Skills
The Display category in Synthiam ARC allows robots to present information visually. It includes features for controlling displays, showing images, and rendering graphical content. This skill set is valuable for creating robots that can convey information to users in a clear and engaging manner.

Chromium
by Google
Configurable Chromium browser skill for ARC: navigate URLs, print, open in PC browser, maximize/restore, set page content to a global variable.
Requires ARC
v7

Display Popup
by Synthiam
Full-screen popup display for ARC: show custom text with configurable timeout, font, text/background color, size and position via controlCommand().
Requires ARC
v13

Full Screen Video Player
by Synthiam
Fullscreen overlay video player controlled by ControlCommand: play/pause/resume/stop; ESC cancels playback and locks new playback until unpaused.
Requires ARC
v9
Games Robot Skills
The Games category in Synthiam ARC introduces entertainment and gaming elements to robotic platforms. It includes functionalities for creating interactive games and activities that engage users with the robot. This category adds a playful dimension to the robot's capabilities.

Tic Tac Toe
by Synthiam
Play Tic Tac Toe with your ARC robot: configurable turn, win and draw scripts, cheat commands and optional speech-recognition control.
Requires ARC
v7
General Robot Skills
The General category in Synthiam ARC encompasses a wide range of general-purpose robot skills. It includes versatile functionalities that can be applied across different robotic applications, providing a foundation for building custom behaviors and features.

Benchmark
by Synthiam
Diagnose EZ-B connection speed and reliability; benchmark ADC read rates (4-70/sec), reveal flood-control effects and optimize data throttle.

Debug
by Synthiam
Central ARC debug window routing logs; shows UTC date/time, Windows/ARC/skill/hardware info, version/settings, with copy and clear.

Diagnostic Report
by Synthiam
Collects and sends ARC diagnostic reports to Synthiam to help troubleshoot EZ-B and robot connection issues

EZ-B Settings
by EZ-Robot
Configures and pushes WiFi SSID, password, system name and channel to EZ-Robot EZ-B v4 from ARC; saves settings with project for quick redeploy.
Requires ARC
v6

EZ-B V3 Configuration
by Synthiam
Manage EZ-B hardware settings: edit Bluetooth name and apply updates to restore altered configurations.

EZ-B V4 Info
by Synthiam
Displays EZ-B v4 internal temperature and battery voltage, shows built-in battery monitor and LiPo protection settings in Connection Control.

EZB Connect By Name
by Synthiam Inc.
Discover EZB WiFi controllers by name, auto-bind connections, avoid IP management; live discovery and multi-EZB support for ARC.
Requires ARC
v2

EZB Stress Test
by Synthiam Inc.
Stress-tests EZ-B controllers (UART, ADC, voltage, temp, audio, digital I/O) to detect disconnects, corruption and stability issues.
Requires ARC
v12
File Manager
by Synthiam
Displays files currently open for reading by scripts, shows only read-opened files, helps diagnose read/write locks and file access errors.

Notepad
by Synthiam
Notepad for ARC: store project notes and connection details in a themed window

Screen Recorder
by Synthiam
Record your screen to WMV1/WMV2/H263P files with selectable bitrate, save-folder and start/stop controls, creating tutorial or demo video snippets.
Requires ARC
v20

Shortcut Creator
by Synthiam
Shortcut Creator relocated to the ARC Options menu; new manual page provides updated Shortcut Creator documentation.

Tutorial
by mikebmac
Tutorial slide plugin for ARC: create, format and embed text and images per .ezb project; navigate/update slides via ControlCommand; auto-resize images
Requires ARC
v9
GPS Robot Skills
The GPS (Global Positioning System) category in Synthiam ARC enables robots to determine their precise geographical location. This is essential for applications that require navigation, mapping, and location-based decision-making. Robots equipped with GPS capabilities can navigate autonomously in various environments.

GPS
by James Graham Hu
Deprecated: reads latitude, longitude, UTC time and speed from ublox NEO-6M GPS; auto-inits UART0@9600, shows processed and raw data.
Requires ARC
v3
Graphs Robot Skills
The Graphs category in Synthiam ARC focuses on visualizing data through graphical representations. It includes tools for creating charts, graphs, and visual displays of information. This skill set is useful for presenting complex data in a comprehensible manner.
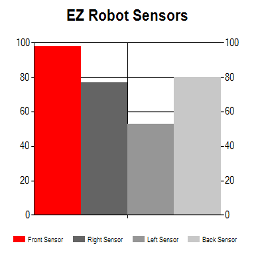
EZ Chart
by leversofpower
4-series bar chart for real-time sensor comparison in ARC; set titles, values, RGB bar colors and conditional coloring via EZ-Script.
Requires ARC
v9
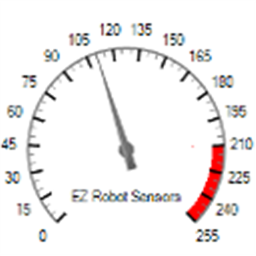
EZ Gauge Chart
by leversofpower
Dashboard-style configurable gauge chart with red-zone indicator, adjustable range/arc, scale ticks, title and live value updates.
Requires ARC
v3
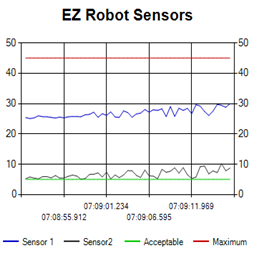
Ez Line Chart
by leversofpower
4-series historical line chart to log and compare robot sensor values over time with customizable titles, colors, time axis and EZ-Script control
Requires ARC
v2

Graphy
by Synthiam
Plot live data with ControlCommand scripts: multi-series charts, many chart types, legend toggle, add/remove series, export graph data to CSV
Requires ARC
v9

Servo Sketch 3D
by Synthiam Inc.
Real-time 3D servo visualization with motion trails, interactive camera controls and clear trail for ARC debugging and analysis.
Requires ARC
v2
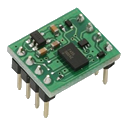
I2C Robot Skills
The I2C (Inter-Integrated Circuit) category in Synthiam ARC facilitates communication between devices using the I2C protocol. This skill set is crucial for connecting and interacting with a variety of sensors and peripherals in a robotics system.
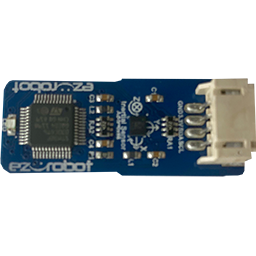
3-In-1 IMU
by Synthiam
EZ-Robot 3-in-1 IMU driver: accelerometer, gyroscope and compass support for motion sensing, orientation tracking and heading/navigation.

Arduinocoms
by ShadowStudios
EZB v4-Arduino I2C bridge for ARC: supports custom C# code and reads gamepad or Wii controller inputs for robot control
Requires ARC
v1
Blinkm
by Synthiam
BlinkM I2C multi-color LED control with slide dials for custom colors; supports SendI2C for custom I2C peripherals. Third-party device.

BV4615 RC-5 IR Decoder
by Synthiam
Adds IR sensor support and button mapping for USB joysticks in ARC, enabling remote control functions; third-party hardware supported.

Dual-Axis Compass
by Synthiam
Dual-axis I2C magnetic sensor for EZ-B robots enabling magnetic direction sensing; requires short 2-3 in wiring. Third-party hardware.

ESP32_MPU6050
by Shawn Miller
ESP32/Arduino EZB firmware with MPU6050 support: provides accelerometer angles and Yaw/Pitch/Roll gimbal servo values for stabilization and scripting
Requires ARC
v3

HMC5883 Compass
by Synthiam
Reads HMC5883 3-axis compass via I2C and updates EZ-Script variables on demand; polled control offers periodic heading data, for connected sensors.
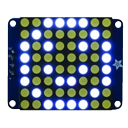
HT16K33 Animator (8X8)
by Synthiam
Control for Adafruit 8x8 LED Matrix (HT16K33) via EZ-B v4 I2C; creates animations, supports module initialization and EZ-Script control.
Lidar-Lite Laser Module
by Synthiam
Laser Lidar-Lite ARC control reads distance, velocity and signal strength (0-40m+) via EZ-B v4 i2c, setting EZ-Script vars for robotics
MMA7455 Accelerometer
by Synthiam
I2C accelerometer for EZ-B robots, supplies IMU/acceleration data over the I2C interface.

MPU6050 Accelerometer Gyro Temperature
by Synthiam
Reads MPU6050 gyro, accelerometer and temperature via I2C, initializes and returns data on-demand to EZ-Script variables using ControlCommand RunOnce

MPU6050 Tilt Angle Sensor
by Proteusy
Flash Arduino Uno firmware to read DHT11 temp/humidity and MPU6050 IMU simultaneously; provides $AngleX, $AngleY and $AngleZ variables.
Requires ARC
v2

MPU9150 ARC control reads compass, gyro, accelerometer and temperature via I2C, initializes and sets EZ-Script variables on demand.

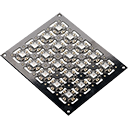
RGB 8X8 Animator
by Synthiam
Create, edit and play animated frames on an RGB 8x8 LED matrix via I2C with looping, adjustable pauses and scriptable EZ-Script canvas control.

RGB Animator
by Synthiam
Create custom animations for JD Humanoid's 18 RGB Eyes LEDs via I2C - per-LED color frames, transitions, pauses, scripting and real-time preview.
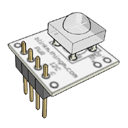
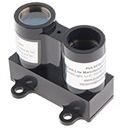
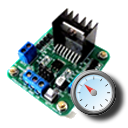
Infrared Distance Robot Skills
The Infrared Distance category in Synthiam ARC enables robots to measure distances using infrared sensors. This is essential for obstacle avoidance, navigation, and proximity sensing. Robots equipped with this capability can interact safely in dynamic environments.
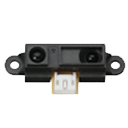
Sharp IR Collision
by Synthiam
Stops movement panels when a Sharp IR sensor on EZB ADC detects objects within a set range; displays ADC voltage, VU meter and 0-255 distance value.

Sharp IR Radar
by Synthiam
Radar-style Sharp IR scanner for EZB ADC: sweeps sensor, displays distance dots, logs ADC voltage, and can steer/avoid obstacles via Movement Panel
Misc Robot Skills
The Misc (Miscellaneous) category in Synthiam ARC includes a collection of miscellaneous robot skills that don't fit into specific categories. It provides a versatile toolkit for handling various tasks and functionalities in robotic applications.

DHT11 Temp & Humidity Sensor
by Proteusy
Read DHT11 temperature and humidity on Arduino (signal pin 4) using EZ-Genuino_DTH11_Uno firmware; exposes $Temp and $Humid variables.
Requires ARC
v1

EDU Activity Editor
by Synthiam
Design, edit and export structured Blockly-based lessons, groups and hints for ARC Lite Portable; supports rich HTML, images, JSON import/export.

Ez430-Chronos Wrist Watch
by Texas Instruments
Map TI eZ430-Chronos watch accelerometer X/Y tilt to ARC servos for intuitive, Wii-Remote-style control of servo positions.

IFTTT Sender
by faengelm
Send web-triggered IFTTT events from ARC/EZ-B: configure Maker Webhooks key and trigger applets to control SmartThings, WeMo and other services.
Requires ARC
v4

Iphone Sensor Stream Server
by Synthiam
Receive iPhone Sensor Stream data in ARC, map accelerometer, gyro and compass to variables for EZ-Script control and visualization.

Miscellaneous Utility Plugin
by ptp
ARC utilities: DataQuery for SQL/ODBC/OLEDB/Excel with parameterized queries returning array variables; Ticks/Millis timing functions.
Requires ARC
v6
Neopixel Blaster
by Synthiam
DIY NeoPixel Blaster for ARC - open-source controller for up to 8×80 LEDs (640), port‑0 onboard RGB, color control via ControlCommand

Neopixel Ring
by CochranRobotics
ARC UI for onboard computers to control NeoPixel rings via serial: test/run patterns, preview and copy Arduino serial commands, includes sample code.
Requires ARC
v3

Remote Mouse
by Synthiam
Scriptable Remote Mouse for ARC: control PC cursor and ARC window via ControlCommand, using voice, camera or I/O inputs; shows cursor coordinates.
Requires ARC
v8
Roll Pitch Yaw
by ptp
Rotate and position camera or object with roll/pitch/yaw controls; save camera settings; bind or monitor a 3-value EZ-Script array for live rotation.
Requires ARC
v2
Serial Toolbox
by ptp
EZB UART parser and Serial-TCP bridge to connect EZ-Robot cameras via Teensy USB, enabling ARC camera control and USB-to-serial bridging.
Requires ARC
v3

Virtual Robot
by Synthiam
Display robot image with real-time servo position readouts and basic servo management including servo deletion
Movement Panels Robot Skills
The Movement Panels category in Synthiam ARC focuses on controlling and managing the movement of robots. It includes features for controlling motors, wheels, and other actuators, allowing robots to navigate and move in a controlled manner. There can only be one movement panel per project. Movement Panel Details

AR Parrot Drone Movement
by AR Parrot
Control Parrot AR Drone v1/v2 via ARC: keyboard, joystick, speech, Wii, web; camera feed, face/color/motion/glyph tracking.

Auto Position Movement Panel (Gait)
by Synthiam
Create servo frames/actions to animate humanoid, hexapod or custom gaits with smooth transitions, SW ramping and directional control

Brushless Motor Movement Panel
by Synthiam
Control brushless motor controllers (hoverboard-style) via EZ-B: configure direction, speed and optional brake ports for DIY robot movement.
Requires ARC
v2

Continuous Rotation Movement Panel
by Synthiam Inc.
Movement panel using two or more continuous servos to control robot motion via movement commands.

Continuous Servo Movement Panel
by Synthiam
Control two continuous servos for bidirectional robot movement with speed sliders, configurable ports/stop values, testing and brake/coast options.

Custom Movement Panel
by Synthiam
Custom Movement Panel maps directional commands to scripts, adjusts per-wheel speed (0-255), and integrates with joysticks for unsupported motors

Custom Movement Panel V2
by Synthiam Inc.
Custom Movement V2 panel for ARC: scripts for F/R/L, Reverse, roll left/right, up/down with speed mapping to PWM for drones, mecanum & custom drives
Requires ARC
v1
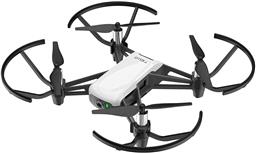
DJI Tello Movement Panel
by DJI
Control DJI Tello from ARC with live camera feed for computer vision tracking; fly via scripts, speech, joysticks, Python, or Exosphere.
Requires ARC
v3
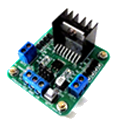
Dual Hbridge
by Synthiam
Two-channel Dual H-Bridge movement panel to control two DC motors (on/off) for forward, reverse, left, right via EZ-B digital ports; no PWM speed.
Dual Hbridge W/PWM
by Synthiam
Dual H-Bridge w/PWM movement panel: control two DC motors' direction and speed via EZ-B PWM for responsive forward/reverse/turning.

Inverted Pendulum
by Synthiam
Balancing controller for Sainsmart v3 (and compatible) robots: PID tuning, real‑time telemetry, angle offset, movement and calibration via ARC.
Requires ARC
v10
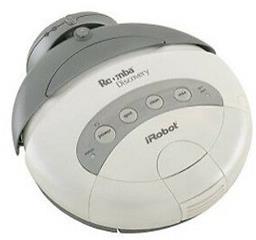
Irobot Roomba Legacy
by iRobot
Legacy iRobot Discovery and 4xxx control via EZB software-serial (D0), supports Arduino/EZ-Robot, adjustable baud rate; not for hardware UART/USB
Requires ARC
v4

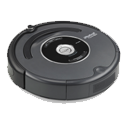
Irobot Roomba Movement Panel
by iRobot
Control Roomba/Create via ARC: drive, stream sensors, read encoders, configure COM/HW UART, and send pose to NMS for mapping/navigation.
Requires ARC
v22

Ohmnilabs Standalone
by OhmniLabs
Connects Ohmnilabs Telepresence robot's UP Board COM to ARC, enabling drive and servo control (neck V0) and integration with ARC cameras.
Requires ARC
v15
Roomba Tones
by iRobot
Deprecated Roomba control; replaced by the iRobot Roomba Movement Panel for updated movement control.
Sabertooth Kangaroo
by Dimension Engineering
Movement panel enabling Kangaroo & Sabertooth encoder-based speed/velocity control, UART/PC serial options, tuning and encoder setup.
Requires ARC
v2
Sabertooth Movement Panel
by Dimension Engineering
Sabertooth movement panel: control two motors via Simplified Serial with variable speed sliders, movement buttons, and serial port options.
Requires ARC
v10

Sphero Movement Panel
by Sphero
Control Sphero via Bluetooth in ARC. Detects two COM ports (one connects); requires deleting and re-pairing after disconnects or reboots.

Ubtech Alpha 1 Bluetooth
by UBTech
Bluetooth control for UBTech Alpha1 servos via ARC: map Vx to servo IDs, enable servos, and integrate with ARC movement & LEDs.
Requires ARC
v19
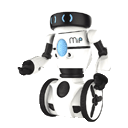
Wowwee MIP Movement Panel
by Wowwee
UART-based EZ-B/ESP32 skill to control WowWee MIP, enabling ESP32-Cam camera support and flexible battery-powered integration.
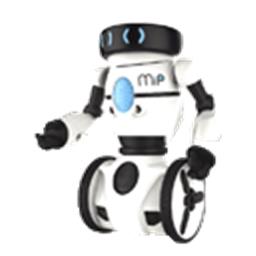
Wowwee MIP V2
by Wowwee
UART interface to hack WowWee MIP with ESP32/ESP32‑Cam or EZ‑B v4 for ARC; hardware UART preferred, configurable power and baud 9600/115200
Requires ARC
v4
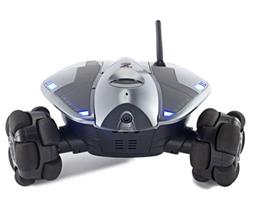
Wowwee Rovio
by Wowwee
Movement panel integrating WowWee Rovio with Synthiam ARC for remote drive, live camera, audio and docking control. Under development.
Requires ARC
v3
Navigation Robot Skills
The Navigation category in Synthiam ARC is dedicated to enabling robots to navigate and move autonomously. It includes functionalities such as path planning, obstacle avoidance, and localization. This skill set is crucial for developing robots capable of exploring and navigating complex environments.

BN-880 GPS Compass
by Beitian
Standalone autonomous navigation using Beitian BN-880 GPS/Compass with real-time map waypointing and offline map caching; requires Arduino.
Requires ARC
v2

Camera NMS Pose
by Synthiam Inc.
Overhead camera tracks a glyph to give precise robot pose to ARC's NMS for multi-camera indoor/outdoor navigation and waypoint control
Requires ARC
v8

EZ-SLAM
by Synthiam
Creates a map in a global variable; proof-of-concept SLAM visualizer (very experimental).
Requires ARC
v25
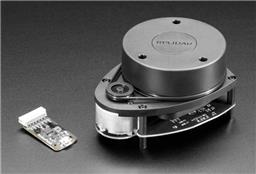
Hitachi-LG LDS Lidar
by Hitachi
Hitachi-LG LDS 360-degree LiDAR driver streaming scans into ARC NMS for obstacle detection, SLAM use, Arduino hookup, config options and variables.
Requires ARC
v22

Indoor Positioning System
by Synthiam
Infrared indoor positioning for ARC robots: dual-camera tracks IR beacon, shows real-time heading, path and EZ-Script navigation variables
Requires ARC
v16
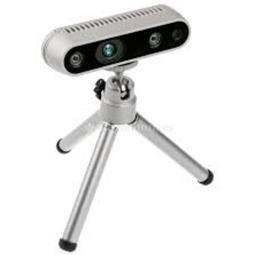
Intel Realsense D435i
by Intel
Connect Intel RealSense depth cameras to ARC NMS for depth-based distance detection, point-cloud mapping, video streaming, and navigation telemetry.
Requires ARC
v20
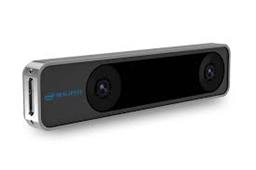
Intel Realsense T265
by Intel
T265 VSLAM for ARC: SLAM-based mapping and precise way-point navigation, low-power tracking, and NMS telemetry.
Requires ARC
v26

Kinect Xbox 360 Depth Mapping
by Microsoft
Converts Xbox 360 Kinect depth frames into NMS obstacle scans for ARC path planning, SLAM, and obstacle avoidance.
Requires ARC
v6

NMS Example
by Synthiam
Example NMS Level #1 navigation skill showing subscription to combined scan+location data, displaying position and scan info; source code included.
Requires ARC
v3

NMS Faux Odometry
by Synthiam
Estimate pose odometry from movement distance for robots without encoders, calibrated by speed. Suited for DIY navigation; pose drifts with lidar.
Requires ARC
v8

NMS Navigation Data Grabber
by Synthiam Inc.
Query NMS lidar scan data by angle, with control commands for range, arc extremes, and obstacle checks from the latest scan.
Requires ARC
v2

PTI Lidar Plugin
by KeenanNW
Pineapple Technology Industries Capstone plugin adds a secretive LiDAR unit to ARC for distance measurement.
Requires ARC
v2
Rplidar
by Slamtec
Slamtec Lidar driver for ARC; scans 360° and publishes distance data to NMS for mapping, obstacle avoidance, and navigation.
Requires ARC
v28

The Better Navigator
by Synthiam
Hector SLAM-based ARC navigator that maps with lidar/depth, saves waypoints, plans paths and autonomously navigates while avoiding obstacles.
Requires ARC
v44

The Navigator
by Synthiam
Path-planning navigator using ARC NMS position and obstacle data to map, log trajectories, and autonomously follow waypoints.
Requires ARC
v31

Wavefront
by rz90208
Wavefront grid planner computes collision-free, deterministic paths from start to goal using known occupancy maps for indoor robots.
Requires ARC
v2

Wheel Encoder Counter
by Synthiam
Arduino UNO wheel encoder: reads left/right ticks, provides counts, configurable ticks, wheel & pivot sizes, optional pose telemetry to ARC NMS.
Requires ARC
v13

XV11 LIDAR
by CochranRobotics
Real-time 2D mapping from Neato XV-11 360° LIDAR via GetSurreal controller; exports $LIDARDistance/$LIDARIntensity, configurable angles, color, zoom.
Requires ARC
v15
Power Robot Skills
The Power category in Synthiam ARC focuses on managing and monitoring the power aspects of robots. It includes features for monitoring battery levels, managing power consumption, and implementing power-related behaviors. This skill set is essential for ensuring the efficient and reliable operation of robotic systems.

Prevent PC Sleep
by Synthiam
Prevents a PC from entering sleep mode via a tiny, resizable control-keeps the system awake while minimizing UI real estate
Requires ARC
v2
PWM Robot Skills
The PWM (Pulse Width Modulation) category in Synthiam ARC facilitates precise control of actuators such as motors and servos by adjusting the duty cycle of the signal. This skill set is crucial for achieving fine-grained control over the movement and position of robotic components.

PWM Slider
by Synthiam
Slider to set EZ-B digital PWM for motor speed or LED brightness; shows duty-cycle, stop button, and board/port selection.
Rafiki Robot Skills
The Rafiki category in Synthiam ARC introduces social and emotional interaction capabilities to robots. It includes features for recognizing emotions, responding empathetically, and engaging in social interactions. This category adds a human touch to robotic interactions.
Rafiki Front Bumber
by CochranRobotics
Rafiki front bumper plugin: reads 4 proximity sensors via serial, updates ARC variables, blocks motor movement toward detected obstacles for SLAM
Requires ARC
v2
Remote Control Robot Skills
The Remote Control category in Synthiam ARC enables robots to be controlled remotely by users. It includes functionalities for remote operation, telepresence, and remote monitoring. This skill set is valuable for scenarios where direct user control or observation is required.

Avatar JD
by goldenbot
3D Avatar JD simulator with bidirectional servo sync, action sequencing, $SIM_ scripting, EZ-B emulator support and pose/movement visualization
Requires ARC
v11

Exosphere
by Synthiam
Telepresence and remote control for any ARC-compatible robot from phone/tablet, combining AI and human operators to perform tasks and train autonomy
Requires ARC
v81

Floor Map
by Synthiam
Draws a live floor map of robot movement using Movement Panel, logging direction, distance and heading; configurable speed and turn settings.

HTTP Server
by Synthiam
Remote web control of ARC desktop: live screen interaction, movement control, camera list, EZ-Script/ControlCommand console with remote execution.

HTTP Server (Custom)
by Synthiam
HTTP server for ARC serving HTML/CSS/PNG/JPG from ARC/HTTP Server Root; supports AJAX tags (ez-move, ez-script, ez-camera) to control the robot.

Interface Builder
by Synthiam
Create touchscreen robot control panels with buttons, joysticks, sliders, camera views and scripts; multi-page fullscreen UIs for PC and mobile.

Joystick (Direct Input)
by Synthiam
DirectInput joystick control for ARC: drive movement panels, control servos, assign button scripts, variable speed and rumble feedback.

Joystick (Xinput)
by Synthiam
XInput joystick skill for ARC: maps Xbox controllers to movement, servos, triggers, vibration, variables; supports analog inputs and scripts.
Requires ARC
v16

Key Control
by Synthiam
Assign scripts to any keyboard key (press/release), map arrow keys to movement controls; activates when the control has focus (green).

Movement Joystick
by Synthiam
Analog joystick UI to control any ARC movement panel via mouse/touch-configurable dead zone, max speed, center-reset for smooth robot motion
Requires ARC
v6

Movement Joystick
by Synthiam Inc.
On-screen joystick to control any movement panel in ARC projects, providing intuitive real-time movement control.
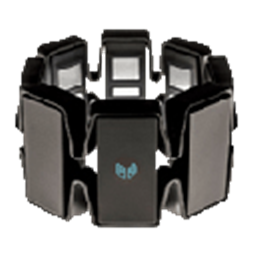
Myo Gesture Armband
by Thalmic Labs
Map Myo armband gestures and accelerometer to servos and ARC scripts for arm-mimic control; supports multiple armbands.
Requires ARC
v8

Remote UI Client
by Synthiam Inc.
PC Remote UI Client for ARC enables remote robot control via customizable multi-page interfaces from other ARC instances.
Requires ARC
v4

Touch Path
by Synthiam
Sketch paths with finger or mouse and set turn/move speeds; interactive, educational demo of timing-based, sensorless robot navigation and limits.

Wii Remote
by Nintendo
Control servos, movement panels and scripts via Wii Remote or mobile accelerometer; D-pad, buttons and Home-enabled accelerometer tracking.
Scripting Robot Skills
The Scripting category in Synthiam ARC empowers users to create custom scripts and behaviors for robots. It includes scripting languages and tools that allow users to define complex and customized robot actions, expanding the flexibility and capabilities of robotic systems. Here are the manuals for JavaScript, Python, EZ-Script, Blockly, and RoboScratch.

EZ-Script Console
by Synthiam
Real-time EZ-Script console for ARC: enter and execute single-line commands, view output, clear display, and recall history with UP/DOWN.

Get Line Containing From Array
by Synthiam
Adds GetLineContainingFromArray() ez-script function to return the first array item that contains specified text, simplifying substring searches.
Requires ARC
v7

Movement Script
by Synthiam
Trigger direction-specific scripts when ARC movement panels change; assign scripts per direction/stop, access direction and speed (JS/Python/EZ).

On Variable Changed
by Synthiam
Run scripts automatically when specified ARC variables change; define variable-to-script pairs, monitor status, and trigger actions.
Requires ARC
v3

Personality Generator
by Synthiam
Background randomizer that executes timed scripts to add lifelike actions (movement, servos, camera/control) and unique personality to your robot

Recorder
by Synthiam
Record and replay EZB communications (servo & digital commands) with forward/reverse playback, save recordings and trigger them from scripts

Script
by Synthiam
Multi-language ARC Script: build, run and debug Blockly, JavaScript, EZ-Script or Python with Intellisense, run/save/load and Roboscratch support

Script
by Synthiam Inc.
Run JavaScript or Python scripts to automate processes and control other ARC robot skills.

Script Collection
by Synthiam
Manage and execute multiple scripts in a single Script Manager using ControlCommand(), with Control Details showing available commands.

Script Monitor
by Synthiam
Monitor and diagnose running ARC scripts: view active script labels, statuses, and stop long-running or background scripts easily.

Servo Script
by Synthiam
Bind scripts to servo moves (V1-V99); triggers on position/speed/accel changes and provides ports, positions and speeds arrays for custom control.
Requires ARC
v10

Sketch Pad
by Synthiam
Script-driven Sketch Pad for ARC: draw shapes, text, lines and faces via controlCommand() to visualize object locations, paths and robot data.

Slide Script
by Synthiam
Adjust a numeric variable via slider (0-1000) with customizable min/max, center button and scripts triggered on value change or bonus button press.

Smart Variable Watcher
by Synthiam
Efficient ARC Variable Watcher - lower CPU for large projects; slow initial array render but faster updates; shows name, type, value, length
Requires ARC
v4

Sound Script
by Synthiam
Replaced by Sound Script (Speech Script) robot skill; see Synthiam's Speech Script support page.

Task Script
by Synthiam Inc.
Split complex robot tasks into sequential scripts, synchronizing asynchronous skills via NEXT/CANCEL commands for staged automation.
Requires ARC
v8

User Defined Function Example
by Synthiam
Add custom EZ-Script functions in C# or JS; intercept unknown calls, parse parameters and return values via AdditionalFunctionEvent.
Requires ARC
v4

Variable State Saver
by Synthiam
Persist and auto-load specified global variables between ARC sessions for consistent, personalized robot behavior and quick state restoration.
Requires ARC
v7

Variable Watch
by Synthiam
Live view of script variables, types, sizes and values for debugging; auto-refresh, hex view, pause/clear; may affect program performance.
Servo Robot Skills
The Servo category in Synthiam ARC focuses on controlling servo motors, allowing precise control over the rotational movement of robotic components. This skill set is essential for tasks requiring accurate and controlled motion in robotic applications.

Auto Position (Gait)
by Synthiam
Create servo frames and actions to animate gaits and gestures with automatic motion planning, software ramping, movement panel, import/export

Auto Release
by Synthiam
Auto-release servos after inactivity: set EZB board/ports, choose 1-60s delay, add/remove ports, pause and view status.

Continuous Servo
by Synthiam
Control a 3-wire continuous 360-degree servo in ARC: adjustable forward/reverse speeds, start/stop buttons, board/port selection and test controls

Custom Servo Controller
by Synthiam
Control up to 99 servos via Vx virtual ports over serial (Arduino/custom firmware), integrating with ARC for scalable servo management.
Requires ARC
v1
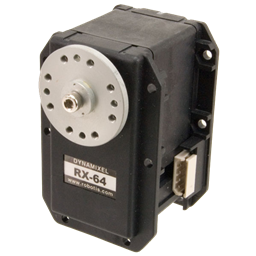
Dynamixel
by Robotis
Open-source ARC plugin to control Robotis Dynamixel servos (XL-320, AX-12, XL430) via EZ-B, Arduino or Robotis. Supports position, speed, accel.
Requires ARC
v53

Feetech RS485 Servo
by FeeTech
Control Feetech serial-bus servos via EZB UART or PC COM, mapping servo IDs to ARC virtual ports; supports position, speed, release, acceleration.
Requires ARC
v8
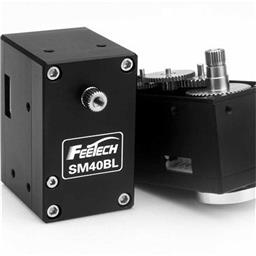
Feetech Serial Bus Servo
by FeeTech
Control Feetech bus servos via EZB UART or PC COM in ARC; map Vx ports to IDs; supports position, speed, acceleration, release at 1M baud
Requires ARC
v13

Horizontal Servo
by Synthiam
Mouse-drag horizontal servo control with configurable min/max limits, center/release functions, multi-servo mirroring and direction invert.

Inverse Kinematic Arm
by Synthiam
Control robot arms with inverse and forward kinematics, converting X/Y/Z positions into joint motion and reporting end-effector location.
Requires ARC
v12
Kondo KRS ICS Servos
by Kondo
Control Kondo KRS ICS2/3.5 servos via EZ-B UART; experimental, untested. Supports chaining, virtual servo ports, Release() and Servo() commands.
Requires ARC
v7
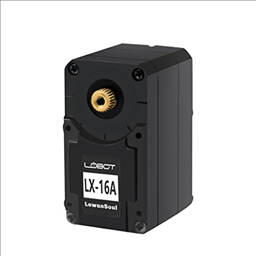
Lewansoul Servo
by LewanSoul
Control LewanSoul LX-16A servos via ARC (EZ-B v4/IoTiny): assign virtual ports, read positions, set speeds, and enable continuous rotation.
Requires ARC
v30
Lynxmotion Smart Servos
by LynxMotion
Compact Lynxmotion Smart Servos with position feedback, safety features and UART TX/RX for Arduino/EZ-B v4; scriptable temp, load, load-dir and ping.
Requires ARC
v9
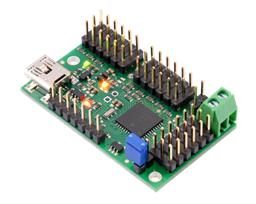
Maestro Servo Controller
by Pololu
USB control for Pololu Maestro (6/12/18/24) via ARC Vx ports. Maps Vx to Maestro channels; supports position, speed, acceleration, release.
Requires ARC
v4
PCA9685 Servo Driver
by Synthiam Inc
Drive 16 servos over EZB I2C with a PCA9685 PWM controller, using ARC servo commands and hardware-timed outputs.
Requires ARC
v2

PWM Servo Feedback (ADC)
by Synthiam
Add ADC positional feedback to hobby PWM servos via minor mod to EZ-B/Arduino; enables real-time position readout, calibration and puppet mirroring
Requires ARC
v10

PWM Servo Feedback (I2c)
by Synthiam
Real-time servo position input via Arduino ADC over I2C; supports Nano (6 channels) or Mega (16), configurable I2C address and scalable chaining.
Requires ARC
v7
PWM Servo Ramping
by Synthiam Inc.
Smoothly ramps PWM servos on EZB D0-D23 via Vx-to-Dx mapping for natural, gradual motion without snapping.
Requires ARC
v1

Relative Servos
by Synthiam
Synchronize servos by designating a master; slave servos mirror scaled (decimal/negative) positions with min/max limits and pause control
Robotis Openmanipulatorx
by Robotis
Inverse kinematics for Robotis OpenManipulatorX: compute joint angles and MoveTo 3D (cm) positions, supports camera-to-CM mapping for pick-and-place.
Requires ARC
v8

Servo
by Synthiam Inc.
Control a servo with an on-screen mouth widget for interactive positioning and testing.

Servo Pad
by Synthiam
Drag mouse or finger as a virtual joystick to control pan/tilt x- and y-axis servos with configurable ports, limits, inversion, and backgrounds.

Servo Recorder
by Synthiam
Record and replay named servo movements with adjustable speed/direction (-5 to +5), multiple recordings, ControlCommand triggers and status var
Requires ARC
v16

Servo Speed
by Synthiam
Adjust servo/PWM speed (0-20) between two positions to quickly experiment and tune motion; select board/port; settings aren't saved.

Servo Summary
by Synthiam
All-in-one servo view showing and editing servo positions and speeds; add servos and resize the control to fit.
SSC-32 Servo Controller
by LynxMotion
ARC integration for SSC-32 servo controllers via PC COM or EZ-B/Arduino UART; maps V0-V31, configurable baud, enables servos in ARC skills.
SSC-32 Servo Controller V2
by Lynxmotion
Bridge ARC to Lynxmotion SSC-32: maps V0-V31 to SSC-32 channels for reliable, high-performance serial control via USB, EZB/Arduino UART.
Requires ARC
v2

Stepper Servo
by Synthian Inc.
Control up to 127 stepper motors via Arduinos mapped to ARC servos; supports any stepper driver, serial network, home calibration, speed/accel.
Requires ARC
v21

UBTECH Alpha Servos UBT-12HC
by UBTech
Control UBTECH Alpha UBT-12HC smart servos via ARC using EZ-B v4/IoTiny UART, assign virtual ports, set baud, custom bits and position mapping.
Requires ARC
v11

Vertical Servo
by Synthiam
Drag vertically to control a servo within set min/max limits; center, release, invert, and mirror to other servos. For 3-wire GVS servos.

Waveshare Bus Servos
by Waveshare
Control Waveshare servos (TTL/RS485): set position & speed, release torque, read position. RTS option for converters; reverse-engineered protocol.
Requires ARC
v1
Ultrasonic Robot Skills

Drone Collision
by Synthiam
Add HC-SR04 ultrasonic sensors with an EZ-B to AR Parrot Drone v1/v2 for collision detection and avoidance

Ultrasonic Collision Detection
by Synthiam
Stops robot movement (no steering) when an EZB-connected ultrasonic sensor detects an object within a set range; integrates with scripting and paused polling.

Ultrasonic Collision Script
by Synthiam Inc.
Ultrasonic sensor triggers custom script on object detection; configurable interval & min distance, with optional forward-only trigger for navigation.
Requires ARC
v1

Ultrasonic Distance
by Synthiam
Displays HC-SR04 ultrasonic distance readings in ARC; scriptable via GetPing(), pausable, sets a variable with multiplier, optional NMS output

Ultrasonic Radar
by Synthiam
Ultrasonic on a servo sweeps 180°; radar shows distances and obstacles, integrates with movement panels for automatic avoidance, scriptable GetPing
Virtual Reality Robot Skills
The Virtual Reality category in Synthiam ARC introduces immersive virtual experiences to robots. It includes features for integrating virtual reality technologies, allowing robots to interact with virtual environments and providing users with unique and engaging experiences.

Dual Camera Servo Server
by Synthiam Inc.
Dual-camera server with servo control for stereo VR; includes C# test app and Unity (Oculus Quest 2) bindings for headset, hands and controllers
Requires ARC
v2
Oculus Quest Robot
by Meta
Immersive Meta Quest VR control for Synthiam ARC robots: stereoscopic camera view, map servos to hands/controllers, plus built-in remote desktop.
Requires ARC
v11

Single Camera Servo Server
by Synthiam
TCP video server for Unity clients to stream camera video and send servo positions to ARC for remote robot control
Requires ARC
v11

Virtual Reality Robot
by Synthiam
Stream robot camera to VR and control servos with headset pitch/yaw; supports SteamVR and Cardboard (iOS/Android) for immersive teleoperation
Requires ARC
v30