
Create, edit and play animated frames on an RGB 8x8 LED matrix via I2C with looping, adjustable pauses and scriptable EZ-Script canvas control.
 Hardware Info
How to add the RGB 8X8 Animator robot skill
- Load the most recent release of ARC (Get ARC).
- Press the Project tab from the top menu bar in ARC.
- Press Add Robot Skill from the button ribbon bar in ARC.
- Choose the I2C category tab.
- Press the RGB 8X8 Animator icon to add the robot skill to your project.
Don't have a robot yet?
Follow the Getting Started Guide to build a robot and use the RGB 8X8 Animator robot skill.
How to use the RGB 8X8 Animator robot skill
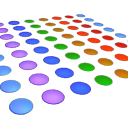
The RGB 8x8 Animator skill lets you control the Synthiam RGB 8x8 Display (64 RGB LEDs arranged in an 8 by 8 grid). You create animations by making frames (pictures), then playing them back in order at a chosen speed—just like a flip book.
Beginner tip: Before pressing Execute, confirm your RGB 8x8 Display is wired to I2C and powered correctly.
What Are “Actions” and “Frames”?
- Action = an animation you can run (example: “Smile”, “Blink”, “Loading”).
- Frame = one still image inside that action (example: Frame 1, Frame 2, Frame 3…).
- When you execute an action, ARC plays the frames from top to bottom with a pause between each frame.
Main Window
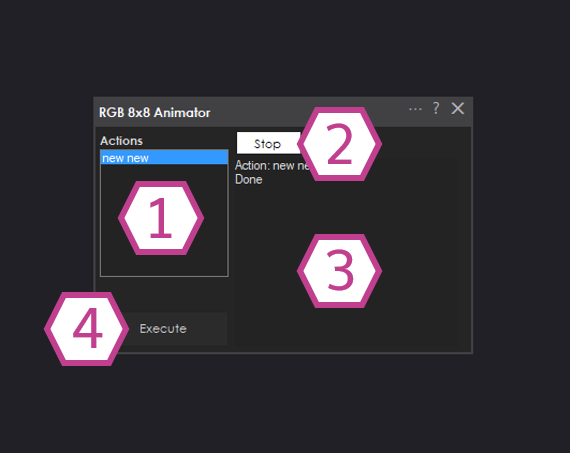
1. Action List
Shows every action (animation) you have created. Click an action to highlight it. The highlighted action is the one that will run when you press Execute.
2. Stop Button
Stops the currently running animation. This is especially useful if an action is set to repeat (loop).
3. Status Display
Shows the most recent event from the skill (for example: which action started, stopped, or what step is occurring). If something is not behaving as expected, check here first.
4. Execute Button
Runs the highlighted action from the Action List.
Configuration — Actions
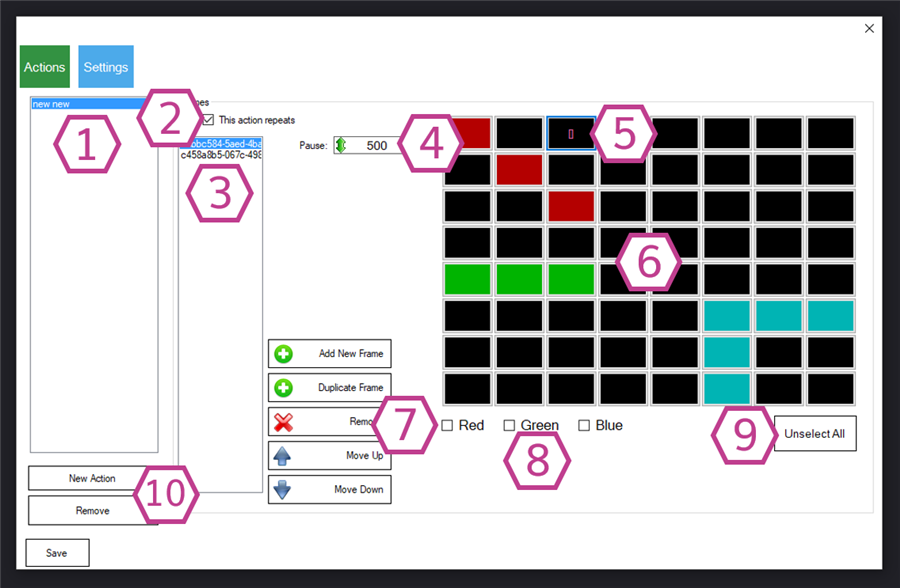
1. Action List
Select which action you are editing. The Frame List (and drawing area) will apply to the selected action.
2. Action Repeats (Loop)
When checked, the action will repeat continuously until you press Stop or execute another action. Use this for “idle” animations (like a heartbeat, breathing light, or scrolling pattern).
3. Frame List
Shows all frames in the selected action, in playback order. Click a frame to edit it. The order matters: the animation plays from the top frame to the bottom frame.
4. Pause Drop-down (Frame Delay)
Sets the delay between frames in milliseconds (ms). Example: 500 ms = half a second. Range is 0 to 5000 in steps of 100 by default.
Tip: You can right-click the drop-down to type a custom value (5000 or below).
5. Cursor (LED Selection)
The cursor is how you choose which LED squares you want to edit. Click one or more squares to select them. Any color changes you make using the Red/Green/Blue checkboxes apply to the selected squares.
Tip: You can select multiple LEDs at once to “paint” larger shapes quickly. Use Unselect All to clear the selection.
6. LED Display (8x8 Grid)
This grid represents the 64 LEDs on the physical RGB 8x8 Display. Each square corresponds to one LED position. You draw your frame by selecting squares and setting their colors.
7. Frame Management Buttons
Tools to edit the Frame List. Typical actions include: Add a new frame, Duplicate a frame, Remove a frame, and Move frames up/down. (Moving frames changes the playback order.)
8. Red / Green / Blue Checkboxes (Color Mixing)
These checkboxes set the color for the currently selected LEDs by mixing RGB:
- Red only = red
- Green only = green
- Blue only = blue
- Red + Green = yellow
- Red + Blue = magenta/purple
- Green + Blue = cyan
- Red + Green + Blue = white
9. Unselect All Button
Clears all selected LEDs (cursors). Use this when you want to start selecting a new area without accidentally changing previous selections.
10. Action Management Buttons
Add or remove actions from the Action List. Tip: Create separate actions for different robot “expressions” (happy, sad, alert) so you can trigger them from scripts later.
Configuration — Settings
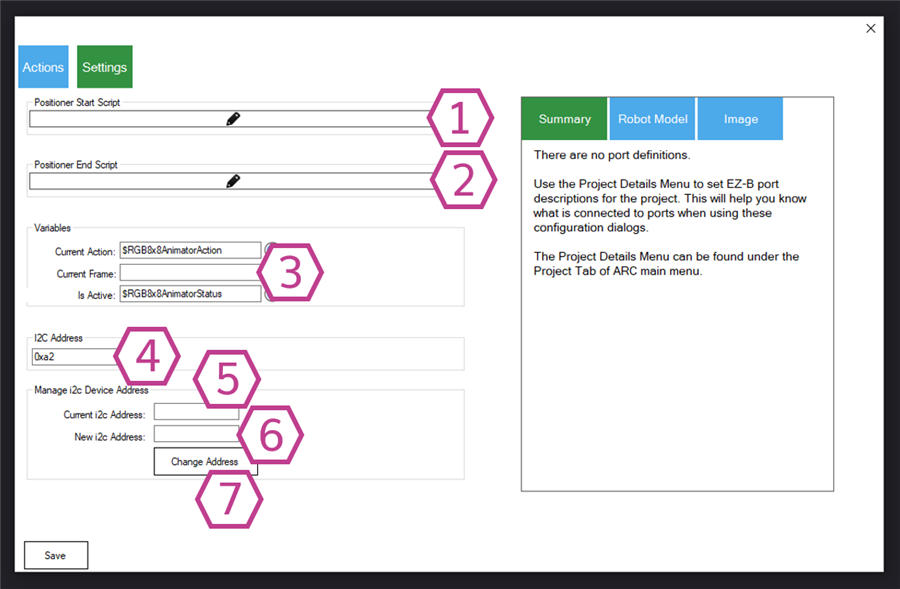
1. Animator Start Script
Runs automatically whenever any action starts. Use this to perform “before animation” tasks (example: set a variable, play a sound, enable other skills, or log a message).
2. Animator Stop Script
Runs automatically when an action stops or finishes. Use this for cleanup (example: turn off the display, restore another animation, or update robot status).
3. Variable Fields (Current Status)
These variables let other parts of ARC know what the animator is doing: which action is running, which frame is currently displayed, and whether the animator is running. This is helpful when writing scripts that react to animations.
4. I2C Address Field
The single-byte I2C address of the RGB 8x8 Display. Most beginners will only use one display, so you typically leave this at the default.
5. Current I2C Address
The address the display is using right now (the one you are changing from).
6. New I2C Address
The address you want to change to. This is mainly used when you want multiple I2C devices of the same type on the same bus.
7. Change Address Button
Sends the command to change the display’s I2C address.
How to Use the RGB 8x8 Animator (Beginner Steps)
- Add the skill to your project: In ARC, go to Project → Add Skill → I2C → RGB 8x8 Animator.
- Open the skill’s Configuration: Find the Actions section and click Add to create a new action. Give it a name you will recognize (example: Smile).
- Add frames: With your new action selected, use the Frame Management buttons to add 2–10 frames to start.
- Draw your first frame: Click a frame in the Frame List, then click squares on the 8x8 grid to select LEDs. Choose colors using the Red/Green/Blue checkboxes.
- Adjust animation speed: Set the Pause value (example: 200–500 ms for a lively animation; 800–1500 ms for slower changes).
- Repeat for other frames: Click the next frame and draw a slightly different picture. Small changes between frames create smooth motion. Use Duplicate Frame to save time, then edit only what changes.
- Test it: Go back to the Main window, click your action in the Action List, then press Execute. Press Stop to interrupt if needed.
- Optional loop: If you want it to keep playing, enable Action Repeats.
Code Samples (EZ-Script)
ControlCommand() options.
When you draw with commands, you are drawing to a memory canvas first.
Nothing appears on the physical display until you call CanvasUpdate.
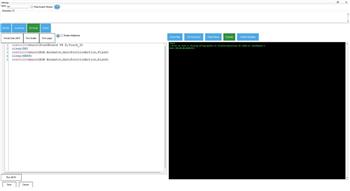
Example EZ-Script that draws an animated rectangle pattern:
$x = 0

: loop

ControlCommand("RGB 8x8 Animator", "CanvasClear", false, false, false)

ControlCommand("RGB 8x8 Animator", "CanvasDrawRectangle", 0, 0, ($x + 1) % 8, ($x + 1) % 8, true, false, true)
ControlCommand("RGB 8x8 Animator", "CanvasDrawRectangle", 0, 0, ($x + 2) % 8, ($x + 2) % 8, false, true, true)
ControlCommand("RGB 8x8 Animator", "CanvasDrawRectangle", 0, 0, ($x + 3) % 8, ($x + 3) % 8, false, true, false)
ControlCommand("RGB 8x8 Animator", "CanvasDrawRectangle", 0, 0, ($x + 4) % 8, ($x + 4) % 8, true, false, false)
ControlCommand("RGB 8x8 Animator", "CanvasDrawRectangle", 0, 0, ($x + 5) % 8, ($x + 5) % 8, true, true, false)
ControlCommand("RGB 8x8 Animator", "CanvasDrawRectangle", 0, 0, ($x + 6) % 8, ($x + 6) % 8, true, true, true)
ControlCommand("RGB 8x8 Animator", "CanvasDrawRectangle", 0, 0, ($x + 7) % 8, ($x + 7) % 8, false, false, true)
ControlCommand("RGB 8x8 Animator", "CanvasDrawRectangle", 0, 0, $x % 8, $x % 8, true, false, false)

ControlCommand("RGB 8x8 Animator", "CanvasUpdate")

sleep(250)

$x++

goto(loop)
Video
Resources
The hardware is open source and available on GitHub: https://github.com/synthiam/E-19_RGB_8x8_Display
Control Commands for the RGB 8X8 Animator robot skill
There are Control Commands available for this robot skill which allows the skill to be controlled programmatically from scripts or other robot skills. These commands enable you to automate actions, respond to sensor inputs, and integrate the robot skill with other systems or custom interfaces. If you're new to the concept of Control Commands, we have a comprehensive manual available here that explains how to use them, provides examples to get you started and make the most of this powerful feature.
Control Command ManualAutoPositionStop
Stop the current LED animation.
Example: controlCommand("RGB 8x8 Animator", "AutoPositionStop")
CanvasClear
Example: controlCommand("RGB 8x8 Animator", "CanvasClear")
"CanvasClear", [red (true/false)], [green (true/false)], [blue (true/false)]
Example: controlCommand("RGB 8x8 Animator", "CanvasClear", [red (true/false)], [green (true/false)], [blue (true/false)])
"CanvasDrawPixel", x, y, red, green, blue
Example: controlCommand("RGB 8x8 Animator", "CanvasDrawPixel", x, y, red, green, blue)
"CanvasDrawLine", x1, y1, x2, y2, red, green, blue
Example: controlCommand("RGB 8x8 Animator", "CanvasDrawLine", x1, y1, x2, y2, red, green, blue)
"CanvasDrawRectangle", x, y, width, height, red, green, blue
Example: controlCommand("RGB 8x8 Animator", "CanvasDrawRectangle", x, y, width, height, red, green, blue)
CanvasUpdate
Example: controlCommand("RGB 8x8 Animator", "CanvasUpdate")
Related Questions
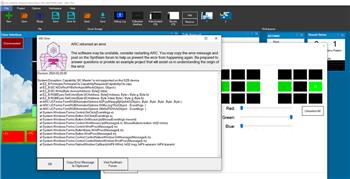
Error With RGB
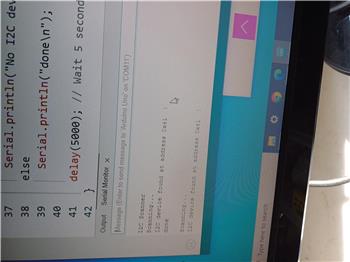
How To Recover Rgb Animator I2c Address
RGB Lighting Remote Control Issue

Upgrade to ARC Pro
Your robot can be more than a simple automated machine with the power of ARC Pro!