Bridge ARC to Lynxmotion SSC-32: maps V0-V31 to SSC-32 channels for reliable, high-performance serial control via USB, EZB/Arduino UART.
How to add the SSC-32 Servo Controller V2 robot skill
- Load the most recent release of ARC (Get ARC).
- Press the Project tab from the top menu bar in ARC.
- Press Add Robot Skill from the button ribbon bar in ARC.
- Choose the Servo category tab.
- Press the SSC-32 Servo Controller V2 icon to add the robot skill to your project.
Don't have a robot yet?
Follow the Getting Started Guide to build a robot and use the SSC-32 Servo Controller V2 robot skill.
How to use the SSC-32 Servo Controller V2 robot skill
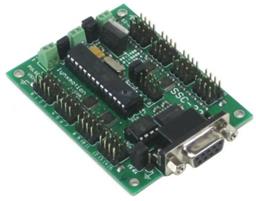
Adding the Synthiam ARC SSC-32 servo Controller robot skill to your project lets ARC communicate with a Lynxmotion SSC-32 servo controller so you can move servos connected to the SSC-32 from inside ARC. This is an improved version of the SSC-32 ARC robot skill with better performance, reliability, and error handling.
Beginner note: ARC does not generate servo signals directly. ARC sends serial commands through a connection (USB/COM port or via UART from an EZB or Arduino), and the SSC-32 generates the servo PWM signals that actually move the servos.
What this skill does
- Creates a serial communication bridge between ARC and the SSC-32.
- Maps ARC’s Virtual servo Ports (
V0-V31) to physical servo channels on the SSC-32. - Allows any ARC robot skill that supports servos to control SSC-32-connected servos transparently.
Connection options (hardware + wiring)
You can connect to the SSC-32 in multiple supported ways depending on your robot layout and whether you want a wired or wireless setup.
Option 1: Direct connection to the PC (USB or USB-to-COM)
This is the simplest setup for bench testing or stationary robots.
How it works:
ARC USB / USB-to-Serial SSC-32 Servos
Supported connection types:
- USB (if your SSC-32 variant supports native USB)
- USB-to-Serial adapter (COM port)
- Built-in serial port (COM port on older PCs)
Wiring:
Plug the SSC-32 directly into your PC using:
- USB cable (if supported by your SSC-32)
- OR USB-to-serial adapter connected to the SSC-32 serial pins
Windows will assign a COM port (for example:
COM3)
ARC Configuration:
- Connection Type: COM Port
- COM Port: Select the port assigned by Windows
- Baud Rate: Must match the SSC-32’s configured baud rate
Tip: You can find the COM port in Windows Device Manager under "Ports (COM & LPT)."
Option 2: Wireless or remote robot (EZB UART SSC-32)
This is the most common setup for mobile robots. ARC talks wirelessly to the EZB, and the EZB relays serial commands to the SSC-32.
How it works:
ARC Wi-Fi EZB UART SSC-32 Servos
Supported controllers:
- EZ-Robot EZ-B v4
- EZ-B v2
- Any EZB-compatible controller as long as the firmware supports UART
- Arduino Mega (also works using hardware serial)
Important: The EZB firmware must support UART. Not all firmwares expose UART, so verify this before wiring.
UART Wiring (EZB SSC-32)
Minimum required connections:
| EZB UART Pin | SSC-32 Pin | Purpose |
|---|---|---|
| TX | RX | Data from EZB to SSC-32 |
| RX | TX | Data from SSC-32 to EZB |
| GND | GND | Shared ground reference |
Wiring rules:
- TX always goes to RX
- RX always goes to TX
- Ground must be shared
- Do not connect 5V or 3.3V power lines between devices unless explicitly required (power the SSC-32 separately for servos)
Power note: The SSC-32 should be powered using its own servo power supply. Do NOT power servos from the EZB.
Option 3: Arduino Mega UART SSC-32
This setup works the same way as EZB UART wiring:
How it works:
ARC USB Arduino Mega UART SSC-32 Servos
Wiring example (Arduino Mega Serial1):
| Arduino Mega | SSC-32 |
|---|---|
| TX1 (Pin 18) | RX |
| RX1 (Pin 19) | TX |
| GND | GND |
ARC talks to the Arduino, and your firmware relays data to the SSC-32.
Baud rate requirements
All devices in the chain must use the same baud rate:
ARC UART Device SSC-32
If the baud rate does not match:
- Servos will not move
- SSC-32 will not respond
- Commands may be garbled
Common baud rates:
9600,38400,115200Use the baud rate configured on the SSC-32.
Virtual servo Ports (V0-V31)
After adding and configuring the skill, ARC exposes servo ports:
V0, V1, V2, ... V31
These map directly to SSC-32 servo channels:
| ARC Port | SSC-32 Channel |
|---|---|
| V0 | Channel 0 |
| V1 | Channel 1 |
| ... | ... |
| V31 | Channel 31 |
This lets all ARC robot skills treat SSC-32 servos like native ARC servo ports.
Configuration (Skill Settings)
In the skill’s Configuration menu, set:
Connection Type
- COM Port (direct USB / USB-to-serial)
- UART (via EZB or Arduino)
COM Port or UART Port
Baud Rate
Using SSC-32 servos in ARC skills
Once connected, SSC-32 servos can be used by:
- Auto Position
- Camera Tracking
- Joystick
- WiiMote
- Myo
- Any skill that moves servos
Beginner tip: When a skill asks for a servo port, choose
V0-V31for SSC-32 servos.
Basic troubleshooting
No movement
- Wrong COM port selected
- UART TX/RX reversed
- Baud rate mismatch
- SSC-32 not powered
Random or jittery movement
- Missing ground connection
- Noisy power supply
- Baud rate mismatch
Skill connects but nothing moves
- SSC-32 powered but servos not powered
- Servo power rail disabled or disconnected
Recommended wiring checklist
- Shared ground between EZB/Arduino and SSC-32
- TX RX crossed correctly
- Correct baud rate on all devices
- SSC-32 powered separately
- Servos powered from SSC-32 supply
- Firmware supports UART