Init Script
An initialization script is a Script Robot Skill used to specify settings for the robot and initialize other robot skills. Generally, this type of script is executed when the EZB connection is successful. Or, this script can be executed when ARC loads the project after Windows starts up. This initialization script will start when Windows loads and the script establishes a connection to the EZB. We'll cover both examples of an initialization script here.
Requirements
- ARC project with a working robot
Robot Skills Used
The following robot skills are used in this tutorial. Click any of these to further read the manuals for robot skills.
Init Script Robot Skill
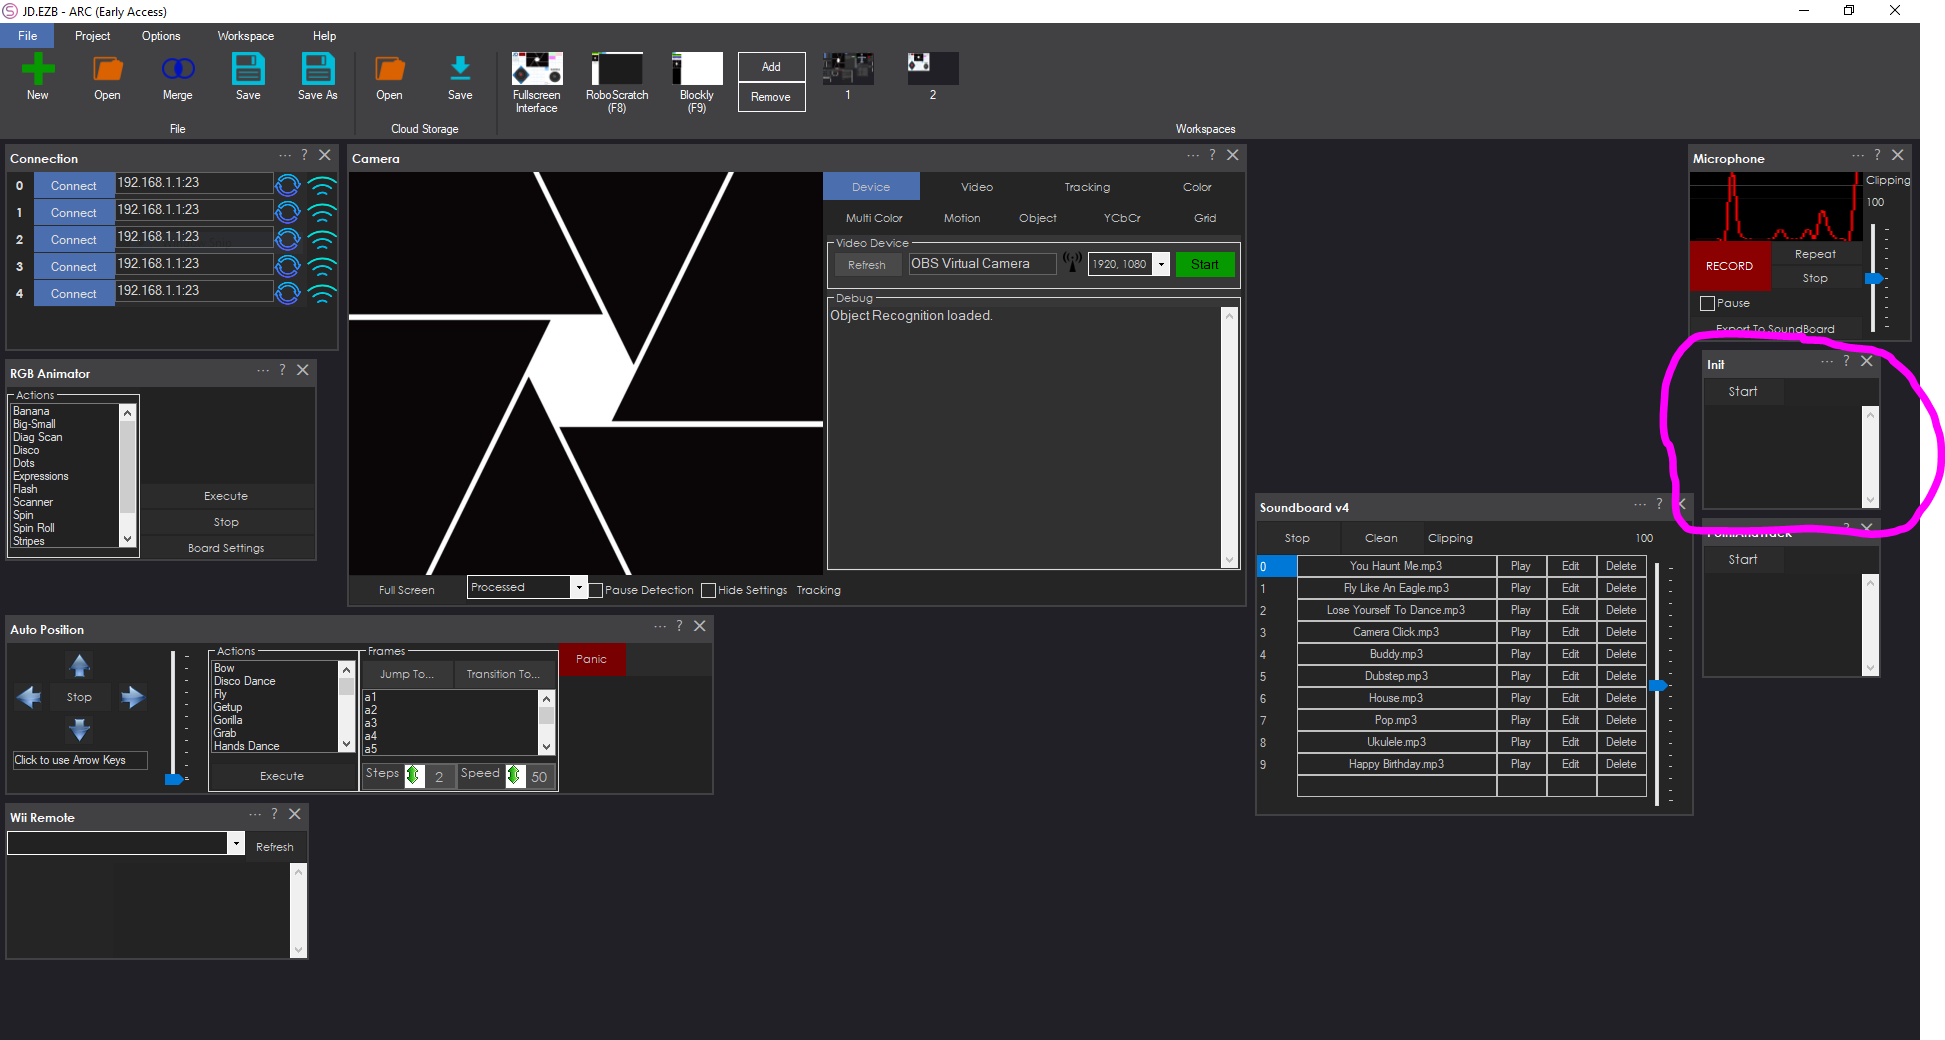
An initialization script will be a Script Robot Skill. This is a popular robot skill for creating scripts for writing and executing scripts. The script robot skill for a project is highlighted in the image above.
a) Init Script Example For Windows Startup
This initialization script will be executed when Windows starts or when a shortcut is clicked. The ARC shortcut creator can be configured to execute a script when a project shortcut is loaded. With a init script executed when Windows loads, you may want the script to establish a connection to the EZB. This is different behavior than the other use of an init script after the connection is established. A project could consist of both, but it's up to your requirements.
This is an example of an init script for when Windows starts up. This script will connect to the EZB and then configure the project. In this script, the first command establishes a connection to the EZB. Once connected, the servo limits are specified. The servo limits prevent the servos from moving past the physical positions of the robot. Then, the auto position is instructed through a control command to move the robot into a "Standing" frame. The speeds of a few servos are specified, the speed of the movement is specified, the camera is initialized, and the camera motion tracking is enabled. Finally, the robot will speak at the end of the script and mention that it is ready.
When the shortcut creator wizard is used, you can specify the script to execute when the shortcut is clicked (or when Windows starts). This script will execute and initialize the robot. This is an example init script for a robot with a dedicated PC or embedded computer.
// Connect to the EZB
ControlCommand("Connection", "Connect0");

// specify the ranges for the servos
// this prevents the servos from ever going past these limits

// Neck
Servo.setMinPositionLimit(d1, 70);

// Left Gripper
Servo.setMinPositionLimit(d6, 30);
Servo.setMaxPositionLimit(d6, 90);

// Right Gripper
Servo.setMinPositionLimit(d9, 30);
Servo.setMaxPositionLimit(d9, 90);

// Left Ankle
Servo.setMinPositionLimit(d14, 60);
Servo.setMaxPositionLimit(d14, 120);

// Right Ankle
Servo.setMinPositionLimit(d18, 60);
Servo.setMaxPositionLimit(d18, 120);

// Initialize JD into the initialize frame
// All servos are set to 90 degrees in this frame
ControlCommand("Auto Position", "AutoPositionFrameJump", "Standing");

// Pause for a tiny bit to ensure the servos have been initialized
sleep(100);

// Begin an animation of his eyes
ControlCommand("RGB Animator", AutoPositionAction, "spin");

// set the speed for JD's head to be a little slower and smoother
Servo.setSpeed(d0, 3);
Servo.setSpeed(d1, 3);

// Initialize the movement speed
Movement.setSpeed(255);

// start the camera so the user doesn't have to press the start button on the camera
if (!getVar("$IsCameraActive"))
  ControlCommand("Camera", "CameraStart");

// Enable camera motion tracking for security warning
ControlCommand("Camera", "CameraMotionTrackingEnable");

Audio.sayEZB("I am initialized and ready for action");
b) Init Script Example For EZB Connection
The other example for using an init script after an EZB establishes a connection. This type of script is used when a robot is to be initialized manually after a successful EZB connection is made. The ARC connection control will send a Control Command to the init script.
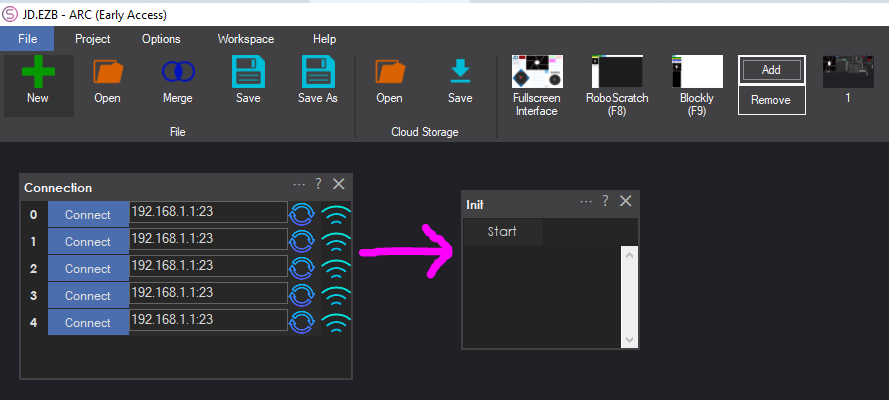
The image above shows how the connection control will command the init script control when an EZB connection is established. First, the Init script will need some code. In the example below, you will notice the script is similar to the previous example, with the difference being there is no command to establish an EZB connection. There is no control command to establish an EZB connection because ARC will execute this script after the connection control connects the EZB.
// specify the ranges for the servos
// this prevents the servos from ever going past these limits

// Neck
Servo.setMinPositionLimit(d1, 70);

// Left Gripper
Servo.setMinPositionLimit(d6, 30);
Servo.setMaxPositionLimit(d6, 90);

// Right Gripper
Servo.setMinPositionLimit(d9, 30);
Servo.setMaxPositionLimit(d9, 90);

// Left Ankle
Servo.setMinPositionLimit(d14, 60);
Servo.setMaxPositionLimit(d14, 120);

// Right Ankle
Servo.setMinPositionLimit(d18, 60);
Servo.setMaxPositionLimit(d18, 120);

// Initialize JD into the initialize frame
// All servos are set to 90 degrees in this frame
ControlCommand("Auto Position", "AutoPositionFrameJump", "Standing");

// Pause for a tiny bit to ensure the servos have been initialized
sleep(100);

// Begin an animation of his eyes
ControlCommand("RGB Animator", AutoPositionAction, "spin");

// set the speed for JD's head to be a little slower and smoother
Servo.setSpeed(d0, 3);
Servo.setSpeed(d1, 3);

// Initialize the movement speed
Movement.setSpeed(255);

// start the camera so the user doesn't have to press the start button on the camera
if (!getVar("$IsCameraActive"))
  ControlCommand("Camera", "CameraStart");

// Enable camera motion tracking for security warning
ControlCommand("Camera", "CameraMotionTrackingEnable");

Audio.sayEZB("I am initialized and ready for action");
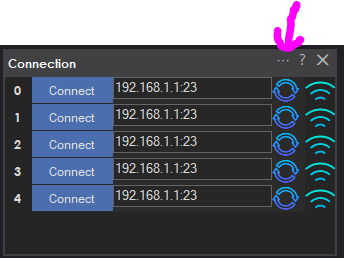
We will configure the connection control and specify it to start the init script when an EZB connection is established. Press the configure button on the connection control.
Select the script for the first EZB established connection.
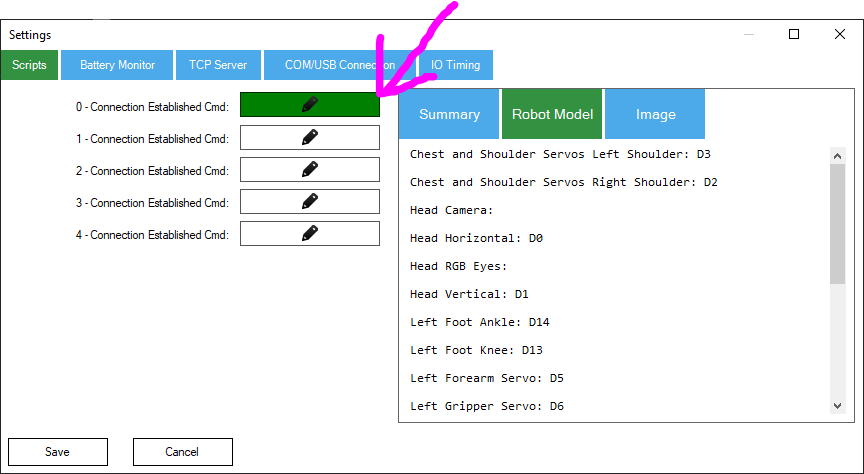
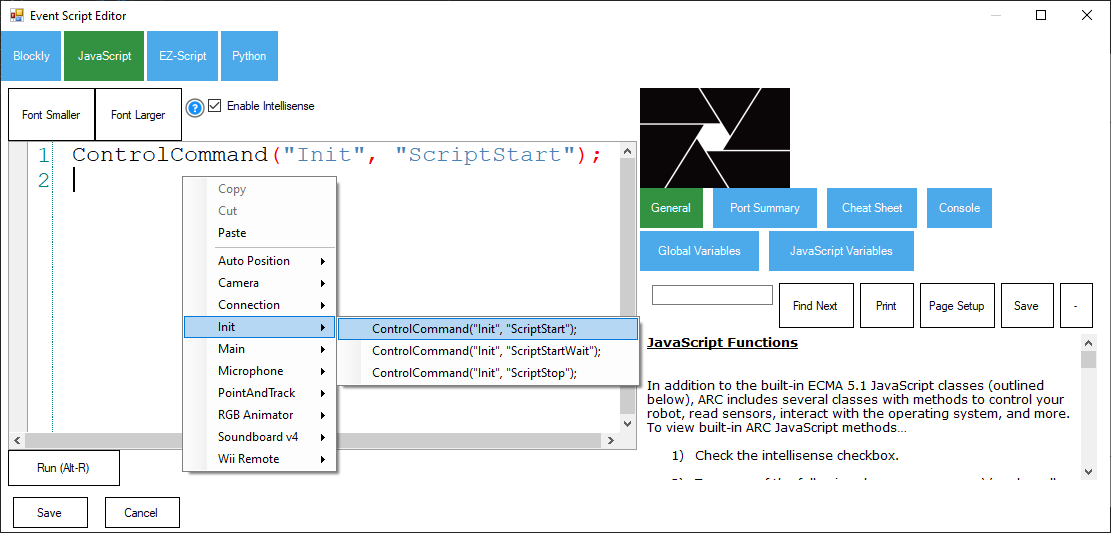
Right-click in the editor, select the Init script menu item, select the option to start the script, and insert the Control Command code. Save the changes to this connection control, and now when the EZB is connected, ARC will execute the init script.