
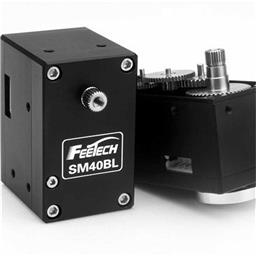
Control Feetech serial-bus servos via EZB UART or PC COM, mapping servo IDs to ARC virtual ports; supports position, speed, release, acceleration.
How to add the Feetech RS485 Servo robot skill
- Load the most recent release of ARC (Get ARC).
- Press the Project tab from the top menu bar in ARC.
- Press Add Robot Skill from the button ribbon bar in ARC.
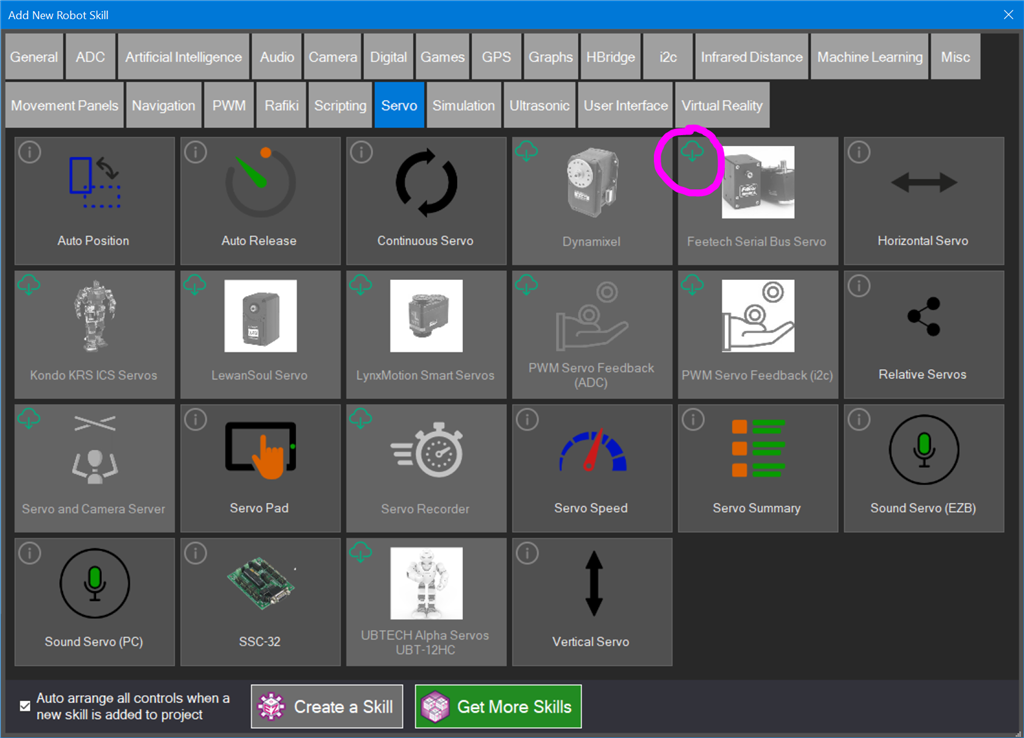
- Choose the Servo category tab.
- Press the Feetech RS485 Servo icon to add the robot skill to your project.
Don't have a robot yet?
Follow the Getting Started Guide to build a robot and use the Feetech RS485 Servo robot skill.
How to use the Feetech RS485 Servo robot skill
Control Feetech serial bus smart servos over EZB UART or PC COM port. The selected ARC’s Vx virtual ports must match the servo IDs in the config screen - and voila, you're off to the robot races!
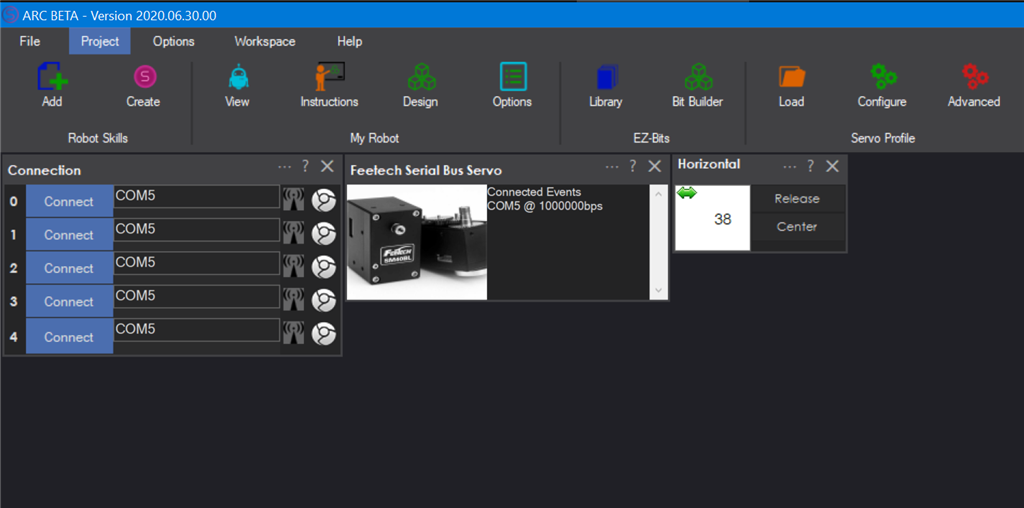
Main Window
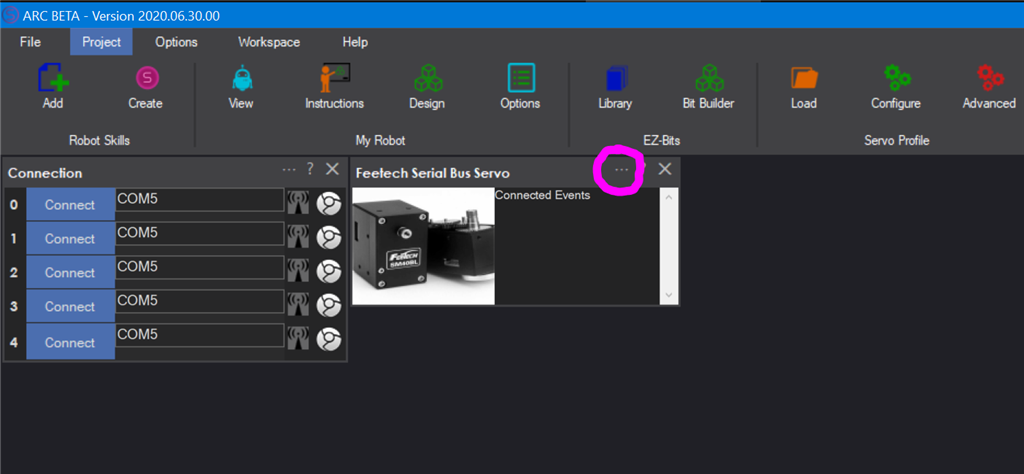
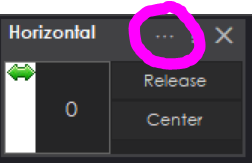
The main window on the project workspace will display information about active connections and errors. To configure the servos, press the ... configuration in the title bar.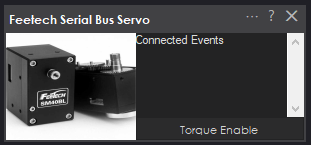
Configuration Screen
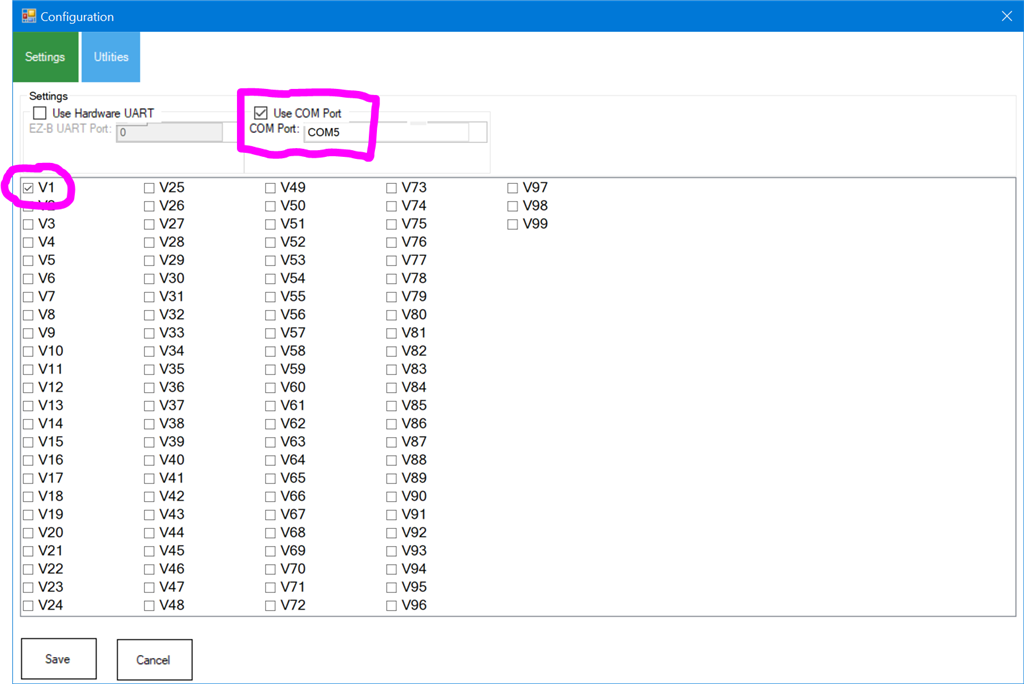
The configuration allows selecting the virtual servo ports that represent the ID's of the Freetech servos. For example, if the servo ID is #1, then V1 will be used. Also, the communication type must be specified (EZB UART or PC COM Port).
Baudrate The baud rate of this skill is 1,000,000 bps, which is also the default baud rate for Feetech servos.
ID All new Feetech servos will have a factory default ID of #1, which is V1 in ARC. If you want to reprogram the servo ID, you need to use the SCS15 software V1.6. from here. The software requires connecting the servo to either their USB device or using an Arduino. The Freetech website contains more information.
ARC Capabilities
ARC has many parameters that can be assigned to servo movements. When selecting a servo, these parameters are specified by script commands or in the Advanced menu of robot skills. This skill supports the following ARC parameters...- Servo position
- Speed
- Release
- Acceleration

How To Use
These steps will demonstrate how to add the Feetech serial bus skill to a project and use a standard servo skill control to move it. All skill controls that use servos will now be able to move the servo. This includes a camera, joystick, scripting, and more. Simply select the virtual servo port and any skill will be able to move the servo.In this example, we'll be using a USB Feetech servo controller. These controllers will create a COM port on the PC that we will select.
Step 1 Load the latest version of ARC on your Windows-based PC.
Step 2 In ARC, press Project -> Robot Skills -> Add from the top menu
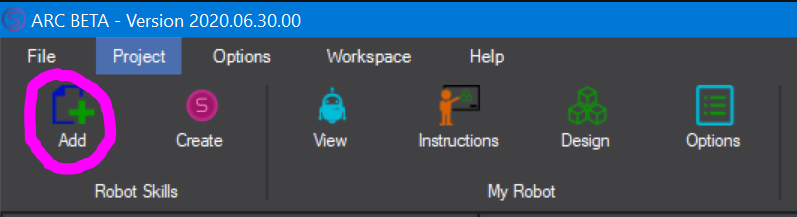
Step 3 When the skills window is displayed, select Servos and locate the Feetech Serial Bus skill. Press the Download icon to download and install the skill to your project.
Step 4 Locate the Feetech Serial Bus skill on your project workspace. Press the Config button in the title bar to access the configuration menu.
Step 5 We will be using the USB COM Port to control the servos in this example. Select the Use COM Port option and select the COM port for the USB controller.
Additionally, the default ID of a new servo will be #1, which is V1 in ARC. A servo ID of #2 will be V2 in ARC, and so on. Select the V1 so ARC will now map all references of servo V1 to the Feetech servo with ID #1.
Press SAVE
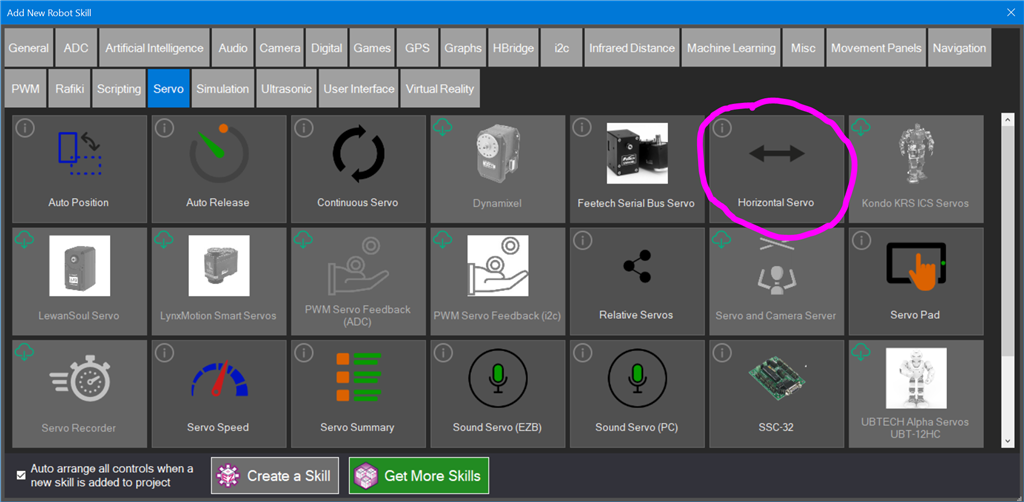
Step 6 Now we will add a basic servo control to test the Feetech servo. Press Project -> Robot Skills -> Add from the top menu. Locate the Servo tab and click the Horizontal Servo to add it to the workspace.
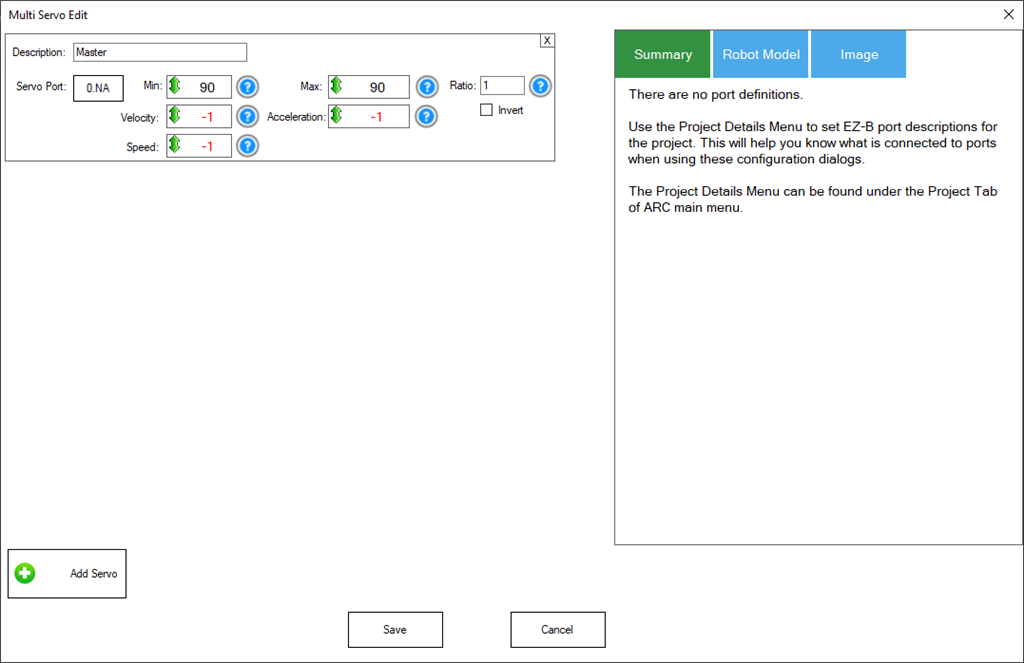
Step 7 Configure the Horizontal Servo skill by pressing the config button in the title bar
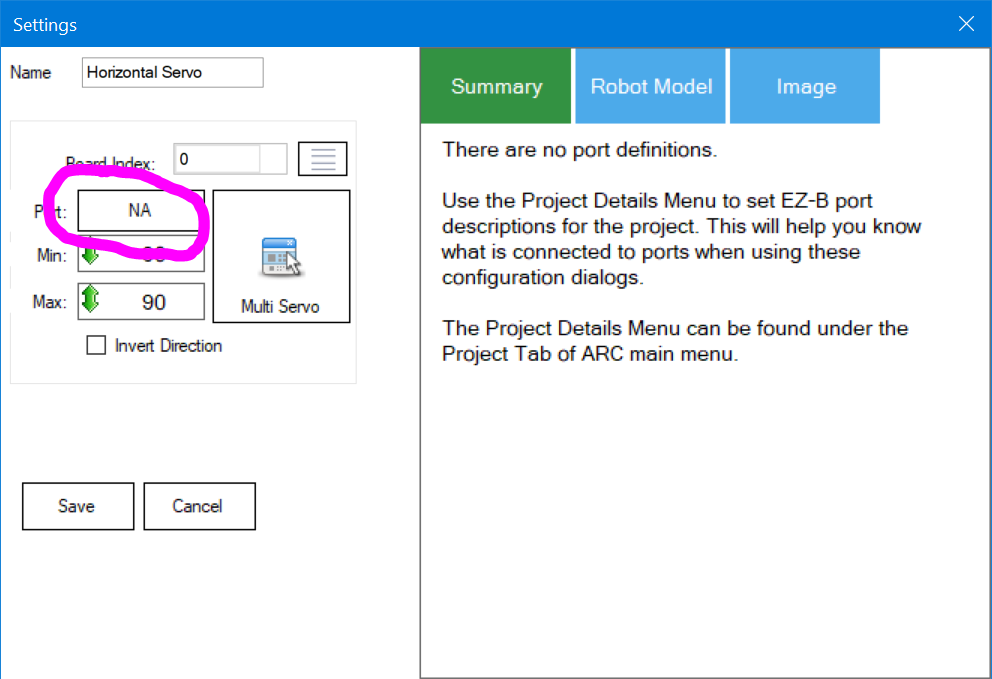
Step 8 Selecting the port for this control. Press the Port button to select the servo port.
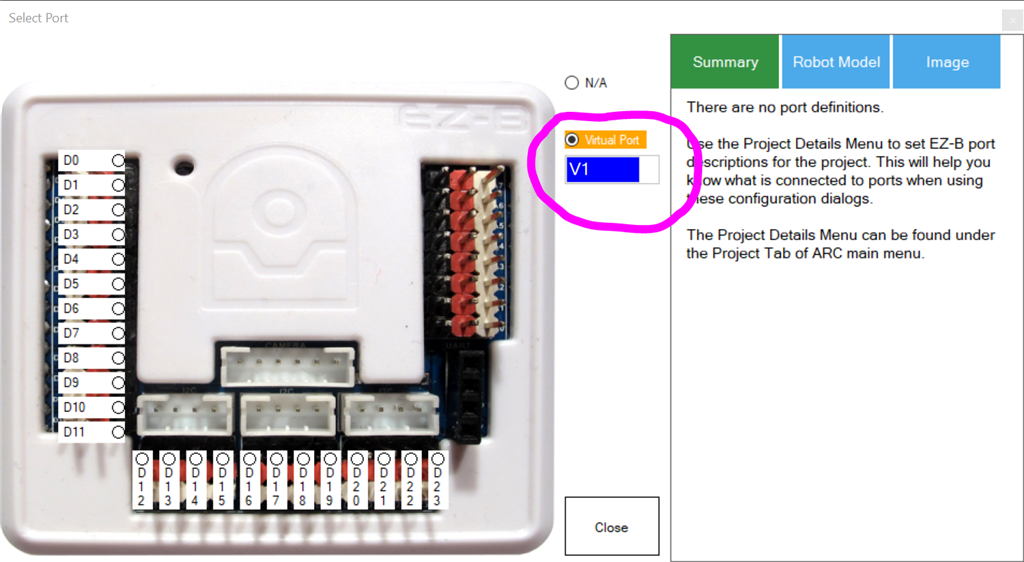
Step 9 The dialog popup for port selection will display. Select V1 from the Virtual Port drop-down list. Press SAVE
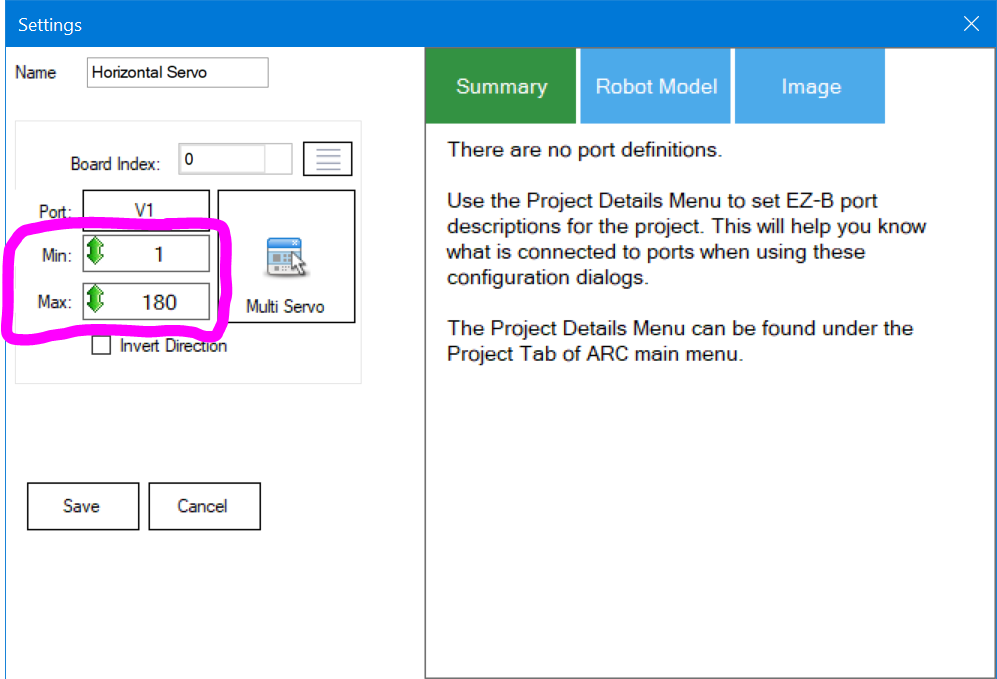
Step 10 The Min and Max range for the servo can be selected. Each control that uses servos will have its own custom range. Click in the Min and Max value and drag the mouse UP or DOWN to select the range. Or, alternatively, you may right-click to enter a range with the keyboard. Keep in mind, the servo will move into each range as you change the value. Press SAVE once the range has been adjusted to return to the workspace.
Finished You may now click on the servo value to drag the mouse Left or Right to move the position. If you right-click, a numeric value can be entered by the keyboard. The servo will only move within the range you specify.
Try other robot skill controls, such as the Auto Position or Joystick with this servo. All robot skills that use servos can now reference this servo by the virtual port ID.

According to their documentation, moving a servo is written to memory instructions decimal 42
Their documentation provides an example of setting servo ID #2 to position 1,000. The example checksum code and everything is there.
I created this robot skill and tested it against this data. Therefore, the output of the robot skill is exactly what Feetech's protocol documentation wants.
Data sent for raw position 1,000: 255 255 2 9 3 42 232 3 0 0 0 0 220
Notice how the data in the above matches exactly what the protocol definition defines.
Data sent using the robot skill's ControlCommand to set a raw position.
Everything matches. If this robot skill doesn't work, I don't know what else to say...
Man what is with these companies and changing the protocol so much from servo to servo??? It does them no good to sell a line of products that are so difficult to support from a development standpoint!
Let me give this a try....and thanks for the time giving it a go!
Works perfectly! Thanks so much! The only thing you get with rs-485 is distance. I guess you can run them one mile apart...I don't need to do that..but currently, Feetech are only offering their strongest servos with RS-485 instead of using TTL. Robotis doesn't have to worry about the competition..these things are noisy..but they are strong and cheaper than Dynamixels.
v6 updated plugin definition to allow multiple instances within an ARC project
v8