Create servo frames/actions to animate humanoid, hexapod or custom gaits with smooth transitions, SW ramping and directional control
How to add the Auto Position Movement Panel (Gait) robot skill
- Load the most recent release of ARC (Get ARC).
- Press the Project tab from the top menu bar in ARC.
- Press Add Robot Skill from the button ribbon bar in ARC.
- Choose the Movement Panels category tab.
- Press the Auto Position Movement Panel (Gait) icon to add the robot skill to your project.
Don't have a robot yet?
Follow the Getting Started Guide to build a robot and use the Auto Position Movement Panel (Gait) robot skill.
How to use the Auto Position Movement Panel (Gait) robot skill
If you are brand new: think of this skill as a “pose-and-playback” animation tool for your robot’s servos. You create a few poses, put them in order, and ARC smoothly moves the servos between them.
Key Ideas (Beginner Friendly)
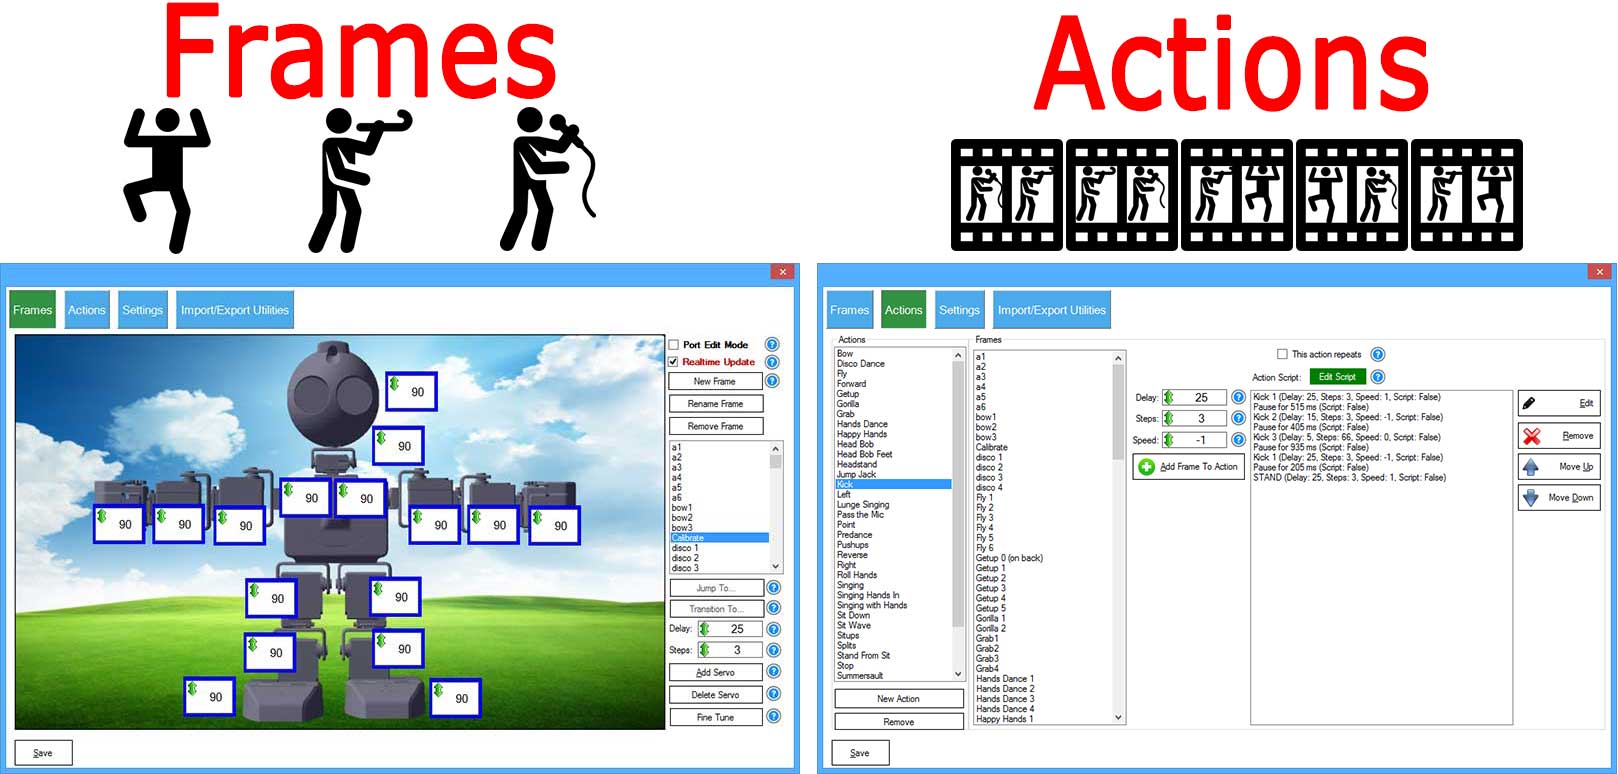
Frame = a Pose
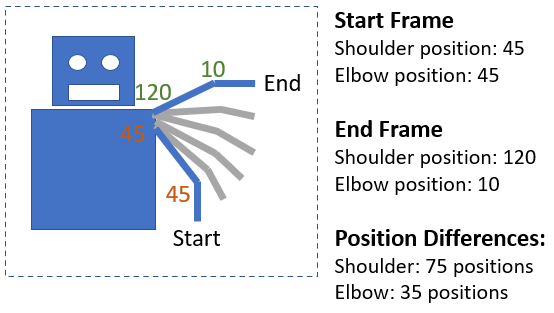
A Frame is a snapshot of servo positions (example: shoulder 40°, elbow 110°, gripper 20°). Frames are your building blocks.
Action = a Sequence of Frames
An Action is a list of frames played in order (example: “Stand” → “Step 1” → “Step 2” → “Stand”). Actions create walking, dancing, waving, etc.
Movement Panel = Direction Controls
The Movement Panel gives you Forward/Reverse/Left/Right/Stop buttons (and keyboard arrow key control). Those buttons trigger specific actions.
A gait is simply a repeated pattern of limb movement for locomotion. Different robot builds need different gaits: humanoids usually use a biped walk pattern, while hexapods typically use a 6-leg crawl pattern.
Two Versions (Which One Should You Use?)
There are two Auto Position gait skills:
If your robot needs “drive-like” direction commands (walk forward, turn left, stop), use the Movement Panel version. If you only need servo animations (wave, pick up, pose) and you want multiple Auto Position skills, use the non-movement version. Learn what a Movement Panel is here: ARC Movement Panels overview.
Auto Position Overview (What ARC Does For You)
When you play an Action, ARC automatically calculates how to transition from the current Frame to the next Frame. You do not need to manually compute intermediate servo positions—ARC “fills in the in-between” so the motion looks smooth.
How It Works (Flipbook Example)
Imagine a flipbook animation: each page is one drawing. When you flip pages quickly, it looks like motion. Auto Position works the same way:
- Create multiple Frames (poses).
- Create an Action and add those frames in order.
- Execute the Action. ARC moves the servos through the frames.
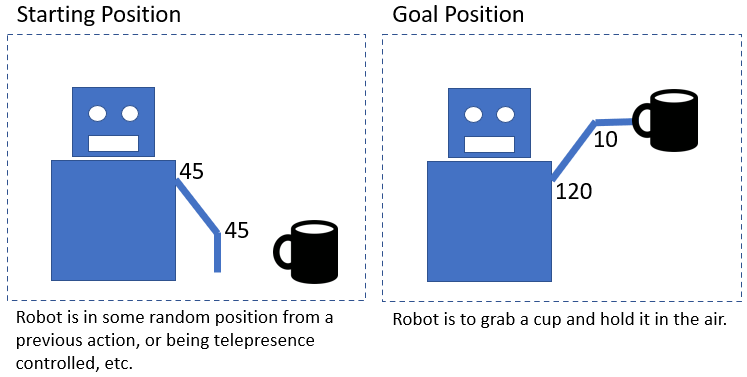
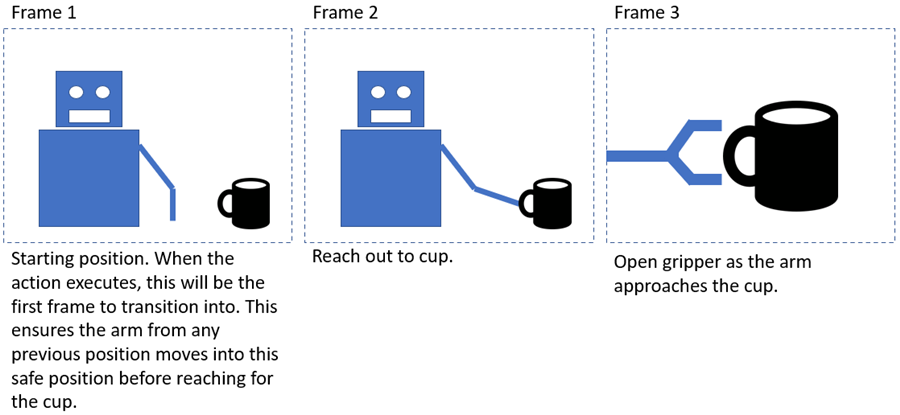
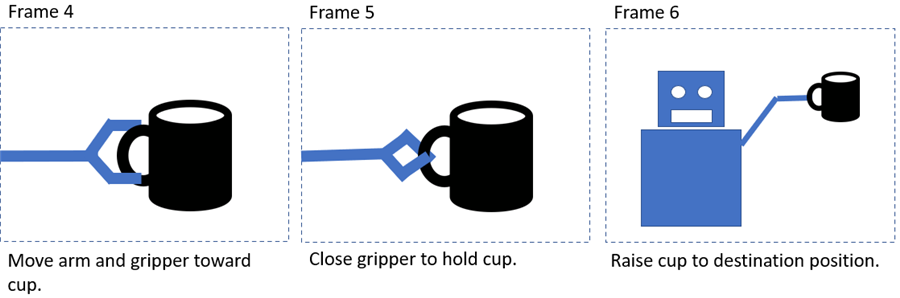
Example: Picking Up a Cup (Frames → Action)
Picture a simple robot arm with a shoulder, elbow, and a gripper. “Pick up cup” is not one single servo move—it’s a series of poses: approach the cup, open gripper, lower arm, close gripper, lift arm, etc. In Auto Position:
- Each pose is a Frame.
- The full motion is an Action made from those frames.
Creating Frames
When you create frames, you are deciding where each servo should end up (goal positions). ARC handles the transition between them. Breaking a task into smaller frames makes it easier to edit and prevents sudden, stressful movements.
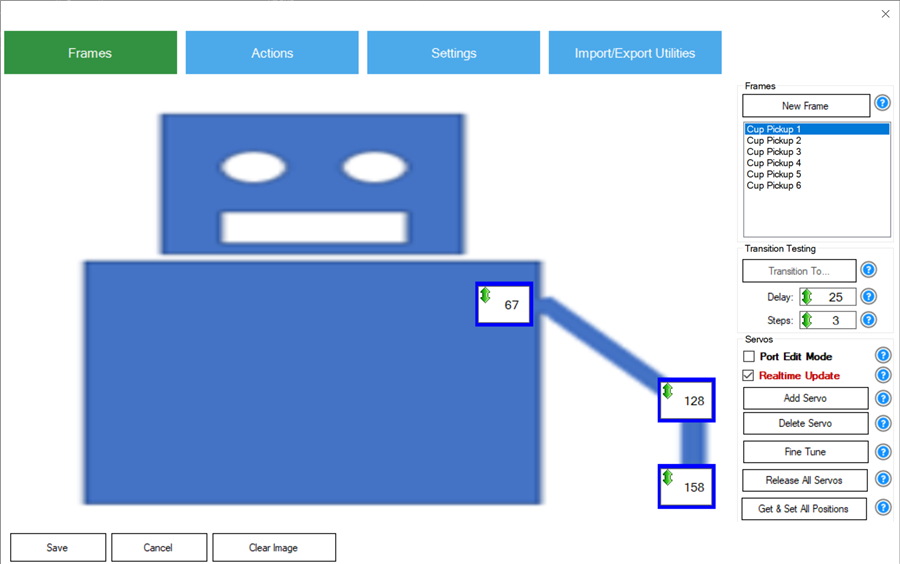
After you create frames, you’ll see a list of them with the servo positions saved inside each frame:
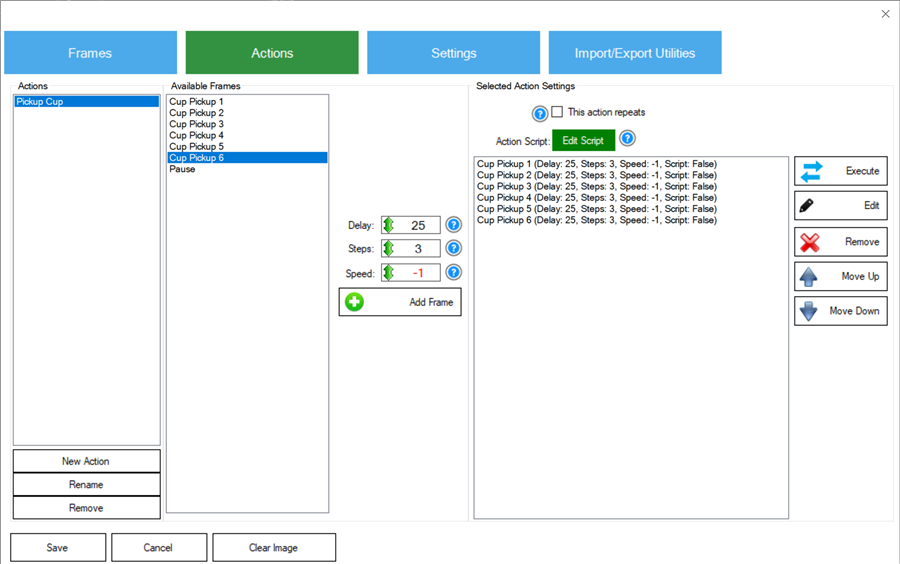
Add Frames to an Action
An Action is where you decide how the robot moves between frames (speed settings, pausing, repeating, and optional scripts).
Step & Delay (The Two Settings Beginners Use Most)
When transitioning from one frame to another, ARC sends a series of small position updates to your servo controller. Steps and Delay control how that transition feels.
Steps
How big each “jump” is while traveling to the next pose.
Smaller Steps = smoother, more updates, usually slower.
Larger Steps = fewer updates, usually faster but can look jerky.
Delay
Time (milliseconds) between updates.
Lower Delay = faster transition.
Higher Delay = slower transition.
ARC calculates how far each servo must move between frames. The servo that has the largest distance to travel sets the “number of updates.” Other servos scale their movement so all servos arrive at the next frame at the same time.
Software Acceleration (SW Ramping)
Some servo systems support built-in acceleration/velocity (for example, certain smart servos). Basic hobby servos and many simple controllers do not, which can cause motion to start/stop abruptly. SW Ramping is ARC’s way of smoothing movement in software.
How to set it up
- Where it is: SW Ramping is set per frame entry inside an Action (because each transition can be different).
- Typical approach: Set Steps to the fastest step size you want to reach during the middle of the move (example: 10), then set SW Ramping to a value above
0(example: 1000).
What it does
- Soft start: begins with smaller step sizes (starts gently).
- Faster middle: near the middle of travel it uses your configured Steps value.
- Soft stop: reduces step sizes near the end (stops gently).
Note: If SW Ramping is
0, no software smoothing is applied.
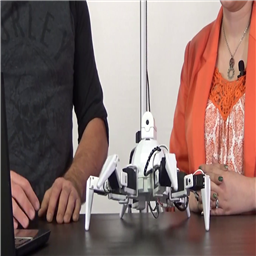
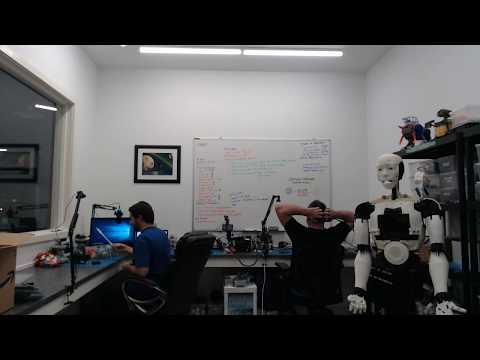
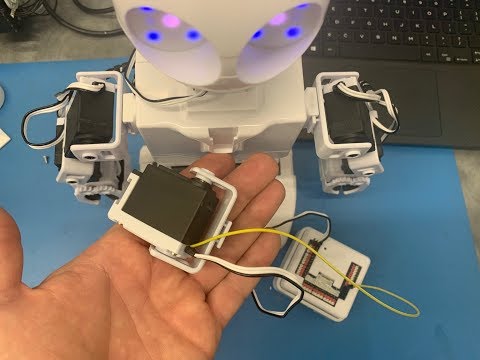
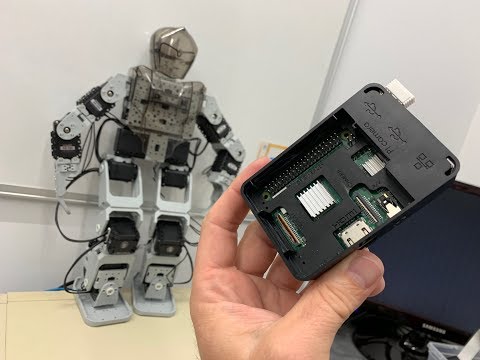
Tutorial Video: Creating a Hexapod Gait
This example shows Auto Position being used to build a walking gait for a large 3D-printed hexapod and how it can be combined with other skills (camera, speech recognition, joystick).
Main Window (What You See Day-to-Day)
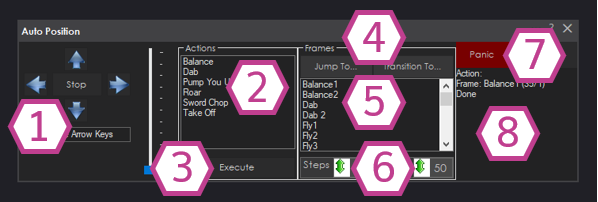
Use these buttons to command direction movement for your robot: Forward, Reverse, Left, Right, Stop.
- Click inside the textbox below the buttons to use your keyboard arrow keys.
- Releasing the arrow key triggers the STOP action.
- On-screen buttons keep moving until you press Stop.
The Action List shows all Actions you created. Select one and press Execute to play it.
- Jump To… moves instantly to the selected frame (no smooth travel).
- Transition To… moves gradually to the selected frame using Step/Delay.
- Step/Delay here apply to this manual frame move (not necessarily your action sequence settings).
Panic stops Auto Position and releases all servos. Status shows what the skill is currently doing.
Configuration: Frames (Building Your Poses)
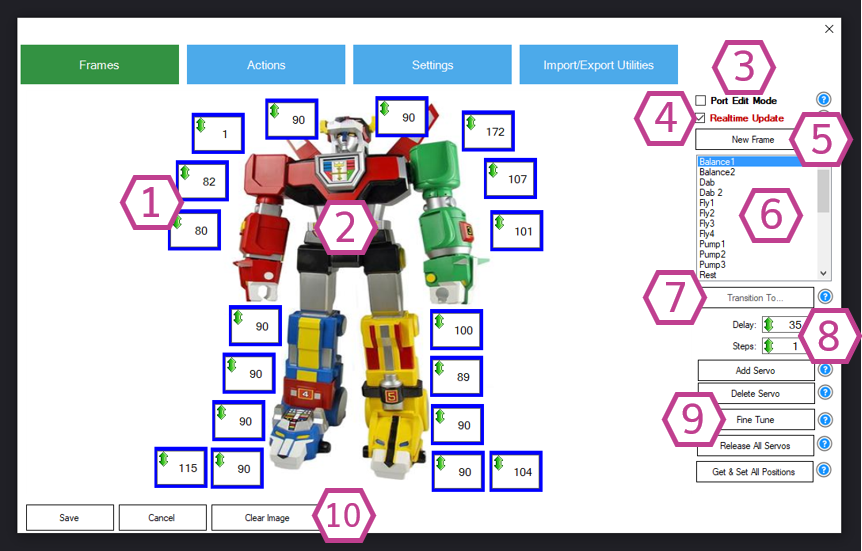
Each Frame contains a list of servo positions (in degrees). With Realtime Update enabled, changing a value moves the real robot immediately.
Editing servo position values
- Left-click + drag a degree value up/down to change it.
- Right-click a value to type a number.
AutoPosition special servo values (important)
- servo values 1 to 180: normal servo angle positions.
- servo value 0: releases the servo (or stops a continuous rotation servo).
- servo value -1: “skip this servo” for this frame (keeps its current position).
Frame tools you’ll use often
- Port Edit Mode: shows port numbers and lets you change them.
- Realtime Update: enable to pose the robot live; disable to edit safely.
- New Frame: duplicates an existing frame so you can make the next pose faster.
- Transition To…: test a frame smoothly using temporary Step/Delay.
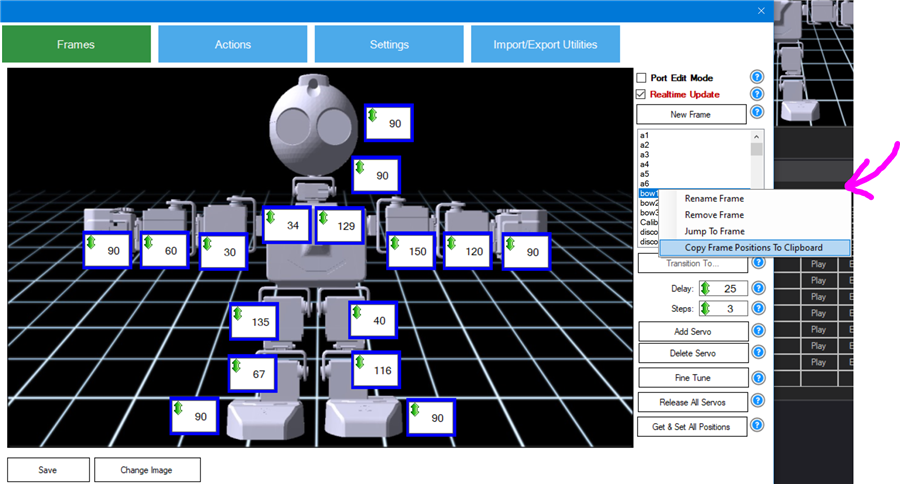
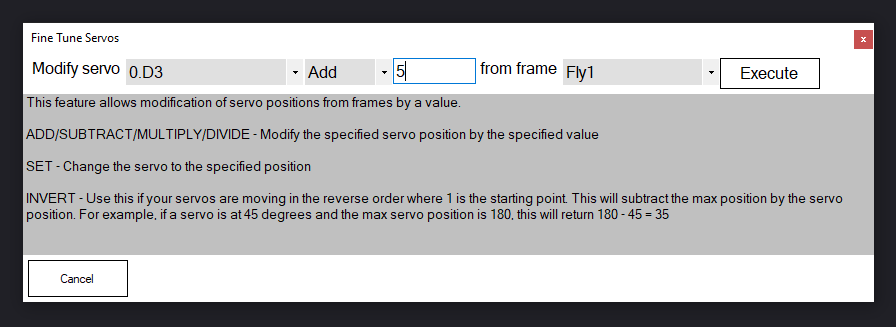
Copying positions (useful later)
You can right-click a frame and copy servo positions to the clipboard. This is handy for building scripts or documenting known-good poses.
Configuration: Actions (Turning Poses into Motion)
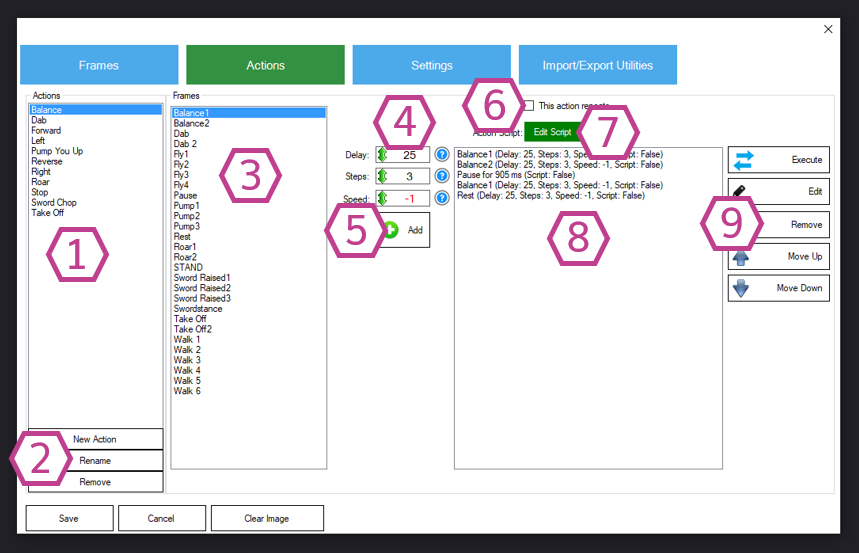
Actions are where you build the “playlist” of frames and how fast each transition should be. For walking gaits, you’ll usually create Actions like FORWARD, REVERSE, LEFT, RIGHT, and STOP.
- Add appends the selected frame to the action’s sequence list along with its transition settings.
- This Action Repeats loops forever until you run a different action (common for FORWARD walking).
- Edit Script lets you run a script when the action starts (button color indicates if a script exists).
- Sequence list is the order frames will play. Use move up/down to reorder.
Configuration: Settings (Scripts + Variables)
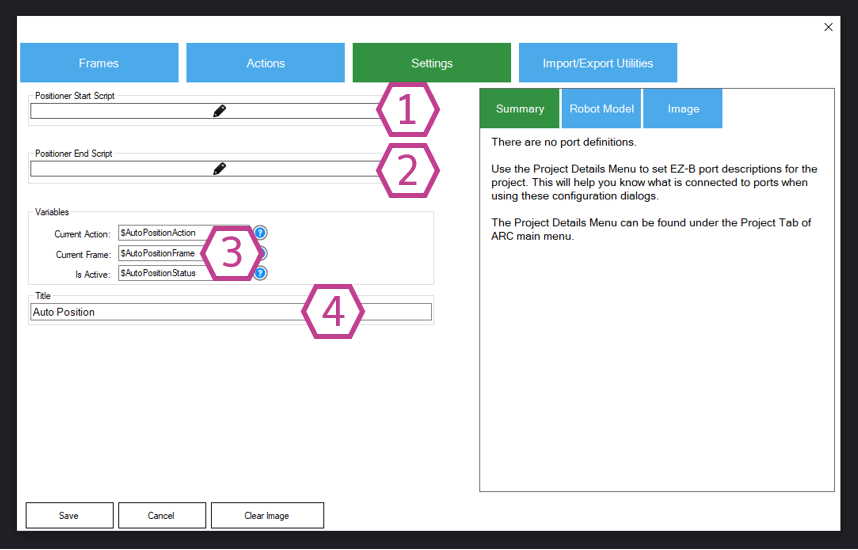
- Start Script: runs before a frame or action executes.
- End Script: runs after the queue finishes.
- Variables: shows current action/frame and running status (example:
$AutoPositionStatusis 1 when running). - Title: renaming changes the name used in
ControlCommand()calls—update your scripts if you rename it.
Import/Export Utilities (Backups and Sharing)
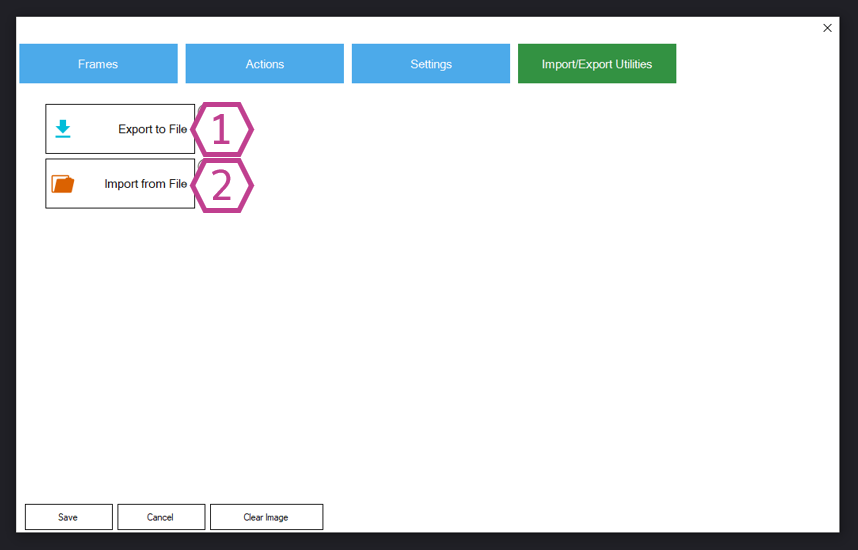
Use Import/Export to back up your Frames/Actions or move them between projects/skills (including between the movement panel and non-movement panel versions).
- Export creates an
.autopositionfile. - Import loads
.autopositionand.ezbfiles. - If you see messages about duplicate frames, it often happens when importing the auto-generated PAUSE frame.
Movement Panel vs. Non-Movement Panel (Practical Differences)
With Movement Panel
- Includes direction buttons (Forward/Reverse/Left/Right/Stop).
- Only one Movement Panel is allowed per ARC project.
- Great for gait locomotion where other controls “drive” the robot.
Without Movement Panel
- No direction buttons.
- You can add multiple instances (useful for separate body parts).
- Best for general servo animation and scripted motion.
For movement panel control in scripts, you can use movement commands like
Forward(), Left(), Right(), Stop(), Reverse(),
or use the Auto Position ControlCommand() options listed in the Cheat Sheet tab.
Quick Start (Step-by-Step for Beginners)
-
Add the skill
In ARC: Project → Add Skill → Movement Panels → Auto Position Movement Panel. -
Create Frames (poses)
Open Configuration → Frames. Add servos, then create a few frames (example: Stand, Step1, Step2). -
Create an Action (sequence)
Go to Actions. Create an action (example: FORWARD) and add frames in order. Add PAUSE frames if you need a short hold. -
Tune the movement
Adjust each sequence entry’s Step/Delay (and SW Ramping if needed) until it looks smooth and stable. -
Test it
Return to the main window, select your action, and press Execute (or use the directional buttons if you mapped gait actions).
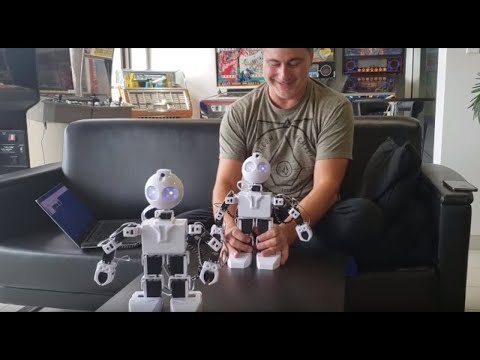
Videos
Resources & Tips
- Use the Import/Export tools to back up your work frequently.
- Start with slow settings (higher Delay, smaller Steps) to avoid jerky movements while learning.
- Build gaits gradually: get a stable “Stand” pose first, then add one step frame at a time.
Control Commands for the Auto Position Movement Panel (Gait) robot skill
There are Control Commands available for this robot skill which allows the skill to be controlled programmatically from scripts or other robot skills. These commands enable you to automate actions, respond to sensor inputs, and integrate the robot skill with other systems or custom interfaces. If you're new to the concept of Control Commands, we have a comprehensive manual available here that explains how to use them, provides examples to get you started and make the most of this powerful feature.
Control Command ManualAutoPositionStop
Example: controlCommand("Auto Position", "AutoPositionStop")
ShowAutoPositionPose
Example: controlCommand("Auto Position", "ShowAutoPositionPose")
"AutoPositionFrame", "STAND", [delay], [steps], [speed]
Example: controlCommand("Auto Position", "AutoPositionFrame", "STAND", [delay], [steps], [speed])
AutoPositionFrameJump", "STAND
Example: controlCommand("Auto Position", "AutoPositionFrameJump", "STAND")
DeleteActionAndAssociatedFrames", "Action Name
Example: controlCommand("Auto Position", "DeleteActionAndAssociatedFrames", "Action Name")
AddFrameToAction", "Action Name
Example: controlCommand("Auto Position", "AddFrameToAction", "Action Name")
AddFrameToAction", delay, steps, speed, "Action Name
Example: controlCommand("Auto Position", "AddFrameToAction", delay, steps, speed, "Action Name")
AddPauseToAction", delay in ms, "Action Name
Example: controlCommand("Auto Position", "AddPauseToAction", delay in ms, "Action Name")
Related Tutorials
Sabertooth+Kagaroo+DC Motors As Servos
The Robot Program Episode 009: Getting Six To Move
The Robot Program Episode 006: Introducing ARC
The Robot Program Episode 003: Getting JD To Move
The Robot Program Episode 021: Detect Face And Wave -...
The Robot Program Episode 020: Detect Face And Wave -...
Related Hack Events
DJ's Third Hack Night
PWM Servo Position Feedback (Read Servo Position)
DJ's 9Th Live Hack - Raspberry Pi + Dynamixel... Together...
Robot As Puppet To Control Another Robot By Reading Servo...
The Lattepanda Robot Hack
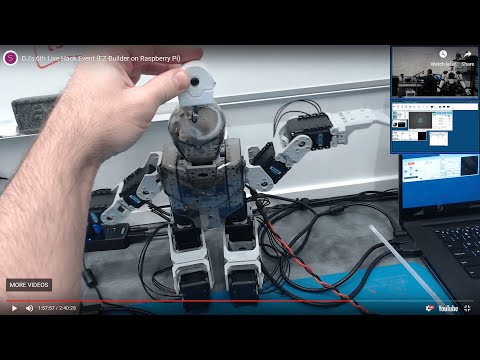
DJ's 6Th Live Hack Event (Raspberry Pi & Neopixel With...
Related Questions
Reverting Servo In Script Or Movement Panel
Strange Issue With Servo Speed/Delay/Steps And Usb Camera

Calibrate Problem

Upgrade to ARC Pro
Join the ARC Pro community and gain access to a wealth of resources and support, ensuring your robot's success.
Given a specific location in 3D space (I have programmed my Oak-D camera to give me a location coordinate in 3D space), I am attempting to move my robot's hand there. Is there a way to do this with this movement panel? Please assume that the location will change. For instance I hold a bottle in my hand and I wish the robot to grab the bottle from me.
The Auto Position uses pre-defined frames. While frame positions can be added programmatically, they cannot be altered programmatically.
What you want to do would have to be done with some math and specifying servo positions directly. Due to the unknown parameters of the robot's configuration, this can't be automated. But, it is something possible to do with math. If you have the 3D coordinates of an object, the joint positions will have to be calculated by the joint lengths to relate to the coordinates. This is how a CNC machine would work.
So then it’s a feature request? A FK and IK feature? Plug in joint lengths and DOF, and the final location (x, y, z) for the claw/hand as inputs? I am guessing it’s not a simple task or you/your guys would have already added it.
Sorry, it’s impossible because every robot has a different configuration. There’s no way a robot skill could be created for infinite configurations. It’s something that would require math specific to the robot configuration. Somehow identifying the position relative to some other arbitrary value in 3D space. Maybe you’d have to figure out some servo values based on fixed points and map that to the arbitrary 3d Cartesian points of your camera?
Im not really sure - have you googled to see any ways others have done it?
*edit: this is the best article that’s easiest to understand of what I’ve found by searching. I use google as my preferred search engine: https://fl0under.github.io/robotics-notes/
he outlines a lot of details that need to be considered in the process. This is also why it’s impossible to create a robot skill that encompasses an infinite robot arm configurations. But it’s a good read to help where you can begin.
a good start is to merely use the x and y coordinates (ignoring depth) to align the hand to the object. If you can do that much, then the depth won’t be much more work.
I’m guessing the number of joints and lengths of each joint will make the process harder.
This skill is one of my favorites but had a couple questions. Is there a way to couple two motors so that they can change values at the same time inside of the skill itself (frames). I understand the master/slave while using servos outside of this skill and it would be nice to have that working inside of this skill because you cannot do realtime update because if the motors are coupled together they would be fighting each other till you change the numbers on both of them. The other question is can you use bluetooth joystick at the same time as you are in the frames mode. Since I am using steppers and the numbers are in the tens of thousands the little arrows are not of any use because they only move by 1s or is there a way to manipulate that and multiply the ratio?
Sounds like you should be using a different Movement Panel for movement and use the regular auto position.
Thought about it but even with the regular Auto Position it still doesn't tie two or three motors values together for real time movement. I have been making due by turning it off temporarily and then changing values then turning it back on. Was just mentioning it to possibly add it for the next update. The reason for bluetooth joystick or or hot keys while using Auto Position is to quickly maneuver end effectors, arms etc to the position and then just save that position. I am doing it now outside of Auto Position and writing down the values and adding them when I go back in.
What movement type is your wheels? Is it a dc motor with hbridge? Continuous rotation servo? Etc..