
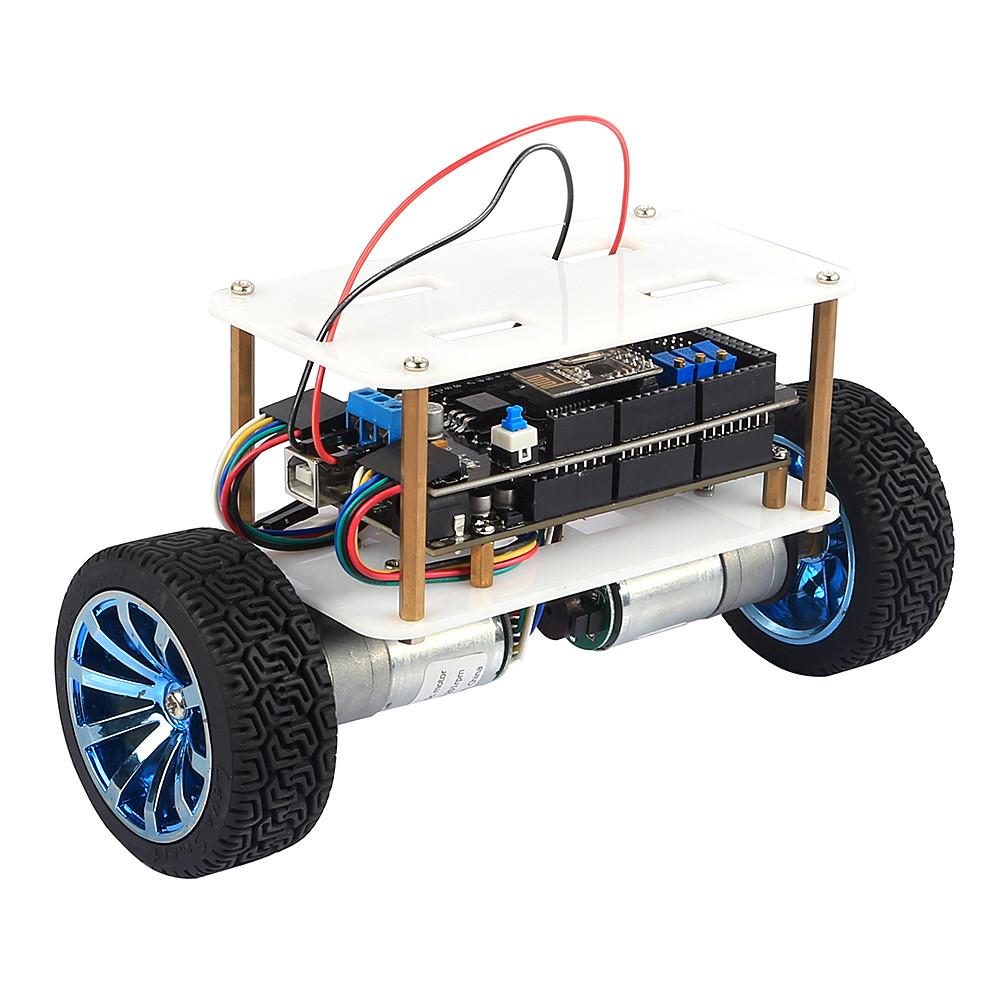
Balance Robot by Sain
The SainSmart v3 balance robot is a type of robot called an inverted pendulum. That means it balances upright on two wheels (similar to how you balance a broom on your hand). To stay standing, the robot constantly reads its tilt angle using an IMU sensor and then speeds the motors up or down to correct the lean.
The good news: you can use this robot’s hardware (Arduino Mega + MPU6050 IMU shield + motors/encoders), along with Synthiam ARC, to make it balance. The custom firmware linked below lets ARC connect to the Arduino Mega and control the robot using ARC’s Inverted Pendulum movement skill. Getting perfect balance usually requires patience, because you will likely need to tune the PID values (a set of numbers that tells the robot how strongly to correct itself when it leans).
What You Need Before You Start
- SainSmart v3 Balance Robot kit (or equivalent hardware)
- Arduino Mega included with the kit
- MPU6050 IMU shield/module included with the kit
- A Windows PC with Synthiam ARC installed
- A USB cable for the Arduino Mega (recommended for first-time setup)
- (Optional) A compatible Bluetooth serial module if you want wireless control
Setup (Step-by-Step)
-
Download EZ-Mega v1 Balance Robot Sourcecode
Source package date: Feb 4, 2019
-
Follow this guide to compile and upload the firmware to the SainSmart Arduino Mega:
Tutorial to compile the source code and upload the firmware to the SainSmart Mega Arduino
You will need the Arduino IDE (or the toolchain described in the tutorial). Uploading firmware is the process of programming the Arduino.
-
In ARC, add the movement skill:
ARC Inverted Pendulum Skill
This skill is what sends balancing and movement commands to the firmware running on the Arduino Mega.
How ARC Connects to the Robot
The firmware supports two main ways to communicate with ARC:
- USB (recommended) – simplest setup, uses the Arduino’s built-in USB connection.
- Bluetooth Serial – wireless connection using a Bluetooth module wired to a hardware serial port on the Mega.
At the top of the firmware source code there is a small configuration section where you choose: (1) which serial port to use and (2) the baud rate (communication speed). ARC must be configured to match the same baud rate.
Connection Type: USB (Recommended)
Use this when your Arduino Mega is plugged into the PC using a USB cable. This is the best option for beginners.
- Baud rate: 115200
- Port in firmware:
Serial
Firmware configuration example (USB @ 115200):
// The communication baud rate
#define _BAUD_RATE 115200

// The primary communication interface between ARC and this controller
// Serial  - USB (recommended 115200 baud)
// Serial1 - 19(RX), 18(TX) <- do not use because pin 18 is used by wheel encoder
// Serial2 - 16(RX), 17(TX) <- recommended for bluetooth dongle
// Serial3 - 15(RX), 14(TX)
#define COMMUNICATION_PORT Serial
Connection Type: Bluetooth (Optional)
Use this if you have a Bluetooth serial module connected to the Arduino Mega’s hardware serial pins. The example below uses Serial2 on the Mega.
- Baud rate: 9600 (must match your Bluetooth module’s setting)
- Port in firmware:
Serial2 - Mega Serial2 pins: RX2 = pin 16, TX2 = pin 17
- Mega TX2 (pin 17) → Bluetooth module RX
- Mega RX2 (pin 16) → Bluetooth module TX
Firmware configuration example (Bluetooth on Serial2 @ 9600):
// The communication baud rate
#define _BAUD_RATE 9600

// The primary communication interface between ARC and this controller
// Serial  - USB (recommended 115200 baud)
// Serial1 - 19(RX), 18(TX) <- do not use because pin 18 is used by wheel encoder
// Serial2 - 16(RX), 17(TX) <- recommended for bluetooth dongle
// Serial3 - 15(RX), 14(TX)
#define COMMUNICATION_PORT Serial2
After You Connect
Once the firmware is uploaded and ARC is connected through the Inverted Pendulum skill:
- Place the robot on a safe surface (start on the floor, not a table).
- Be ready to catch it—early PID values may cause the robot to jerk or fall.
- If the robot shakes rapidly or immediately drives away, you will likely need to adjust PID tuning and/or verify motor direction settings.

I assume the communication is going through a ESP8266 on the bot? Contacted the company to purchase one of the shields (to build myself) but was told it was discontinued You must have to buy the whole bot from them now.
Thanks in advance.
Yeah - we should be able to recreate the same build with DIY parts. The shield is merely an HBridge, but you can use any hbridge (specifically the EZ-Robot one). The IMU it uses is the MPU6050.
As for wireless... I'm actually using a Bluetooth <-> UART module. The same ones that were on the EZ-B v3.
Can i use this for esp32