

Send web-triggered IFTTT events from ARC/EZ-B: configure Maker Webhooks key and trigger applets to control SmartThings, WeMo and other services.
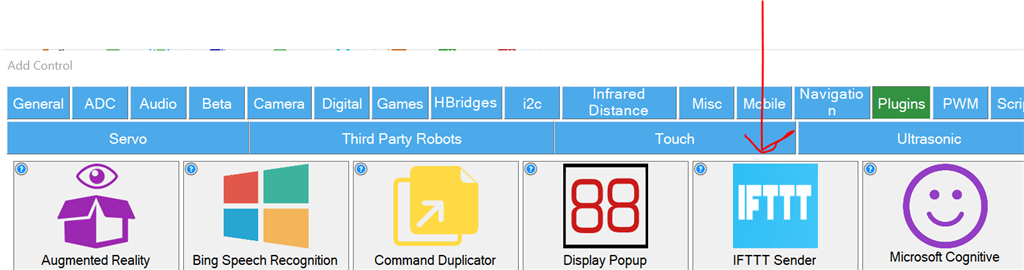
How to add the IFTTT Sender robot skill
- Load the most recent release of ARC (Get ARC).
- Press the Project tab from the top menu bar in ARC.
- Press Add Robot Skill from the button ribbon bar in ARC.
- Choose the Misc category tab.
- Press the IFTTT Sender icon to add the robot skill to your project.
Don't have a robot yet?
Follow the Getting Started Guide to build a robot and use the IFTTT Sender robot skill.
How to use the IFTTT Sender robot skill
Please note that this plugin only handles the sending of messages to IFTTT. If you plan on receiving messages from IFTTT, take a look at this tutorial: https://synthiam.com/Support/Skills/Misc/IFTTT-Sender?id=15883
As this is my first plugin, it may be a bit rough... feedback and advice welcomed. Thanks to DJ Sures for the great plugin tutorial and sample code.
- First, create an IFTTT account here: https://ifttt.com/

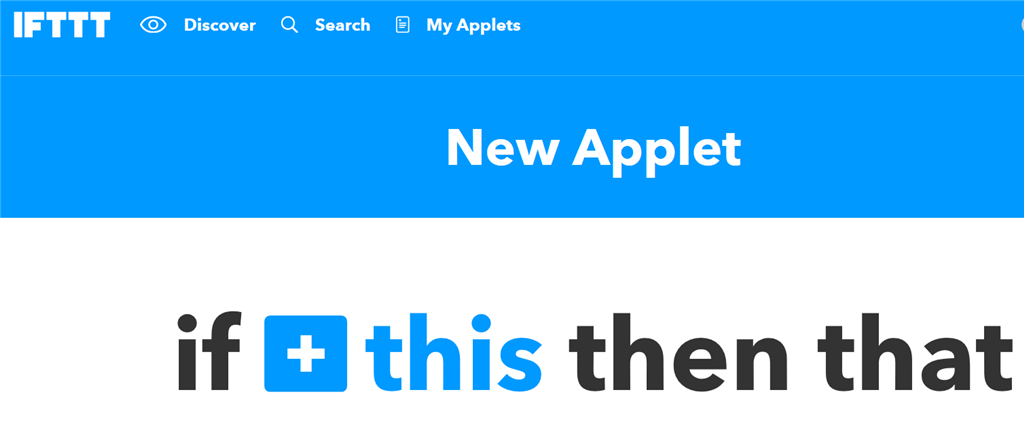
Click on My Applets

Click on New Applet

Click the "If This" clause
Choose Maker Webhooks channel

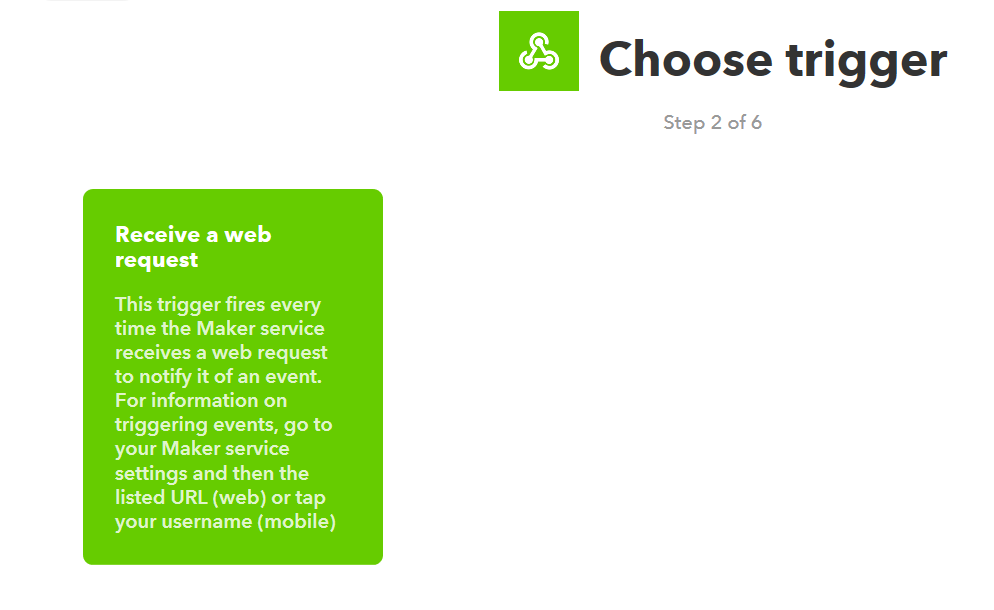
Choose a trigger- receive a web request
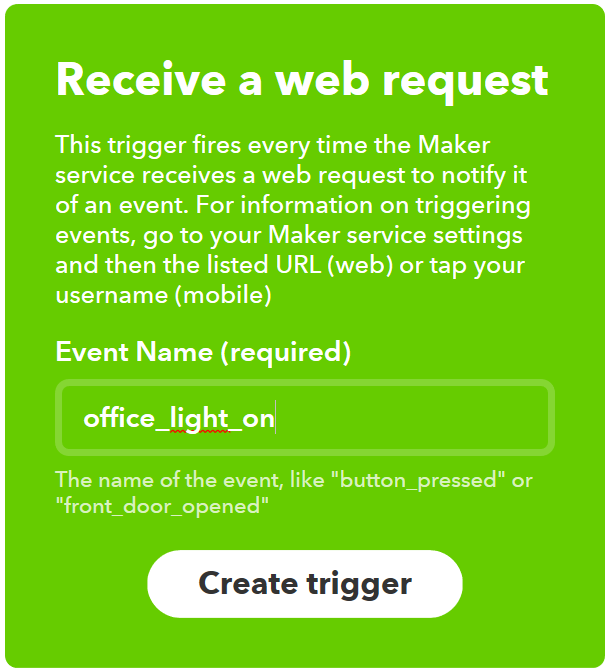
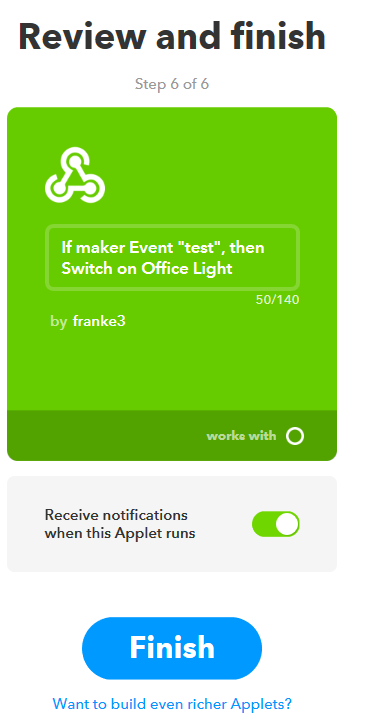
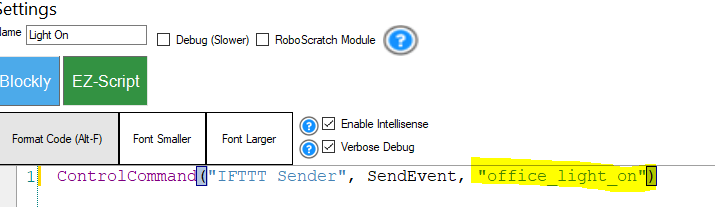
Enter an Event Name- Remember this exact name for use in your EZB script. In my example, I chose office_light_on Click Create trigger
Click Then That

Choose Action Service- in may case, SmartThings.. you could chose anything e.g. WeMo
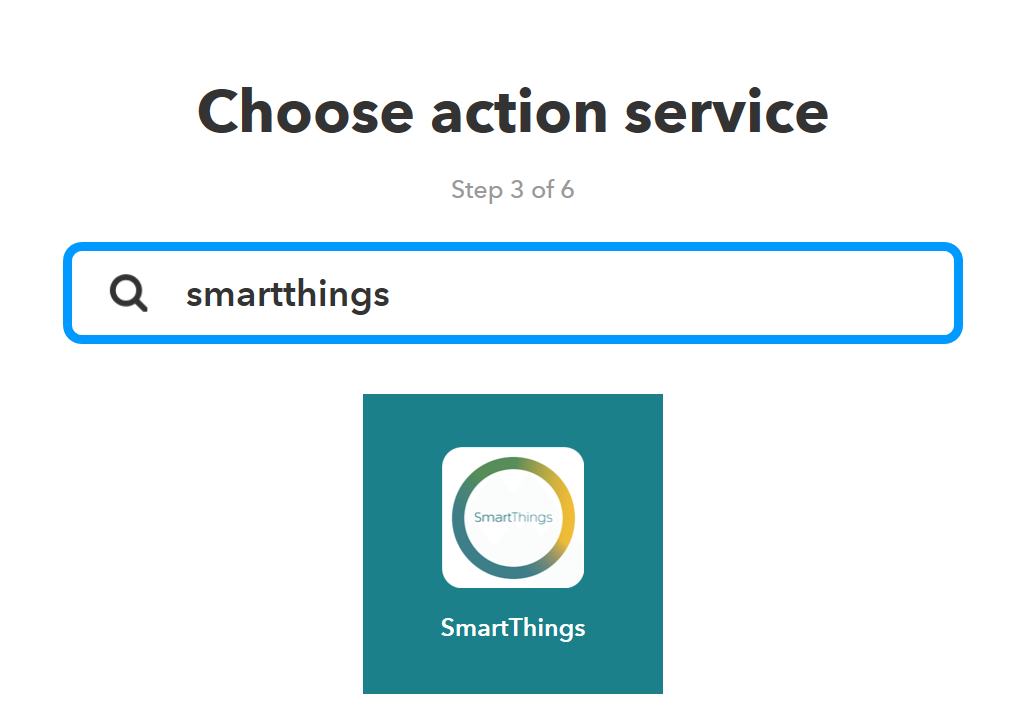
The rest of the steps are SmartThings specific... Choose Action
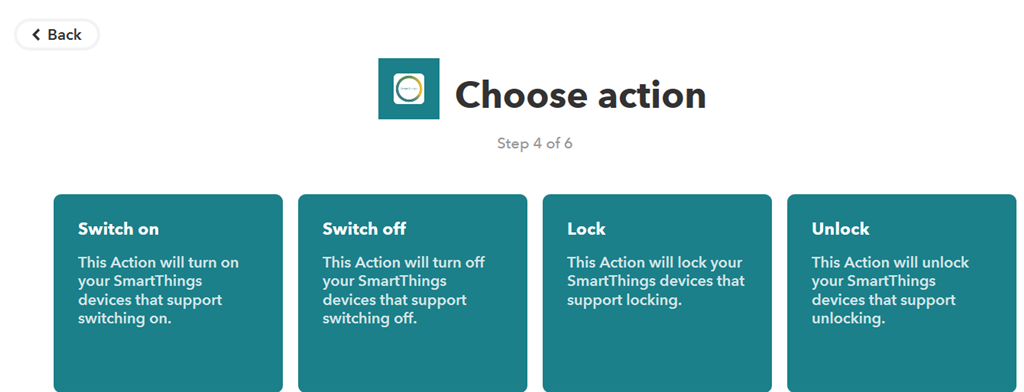
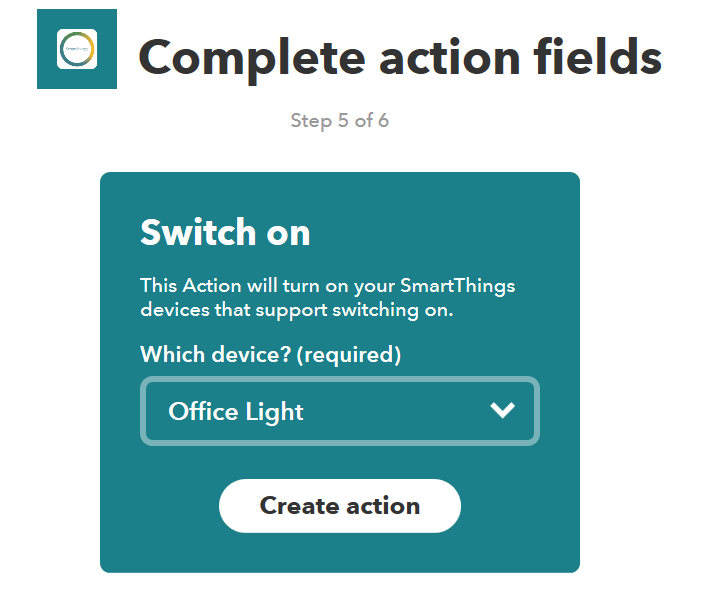
I picked Switch On
Finally- Finished with IFTTT side
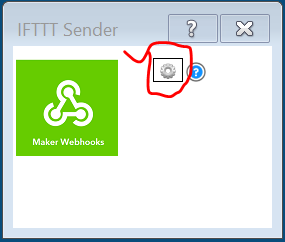
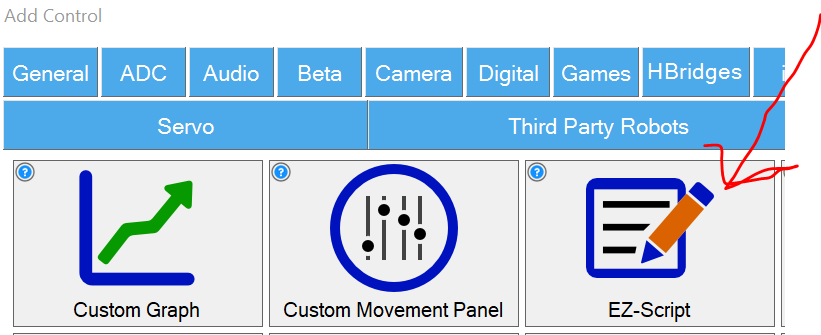
Now, unto setting up the Plugin..... In your EZB project, add the IFTTT Sender Plugin
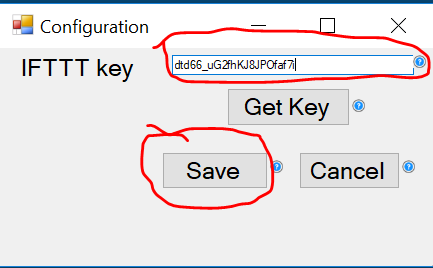
Click the Configure button
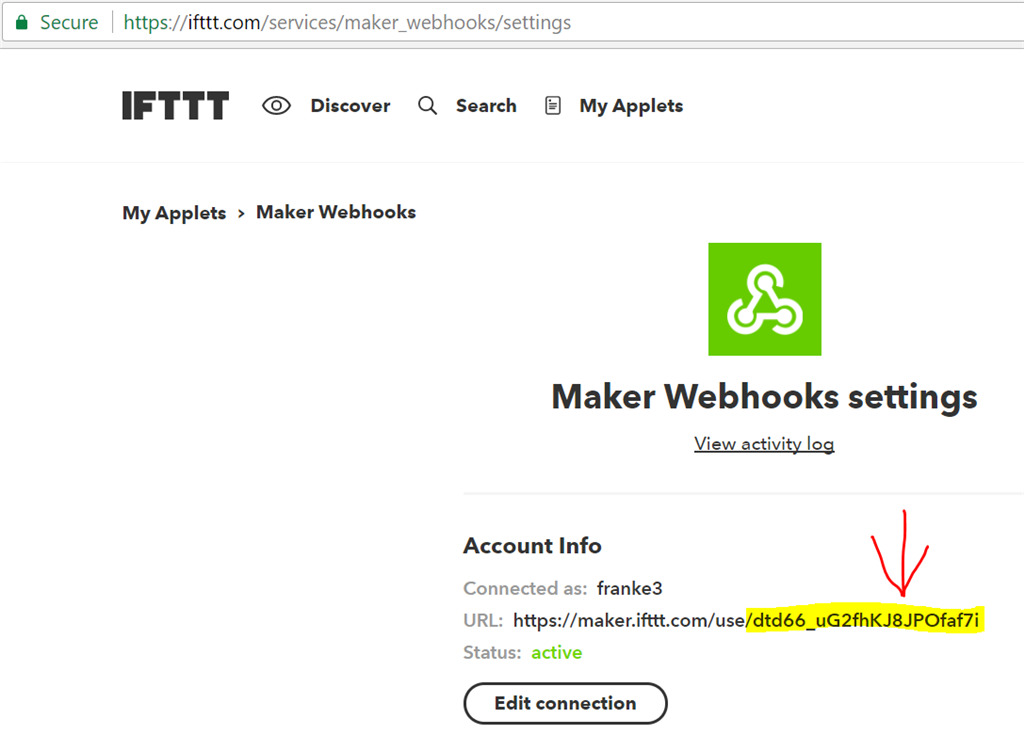
Click the Get Key button
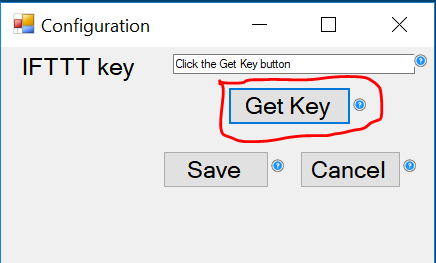
Copy the IFTTT key
Paste it into the form and save it
The plugin is now ready to use...
Create a script in your project
Right-click in your script and choose ControlCommand for IFTTT Sender

Edit the script- use the exact Event Name you setup in the IFTTT applet. Remember to keep the quotes
Save your script and test it

You are now ready to start using the plugin in any script... enjoy

I did all of the things you mentioned but
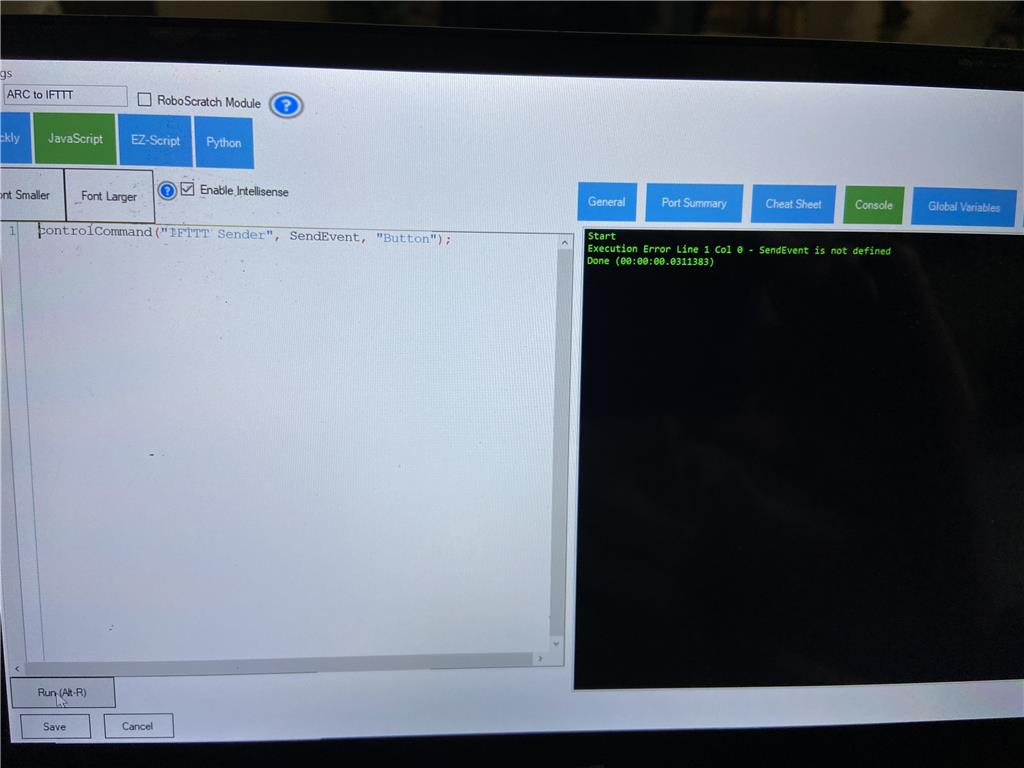
it mentions Send event is not defined. Doesn't it need to know which website to go to -IFTTT. Is this site built in behind the scenes? I put in the key as you have suggested and erased the preliminary words that were copied and pasted at the same time. Any suggestions?His example is ezscript. You’re using JavaScript which means the command needs to be in "quotes"
also check ControlCommand Cheat Sheet list. Does that not show the correct command?
I did use the Cheat Sheet in Javascript and pulled up the ControlCommand for IFTTT. I then changed the word Event_name to Button to keep it simple (this is also the name of the applet in IFTTT) and kept the " " around it . It seems like it should have worked but it states that it is not defined. Do I need to define it somewhere else? somewhat similar to what you do with a global variable in a script.
I’ve never used this robot skill so I was only guessing some suggestions. When I’m home tonight or tomorrow I’ll take a look and see if I have any ideas
Appreciate it. Looks like this skill was done in 2017 and it may need some updating. If you can verify that it works on your end then I can conclude it is something on my end that needs modification.
Just a heads up- I tried to put the IFTTT app on my Iphone this morning and think the app itself was hacked as it had a very suspicious username, password and email already filled in. I did not continue with it for my phone but it is already ok and on my computer.
I don't know anything about this skill or if this skill is outdated or not and will work. However In any case, DJ is correct. If the script you are using is the one you picture then writing in Javascript you will need the have quotes " " around the command SendEvent. Notice how it's in black type? in your picture. That's a clue that something is wrong in that spot.
Just a guess but maybe you're correct and something else needs to be stated so the script knows where to send the event.
Great catch Dave!! (maybe that is what DJ was trying to tell me but I didn't realize it) I haven't had to modify that area of the script before so it was new to me. I got it to work although it is a bit slow with a response time of about 45 seconds to a minute. Good for some things but not for others.