
Controlcommand()
Robot Skill Controls Overview
The ARC project desktop contains many windows, and each window represents a robot skill control. A robot skill control is a small program that runs inside ARC and is typically created by a partner. Examples include GPT integrations, vision detection tools such as face, emotion, color, and glyph recognition, servo gait and animation controllers, speech recognition, and many more. Each robot skill control adds a specific behavior that expands what your robot can do.
Common robot skill controls include Connection, Camera, and Auto Position. Because each robot skill is a separate program, ARC provides a way for those skills to communicate with one another. That mechanism is the script command ControlCommand(). With ControlCommand(), an event in one control can instruct another robot skill to perform an action. For example, when the Speech Recognition control detects the phrase "Follow My Face," it can tell the Camera control to enable face tracking.
Since ControlCommand() references robot skills by name, you can rename a robot skill when needed. Right-click the robot skill title bar and select Rename, then enter a new name.
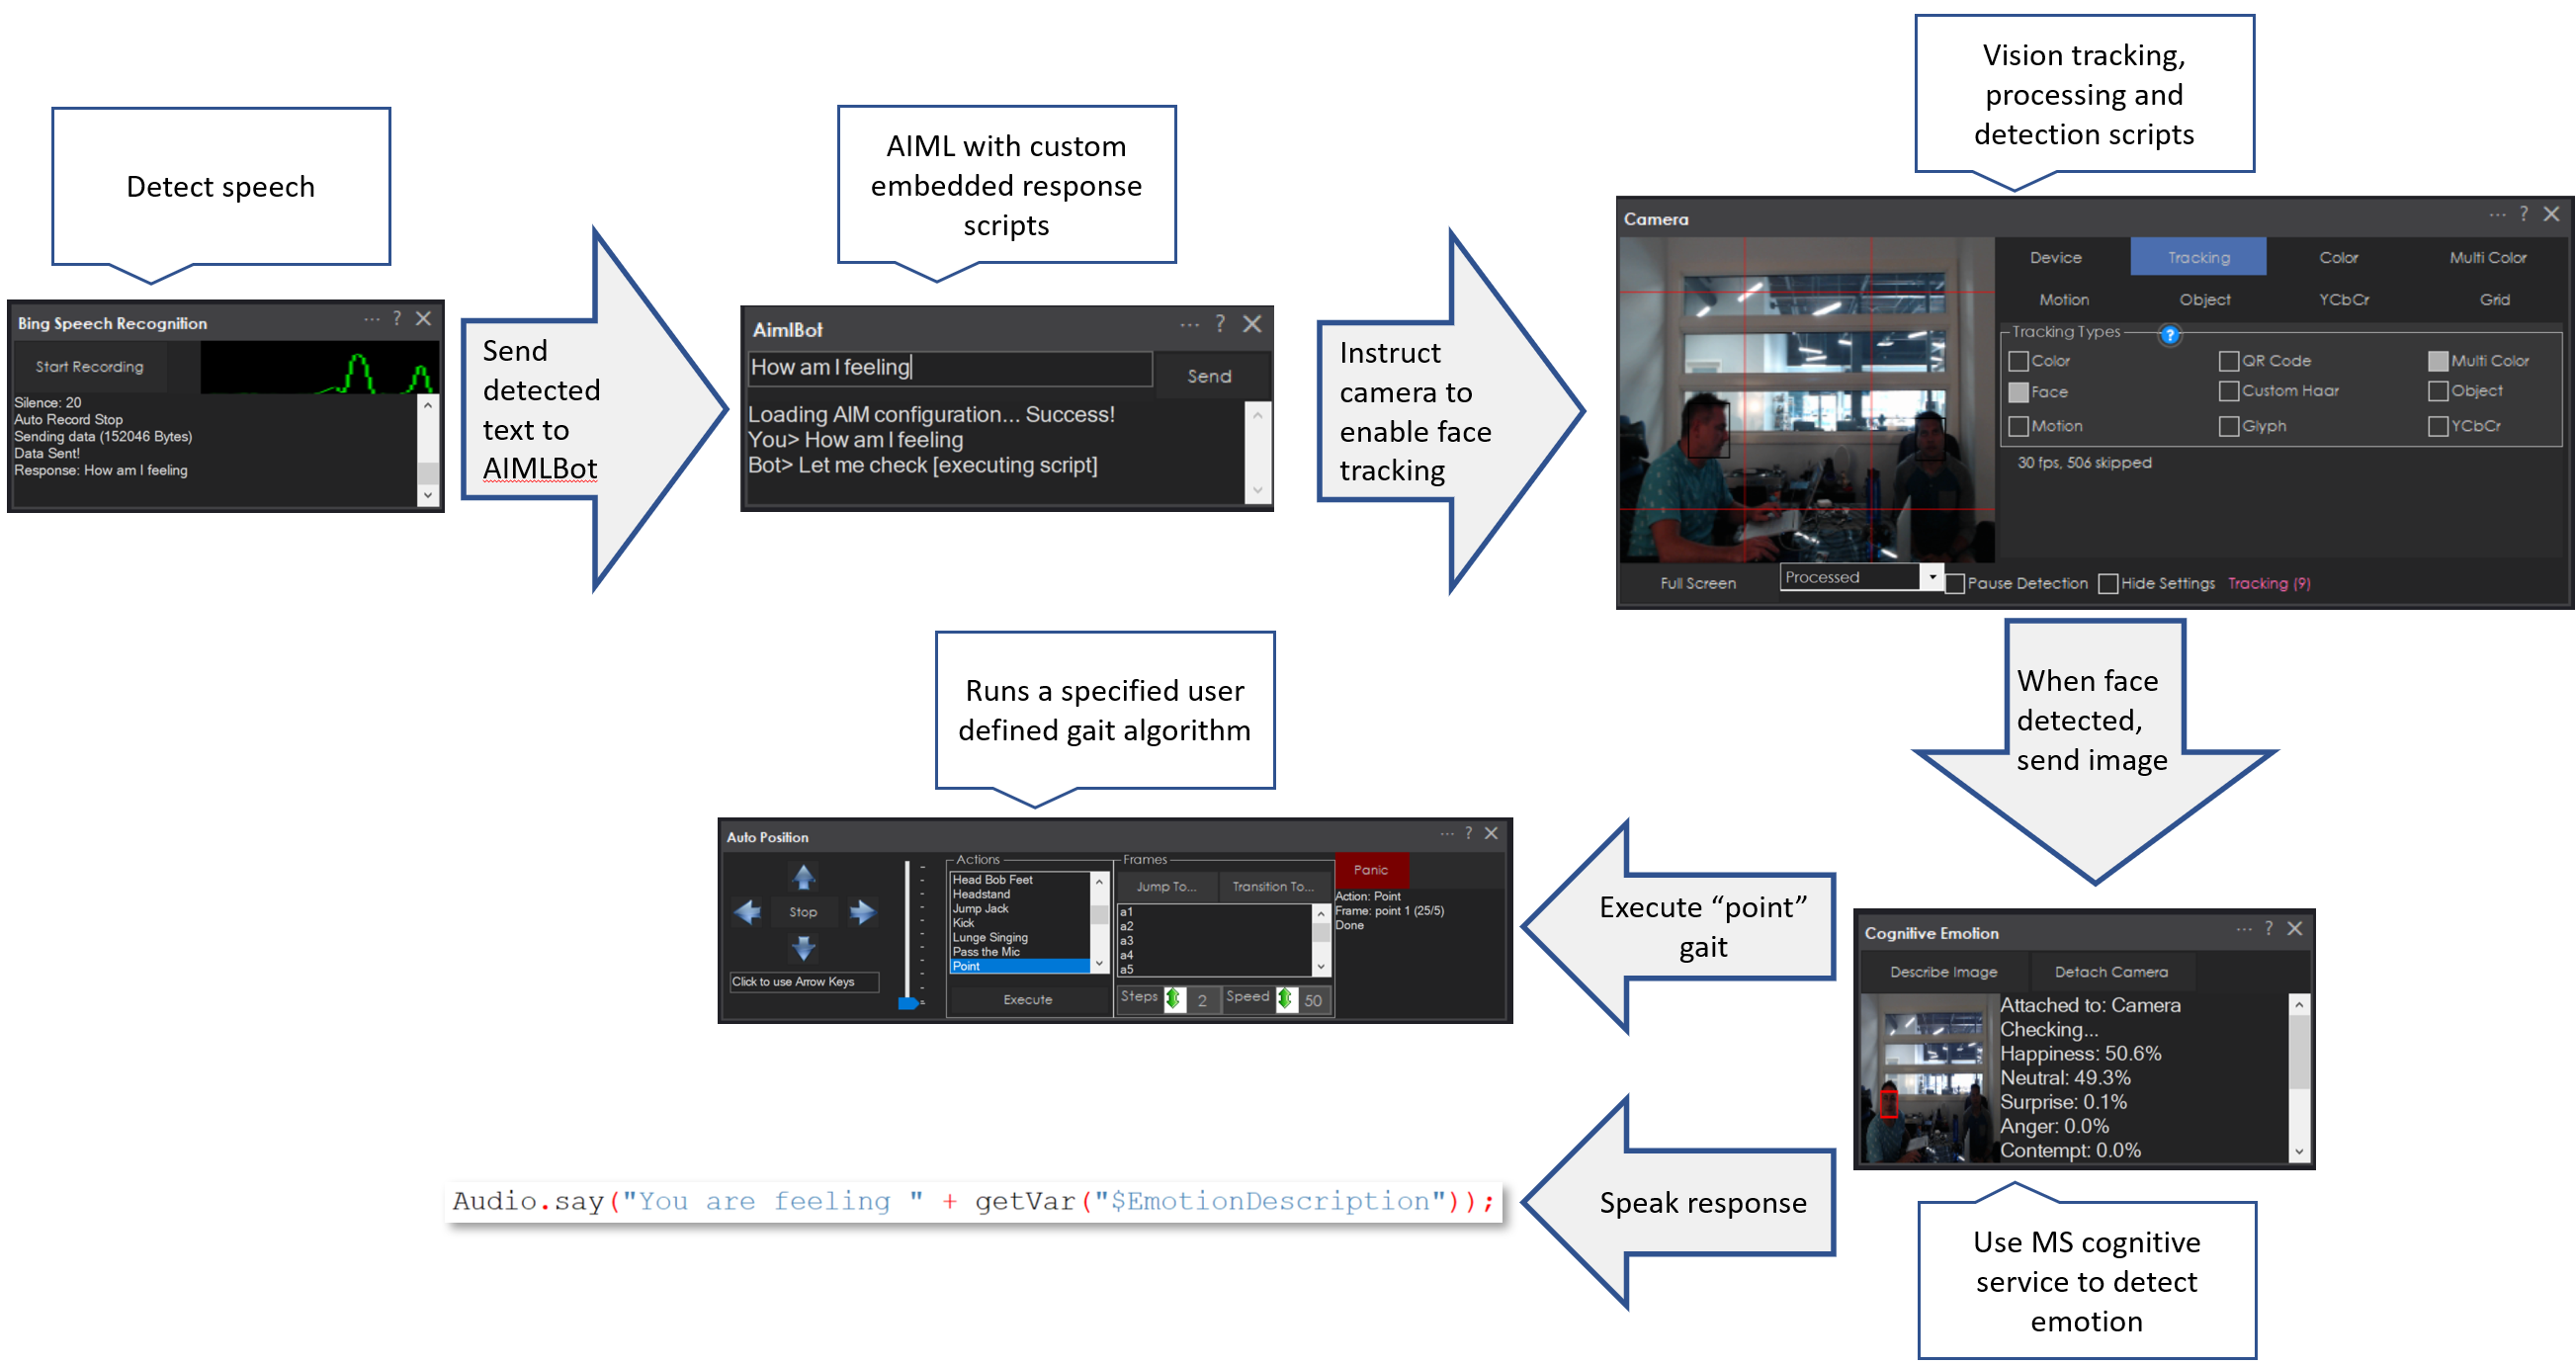
Video Example

The example above demonstrates detecting speech recognition text and using cognitive services to respond to more complex messages. When building projects, review the manuals for each robot skill you plan to use, since every skill documents the commands and variables it exposes.
In the Code
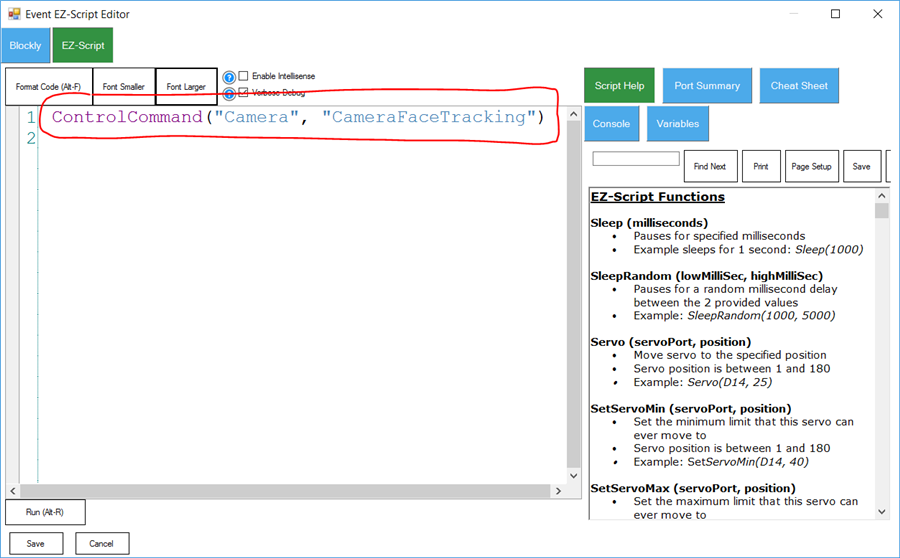
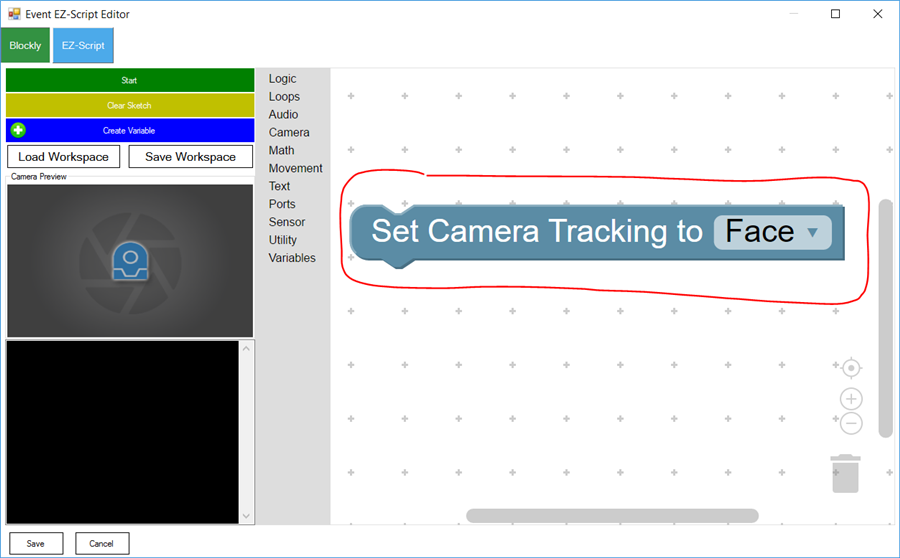
In the earlier example, the Speech Recognition robot skill used the phrase "Follow My Face" to instruct the Camera control to begin face tracking. The following examples show how that command is implemented in both script and Blockly form.
EZ-Script
Blockly
What Commands Are Available?
Each robot skill accepts a specific set of ControlCommand() parameters, and not every skill supports the same commands. ARC queries each robot skill by asking, "What control commands do you accept?" and displays the available commands in several places. The sections below show where you can find the available ControlCommand() options for robot skills within your project.
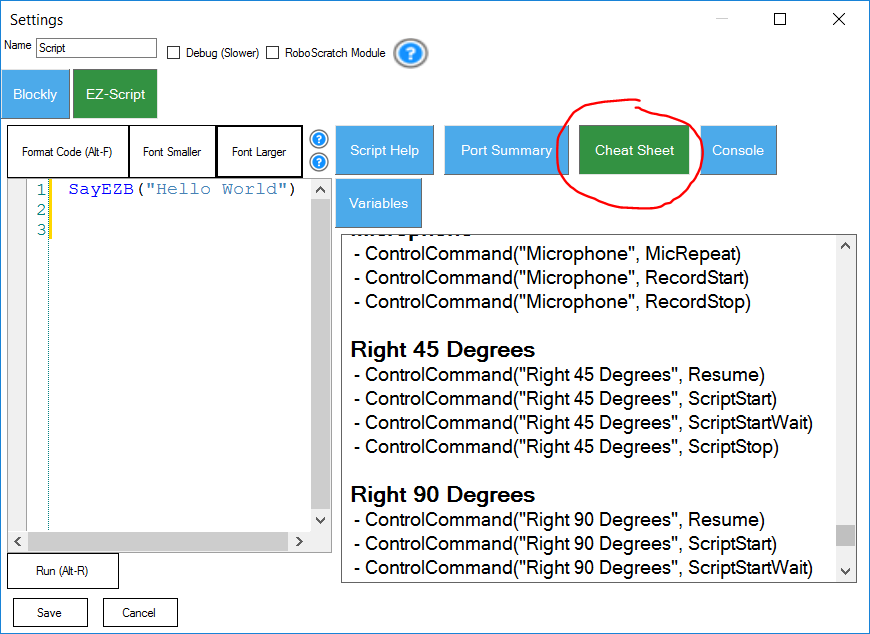
Cheat Sheet
Displayed while editing a script, the Cheat Sheet shows the available commands for the selected control.
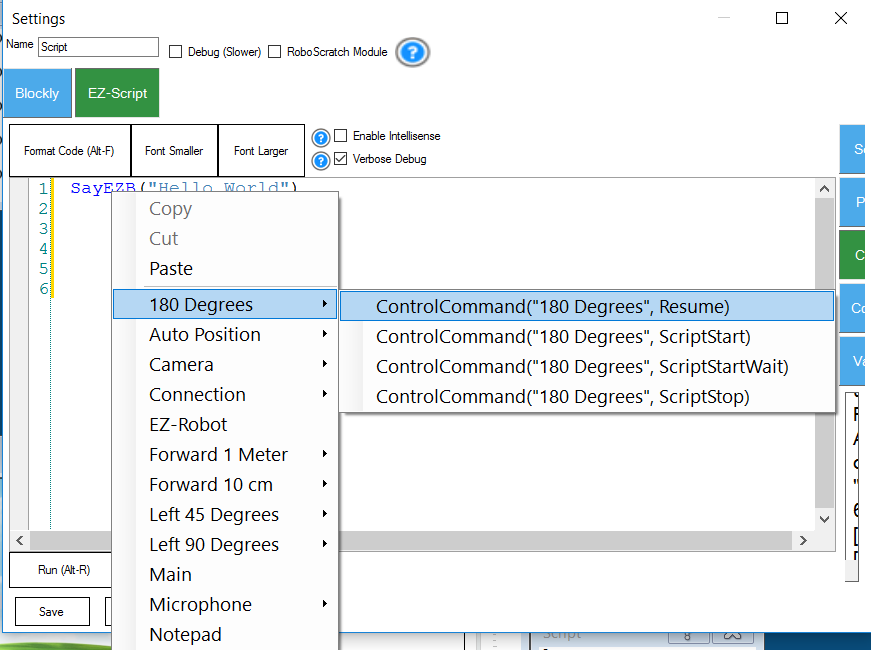
Right-Click Menu
Right-click inside the script editor to view commands that are relevant to the current control.
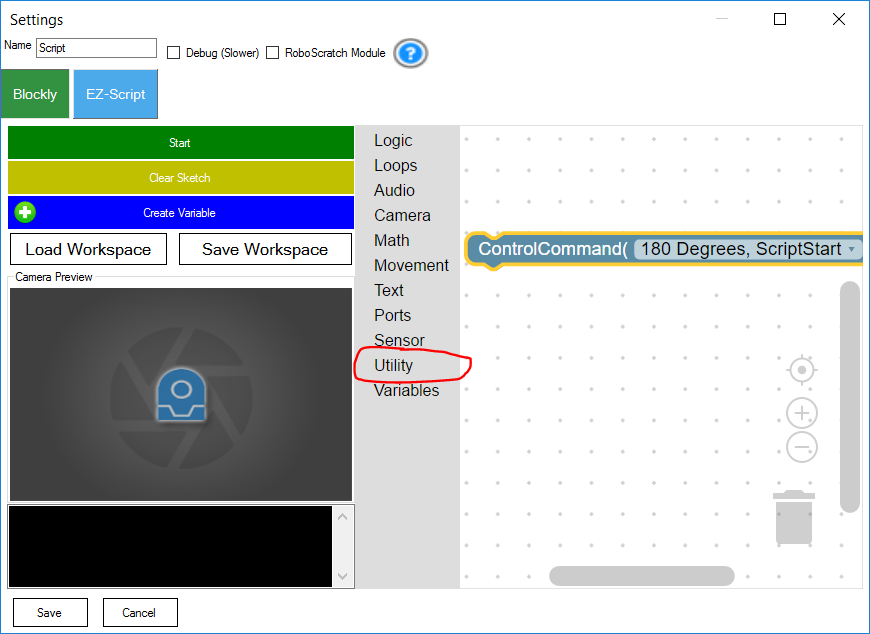
Blockly
Blockly provides a utility block that lists ControlCommand() options for the selected control.
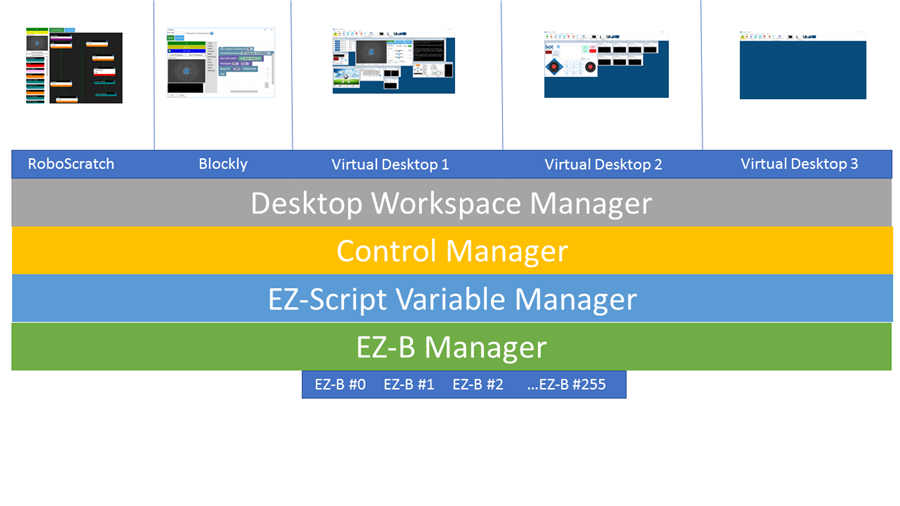
How It Works
ARC uses a Robot Skill Control Manager to track all robot skill controls in the project. When a control is added, the manager assigns it a unique name. You can also edit a control's name on its configuration page. The ControlCommand() function uses the target robot skill's name as its first parameter, and the remaining parameters depend on the skill. Those parameters are documented in the Cheat Sheet, right-click menu, or Blockly block.
ControlCommand() Is Non-Blocking
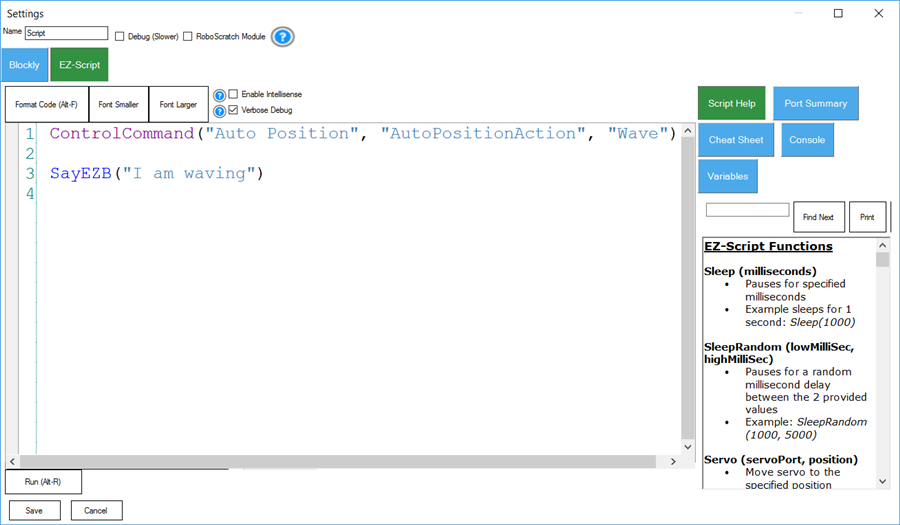
ControlCommand() does not wait for the destination robot skill to finish executing its action. For example, if your script instructs the Auto Position control to perform the "Wave" action, your script immediately continues to the next line without waiting for the wave to complete:
controlCommand("Auto Position", "AutoPositionAction", "Wave");
Audio.SayEZB("I am waving");
EZ-Script
Blockly
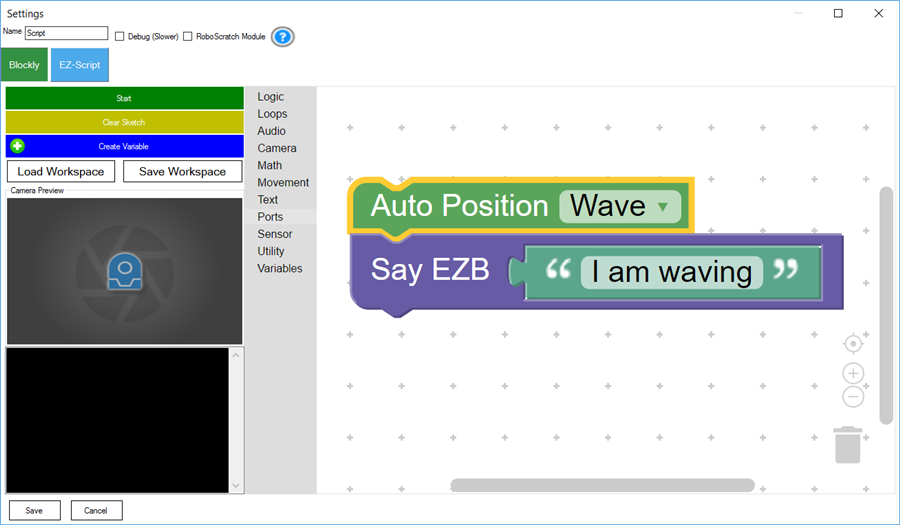
Because the Auto Position control runs as a separate program, ControlCommand() only sends a one-way instruction: "Do this." It does not wait for an immediate response or block until the action is complete.
What If I Want to Wait?
Most ControlCommand() calls are non-blocking. A few commands explicitly support waiting, and those commands usually include "Wait" in the parameter name. For example, the Scripting control accepts a ScriptStartWait command that waits for the script to finish. These wait-capable commands are uncommon.
If a control does not provide a built-in wait command, you can often monitor variables that the control sets to indicate status. For example, some controls expose a status variable such as $AutoPositionStatus, which is 1 while the action is running and 0 when it finishes. Not every control provides a variable like this, but those that do usually list it on their configuration page. You can also view all project variables using the Variable Watcher.
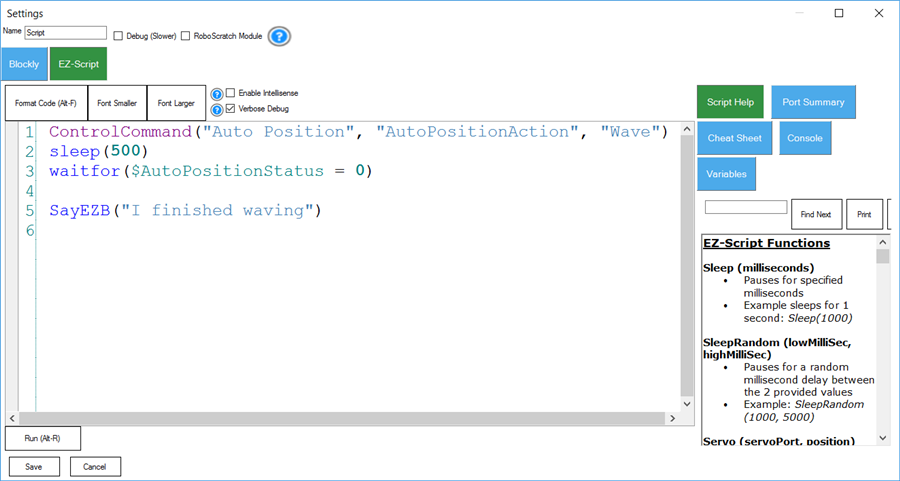
RoboScratch and Blockly include explicit wait commands for common tasks, such as "Wait for Auto Position" or "Wait for Sound." These commands clearly indicate "(Wait)" in their titles. The example below shows how to wait for an Auto Position action to complete before speaking.
controlCommand("Auto Position", "AutoPositionAction", "Wave");
sleep(500);
while (getVar("$AutoPositionStatus"));
Audio.SayEZB("I finished waving");
EZ-Script
Blockly
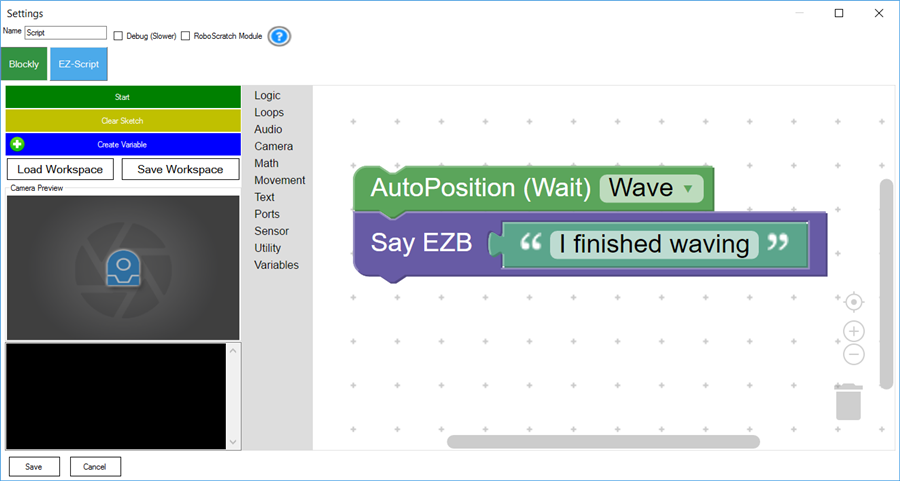
In the example above, the sleep(500) call gives the Auto Position control a brief moment to start the action. The loop that checks getVar("$AutoPositionStatus") keeps running until the status variable changes. When Auto Position finishes, it sets the variable to 0, the loop exits, and the script speaks the confirmation phrase.