
Overlay translucent PNG targets onto a camera stream with loadable templates, attach/detach control, preview and status for visual alignment.
 Source Code
How to add the Target Overlay robot skill
- Load the most recent release of ARC (Get ARC).
- Press the Project tab from the top menu bar in ARC.
- Press Add Robot Skill from the button ribbon bar in ARC.
- Choose the Camera category tab.
- Press the Target Overlay icon to add the robot skill to your project.
Don't have a robot yet?
Follow the Getting Started Guide to build a robot and use the Target Overlay robot skill.
How to use the Target Overlay robot skill
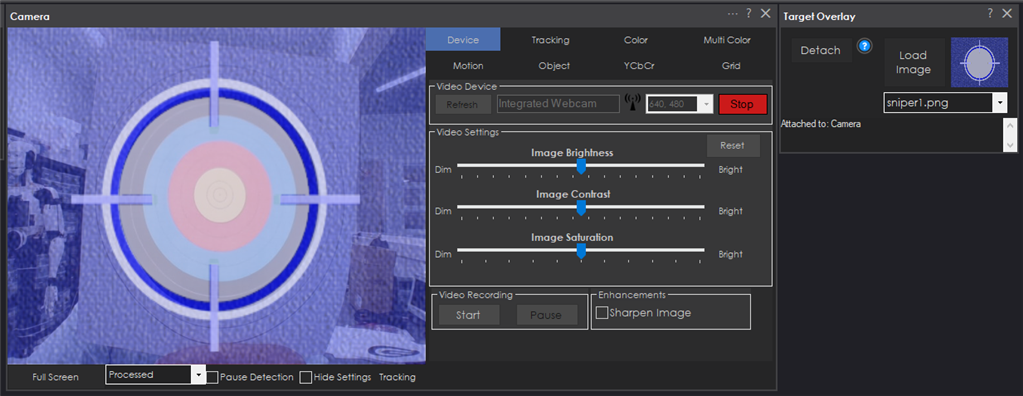
Select one of the included templates, or select your own. The images are translucent PNG files which are overlaid on each frame of the camera stream.
Main Window
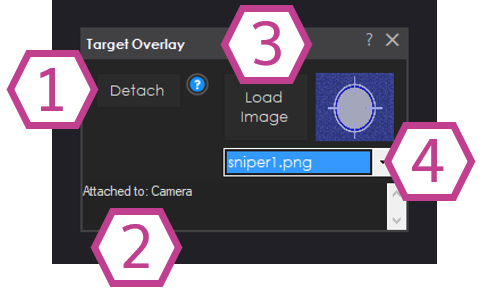
1. Attach/Detach Button This checkbox will add the Source Camera Device video stream on top of the Destination Camera Device video stream.
2. Status Field This field will display the status of the connection to the camera device skill and any errors that occur.
3. Load Image Button This button allows you to load your own custom target image, .PNG is recommended. An image preview window is shown beside it.
4. Image select drop-down This drop-down has many different target overlays to select from.
How To Use the Target Overlay Skill
Add a Camera Device skill (Project -> Add Skill -> Camera -> Camera Device).
Add a Target Overlay skill (Project -> Add Skill -> Camera -> Target Overlay).
In the Target Overlay skill choose a .PNG overlay image. Use the Image selection drop-down or Load a new image.
Press the ATTACH button. This will attach the Target Overlay skill to the camera device skill. You will now see a target overlaid on the camera's video stream.
