EZB UART parser and Serial-TCP bridge to connect EZ-Robot cameras via Teensy USB, enabling ARC camera control and USB-to-serial bridging.
How to add the Serial Toolbox robot skill
- Load the most recent release of ARC (Get ARC).
- Press the Project tab from the top menu bar in ARC.
- Press Add Robot Skill from the button ribbon bar in ARC.
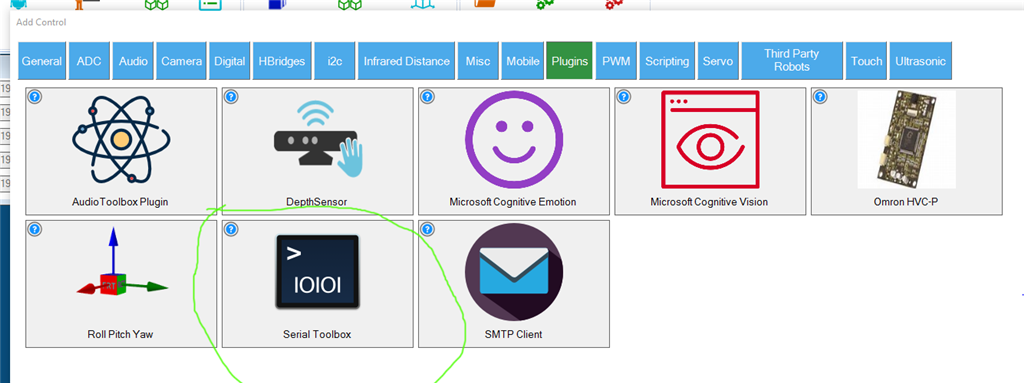
- Choose the Misc category tab.
- Press the Serial Toolbox icon to add the robot skill to your project.
Don't have a robot yet?
Follow the Getting Started Guide to build a robot and use the Serial Toolbox robot skill.
How to use the Serial Toolbox robot skill
Provides two different features: An EZB Uart Serial Parser, SerialTcpBridge (Connect EZ-Robot Camera via USB)
Version 2
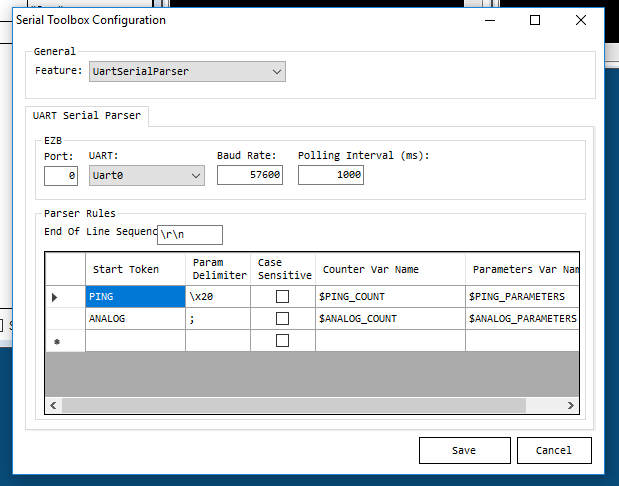
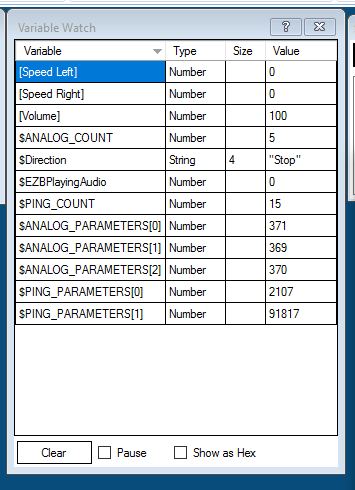
New Feature: EZB Uart Serial Parser
Results:
//TODO: Improve details
This plugin requires:
- Extra hardware
1.1) Teensy 3.2 Micro-controller
https://www.pjrc.com/store/teensy32.html
https://www.robotshop.com/en/teensy-32-usb-microcontroller-development-board.html
1.2) JST 2.0 PH 6-Pin Male Connector
https://www.digikey.com/product-detail/en/jst-sales-america-inc/B6B-PH-K-S(LF)(SN)/455-1708-ND/926615
1.3 ) JST 2.0 PH 6-Pin Female Connector with cable (Optional)
- Extra Knowledge: One time only, needed to program the micro-controller
2.1) Arduino IDE 1.6 or higher
https://www.arduino.cc/en/Main/Software
2.2) Teensy (Micro-Controller) driver & add-on for Arduino IDE
https://www.pjrc.com/teensy/loader_win10.html
- Target Audience
DIY users with hardware experience.
Teensy Setup (One time only)
Firmware code:
void setup() {
  Serial.begin(3333333);

  Serial1.begin(3333333);
  Serial1.attachRts(2);
  Serial1.attachCts(18);
}

void loop() {
  if (Serial1.available() > 0) {
    byte b = Serial1.read();
    Serial.write(b);
  }

  while (Serial.available() > 0)
  {
    byte b = Serial.read();
    Serial1.write(b);
  }
}
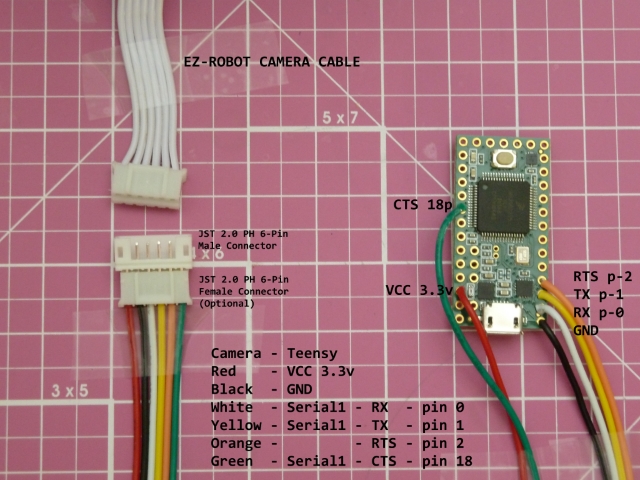
Wiring:
How to use
Download and Install this plugin
Connect Teensy usb port (MicroB) to your Desktop/Mini PC usb port
Start ARC
add the plugin to your project:
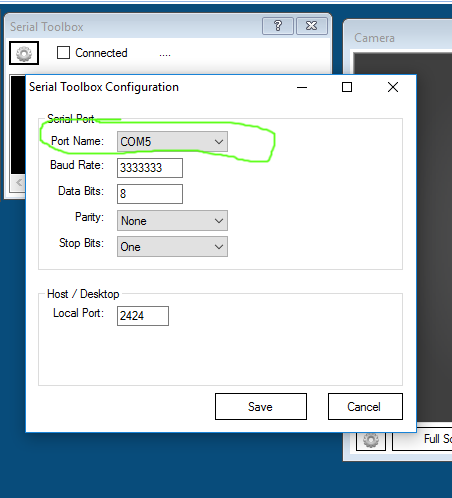
configure the usb serial port (teensy):
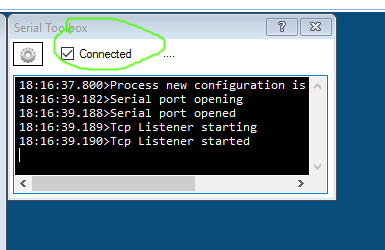
connect/disconnect:
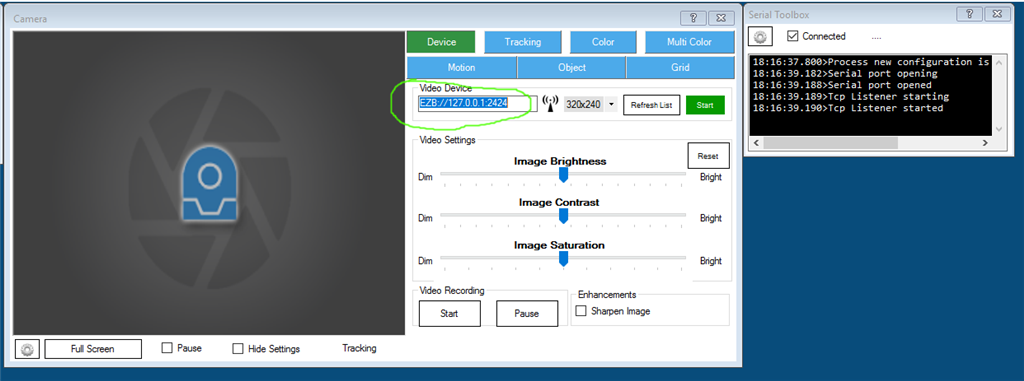
setup the camera url:
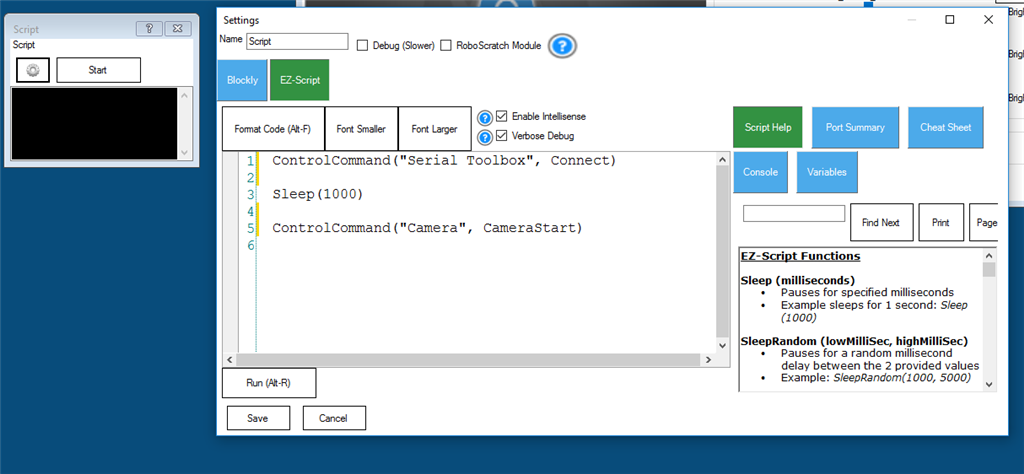
Notes: 2424 is the default TCP Port The url port must be equal to the plugin Configuration's Local port.Ez-Script: connects the usb camera and then starts the camera control.
Disclaimer
The information contained here is for general information purposes only. The information is provided by PTP (Forum Member) and while I try to keep the information up to date and correct, I make no representations or warranties of any kind, express or implied, about the completeness, accuracy, reliability, suitability or availability with respect to the website or the information, products, services, or related graphics contained here for any purpose. Any reliance you place on such information is therefore strictly at your own risk. In no event will we be liable for any loss or damage including without limitation, indirect or consequential loss or damage.


@DJ,
is there any way you could make this plugin work with ARC? Currently ut does not work with ARC.
Thanks in advance.
The camera device supports the cameras over usb com ports already. Why would you need this robot skill?
I want to use the camera port on my ezb4/2 I thought this was the only way to get the ezb camera to work. i did find this link https://synthiam.com/Community/Questions/Usb-To-Serial-Connection-Camera-Option-3975
Will This work while I use usb on my EZB 4/2?
Thanks DJ
You want to use the camera port on the EZ-Robot EZ-B v4/2 with a camera?
Plug the camera connector into the camera port on the EZ-Robot EZ-B v4.
Load the Camera Device robot skill
Select the IP Address of the EZ-B v4
Press the START button
More information on the camera device here: https://synthiam.com/Support/Skills/Camera/Camera-Device?id=16120
I my have not explained myself. I want to use the camera port for a usb connected to my pc. So I don’t have to use wifi. I have a ezb camera in my InMoov’s eye and need it to connect to a USB port too.
Hope this makes sense. Thanks for answering my dumb question.
You want to connect an EZ-B v4 to the PC via USB. This ez-robot manual will help: https://www.ez-robot.com/learn-robotics-serial-usb-connectivity-ezb-smart-robot-controller-and-iotiny.html
I know how to connect a Ezb v 4 to my pc via usb. My question is how can I connect my Ezb camera that was connected to my ezb 4 camera port that I’m now using a usb connected via my pc.
I used to be able to use a usb connected to my ezb camera before the software became ARC. This is why I was hoping you could update the still IOIOI.
or can I use the setup the will was using usb to serial.
thank you
Thank you for updating to v3. You the man DJ!