1. Make A DIY Robot!
Plan Your Robot on Paper
Before assembling hardware or writing code, sketch your robot and write down its goals. Clear drawings and concise objectives help you visualize component placement, plan wiring and mounting, and identify potential mechanical or sensor conflicts early. Paper plans also create a record you can revisit as the project evolves — they are useful when troubleshooting, iterating on the design, or sharing progress with others.
During the following steps we provide hardware and software options that will help your robot achieve its goals, whether the project is a serious build or an experimental, fun prototype. Spend a little time now to imagine the final robot and note the key functions you want it to perform.
Tip: If you have questions at any point, ask in our friendly community for advice, feedback, or troubleshooting help.

Document the Physical Appearance and Layout
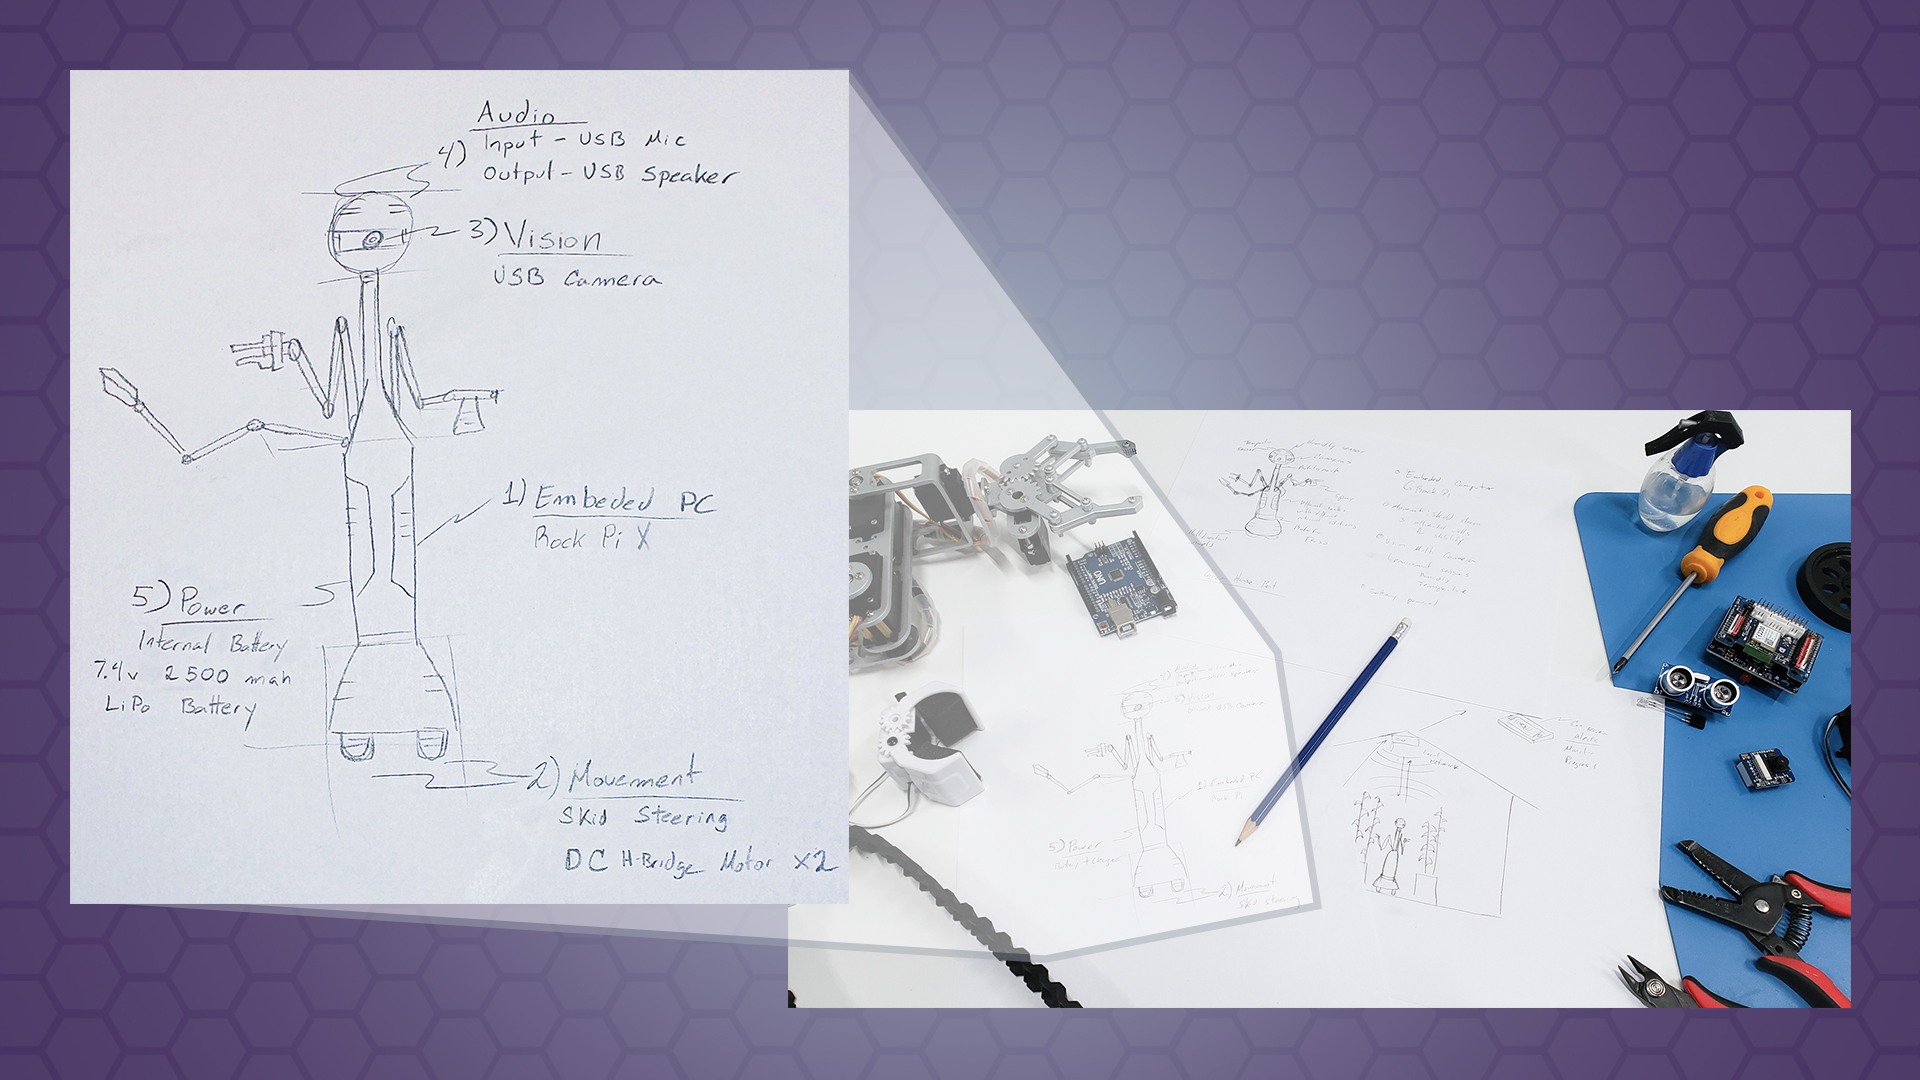
Sketch the robot’s exterior and internal layout. Mark where you will mount sensors, motors, controllers, batteries, and wiring harnesses. A clear diagram helps you estimate space requirements, avoid component interference, and plan cable routing. When you share these sketches on forums, contributors can give more precise suggestions when they clearly see your intended layout.
Below is an example sketch that illustrates component placement and physical arrangement.
Break the Robot Down into Micro-Goals
Complex behaviors become manageable when you break them into smaller, testable tasks. List each discrete capability your robot needs to perform the overall feature, then refine those into sub-tasks that a robot can follow precisely. This makes programming, testing, and debugging much easier.
For example, consider the goal "retrieve a peanut butter jar from a cupboard." You would decompose it like this:
- Know where the peanut butter jar is (identify via label, visual marker, or known coordinates).
- Plan and move to the jar’s approximate location.
- Detect whether a cupboard door obstructs access; if so, open the door.
- Visually locate the jar on the shelf (confirm it is visible and reachable).
- Clear any obstructing items and grasp the jar securely.
- Determine the work area for placing the jar (a table or counter coordinate).
- Navigate to the work area while avoiding obstacles.
- Place the jar at the specified location and release grip safely.
- Perform any cleanup or return motions as required.
The number and complexity of micro-goals will depend on your robot’s capabilities and the environment. Write each desired feature down and continue breaking it into smaller steps. Remember that robots do not possess the general world knowledge humans take for granted, so explicitly define any assumptions or environmental constraints the robot requires to succeed.