Record Servo Positions To Auto Position Frames
In this tutorial, we'll demonstrate how to create Auto Position robot skill animations by recording the servos' positions after you manually move them. The Auto Position robot skills create animations and gait for walking. While this isn't a manual for the auto position robot skill, we'll be using the Auto Position robot skill in this tutorial.
Prerequisite
-
Servo Manual
Not all servos are alike, so we have written a fantastic manual explaining the differences. It is highly recommended that the servo manual be read before building a robot.
Introduction To Servo Motors
-
Auto Position
It's a good idea to read the Auto Position Robot Skill manual to familiarize yourself with how it works. This ensures you know how to create and link Frames into Actions. You should also know the two types of Auto Position Robot Skills to ensure you use the correct one. One is a Movement Panel (walking forward, etc.), and the other is for simple animations complimenting an existing movement panel. If this doesn't sound familiar, the auto position manual will teach you what those terms mean.
Auto Position Movement Panel Manual Auto Position Manual
*Note: This tutorial will require adding an Auto Position robot skill and configuring the servos. Use the Auto Position manual to accomplish those steps.
Compatible Servos
It is important to note that not all servos are compatible with the ability to transmit their position. This is because the most popular type of servo is a PWM Hobby Servo, and they only receive a position command but do not transmit their position. The type of servos that will transmit their position are Serial Smart Servos, such as Dynamixel, LewanSoul, LynxMotion, etc. This is documented in the Introduction To Servo Motors, which is mentioned as a pre-requisite above.
-
PWM Servos
The PWM Hobby Servos can be modified to transmit their position. ARC can decipher the servo position using a compatible robot skill. The manual for the robot skills demonstrates how to modify the PWM servo for this use case.
PWM Servo Feedback (ADC) PWM Servo Feedback (i2c)
-
Serial Smart Servos
As documented in the Introduction To Servo Motors mentioned in the pre-requisite section of this tutorial, smart servo motors can transmit their position. This is because these types of servos use a bi-directional communication protocol. Here are links to the most popular ARC-supported smart servo motors.
Dynamixel (most popular) FeeTech RS485 FeeTech Serial Bus Kondo KRS ICS LewanSoul Lynx Motion
Tutorial Steps
-
Configure Servos
The first step of this tutorial is to verify that you already have an ARC project with servos that move. Also, if the servos are smart servos, the servos are connected correctly for bi-directional communication. Or, if they're PWM Hobby Servos, the selected PWM Servo robot skill is selected.
-
Add Auto Position
Using the information from the pre-requisite above, add the Auto Position robot skill that best suits your needs.
-
Add New Frame
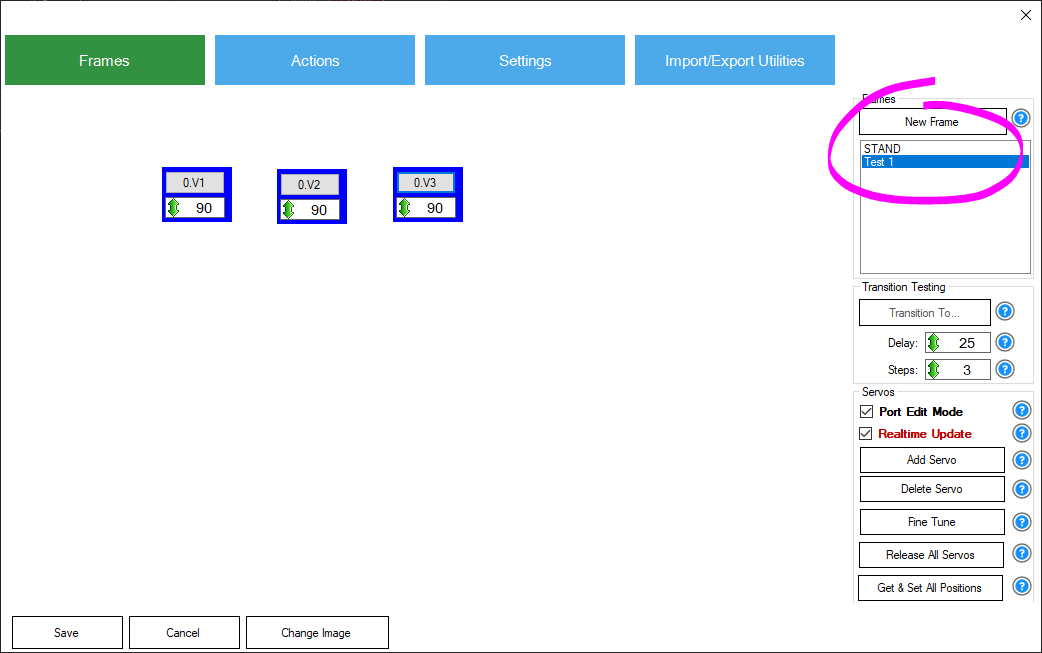
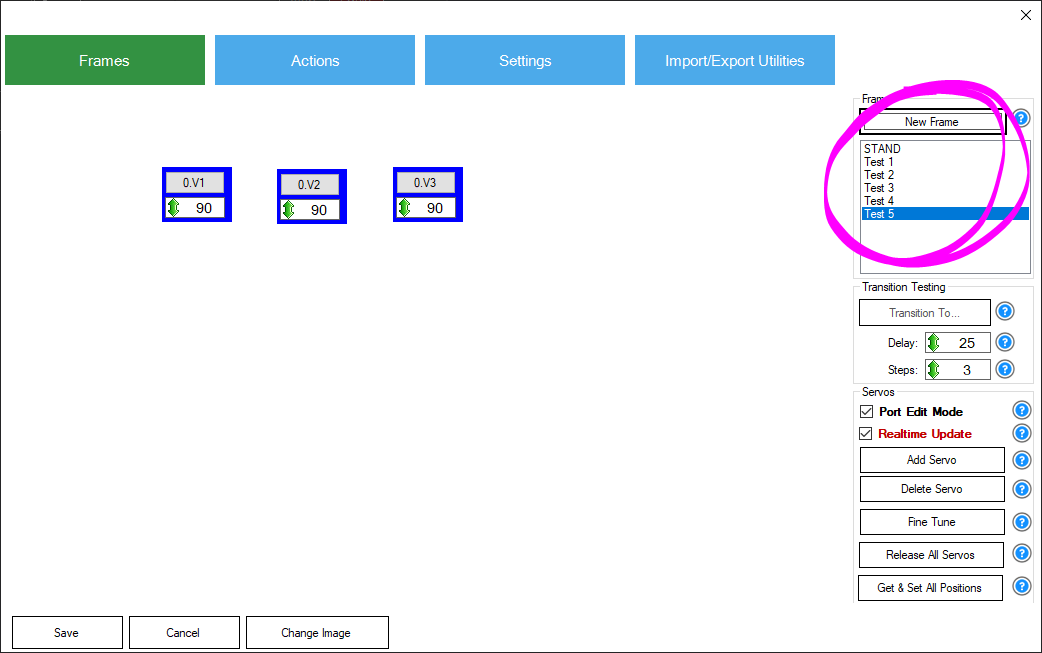
1) Press the CONFIGURE button on the Auto Position to load the configuration window.
2) Press the NEW FRAME button and enter Test 1 as the new frame name
3) Select the Test 1 new frame that you just added
-
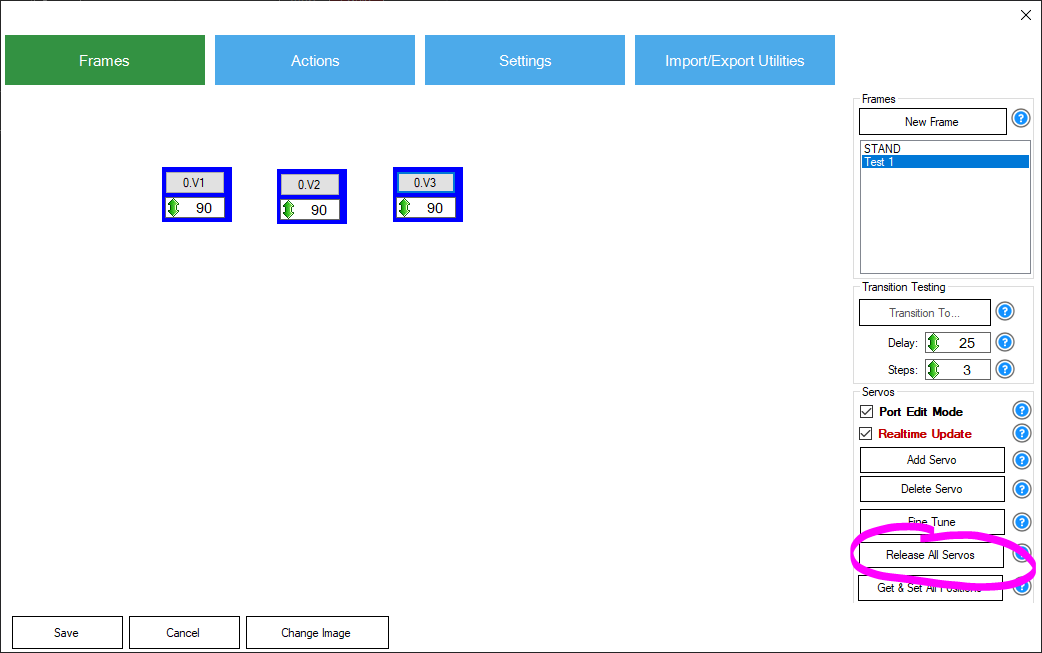
Release All Servos
Press the Release All Servos button to have the servos stop holding their position. This is required so that you can manually move the servos into position. Without doing this, the servos will hold their position, and it will be impossible to move them by hand.
-
Move Servo By Hand
Move the servos into a position by hand.
-
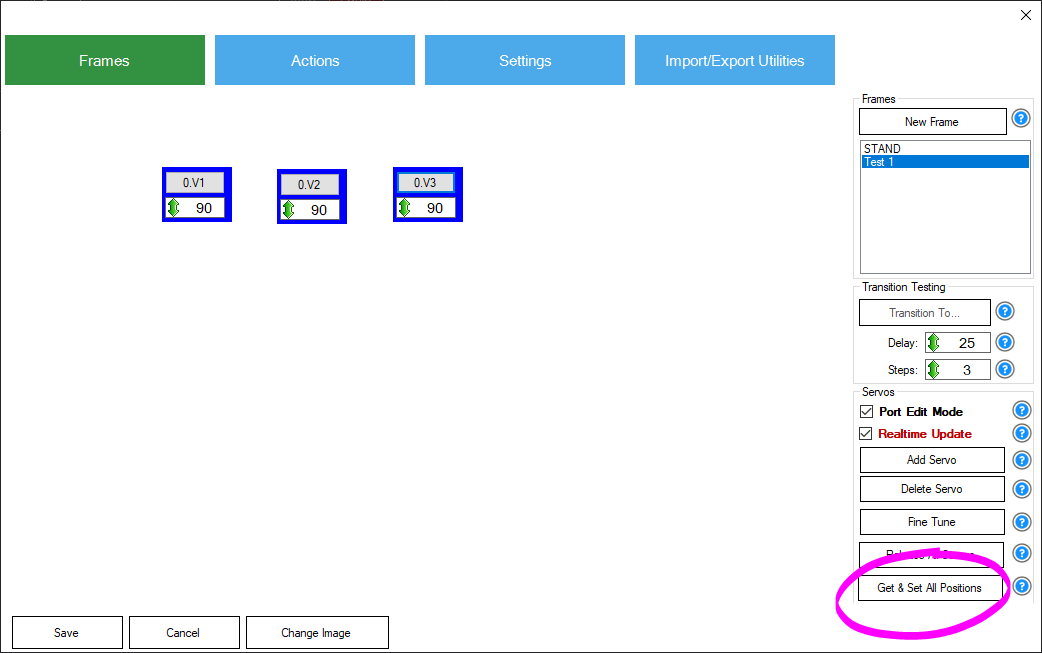
Get & Set All Positions
Press the "Get & Set All Positions" button. This will retrieve all servo positions and set their values for the selected frame.
-
Add More Frames
Continue to repeat the previous steps by adding multiple frames with the servos in each position.
-
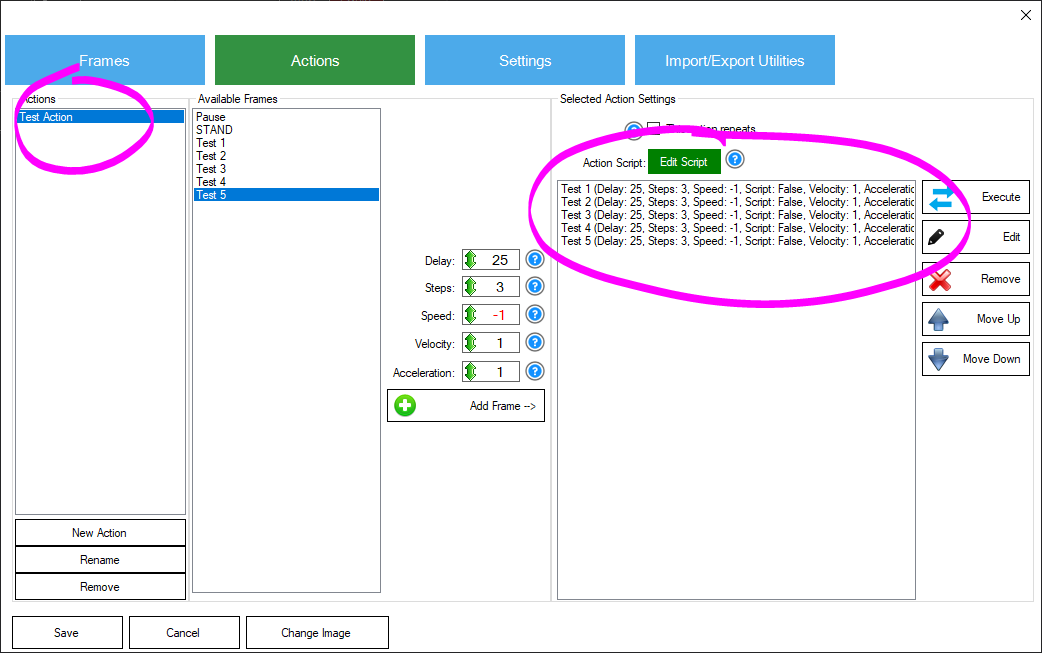
Add Frames To An Action
Now that you have created all the frames, you can play them back in any order by adding them to a new Action.