
Roboscratch
Designed for learning the basics of programming, RoboScratch introduces a programming interface exclusive to ARC (Windows PC and Mobile). With RoboScratch, function blocks are added to the workspace to create a sketch. Specific parameters of each block, such as wait for the camera to see an object, wait for speech, or execute a movement action. Link blocks and instruct your robot to perform behaviors and complete tasks.
Show Me RoboScratch
What Is RoboScratch?
RoboScratch teaches linear programming without the complexities of loops and conditions. Even though ARC includes Blockly, we recommend RoboScratch for beginners to teach logical execution of commands. Programming is a similar to a food recipe, in that instructions are to be completed in order. RoboScratch provides a fun and engaging way of identifying how to organize instructions to complete tasks. Similar to Blockly, RoboScratch generates real usable code with friendly comments. The initiative of scratch-like development environments is meant to teach programming and order of instructions. The RoboScratch approach provides the ability to learn how to program quickly by viewing the auto-generated code. Think of RoboScratch as training wheels for programming!
Also, the user interface is a little different than traditional block programming, by placing instructions which are connected with lines demonstrating the execution path. You may recognize this approach similar to creating flow charts and process outlines. As you can see, the RoboScratch approach provides very strong educational value.
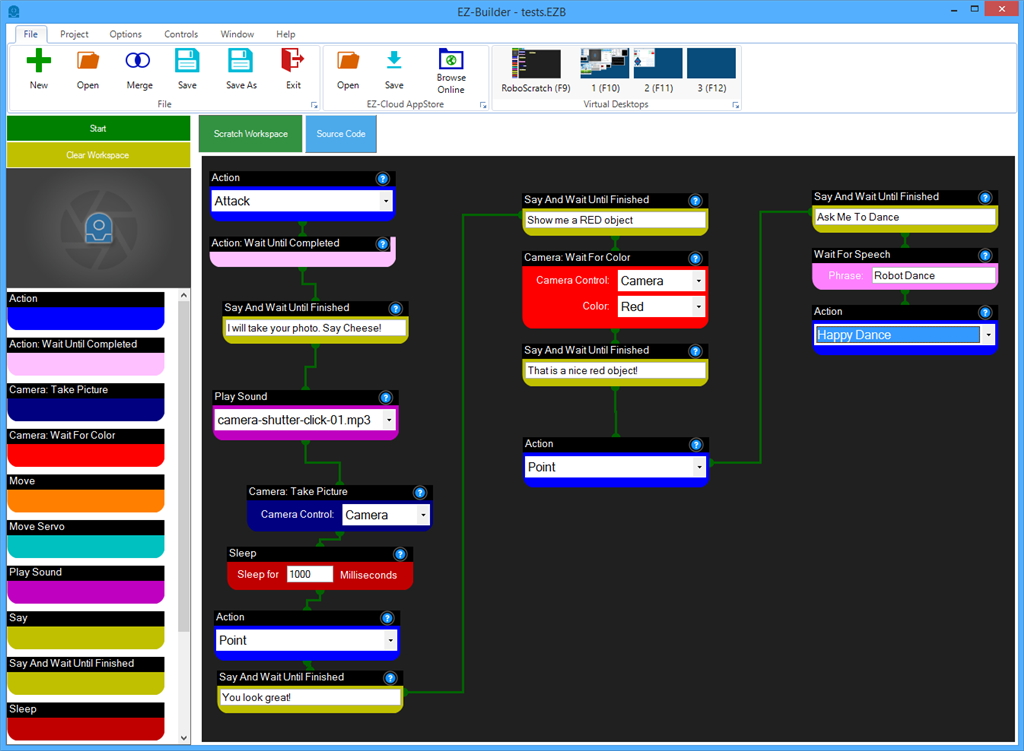
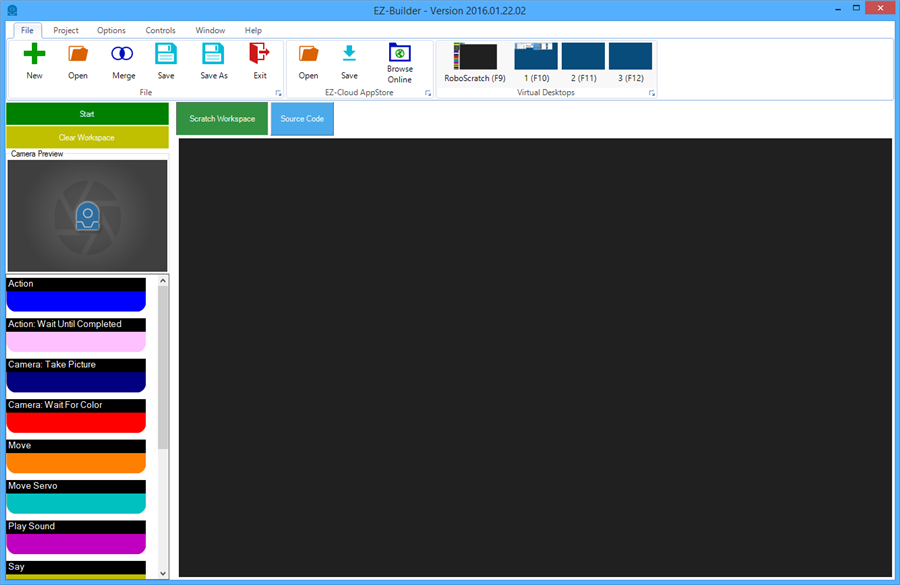
The Work Space
The workspace is where you create a sketch. Common functions and methods are displayed as element blocks. The element blocks can be added to the work space. Each element block includes attributes. The element blocks are connected with lines, which outlines the "path of execution". Starting from the first element, the program will executed each consecutive element and stop at the last element.
Elements
The elements available in RoboScratch (camera tracking, actions, sound, etc.) are only available when respective controls have been added to the project. For example, if you load a project that does not have a Camera Control, RoboScratch camera related elements will not appear. To add camera related elements, simply add and configure a Camera Control to the project. You can learn more about ARC Controls by clicking HERE.
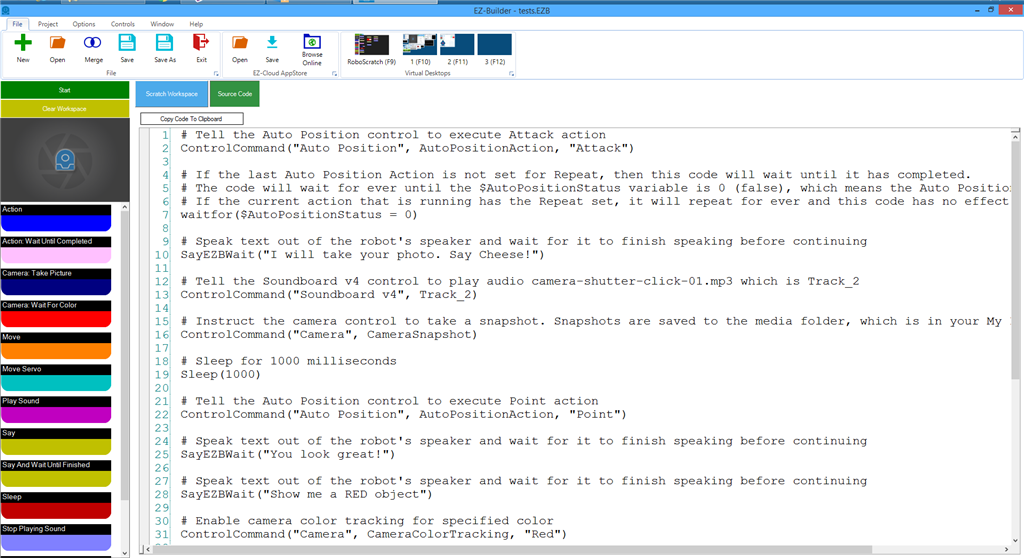
The Code
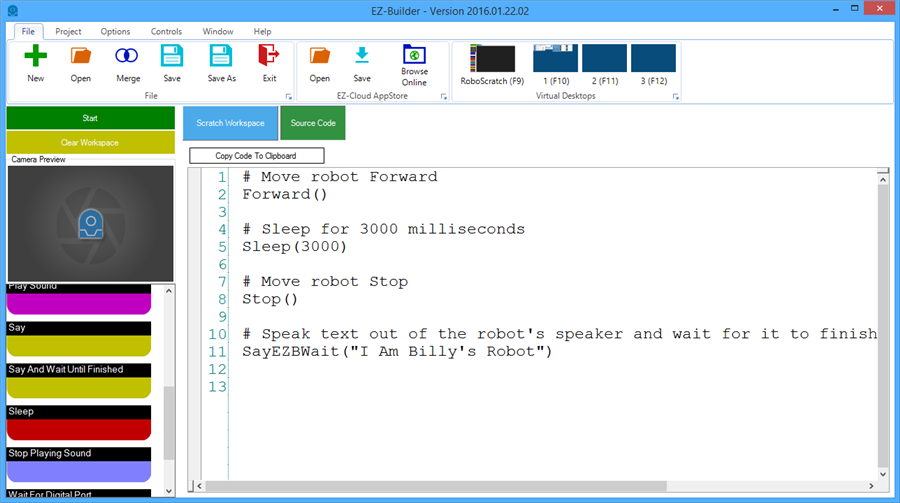
The magic happens - pressing the Code tab will display the auto-generated code from the RoboScratch UI element blocks. The generated code also includes friendly and helpful comments which explain each line. Below is the auto-generated code from the above screenshot. This code display is read-only.
Get Started
Step 1
Load the default example project for your robot from either the top menu's File->Open option, or the EZ-Cloud->Open. Remember, the default example project is named after your robot, which will be JD, or Six, Roli, etc.. This was covered in the tutorials while assembling your robot. If your robot requires a servo profile, ensure you have loaded the one which was created during the assembly tutorials.
*Note: The elements available in RoboScratch (camera tracking, actions, sound, etc.) are only available when respective controls have been added to the project. This means, if you load a project that does not have a Camera Control, any RoboScratch camera related elements will not appear. You can learn more about ARC Controls by clicking HERE.
Step 2
Establish a connection to your robot. This was also covered in the assembly tutorials. Connect to the robot's WiFi network, press the Connect button in ARC connection control, and the Start button on the Camera Control to begin streaming the video.
Step 3
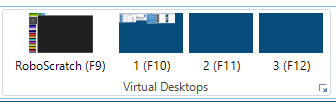
Press the RoboScratch window button to load the RoboScratch designer view.
Step 4
Press the RoboScratch window button to load the RoboScratch designer view. As you can see, the work space will be empty so you can begin right away!
Step 5
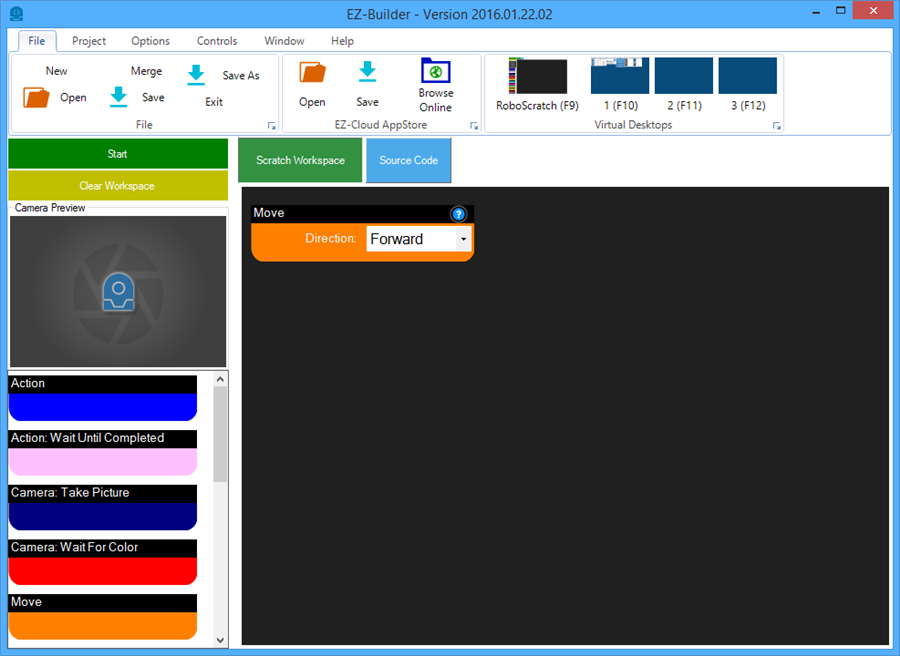
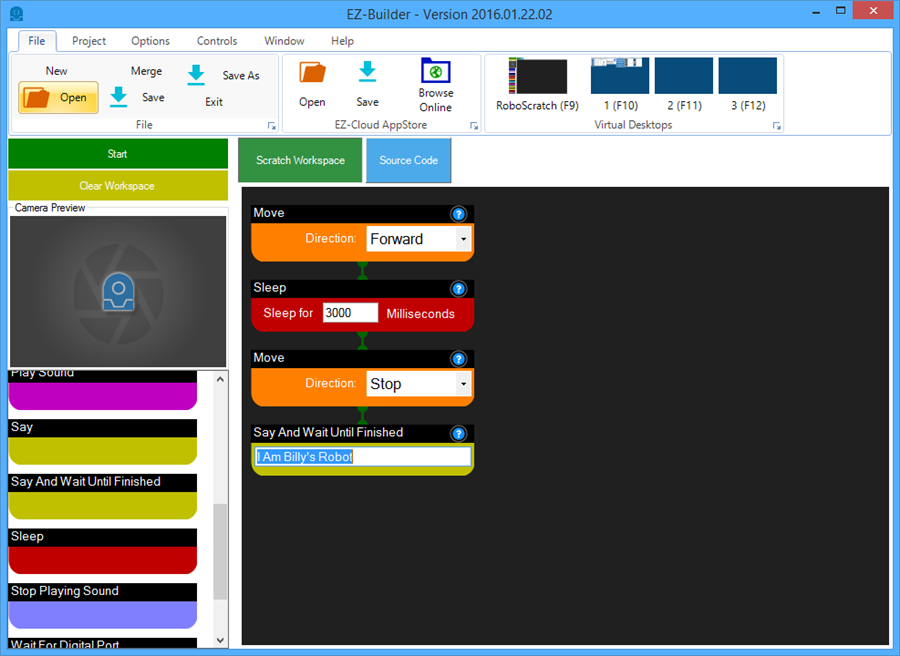
We will start by demonstrating how to make the robot move forward for 3 seconds, stop, and speak a phrase.
Step 6
Locate and press the Move element from the side menu. This will add the Move Element to the work space. Select FORWARD from the Move Element's list of movement directions in the drop down.
Optionally, you can hover the cursor over the blue question mark of an element in the work space to read additional details.
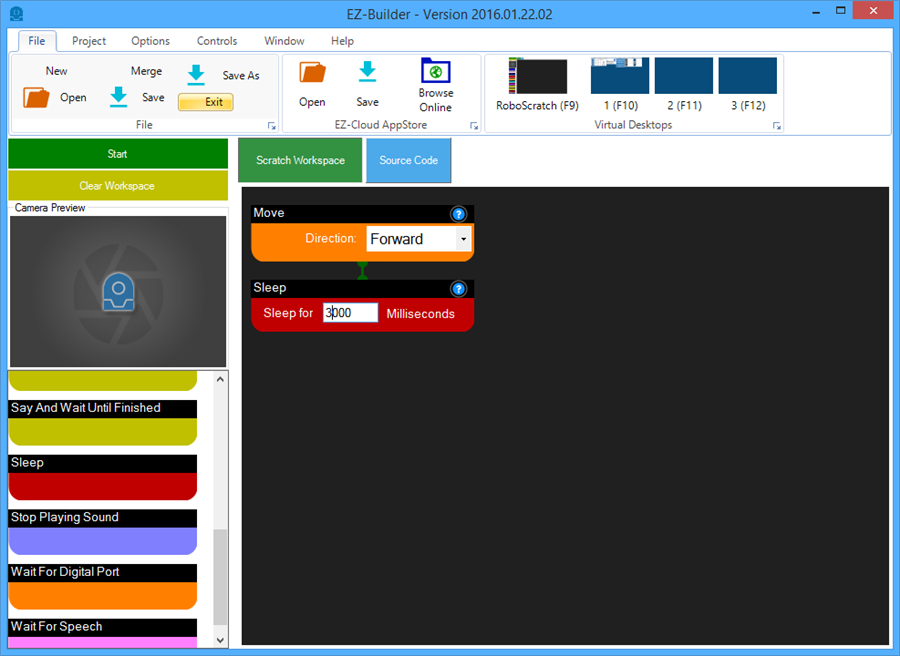
Step 7
Locate and add the Sleep element from the side menu. Enter the value of 3000 milliseconds, which is 3 seconds. Computers work very fast in the speed of milliseconds. Also, the term Sleep is used in computer programming, not delay as you may expect. The two have different meanings, which can be identified by reading the help by hovering your cursor over the blue question mark on the Sleep element.
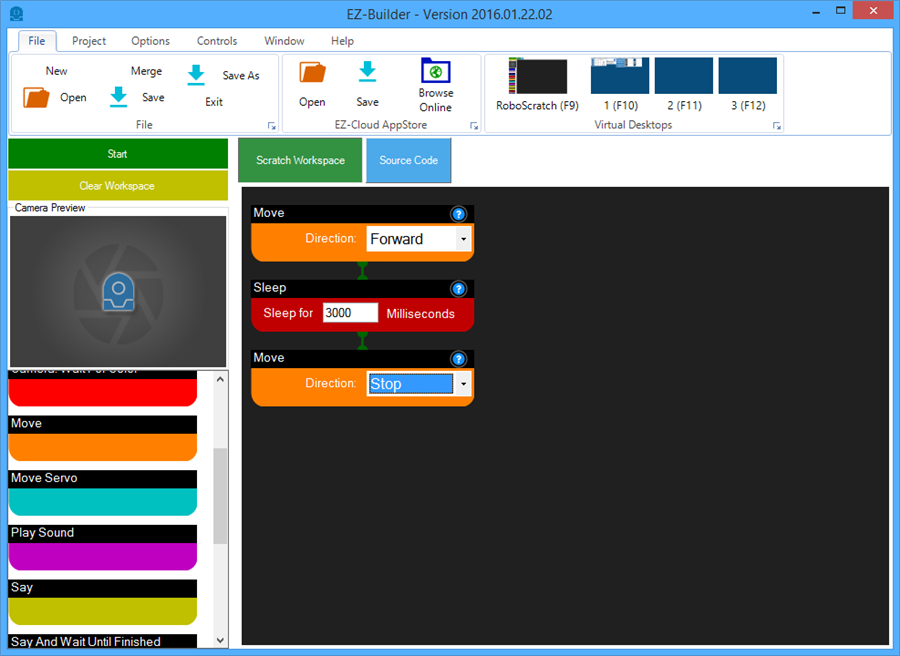
Step 8
Locate and add the Move element again, and this time select STOP.
Step 9
Now we will make the robot speak by adding the Say And Wait Until Finished element. For fun, add your own custom text into the field to have your robot speak your name!
Step 10
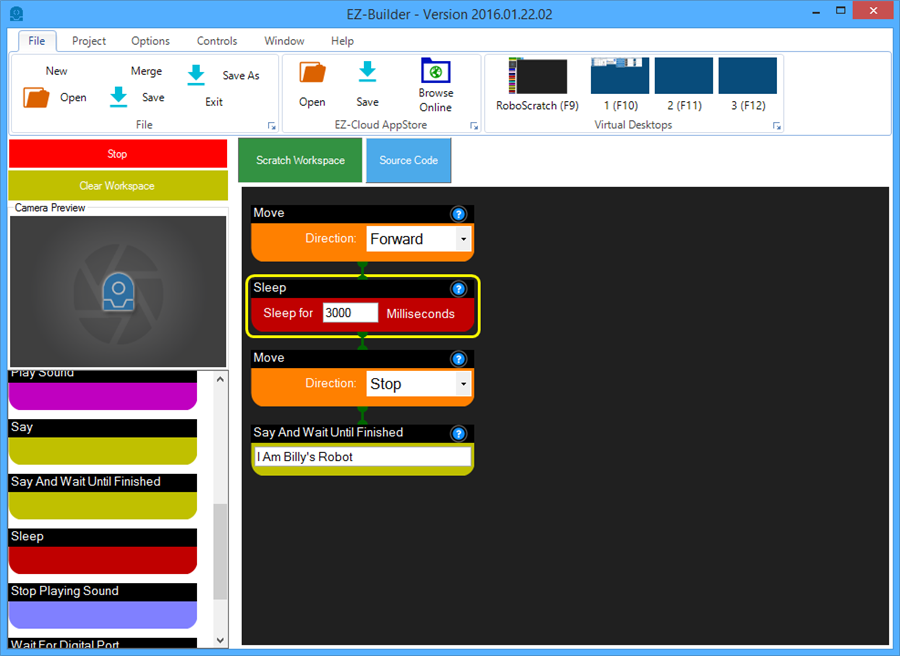
Now press the START button in the top left and the robot will begin executing the command of each element. Notice how the RoboScratch elements will highlight in Yellow as they are being executed.
View The Code
The goal of RoboScratch is to teach you how to program. This is done by converting your RoboScratch elements into real code! The code can be viewed by pressing the Source Code tab.
Finished!
You have now mastered RoboScratch! Start experimenting by creating your own programs by adding elements. Hover your mouse cursor over the blue question marks to find out what an element does.