
MPU9150 ARC control reads compass, gyro, accelerometer and temperature via I2C, initializes and sets EZ-Script variables on demand.
 Hardware Info
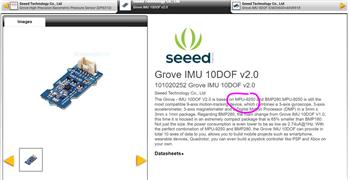
How to add the MPU9150 Accelerometer, Gyro, Temperature, Compass robot skill
- Load the most recent release of ARC (Get ARC).
- Press the Project tab from the top menu bar in ARC.
- Press Add Robot Skill from the button ribbon bar in ARC.
- Choose the I2C category tab.
- Press the MPU9150 Accelerometer, Gyro, Temperature, Compass icon to add the robot skill to your project.
Don't have a robot yet?
Follow the Getting Started Guide to build a robot and use the MPU9150 Accelerometer, Gyro, Temperature, Compass robot skill.
How to use the MPU9150 Accelerometer, Gyro, Temperature, Compass robot skill
The MPU9150 EZ-Bit is an all-in-one sensor (often called an IMU) that can measure:
- Accelerometer (movement/acceleration on X, Y, Z)
- Gyro (rotation rate on X, Y, Z)
- Magnetometer / Compass (magnetic heading)
- Temperature (sensor temperature)
This Synthiam ARC skill reads the MPU9150 using the I2C connection on the EZ-B. When you request a reading, the skill stores the results into EZ-Script Variables (so you can use them in your scripts).
Init before the sensor will return data. Also, if the MPU9150 is not connected and you try to use it,
the EZ-B v4 may lock up. Always confirm wiring and connection first.
ControlCommand() with RunOnce. Each time you call RunOnce, the skill reads the sensor one time and updates the variables.
Before You Start (Beginner Checklist)
- Add the MPU9150 skill/control to your ARC project.
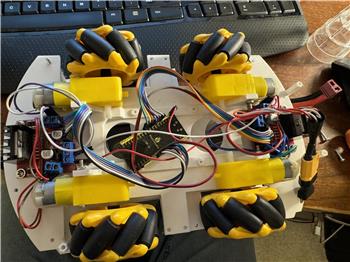
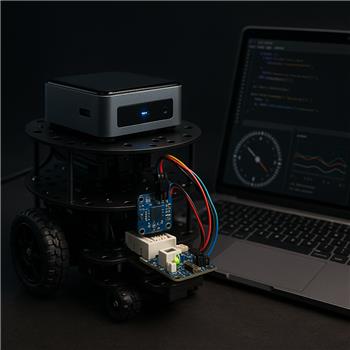
- Connect the MPU9150 EZ-Bit to the EZ-B’s I2C port correctly (power + I2C lines).
- Make sure the sensor is powered and firmly connected before pressing Connect in ARC.
- Open the MPU9150 skill and click Config to see which variables it will update (names may vary depending on the skill version/settings).
- Optional but helpful: open the Variable Watcher to watch values change in real time.
Example: Read the Sensor Repeatedly (Every 100ms)
The script below initializes the MPU9150 once, then requests a new reading every 100 milliseconds. After each reading, the MPU9150 skill updates its EZ-Script variables. You can then use those variables in your own logic (for example: detect movement, check heading, etc.).
ControlCommand("MPU9150", Init)

:loop

ControlCommand("MPU9150", RunOnce)

Sleep(100)

Goto(loop)
- The control name is exactly
MPU9150(or change the script to match your control’s name in ARC). - You ran
Initonce before callingRunOnce. - Your I2C wiring and power are correct.
- You are viewing the correct variables in Variable Watcher (use the skill’s Config button to confirm variable names).
Calibration (Compass / Magnetometer)
If the compass heading looks incorrect (for example, it jumps around, drifts, or points the wrong direction), the magnetometer may need calibration. Calibration helps the sensor “learn” the magnetic interference around it (motors, metal frames, magnets, screws, battery wires, etc.).
A common calibration method is moving the robot (or the sensor module) in a figure-8 pattern in the air, similar to how smartphones ask you to calibrate. This video shows the same idea on a phone (the motion concept is what matters): Calibration demonstration video.
ControlCommand("MPU9150", RunOnce) during calibration.
In other words, do not poll the sensor while you are calibrating it. Pause/stop your loop script, calibrate, then start the script again.
How It Works (Optional Reading)
Want to learn what an IMU is and how accelerometers/gyros/magnetometers work together? Read this guide: https://www.starlino.com/imu_guide.html.
Video
Related Questions
MPU9250 Accelerometer, Gyro, Temperature, Compass Upgrade...
Connect Wiring For Iotiny To Arduino
MPU9150 Polling Stalls On Turtlebot3

Upgrade to ARC Pro
Unleash your robot's full potential with the cutting-edge features and intuitive programming offered by Synthiam ARC Pro.