

Animate servos to simulate jaw/mouth with ARC text-to-speech; configurable vowel/consonant timing, start sync, multi-servo control, pause/stop.
How to add the Talk Servo V2 robot skill
- Load the most recent release of ARC (Get ARC).
- Press the Project tab from the top menu bar in ARC.
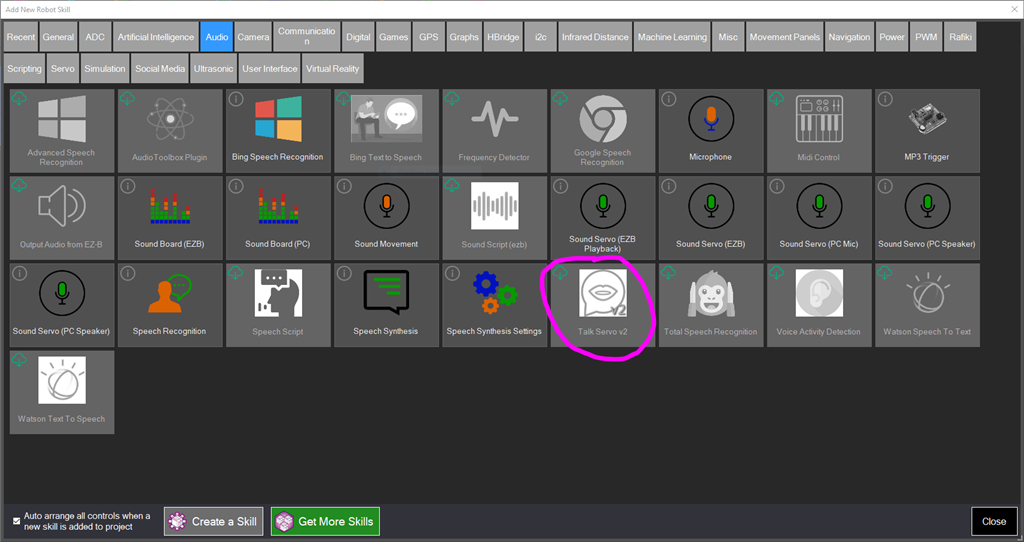
- Press Add Robot Skill from the button ribbon bar in ARC.
- Choose the Audio category tab.
- Press the Talk Servo V2 icon to add the robot skill to your project.
Don't have a robot yet?
Follow the Getting Started Guide to build a robot and use the Talk Servo V2 robot skill.
How to use the Talk Servo V2 robot skill
This skill will bind to the Text-to-speech engine and move servos to simulate jaw movement when speaking without writing code. This skill will move the specified servos to simulate a mouth movement whenever a ARC text-to-speech command is executed (i.e., Say, SayEZB, SayWait, SayEZBWait). If your robot has servos connected to simulate a mouth, this skill will move those servos while speaking.
If the robot skill that is speaking is not using the built-in Say() commands (such as the Azure Text To Speech), you can use the ControlCommand() "Speak," which simulates the mouth servos with the first parameter.
This skill has parameters to configure for the voice and voice settings selection. Every voice and different voice settings (i.e., speaking speed) will require custom settings. The settings are delayed for each type of audio. For example, there are delay specifications for Constants and Vowels. The mouth is closed when a Constant is detected and opened when a vowel is detected. The mouth is again closed at the end of a word or sentence. The delays for each setting can be specified to tune your effect.
Main Window
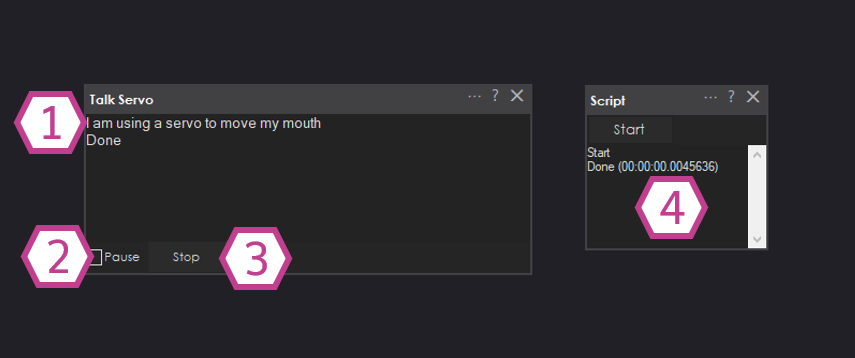
1. Text Display Displays the text sent by a script to activate the servo movement.
2. Pause Checkbox When checked, the talk servo skill will be paused and won't execute servo commands until unchecked.
3. Stop Button This button will stop the servo movement at any time.
4. Script A script must be used to activate the Talk servo skill. Use commands like Say, SayEZB, SayWait, or SayEZBWait to trigger the servo movement.
Settings

1. Title Field This field contains the title of the Talk servo skill. You can change it if you'd like.
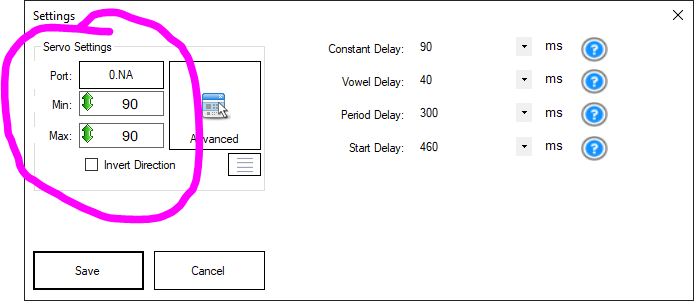
2. servo Settings This section lets you set up servo movement parameters such as servo port, board index, servo configuration, max/min degree limitations, multiple servo control, and inverted direction.
3. Constant Delay Drop-down The talk servo will go to the minimum servo value for each consonant in the text being executed by this skill. The value in this drop-down determines how long the servo will stay in that position. The range is 10-1995 milliseconds. The default is 90 ms.
4. Vowel Delay Drop-down For each vowel in the text this skill executes, the talk servo will go to the maximum servo value. The value in this drop-down determines how long the servo will stay in that position. The range is 10-1995 milliseconds. The default is 40 ms.
5. Period Delay Drop-down The talk servo will go to the minimum servo value for each period or coma in the text being executed by this skill. The value in this drop-down determines how long the servo will stay in that position. The range is 10-1995 milliseconds. The default is 300 ms.
6. Start Delay Drop-down The text-to-speech engine and audio buffer are slightly delayed before the audio begins to play. Use this drop-down to adjust the delay before the Talk servo movement begins. Use this delay to sync up the servo movements with the audio. The range is 10-1995 milliseconds. The default is 460 ms.
Control Commands
Several ControlCommand() can be used to interact with the talk servo v2 robot skill.PauseOn Check the PAUSE checkbox so the talk servo skill no longer activates when speech is set. Example: ControlCommand("Talk servo v2", "PauseOn");
PauseOff Uncheck the PAUSE checkbox so the talk servo skill will begin speaking. Example: ControlCommand("Talk servo v2", "PauseOff");
PauseToggle Toggle the PAUSE checkbox status. Example: ControlCommand("Talk servo v2", "PauseToggle");
Speak Speak the text that is specified as the first parameter. This can be used to instruct the skill to begin animating the text. Example: ControlCommand("Talk servo v2", "Speak", "Some text to be speaking");
Stop Stop speaking the current animation. Example: ControlCommand("Talk servo v2", "Stop");
How to use Talk Servo
This short tutorial will demonstrate how the Talk servo works when the robot is instructed to speak. Any control that uses the text-to-speech engine will cause the Talk servo robot skill to move the servo. This tutorial will use Blockly to have the robot speak and move the servo.Attach a servo to the EZB controller on port D0
Add this Talk servo skill to your ARC project (Project -> Add Skill -> Audio -> Talk Servo).
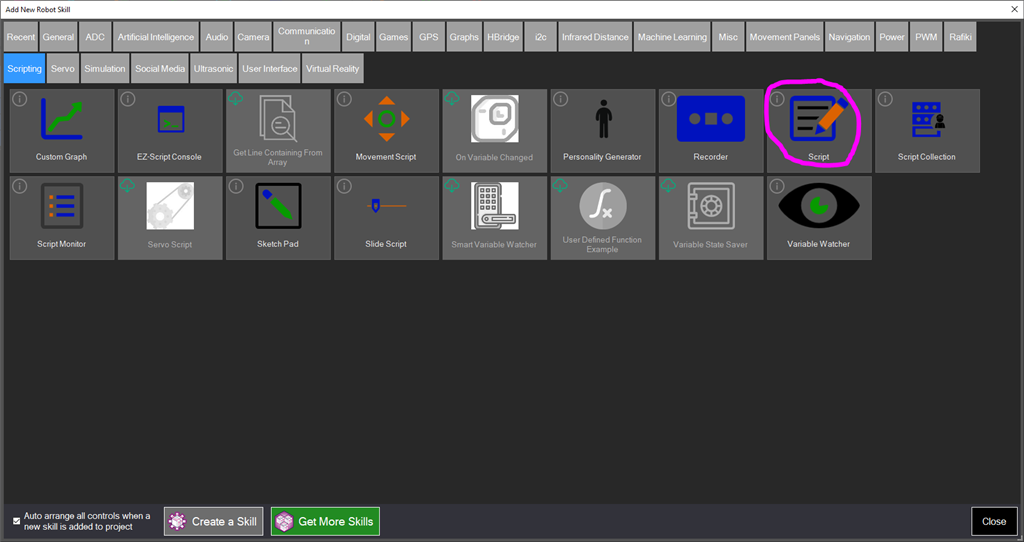
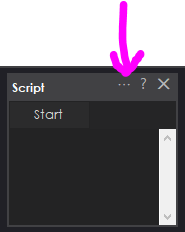
Add a Script skill to your ARC project (Project -> Add Skill -> Scripting -> Script).
Press the config button on the Talk servo robot skill

The Talk servo config menu will display. Select the port for the servo. Also, specify the minimum and maximum positions for that servo. Press SAVE to save these configuration settings.
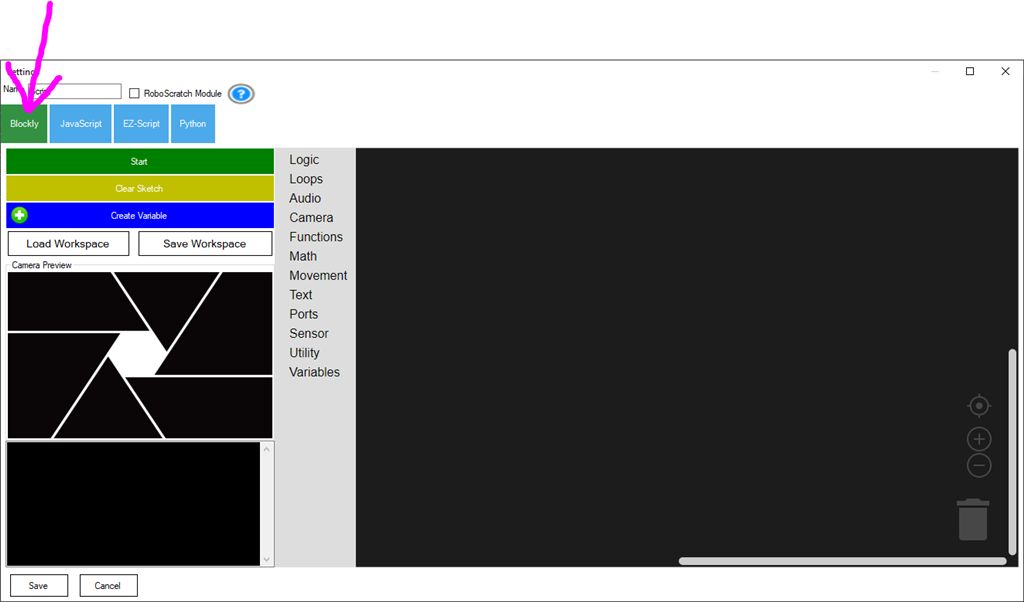
Press the Config button on the Script robot skill.
Switch to the Blockly tab
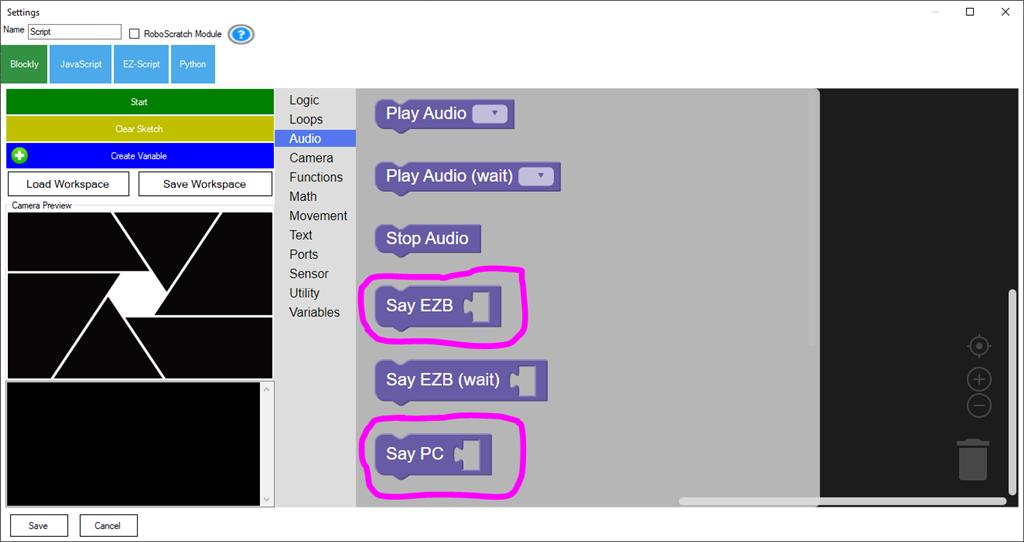
Expand the AUDIO section. Select one of the two blocks for having the robot speak. The Say EZB block will speak out of the EZB speaker (if supported). The Say PC block will speak out of the PC speaker.
Expand the TEXT section. Drag the text string and fit it into the Say block.
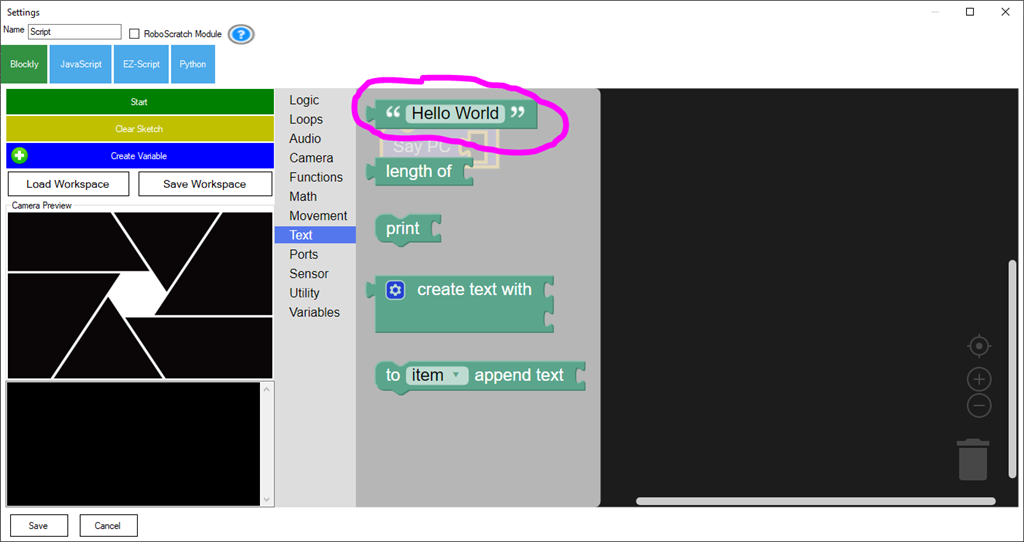
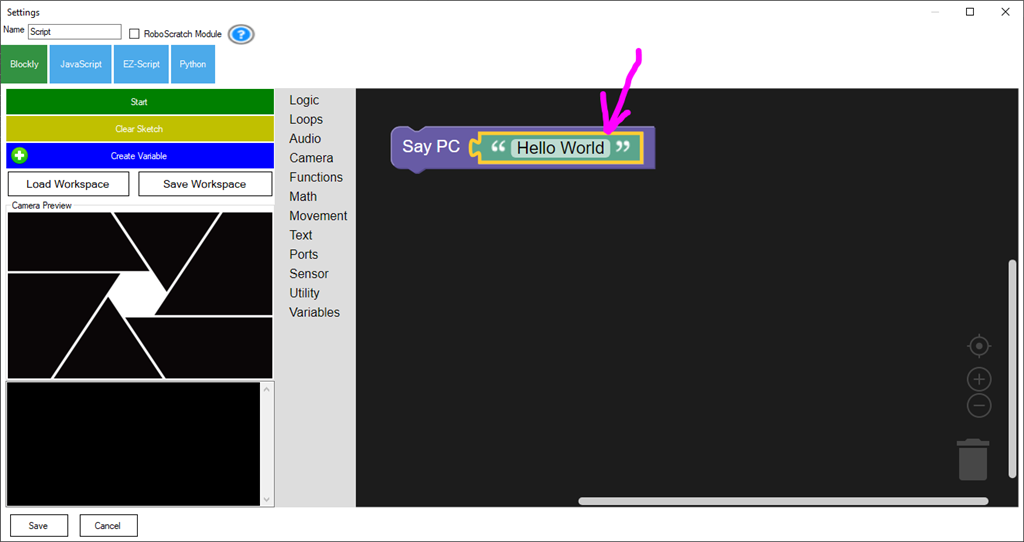
Edit the string to some text that you wish the robot to speak.
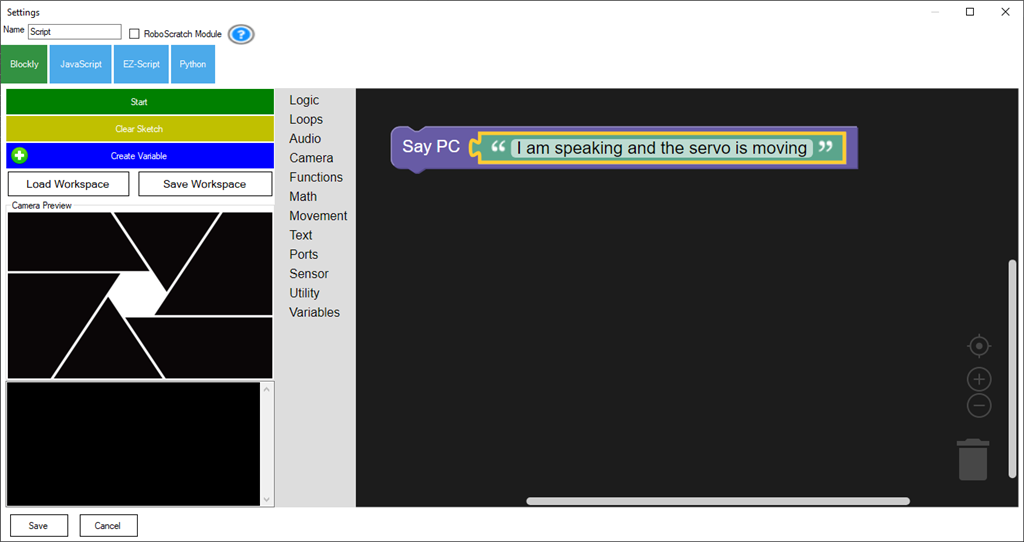
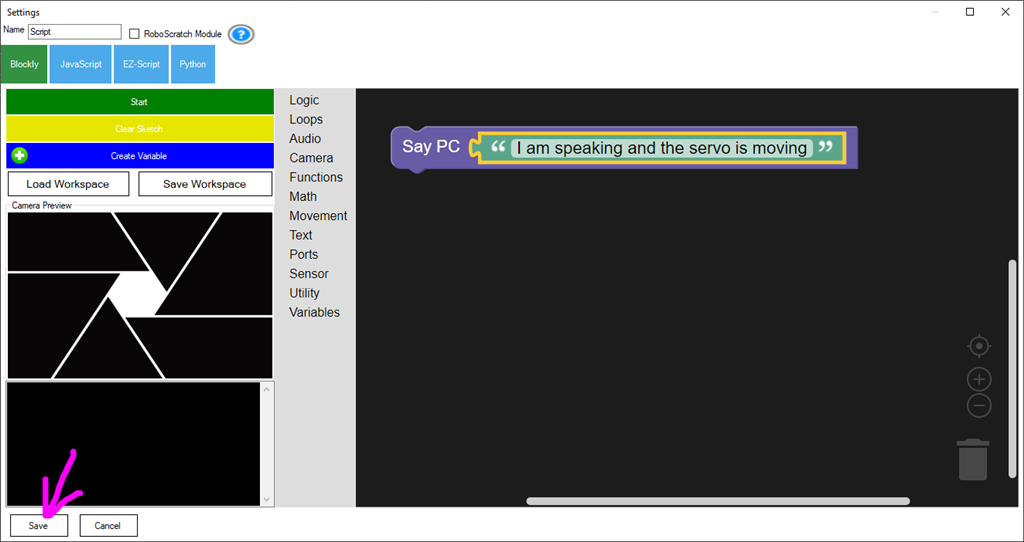
Save the script
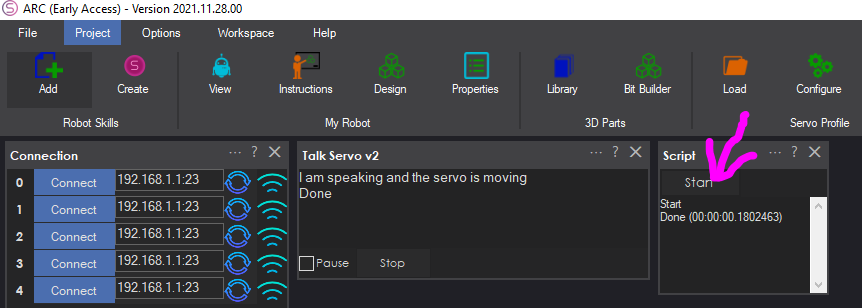
Ensure you are connected to an EZB (required to move the servo). Now, press the START button on the script. Watch the servo move as the robot speaks your phrase.
Now that you have seen how the Talk servo works, you can have any robot skill that speaks to move the servo. Look at the chatbot robot skills, such as AIMLBot, BotLibre, or PandoraBot, in the Artificial Intelligence section of the robot skill store.


Is this free like it use to be?
One plugin skill can be added to the free version of ARC. If you wish to use more than one plugin skill, a license is required. If you require more than one plugin skill in your project, a license can be purchased here: https://synthiam.com/Products/ARC
I just noticed this said V2. Is this a new issuance or is it the same rev from the last 12 months or so? The one I was using worked very well.
Thanks, Perry
I don’t think there was an update to the skill. Only the description was updated in this skill. I think a tutorial was added to it
Hi All, 1st time post. Been using ARC a while love it. I was using the above example on Vern my as yet Half InMoov. When I used.
The talk servo worked as expected, with the voice coming from PC speaker.
When I used
The voice came from speaker in robot attached to EZB controller as expected but no movement from Talk Servo.
I tried with an IoTiny and got the same result. Also tried with another PC and got the same result.
Hope this is clear. I have the most recent update of ARC. I’m a bit stumped, It was working all as expected correctly on previous update.
Many thanks
I use: min = 1 max - 180
Thank you, I'll give it a go and report back..
We can confirm the talk servo v2 isn't working with EZB - I've filed a bug report, and it'll be addressed asap. Thank you for the kind words about ARC; I'll share them with the team . Apologies for the talk servo bug - we'll resolve it shortly.