Servo Controls
This tutorial will provide technical information about servo motors and how they work. We made it easy to get a robot up and running. However, there are many fun and exciting things to learn about how the robot works. The more you know, the more you can get your robot to do it!
Types of Servos
ARC supports all servos, including the ability to define your servo driver using the Servo Script Robot Skill. The most common types of servos are...
- PWM Hobby servos that are connected directly to EZB digital ports
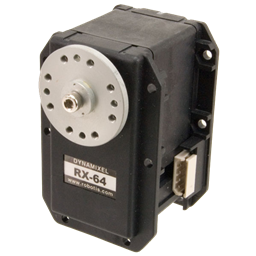
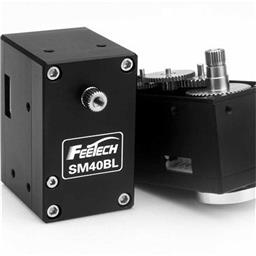
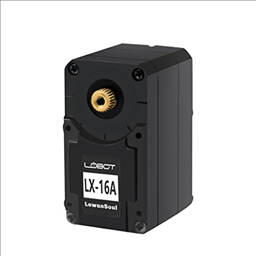
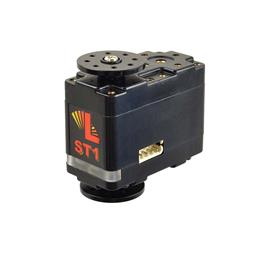
- Smart (Robotis Dynamixel, Lynx Motion, Feetech, Kondo KRS, LewanSoul, UB-Tech, and more)
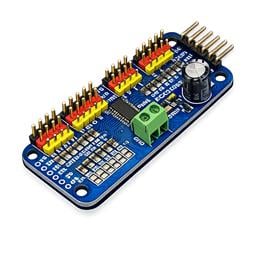
- PWM servo extenders (SSC-32)
*Note: Servo driver robot skills are in the Servo Robot Skill Category. These skills are also listed at the bottom of this document.
Servo Ports (Vx and Dx)
There are two types of servo ports for ARC: those starting with the letter D and those starting with the letter V.
Dx servo ports range between 0-24 (D0-D24) and are directly connected to the EZB microcontroller firmware's communication protocol. This means that if you specify the position of a Dx servo port, the value will be sent to the EZB microcontroller using the communication method. Dx servo ports are, therefore, directly controlling an EZB microcontroller servo pin. Because of this, there may be a mapping between the Dx port in ARC and the physical EZB microcontroller pin. When selecting a servo port, the dialog will display the EZB and mapping pins. Reference the mapping pins of the EZB when selecting the Dx port in the dialog.
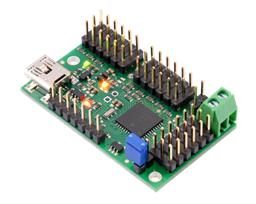
Vx servo ports are virtual servo ports ranging between 0-99 (v0-v99). They are used internally within the ARC framework and not connected to an EZB via the communication protocol or the firmware. Changing the value of a Vx port signals an event within the ARC framework for other robot skills to act upon. The best example is using a Robotis Dynamixel smart servo as you select the Vx port for the corresponding ID. When the Vx value changes, the Dynamixel robot skill will notice the new value and send it to the corresponding servo. The Vx virtual servos allow servos that have respective robot skills to control unique protocols. Another example of using a Vx servo port is a servo controller, such as the SSC-32 or Pololu Maestro.
Servo Interface Menu
ARC displays a standard configuration dialog for configuring servos across all robot skills. This manual will explain how to configure a servo (even multiple servos) to be moved from a robot skill. In this example, we will use a vertical servo robot skill, although this procedure applies to any robot skill that uses servos. Many robot skills use servos, including WiiMote, MYO, Camera, and dozens more...
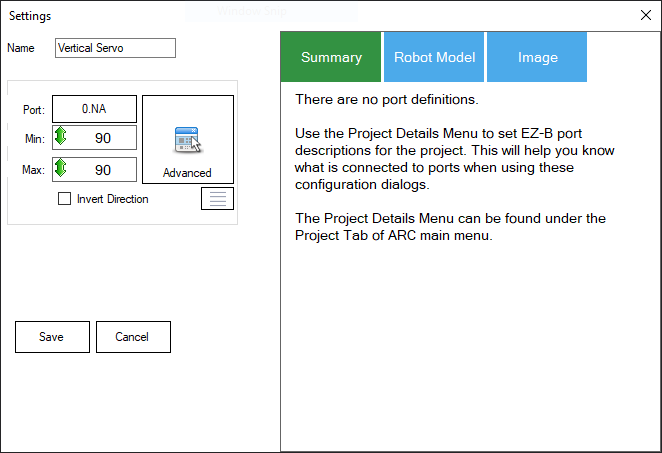
The servo interface menu is standard across all robot skills using servos in their configuration menu. This menu will be displayed when selecting a servo in a robot skill's configuration. By default, you can choose the port and EZB for the servo, the MIN position value, and the MAX position value. You may also select the checkbox to invert the direction.
Advanced Servo Interface Menu
This new menu will display when the advanced button is pressed on the standard interface menu. This advanced menu allows the user to specify additional options and add multiple servos to an option. Press the Advanced button to add various servos or configure advanced settings.
*Note: Hover your mouse cursor over the blue question marks to read about advanced options. Many advanced options require hardware support to work. So, by default, they are set to -1, which means ignore.
Advanced settings such as...
-
Min/Max
The minimum and maximum limits the servo can move. This is between 1 and the global max servo resolution value (default 180). -
Ratio
The ratio is a multiplier of the position from the first servo. It is important to note that the ratio of the first servo will always be 1. This is because it is the master servo that all consecutive servos will reference for their position * ratio. Even if you attempt to change the first servo ratio, it will restore to a value of 1. -
Velocity
If supported by the servo/driver/ezb, the velocity will control the servo's velocity. Check the manual for your specific servo to understand the value range. The values are not specific to ARC because they are unique to each servo. -
Acceleration
If supported by the servo/driver/ezb, the acceleration will control the servo's acceleration. Check the manual for your specific servo to understand the value range. The values are not specific to ARC because they are unique to each servo. -
Speed
If supported by the servo/driver/ezb, the speed will control the servo's speed. Check the manual for your specific servo to understand the value range. The values are not specific to ARC because they are unique to each servo.
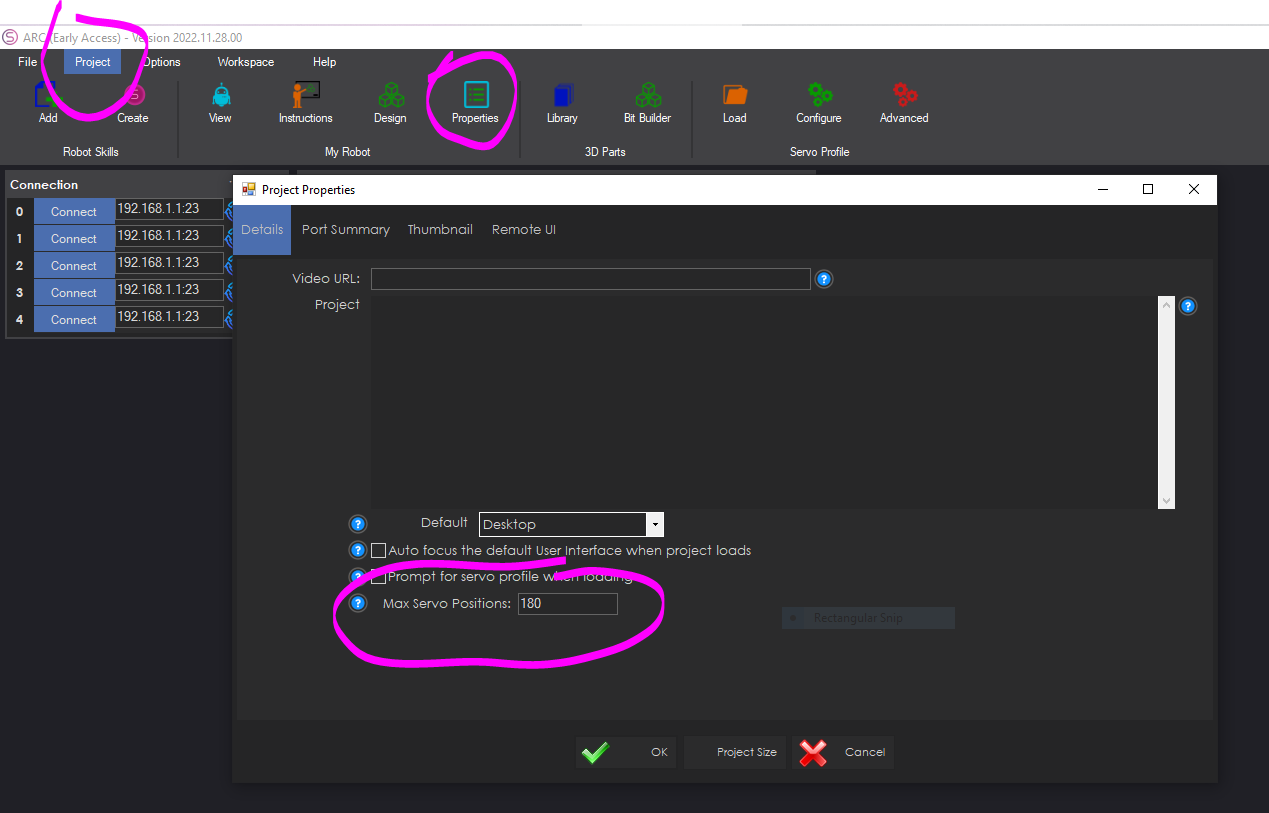
Specify Servo Resolution
By default, the software will have a servo resolution of 180 positions. While most hobby servo controllers (i.e., Arduino, EZ-Robot EZB) are limited to 180 degrees, some servos support a much higher resolution (i.e., Dynamixel). You can configure ARC to support a higher servo resolution per project. The global servo resolution setting can be configured in the My Robot Project Properties menu. The range will be calculated to compensate if the value of servo positions is higher than the EZB supports. For example, if you set the ARC servo resolution to 360 while using a PWM Servo, the value 360 will become the new maximum servo position. Still, the servo will not have any higher resolution because PWM servos are limited to 180 degrees. However, a dynamixel servo or stepper motor would use the 360 degrees. Remember, servos can only move in positive integer values.
*Note: The maximum servo resolution supported in ARC is 2,147,483,647
Most Popular Servo Robot Skills
Many robot skills control servos, such as the Camera Device, WiiMote, Joystick, and scripting. Here are a few of the most popular servo skills used by robot builders to get started.
Vertical/Horizontal Servo
These servo skills allow you to drag the mouse horizontally (left & right) on display to move the position of a horizontal servo. The horizontal servo will only move to the minimum and maximum limits you specify in the skill's settings. These robot skills are excellent for testing your robot's movement range and ensuring the servos work. We always recommend using these robot skills when building your robot to ensure everything works correctly. At the same time, the two versions of this skill differ in how the user interface is presented by dragging vertically or horizontally. This does not have to matter based on the orientation of your servo in the robot itself. These two skills can be used for testing as it is a matter of preference.
 Horizontal Robot Skill
Horizontal Robot Skill
Horizontal Robot Skill
Camera Device

The camera device is one of the most potent and popular robot skills, demonstrating ARC's power. This robot skill will use either the EZB remote camera (if supported) or a USB webcam mounted on the robot. By configuring options, the camera can track objects, faces, and colors and even detect emotion or age with additional robot skills. The Camera Device has settings in the options menu for controlling servos when a camera is mounted on a gimbal. This feature allows the robot's camera to move and track the object.
Camera Device
Auto Position
Create servo animations to have your robot wave, dance, or pick up and move objects. The Auto Position skill transforms a group of servos into custom positions (Frames) to create animations. You can combine the frames into actions for your robot's animation. This is done with "Inverse Kinematics" or "Motion Planning."
There are two types of the Auto Position robot skill. One is a movement panel that plays servo animations for robots that use servos to walk (i.e., humanoids or hexapods). The other type is used for robots that use a different movement panel (i.e., hbridge, continuous rotation, etc.) but has servos for arms to be animated.
This is a popular robot skill for humanoid robots, such as the InMoov, Robotis Bioloid, or EZ-Robot JD/Six. For robots with many servos used in arms or legs, this allows the creation of animations that can be executed programmatically by other robot skills using the ControlCommand(). This means your robot can perform actions based on speech recognition or chatbot conversations.
Auto Position with movement panel
Auto Position for only servos
Joystick

Two types of joystick robot skills are based on the type of joystick used. The most common type is the XInput version, which supports the latest joysticks, including Xbox controllers. The xInput has additional support for analog trigger buttons and multiple independent joysticks. These robot skills can control servos, allow scripts to be assigned to buttons, and optionally control the current movement panel to move the robot.
Direct Input Joystick
xInput Joystick
Virtual Reality
Being able to control your robot servos with your hands and move the robot's camera with your head is a fantastic experience. A few robot skills support a variety of VR headsets, including the Meta Oculus Quest and Steam VR (i.e., HTC Vive, Windows Mixed Reality, etc.). The hand tracking feature is one of the great features of using the Meta Oculus Quest robot skill. This feature lets you move servos without holding the controllers in your hands. You can map your fingers to individual servos, which is excellent for humanoid projects like the InMoov.
Direct Input Joystick
xInput Joystick
Hard Set Servo Limits
With the appropriate Javascript, EZScript, or Python commands, you can set global servo positions across all robot skills.
The robot skill settings for servos are for the individual robot skill only. Every robot skill has servo values (i.e., min and max). This means the Camera skill has different servo values than the Joystick skill. The values specified in a skill's configuration are specific to that skill.
There are commands for all languages (JavaScript, Python, EZ-Script, etc.) for specifying limits. For example, the EZ-Script command in an INIT script to specify servo positions globally across the entire application is...
SetServoMin (servo port, position)
Set the minimum limit that this servo can ever move to
The servo position is between 1 and 180 (or global max servo value)
Example: SetServoMin(D14, 40)
SetServoMax (servoPort, position)
Set the maximum limit that this servo can ever move to
The servo position is between 1 and 180 (or global max servo value)
Example: SetServoMax(D14, 100)
Here's an example from the EZ-Robot JD project that prevents the left gripper from moving further in either direction globally across the ARC software. The appropriate commands for setting global servo position values are in the JavaScript, Python, or EZ-Script manual.
# Left Gripper
SetServoMin(d6, 30)
SetServoMax(d6, 90)
Example Testing a PWM Servo
Because ARC uses a standard dialog for configuring servos, the following steps will demonstrate how to use it. Any robot skill supporting moving servos will display the same "servo selection" dialog as this example. In this example, we will use a standard PWM hobby servo connected to one of the EZB digital ports.
Step 1
Load ARC.
*Note: Always ensure you have the latest ARC. When you load ARC and connect to the internet, it will notify you of a newer version.
Step 2
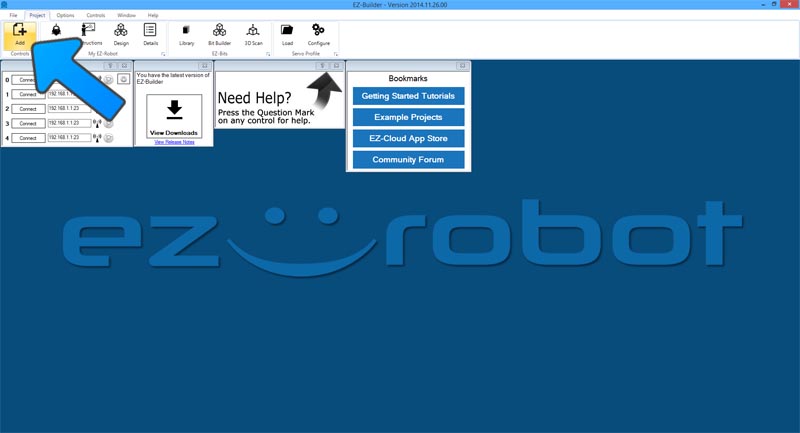
Press the Project tab from the top menu. Now press the Add Control button.
Step 3

The Add Control window will display. This window allows you to browse and select controls to add to your project. Press the SERVO tab to view servo-specific robot skills.
Step 4
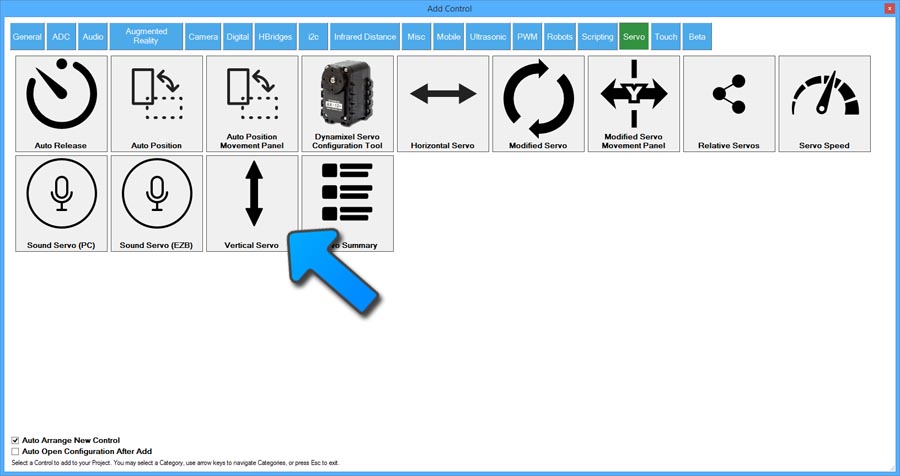
We are going to use the Vertical Servo control for this example. Many kinds of robot skills interact with servos, even more than you can see on this page. Nearly every skill control uses servos; however, only the specific servo skill controls are listed on this page. Even the Camera, WiiMote, MYO, and more use servos. Click the Vertical Servo button to add the vertical servo skill control to your project.
Step 5
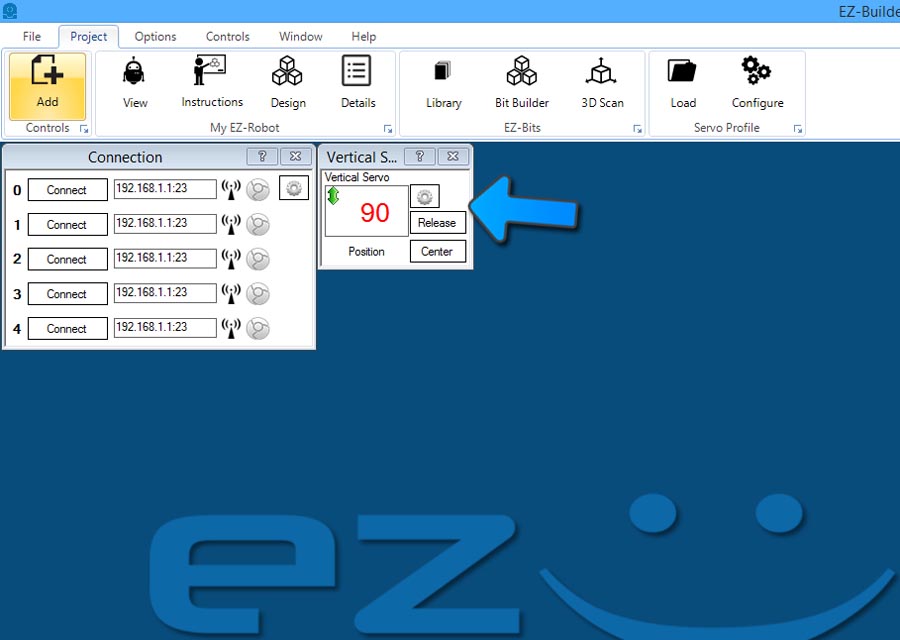
You will add the Vertical Servo skill control to the workspace. This skill allows sliding the mouse vertically to move a servo position. Alternatively, a Horizontal Servo skill control enables the mouse to be dragged horizontally to move the position.
Step 6
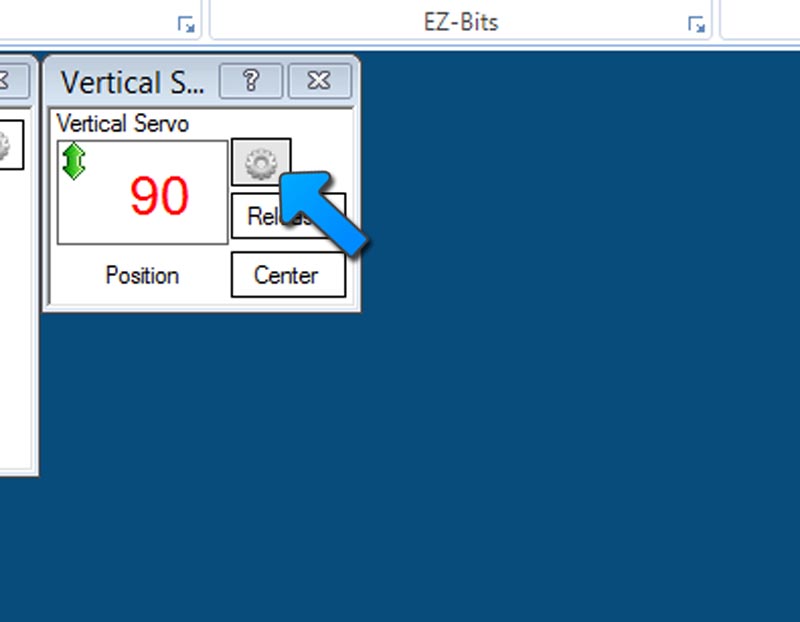
As mentioned in the Controls Tutorial, every control has a gear button. You can press this gear button to load the configuration menu. Each control has a unique configuration menu.
Step 7
ARC will now display the configuration menu
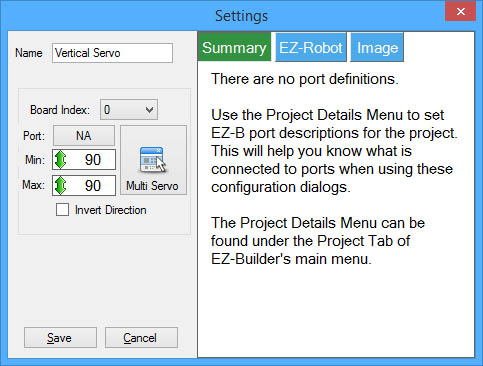
Step 8
Each configuration robot skill will have many options. Any robot skill that uses Servos will have a similar servo configuration interface. Some robot skills may have two or more servo configuration interfaces (usually for horizontal and vertical servo robot skills). In this control, there is only one servo interface.
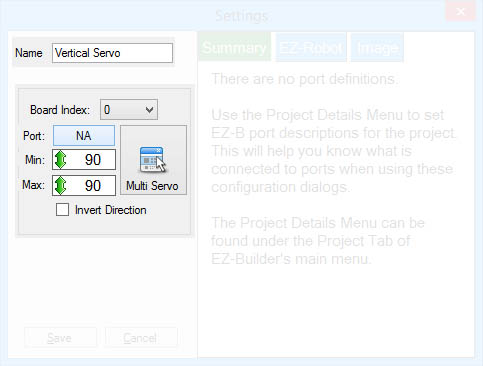
Name: This is the name of the robot skill.
Board Index: ARC can connect 5 EZ-Bs to the ARC Software. This specifies which EZ-B to send the servo command to.
Port: The EZ-B port of the servo. Pressing this button will display the EZ-B to select the respective port.
Min/Max: Min and Max limits in degrees of the servo. The servo can move between 1 and 180 degrees (or global max servo value). The value for Min must be less than the value of Max in all cases, even when Invert is checked.
Invert: If the servo is moving in the wrong direction, checking this box will reverse/invert the direction of the servo.
Multi Servo: If more than one servo moves, you can specify multiple servos.
Step 9
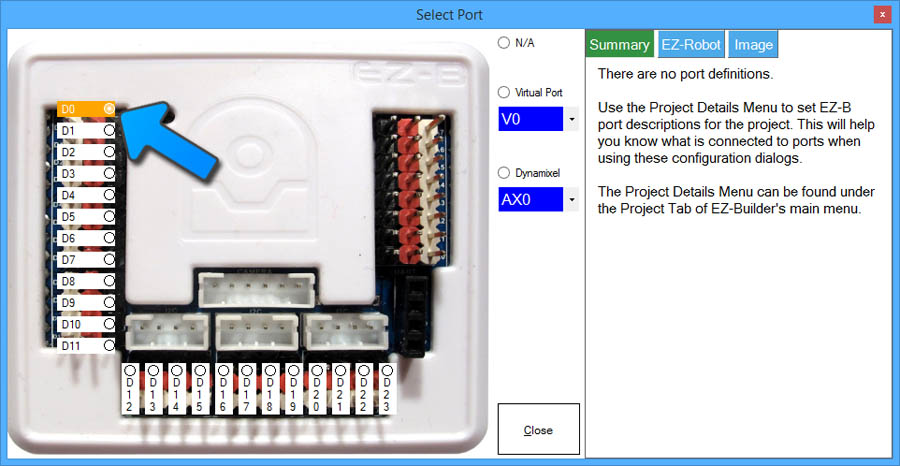
Press the PORT button, and ARC will display the EZ-B port configuration. In this dialog, you may select the port and press the Close button.
Step 10
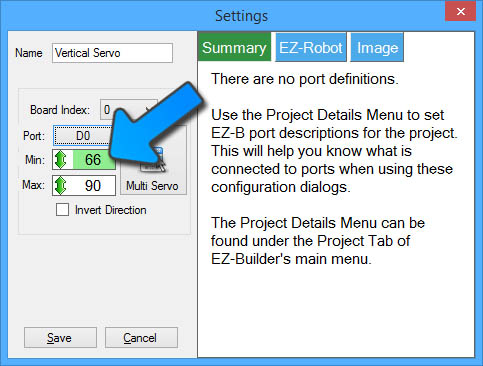
Now that you have selected a port, we can move the servo to specify the MIN and MAX limits. These numbers are in degrees between 1 and 180 (or global max servo value). Start with the MIN by pressing the mouse button while dragging the cursor UP or DOWN. The MIN value must be less than the MAX value. In this example, set the MIN to a low number, and the servo will move in real-time if connected to an ARC and an EZ-B.
Step 11
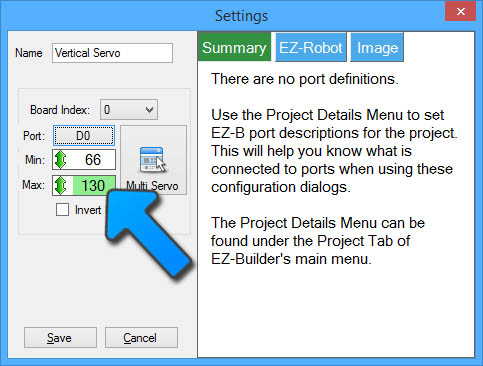
Move the MAX by pressing the mouse button while dragging the cursor UP or DOWN. The MIN value must be less than the MAX value. In this example, set the MAX to a low number, and the servo will move in real-time if connected to an ARC and an EZ-B.
Step 12
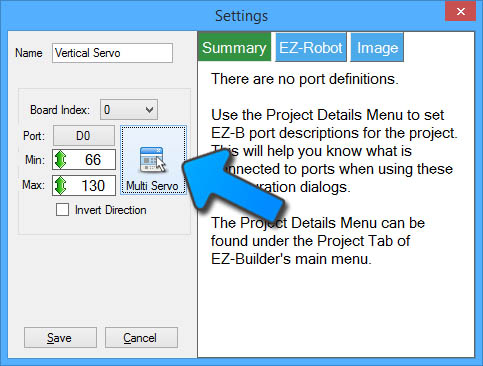
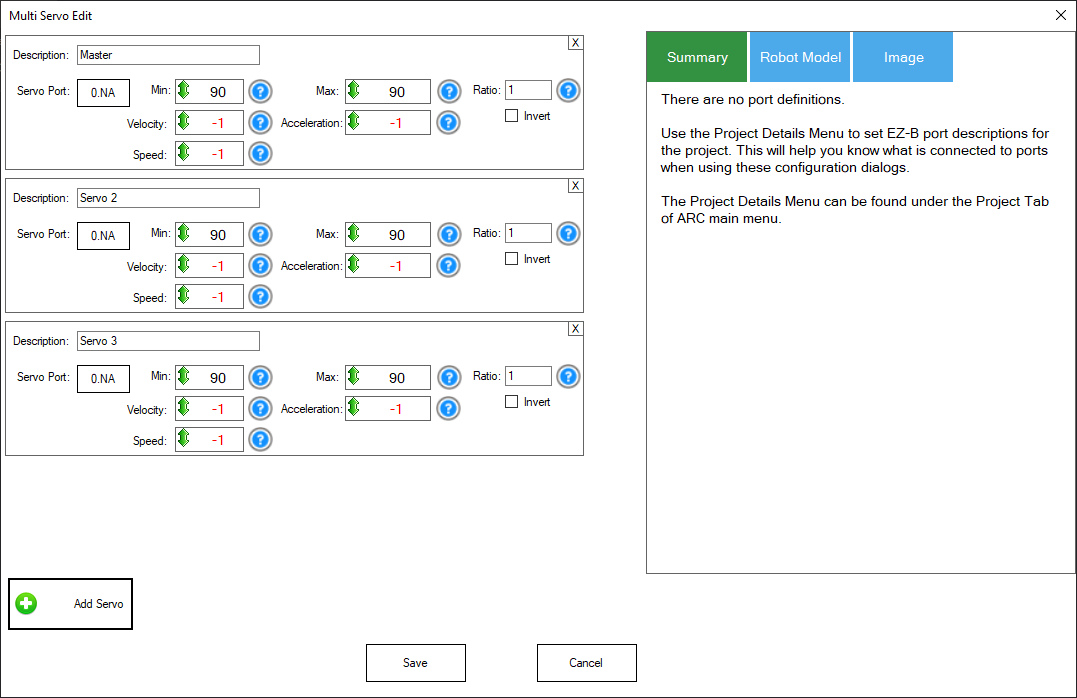
The Multi Servo button allows this control to move more than one servo simultaneously. Press the button to display the Multi Servo dialog.
Step 13
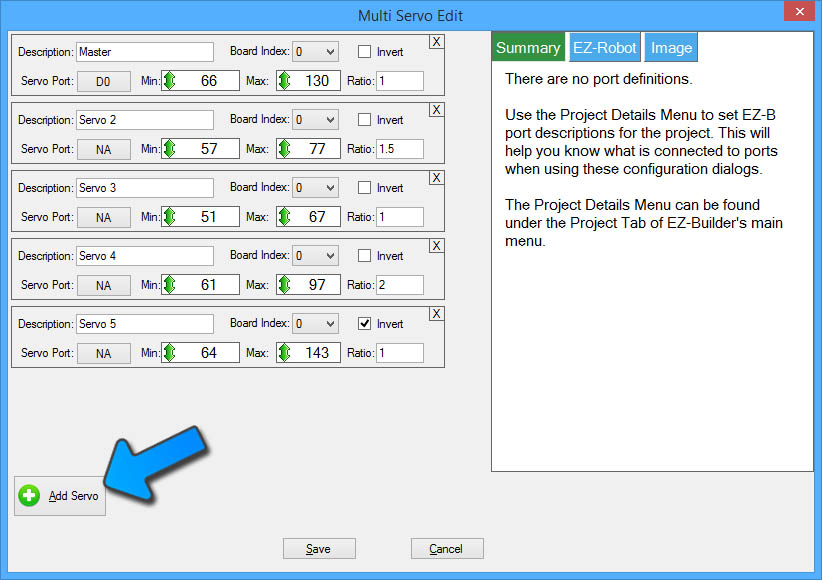
To add multiple servos, press the ADD SERVO button. Each time the button is pressed, a new servo entry is added. You can remove the servo by pressing the X on the respective servo. Use the PORT, MIN, and MAX to configure the limits. The multi-servo option also allows a ratio to be specified. The ratio is based on the primary value for the first servo in the list. If the servo degree position for the first servo is defined as ten and the ratio is 2, the respective servo will move to degree position 20.
Step 14
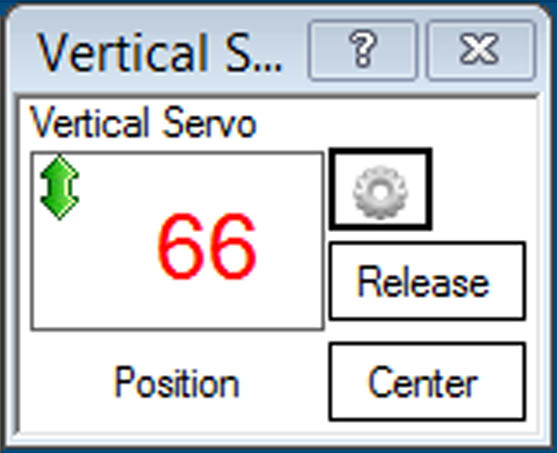
Close the servo control configuration dialog and return to the workspace. Now that the servo has been configured, you may move it between your specified MIN and MAX limits. Click in the servo position, and the cursor will change while you hold the mouse button. Slide the mouse up and down (for vertical control) to move the servo between the specified limits.
*Note: Even though many controls may move servos, the configuration of those servos is only valid for that control. If you configure a camera control to move servos to specific min/max ranges, those ranges only apply to the camera control. Use the Relative Servo control if you wish a servo or group of servos to move together from the script.
Servo Robot Skill Drivers
While hundreds of robot skills use servos, that may not be their primary focus, and they are in different categories. For example, the Camera Device is a popular robot skill, but its primary focus is the camera and tracking, so it is located in the Camera category. The Servo category generally lists robot skills that are driver- or servo-specific. You will find the robot skill driver in the Servo category if you use an intelligent servo, such as the Robotis Dynamnixel. Below is a list of all robot skills from the Servo robot skill category.