
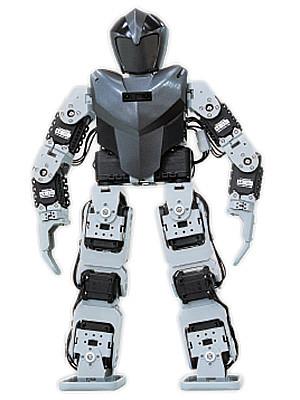
Bioloid by Robotis
The Robotis Bioloid humanoid robot uses Dynamixel AX-12 smart servos. These are not the same as “regular” hobby servos—AX-12 servos communicate digitally over a bus (multiple servos can share the same data line), and they require a controller that can speak the Dynamixel protocol.
Synthiam ARC can control AX-12 servos when you use one of the supported controllers below. Pick one controller, follow its setup guide, then add the Dynamixel/servo control features inside ARC.
Supported controllers (choose one)
- Robotis OpenCM 9.04 A Robotis controller commonly used with Dynamixel systems.
- Robotis OpenCR Another Robotis controller option for Dynamixel robots.
- LattePanda A small Windows computer that can run ARC and connect to Dynamixel hardware.
- EZ-Robot EZ-B v4 A popular ARC controller; can also be paired with a camera for vision features.
- EZ-Robot IoTiny A compact controller option; can also be paired with a camera for vision features.
- Arduino Leonardo A microcontroller option when configured for Dynamixel control with ARC.
Beginner setup overview
- Install Synthiam ARC on your computer. ARC is the software that will send commands to your robot.
- Choose a controller from the list above and open its guide. Each controller has its own connection method (USB, Wi-Fi, serial, etc.).
- Connect your controller to the Bioloid’s AX-12 servo chain. AX-12 servos typically connect “daisy chain” style. Make sure power and data wiring match the controller’s Dynamixel interface.
- Power the servos correctly. AX-12 servos usually require their own power source (often higher current than USB can provide). If servos twitch, reset, or go limp under load, you likely need a better power supply/battery.
- Follow the controller page instructions to connect ARC to your controller. Once ARC can talk to the controller, you can begin controlling the servos and building behaviors.
Optional: add “vision” (camera sensors)
Some controllers—such as the EZ-B v4, IoTiny, and LattePanda—can be used with cameras. This lets you add ARC features like object tracking, face detection, color tracking, and other computer-vision skills. If your goal is a humanoid that can “see,” consider choosing one of these controller options.
Once your controller is connected and ARC is communicating, start simple: test a single servo, confirm its direction and range, then expand to multiple servos and full-body movements.

I just want to say to a great guy named DJ Sures and his friend Jeremy, thank you both. Because ive finally got it to work both Ez4 and the Dymanixel. It's been a long time almost done with school what listening and learning from you guys I think your bottom of my heart. I'm still a student EZ robots still learning easy robots do learning and I hopefully one day to go and teach the kids in my community how to use Easy Builder and its products God bless both of you guys and thank you, Mike.
To DJ and Jeremy, how did you wire both ex4 and the bioloid premium battery?