
ESP32/Arduino EZB firmware with MPU6050 support: provides accelerometer angles and Yaw/Pitch/Roll gimbal servo values for stabilization and scripting
 Hardware Info
How to add the ESP32_MPU6050 robot skill
- Load the most recent release of ARC (Get ARC).
- Press the Project tab from the top menu bar in ARC.
- Press Add Robot Skill from the button ribbon bar in ARC.
- Choose the I2c category tab.
- Press the ESP32_MPU6050 icon to add the robot skill to your project.
Don't have a robot yet?
Follow the Getting Started Guide to build a robot and use the ESP32_MPU6050 robot skill.
How to use the ESP32_MPU6050 robot skill
This is an updated version of the ESP32_MPU6050 skill that EZB ESP32 over WiFi and Arduino EZB_UNO EZB_Leonardo firmware connected through USB with MPU6050 support. This skill uses a modified versions of the EZB firmwares created by DJ and has all the features of that firmware and also supports the MPU6050. This skill provides servo values to create gimbal servo values for every axis like a camera gimbal and also provides accelerometer angle values that can be used for other scripting needs.
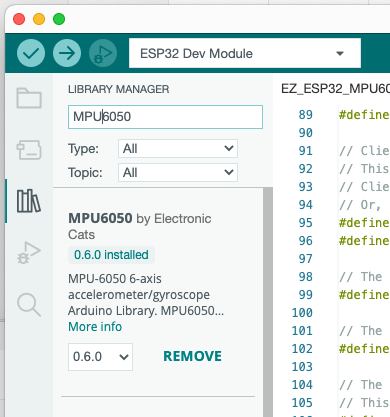
To load the you will need to make sure you have the following library installed in the Arduino IDE.
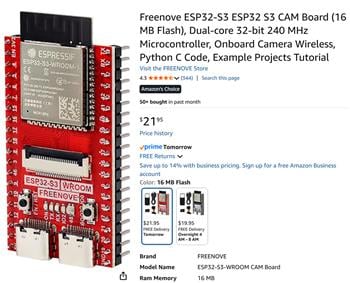
For ESP32 do the following: You need to flash the firmware to the ESP32 Dev board. With this firmware you can use MPU6050. EZ_ESP32_MPU6050.zip Please follow the instruction on the Esp32 DevKit v1 by Espressif Hardware page for firmware loading instructions at the following LINK The variables YPR $AngleX, $AngleY, $AngleZ, $servoYvalue, servoPvalue and servoRvalue are created. Have Fun!
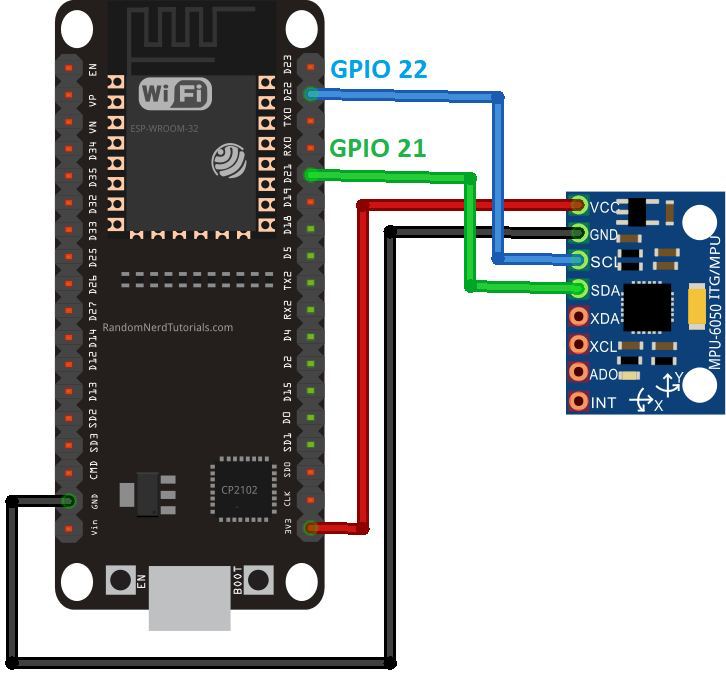
The following is how to connect the ESP32 to the MPU6050.
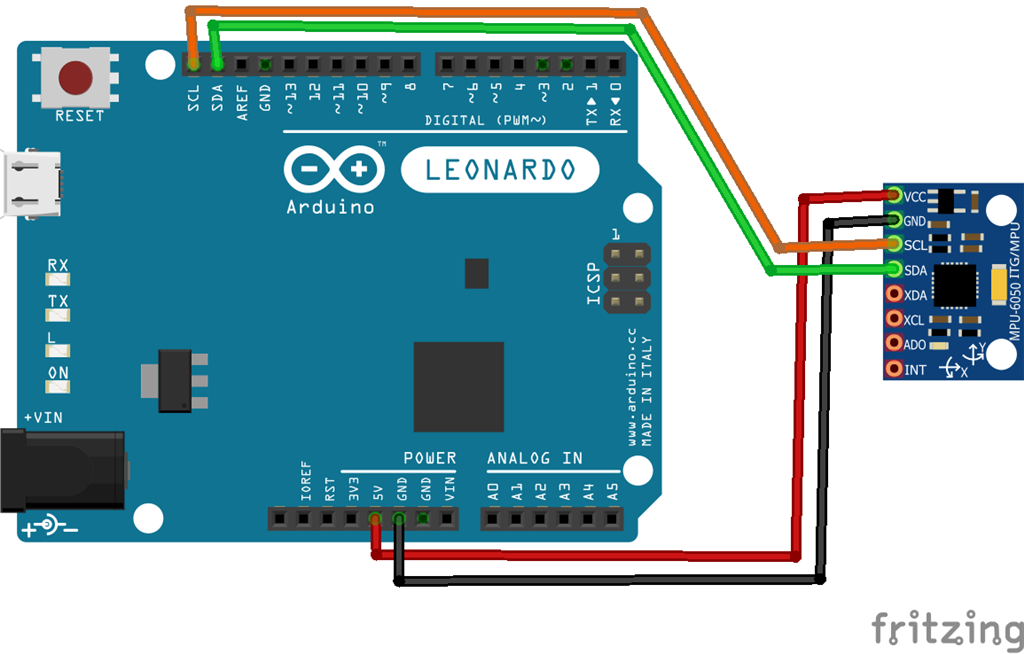
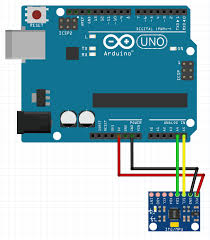
For Arduino Leonardo and Arduino UNO do the following: You need to flash the firmware to the Arduino Leonardo board or LattePanda Leonardo. With this firmware you can use MPU6050. EZ_Genuino_Leonardo_MPU6050.zip EZ-Genuino_Uno_MPU6050.zip For instructions on how to install the firmware please review this link The following is how to connect the Arduino Leonardo to the MPU6050.
There is a section of code in the both firmware that you can calibrate your MPU6050 offset because most MPU6050 don't use the same values.
  // supply your own gyro offsets here, scaled for min sensitivity
  mpu.setXGyroOffset(149);
  mpu.setYGyroOffset(76);
  mpu.setZGyroOffset(-21);
  mpu.setXAccelOffset(-1539);
  mpu.setYAccelOffset(-2070);
  mpu.setZAccelOffset(713); // 1688 factory default for my test chip
To get the correct values please use the attached script: MPU Calabratiion.ino.zip
The following is a very basic EZ-Script making a gimble.
#Basic Gimble Script
:loop

Servo(D10, $servoYvalue)
Servo(D11, $servoPvalue)
Servo(D12, $servoRvalue)

sleep(100)

goto(loop)
The following video shows a servo on one axis using the servoRvalue.