Control Feetech SC series serial-bus servos via EZB UART or PC COM port; map virtual Vx IDs, set position, speed, acceleration, and release in ARC.
How to add the Feetech Serial Bus Servo robot skill
- Load the most recent release of ARC (Get ARC).
- Press the Project tab from the top menu bar in ARC.
- Press Add Robot Skill from the button ribbon bar in ARC.
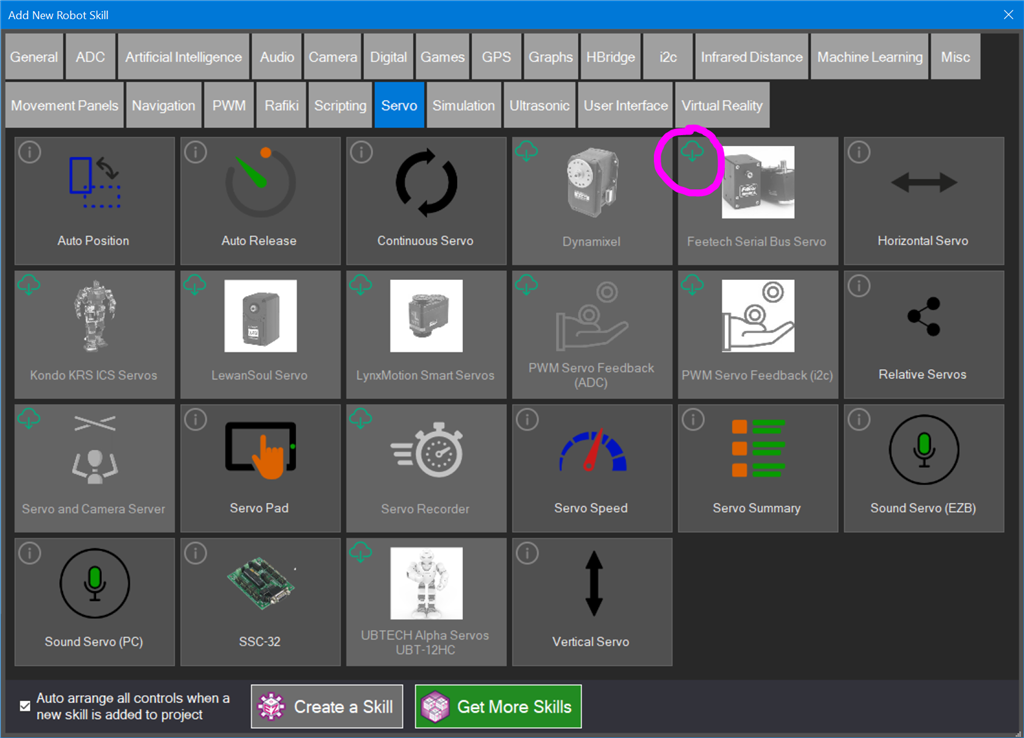
- Choose the Servo category tab.
- Press the Feetech Serial Bus Servo icon to add the robot skill to your project.
Don't have a robot yet?
Follow the Getting Started Guide to build a robot and use the Feetech Serial Bus Servo robot skill.
How to use the Feetech Serial Bus Servo robot skill
Control Feetech serial bus smart servos over EZB UART or PC COM port. The selected ARC’s Vx virtual ports must match the servo IDs in the config screen - and voila, you're off to the robot races!
A Bus servo from Feetech has a model number starting with SC, such as SC215.
Main Window
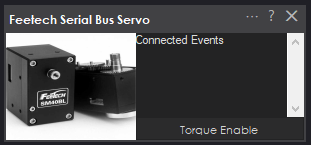
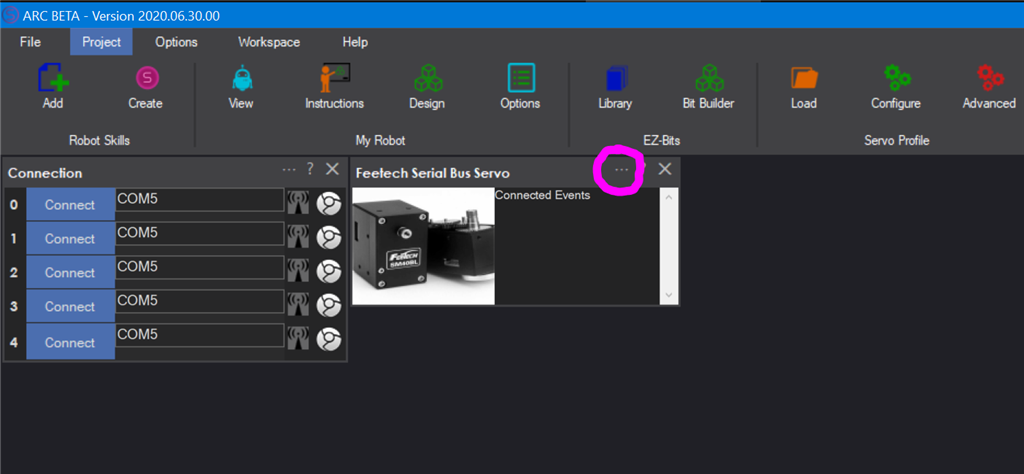
The main window on the project workspace displays information about active connections and errors. To configure the servos, press the ... configuration in the title bar.Configuration Screen
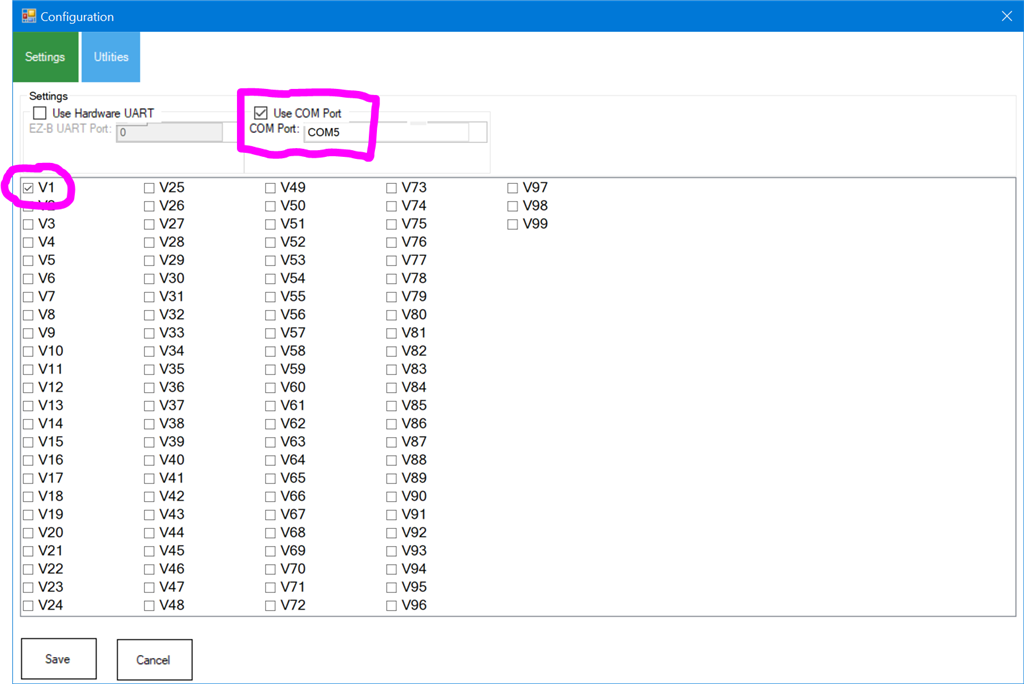
The configuration allows selecting the virtual servo ports that represent the ID's of the Freetech servos. For example, if the servo ID is #1, V1 will be used. Also, the communication type must be specified (EZB UART or PC COM Port).Baudrate This skill's baud rate is 1,000,000 bps, which is also the default baud rate for Feetech servos.
ID All new Feetech servos will have a factory default ID of #1, V1 in ARC. Select the Vx ID that matches the servo's ID.
Changing servo ID
If you want to reprogram the servo ID, you need to use the SCS15 software V1.6. Download it HERE. The software requires connecting the servo to a USB device or an Arduino.
ARC Capabilities
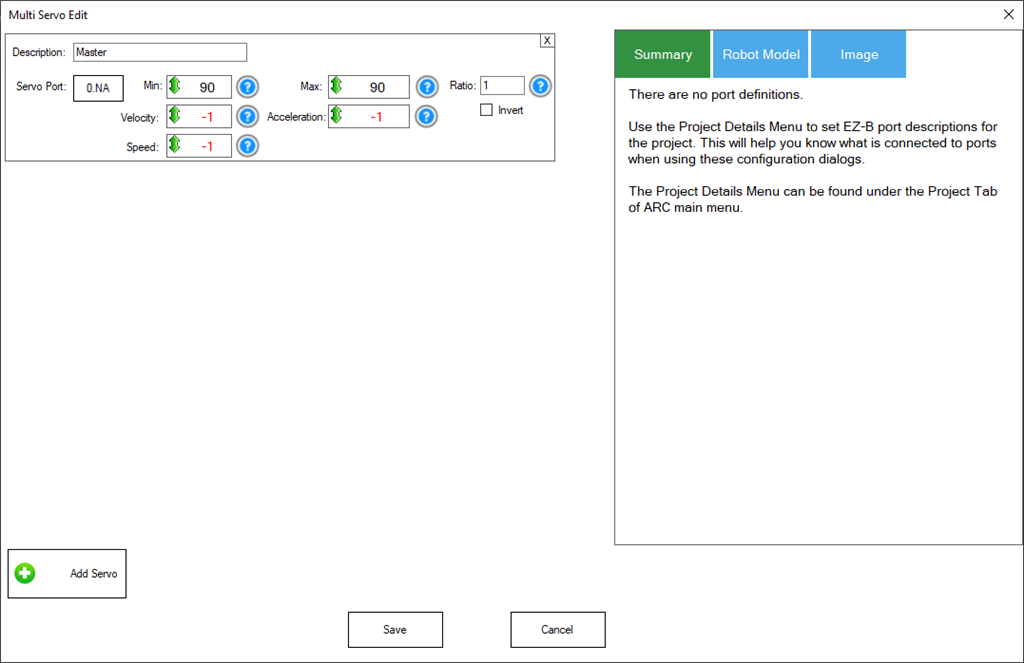
ARC has many parameters that can be assigned to servo movements. When selecting a servo, these parameters are specified by script commands or in the Advanced menu of robot skills. This skill supports the following ARC parameters...- Servo position
- Speed
- Release
- Acceleration
How To Use
These steps will demonstrate how to add the Feetech serial bus skill to a project and use a standard servo skill control to move it. All skill controls that use servos can now move the servo, including the camera, joystick, scripting, and more. Select the virtual servo port, and any skill can move the servo.In this example, we'll be using a USB Feetech servo controller. These controllers will create a COM port on the PC we will select. The SCPC-2 or URT-1 works great for this application. Alternatively, if you wish to wire the servos directly to a custom hardware UART, it will require the option to be selected in the config menu in the steps below and additional hardware.
Step 1 Load the latest version of ARC on your Windows-based PC.
Step 2 In ARC, press Project -> Robot Skills -> Add from the top menu
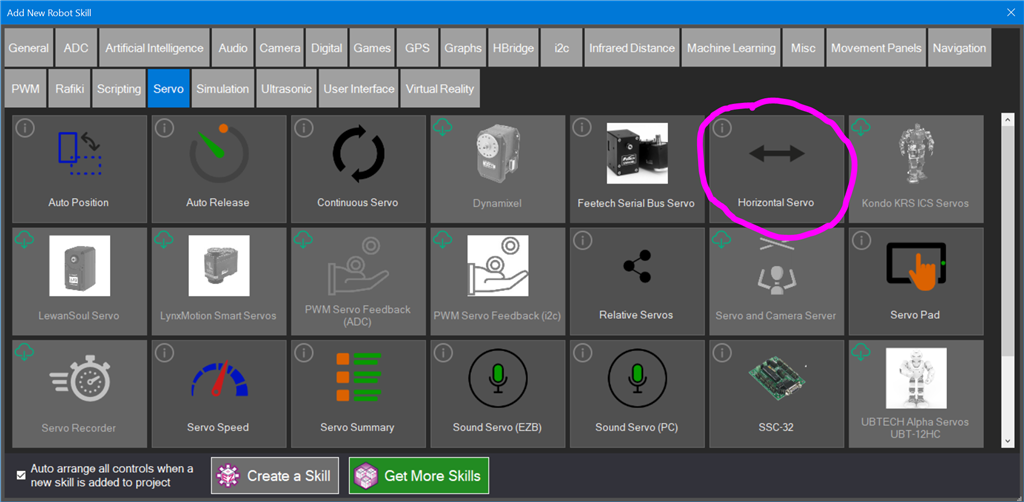
Step 3 Select Servos and locate the Feetech Serial Bus skill when the skills window is displayed. Press the Download icon to download and install the skill to your project.
Step 4 Locate the Feetech Serial Bus skill on your project workspace. Press the Config button in the title bar to access the configuration menu.
Step 5 In this example, we will use the USB COM Port to control the servos. Select the Use COM Port option and select the COM port for the USB controller.
Additionally, the default ID of a new servo will be #1, which is V1 in ARC. A servo ID of #2 will be V2 in ARC, and so on. Select the V1 so ARC will now map all references of servo V1 to the Feetech servo with ID #1.
Press SAVE
Step 6 Now we will add a basic servo control to test the Feetech servo. Press Project -> Robot Skills -> Add from the top menu. Locate the Servo tab and click the Horizontal Servo to add it to the workspace.
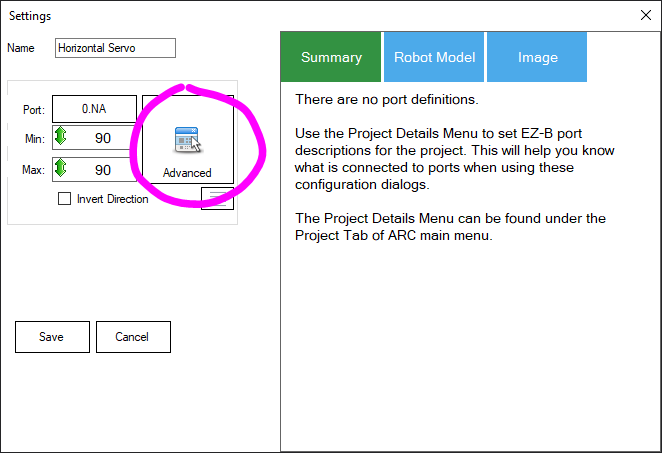
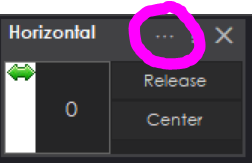
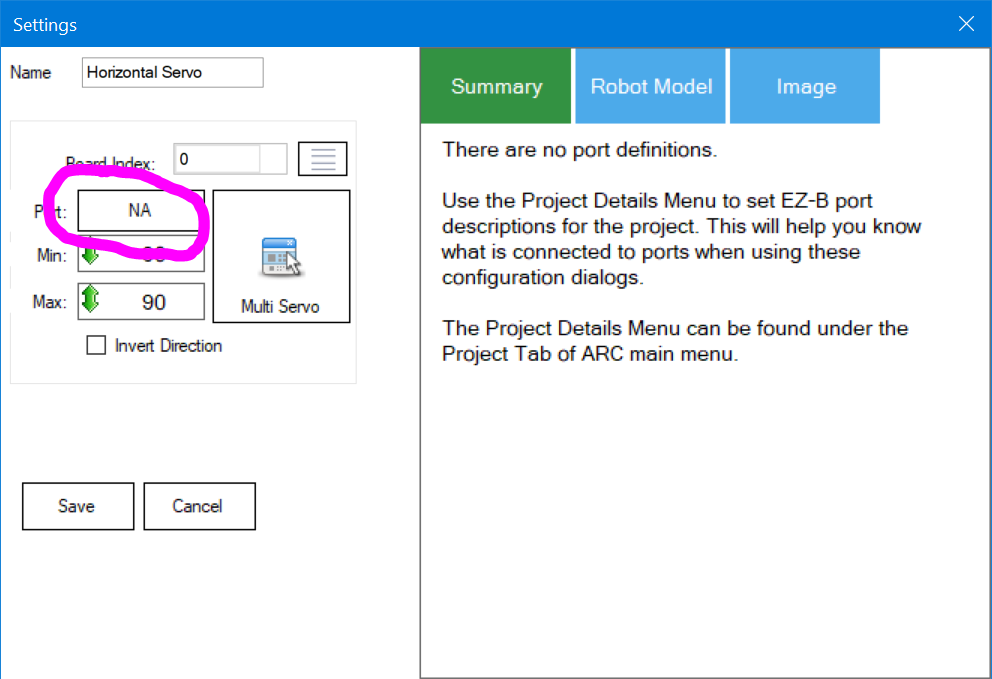
Step 7 Configure the Horizontal Servo skill by pressing the config button in the title bar.
Step 8 Selecting the port for this control. Press the Port button to choose the servo port.
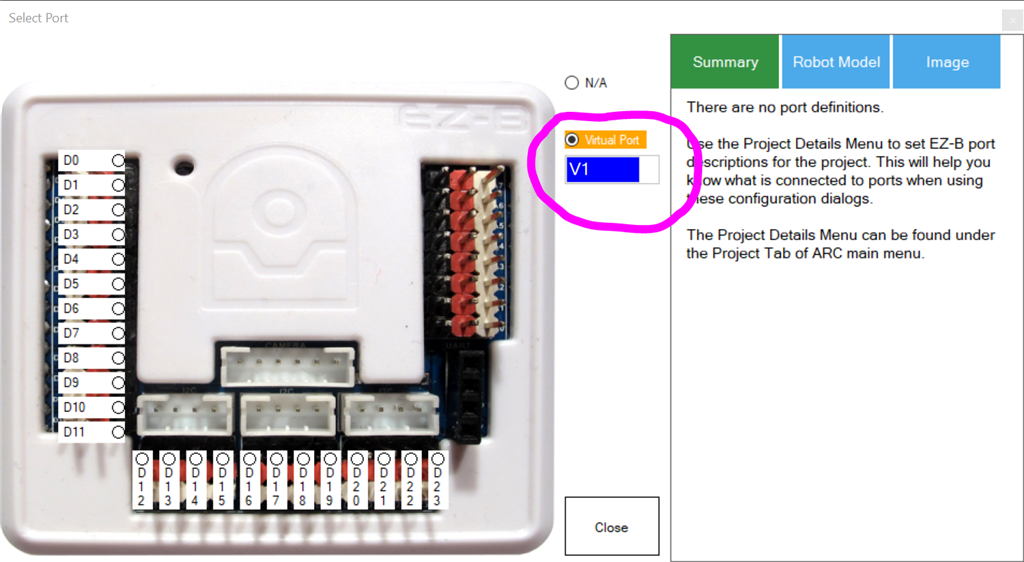
Step 9 The dialog popup for port selection will display. Select V1 from the Virtual Port drop-down list. Press SAVE
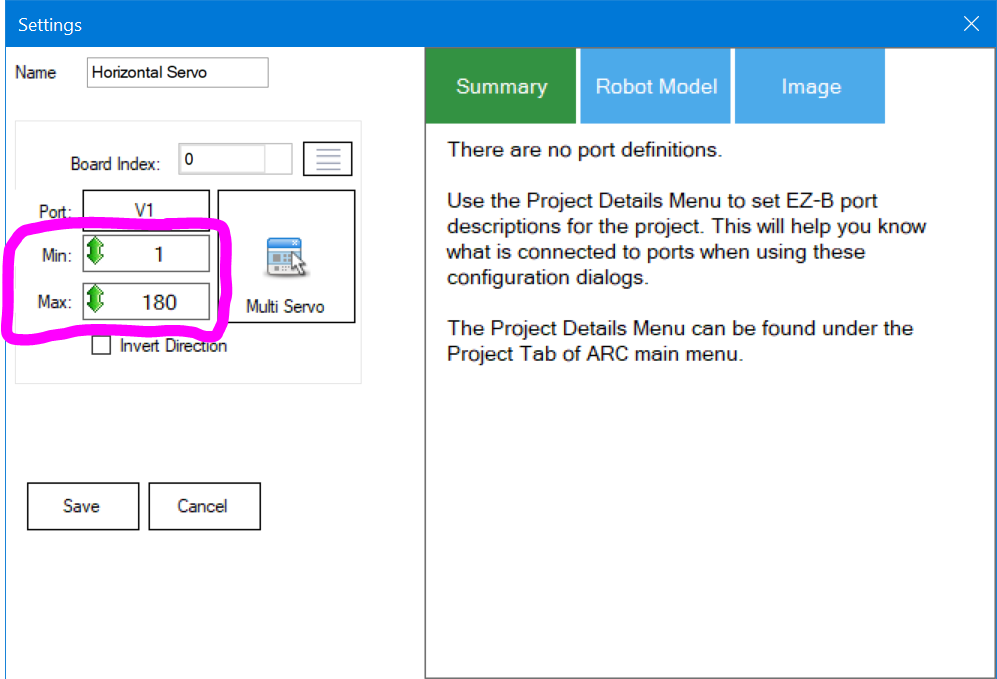
Step 10 The servo's Min and Max range can be selected. Each control that uses servos will have its own custom range. Click in the Min and Max value and drag the mouse UP or DOWN to select the range. Alternatively, you may right-click to enter a range with the keyboard. Keep in mind that the servo will move into each range as you change the value. Press SAVE once the range has been adjusted to return to the workspace.
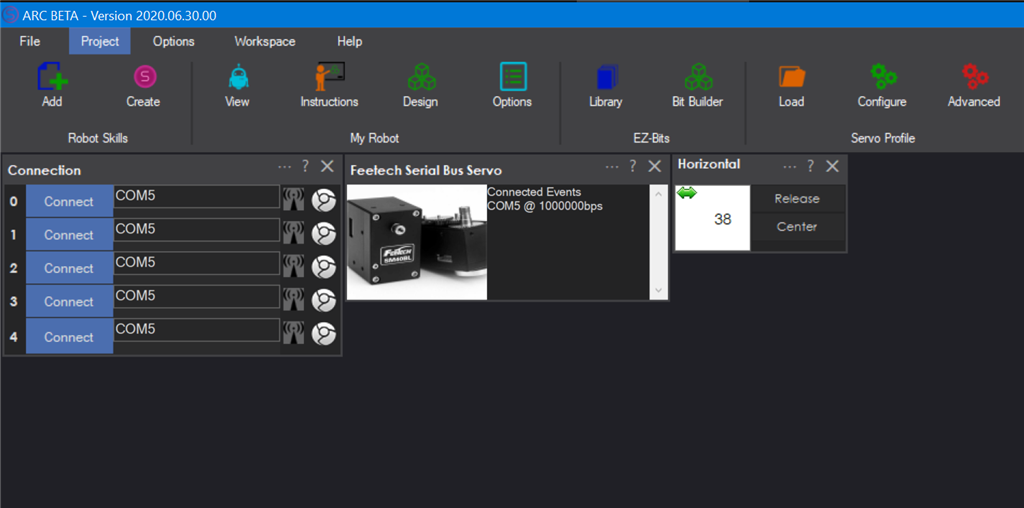
Finished You may now click on the servo value to drag the mouse Left or Right to move the position. If you right-click, you can enter a numeric value on the keyboard. The servo will only move within the range you specify.
Try other robot skill controls, such as the Auto Position or Joystick, with this servo. All robot skills that use servos can now reference this servo using the virtual port ID.

 Hardware Info
 Source Code


2 questions. Can this be used on the EZ-B using uart D5 D6?
When might this be updated be to include changing servo ID as described above?
it can use all ezb uart or pc com
I do not have a date for adding the utility to change ids. Right now we use the software provided by the servo manufacturer
Ok thank you for the info.
No prob
They're utility software is really great and has a number of features that would be duplicate effort for us to implement. Makes sense to use the features implemented by their team.
Interesting. The SCS15 SCS20 and SCS25 etc look size and bracket compatible with the HDD servo's. Maybe time to give my old JD robot an overhaul and cut down the wires (especially after the potentiometer hack). Anyone tested these servo's? Do they fit in JD or other ez-robot brackets? The Micro HDD is pretty small 10cm and I can't find a size compatible. SCS009 is 22cm so huge difference. I guess I would need to keep the original HDD servo in the head, neck and hands (or do a redesign).
Why would you want to swap the hdd servos out? Nothing competes in that form factor
Position Feedback, Higher Torque (25kg, 30kg, 35kg), Less Wires ... If you spent some time redesigning the servo brackets / connectors you could also remove wiring all together. I love the Clicbots, they use TTL servo's and no wires.
That clickbot was one of the worst experiences I’ve had with a product. There’s not enough power because the servos connect inline with high resistance of each connection.
I misunderstood your original post about switching the hdd servos because you mentioned potentiometer hack. But I think what you were trying to say is swapping the servos doesn’t mean you have to do the hack.
I haven’t had great experience with these servos coming close to the advertised specs. But they should be ok - maybe not great for a jd but I’d like you to find out worth the trial!