

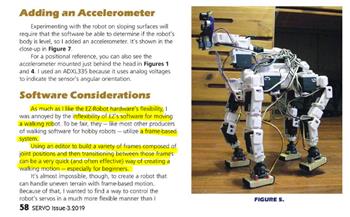
Mouse-drag horizontal servo control with configurable min/max limits, center/release functions, multi-servo mirroring and direction invert.
How to add the Horizontal Servo robot skill
- Load the most recent release of ARC (Get ARC).
- Press the Project tab from the top menu bar in ARC.
- Press Add Robot Skill from the button ribbon bar in ARC.
- Choose the Servo category tab.
- Press the Horizontal Servo icon to add the robot skill to your project.
Don't have a robot yet?
Follow the Getting Started Guide to build a robot and use the Horizontal Servo robot skill.
How to use the Horizontal Servo robot skill
The Horizontal Servo skill lets you move a servo by dragging your mouse left and right on the skill’s display. This is a simple way to “manually” aim something like a robot head, camera, sensor, or arm joint.
Main Window
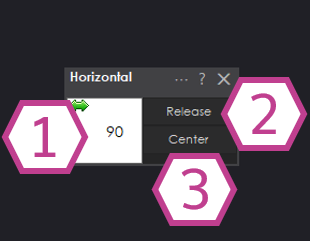
1) Position Adjust / Display
- Drag control: Click and hold the left mouse button on this area, then drag left/right to move the servo.
- Type a value: Right-click to enter an exact position using the keyboard.
- Position readout: This area shows the current servo position as a value from 1 to 180 degrees. (Most hobby servos are designed for about 0–180° of travel, but your usable range depends on your servo and your limits.)
2) Release Button
Press Release to stop the servo from actively holding its position (sometimes called “detach”). If your servo and gearing allow it, you may be able to gently move the servo horn/output by hand after releasing. (Avoid forcing the servo if it doesn’t move easily.)
3) Center Button
Press Center to move the servo to the midpoint between your configured Minimum and Maximum limits.
Example: Minimum = 10, Maximum = 140 → Center = 75.
Settings
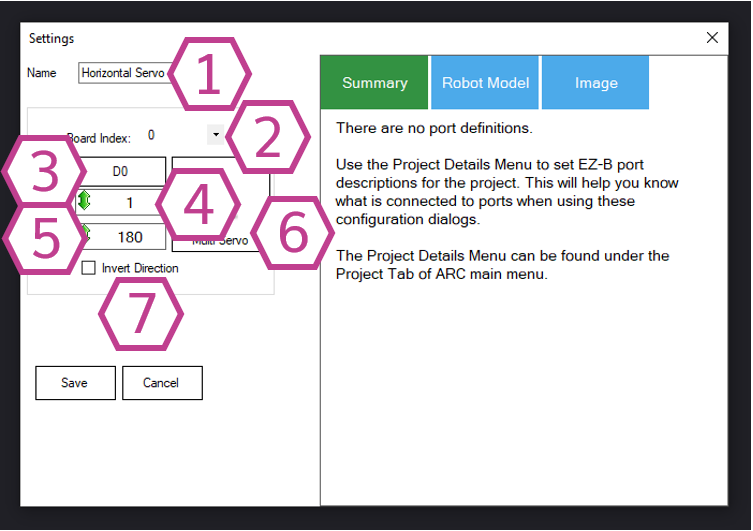
This is the name of the skill as it appears in your ARC project. You can rename it to something descriptive like
Head Pan or Camera Left/Right.
Note: Changing the title also changes the name used in the controlCommand() call for this skill.
Select which controller board the servo is connected to. This matters if you have more than one board connected to ARC. If you only have one board, this is usually Board 0 (the first/only board).
Choose the digital port where the servo signal wire is connected. Make sure the servo is plugged into a servo-capable connection on your controller and that the wiring is correct (Ground / Power / Signal).
- Sets the lowest position this skill will send to the servo.
- Left-click and drag to adjust the value, or right-click to type the value.
- Use this to prevent the servo from turning too far and hitting your robot frame, wires, or mechanical stops.
- Sets the highest position this skill will send to the servo.
- Left-click and drag to adjust the value, or right-click to type the value.
- If your servo buzzes, stalls, or the mechanism binds near an end, reduce the maximum (or increase the minimum).
This lets you select additional servos to mirror the movement of the “master” servo. This is useful when two servos must move together (for example, left/right linkages). Make sure mirrored servos are mechanically safe and use Invert Direction if one needs to move the opposite way.
When enabled, the servo direction is reversed.
Example: If a position of 180 normally moves the servo all the way left, enabling inversion makes 180 move it all the way right.
This is commonly used when mirroring two servos mounted in opposite orientations.
How to Use Horizontal Servo (Step-by-Step)
- Add the skill to your ARC project: Project → Add Skill → Servo → Horizontal Servo.
- Open the skill’s Settings and select the correct Board Index (controller) and Port (digital pin).
- Set the Minimum and Maximum positions to a safe range. If the servo does not move at all, confirm you changed the defaults (90/90) to a real range (for example 10/170).
- Return to the skill’s main window. Click and hold on the position area and drag your mouse left/right to move the servo.
- Use Center to quickly test the midpoint, and use Release if you want the servo to stop holding position.
Video
Requirements
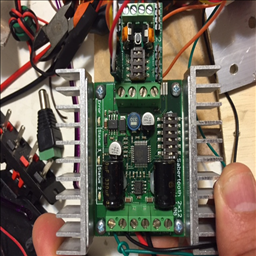
- A 3-wire GVS (Ground-Voltage-Signal) 180° hobby servo motor.
- Adequate servo power. If your servo jitters, resets the board, or moves weakly, you may need an external 5–6V supply that can provide enough current.
Resources
- Servo basics: How a servo works
- ARC servo skills overview: Using a servo skill
Related Tutorials

Rotating Servo Calibration-Unscripted
Sabertooth+Kagaroo+DC Motors As Servos
Setting Servo Speeds And Initialization Script Tutorial
Related Robots

Related Questions
It's Not Just Me; Went To A Makerspace And Even The Latest...

New Servo Less Degree
Strange Behavior Servo

More Servo Degree Possible?

Upgrade to ARC Pro
Discover the limitless potential of robot programming with Synthiam ARC Pro – where innovation and creativity meet seamlessly.