EZB-Compatible Robot Controllers & Microcontroller Boards for Synthiam ARC
Synthiam ARC works with many robot controllers and microcontroller boards using EZB firmware.
- � Install EZB firmware to turn supported hardware into an ARC robot controller
- � Control servos, motors, sensors, cameras, and AI vision
- � Works with DIY robots, education kits, and custom builds
An EZB is any robot computer or microcontroller that connects to Synthiam ARC Robot Software.
Below is the current list of robot controllers and microcontroller boards compatible with Synthiam ARC using EZB firmware.
Manufacturers
Adafruit
1 platform
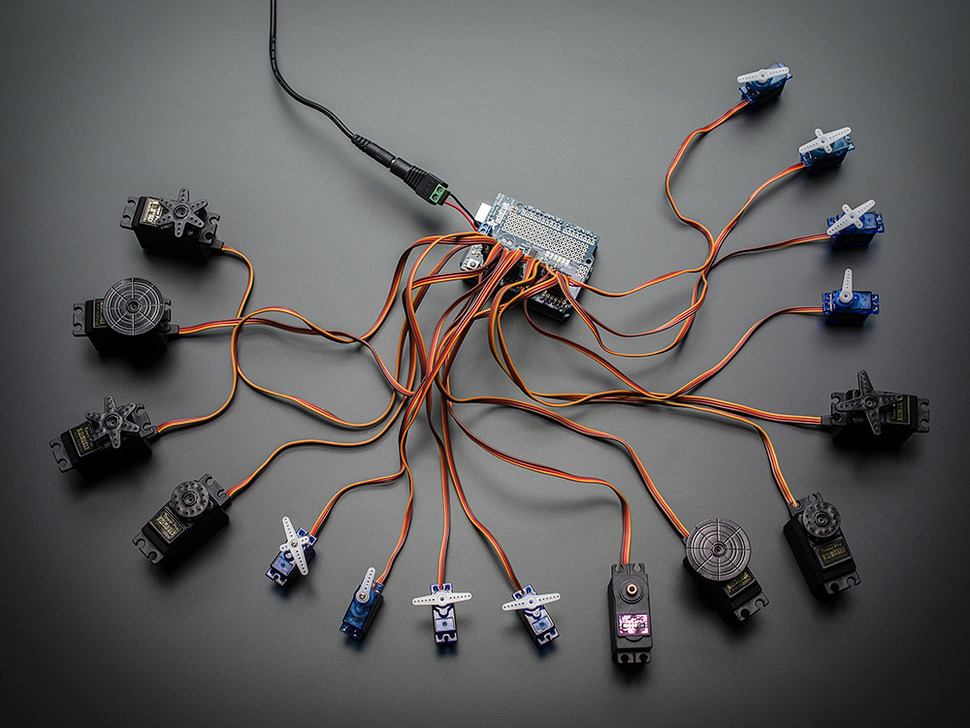
Arduino With PCA9685 Servo Controller
by Adafruit
Control PCA9685 servo breakout with Arduino Uno using Synthiam ARC and EZB firmware; servo shield support and programming tutorial.
USB
Servos
16
Camera
Audio
UART
✕
I2C
ADC
✕
Digital
✕
Arduino
3 platforms
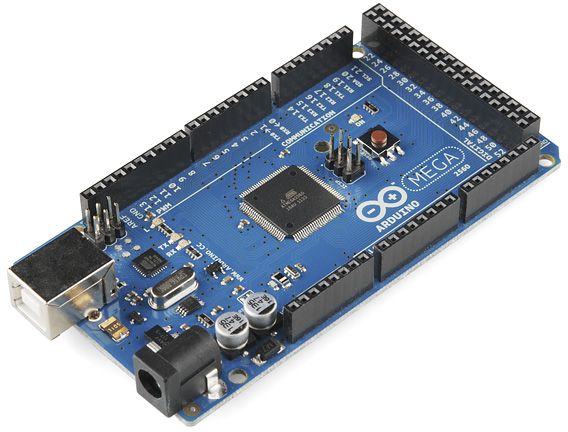
Arduino Due/Mega
by Arduino
Synthiam ARC enables Arduino Mega 2560 control with 8 ADC, 13 PWM, 21 digital ports and 24 servos; includes firmware, shield and tutorials
USB
Servos
24
Camera
Audio
UART
3
I2C
ADC
8
Digital
21
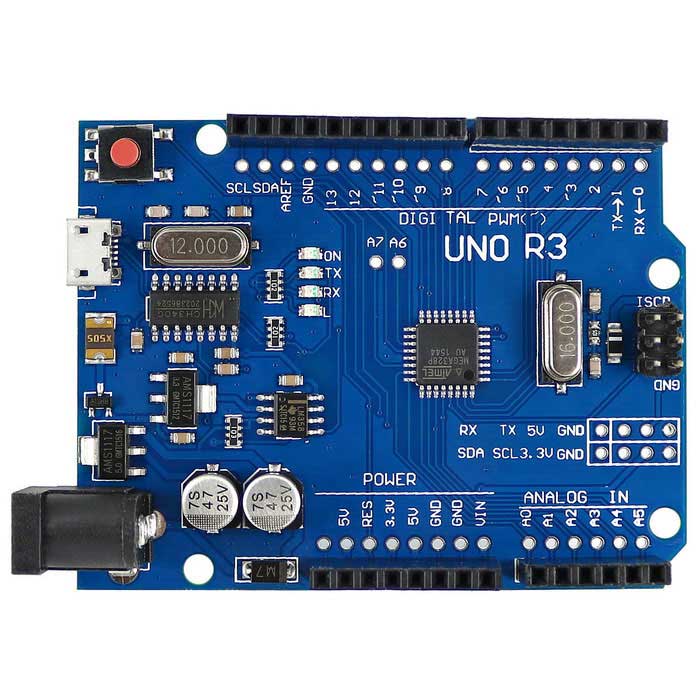
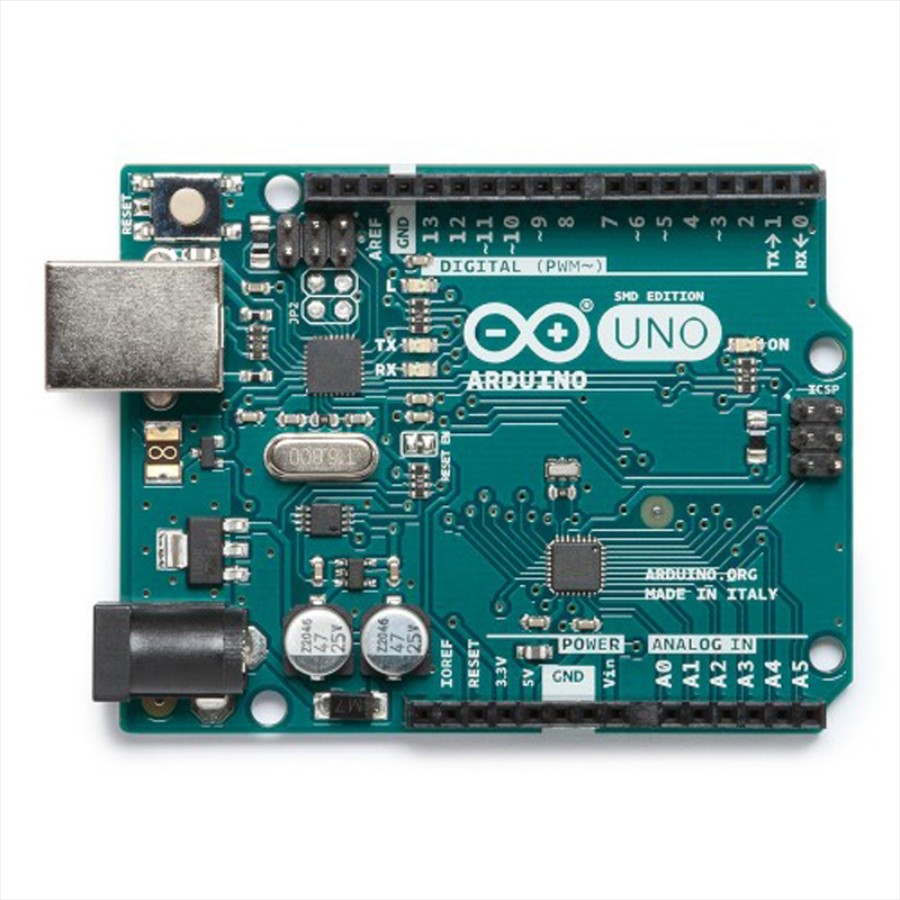
Arduino Genuino Uno
by Arduino
Program Arduino Uno with EZB firmware for Synthiam ARC control; pinouts, PWM pins and frequency details for Arduino boards.
USB
Servos
12
Camera
Audio
UART
✕
I2C
ADC
6
Digital
14
Arduino Leonardo
by Arduino
Connect Synthiam ARC to Arduino Leonardo via USB using EZB firmware to control GPIO, PWM, servos, and ADC; enable DTR in ARC connection.
USB
Servos
12
Camera
Audio
UART
Varies
I2C
ADC
Varies
Digital
Varies
BBC
1 platform
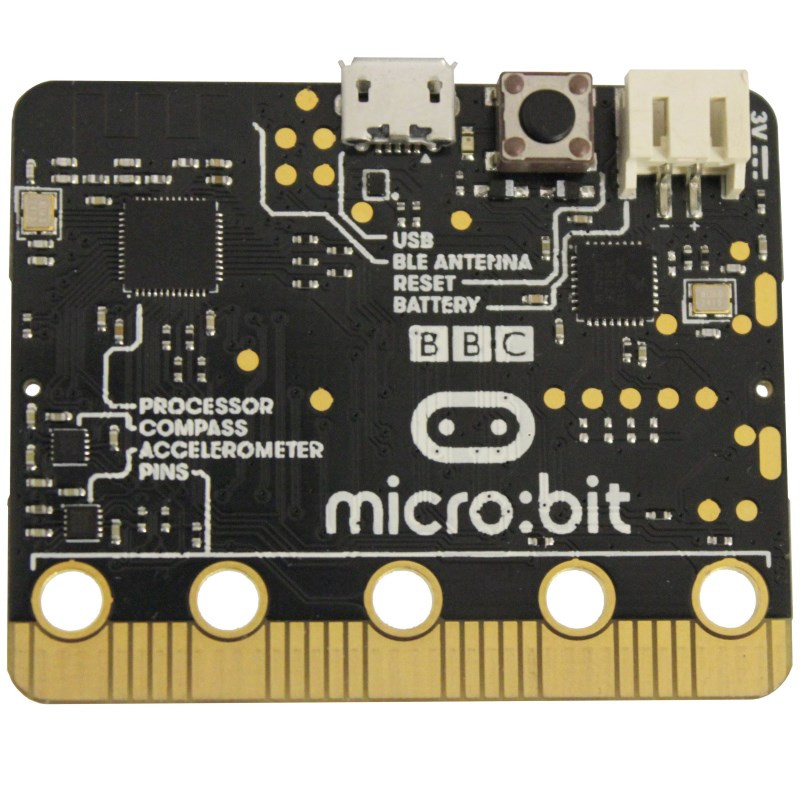
Micro:Bit
by BBC
Connect BBC Micro:bit to Synthiam ARC via USB. Access GPIO, LEDs, buttons; upload Arduino firmware for I2C, SPI and analog sensors.
USB
Servos
Varies
Camera
Audio
UART
✕
I2C
ADC
3
Digital
16
DF Robot
1 platform
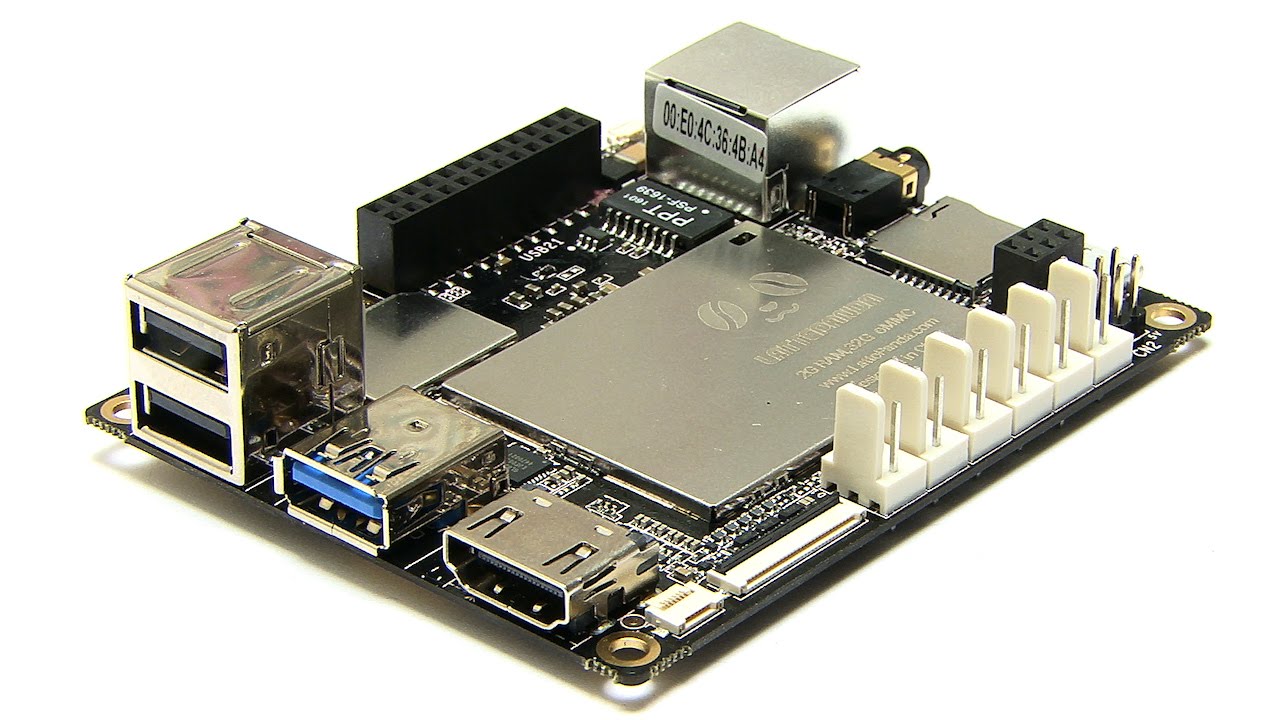
Lattepanda
by DF Robot
LattePanda runs Windows and Synthiam ARC, with onboard Arduino (EZB firmware) for GPIO and direct EZ‑B v4 hardwire control with low latency.
Wi-Fi / USB
Servos
12
Camera
Audio
UART
1
I2C
ADC
5
Digital
12
DJI
1 platform
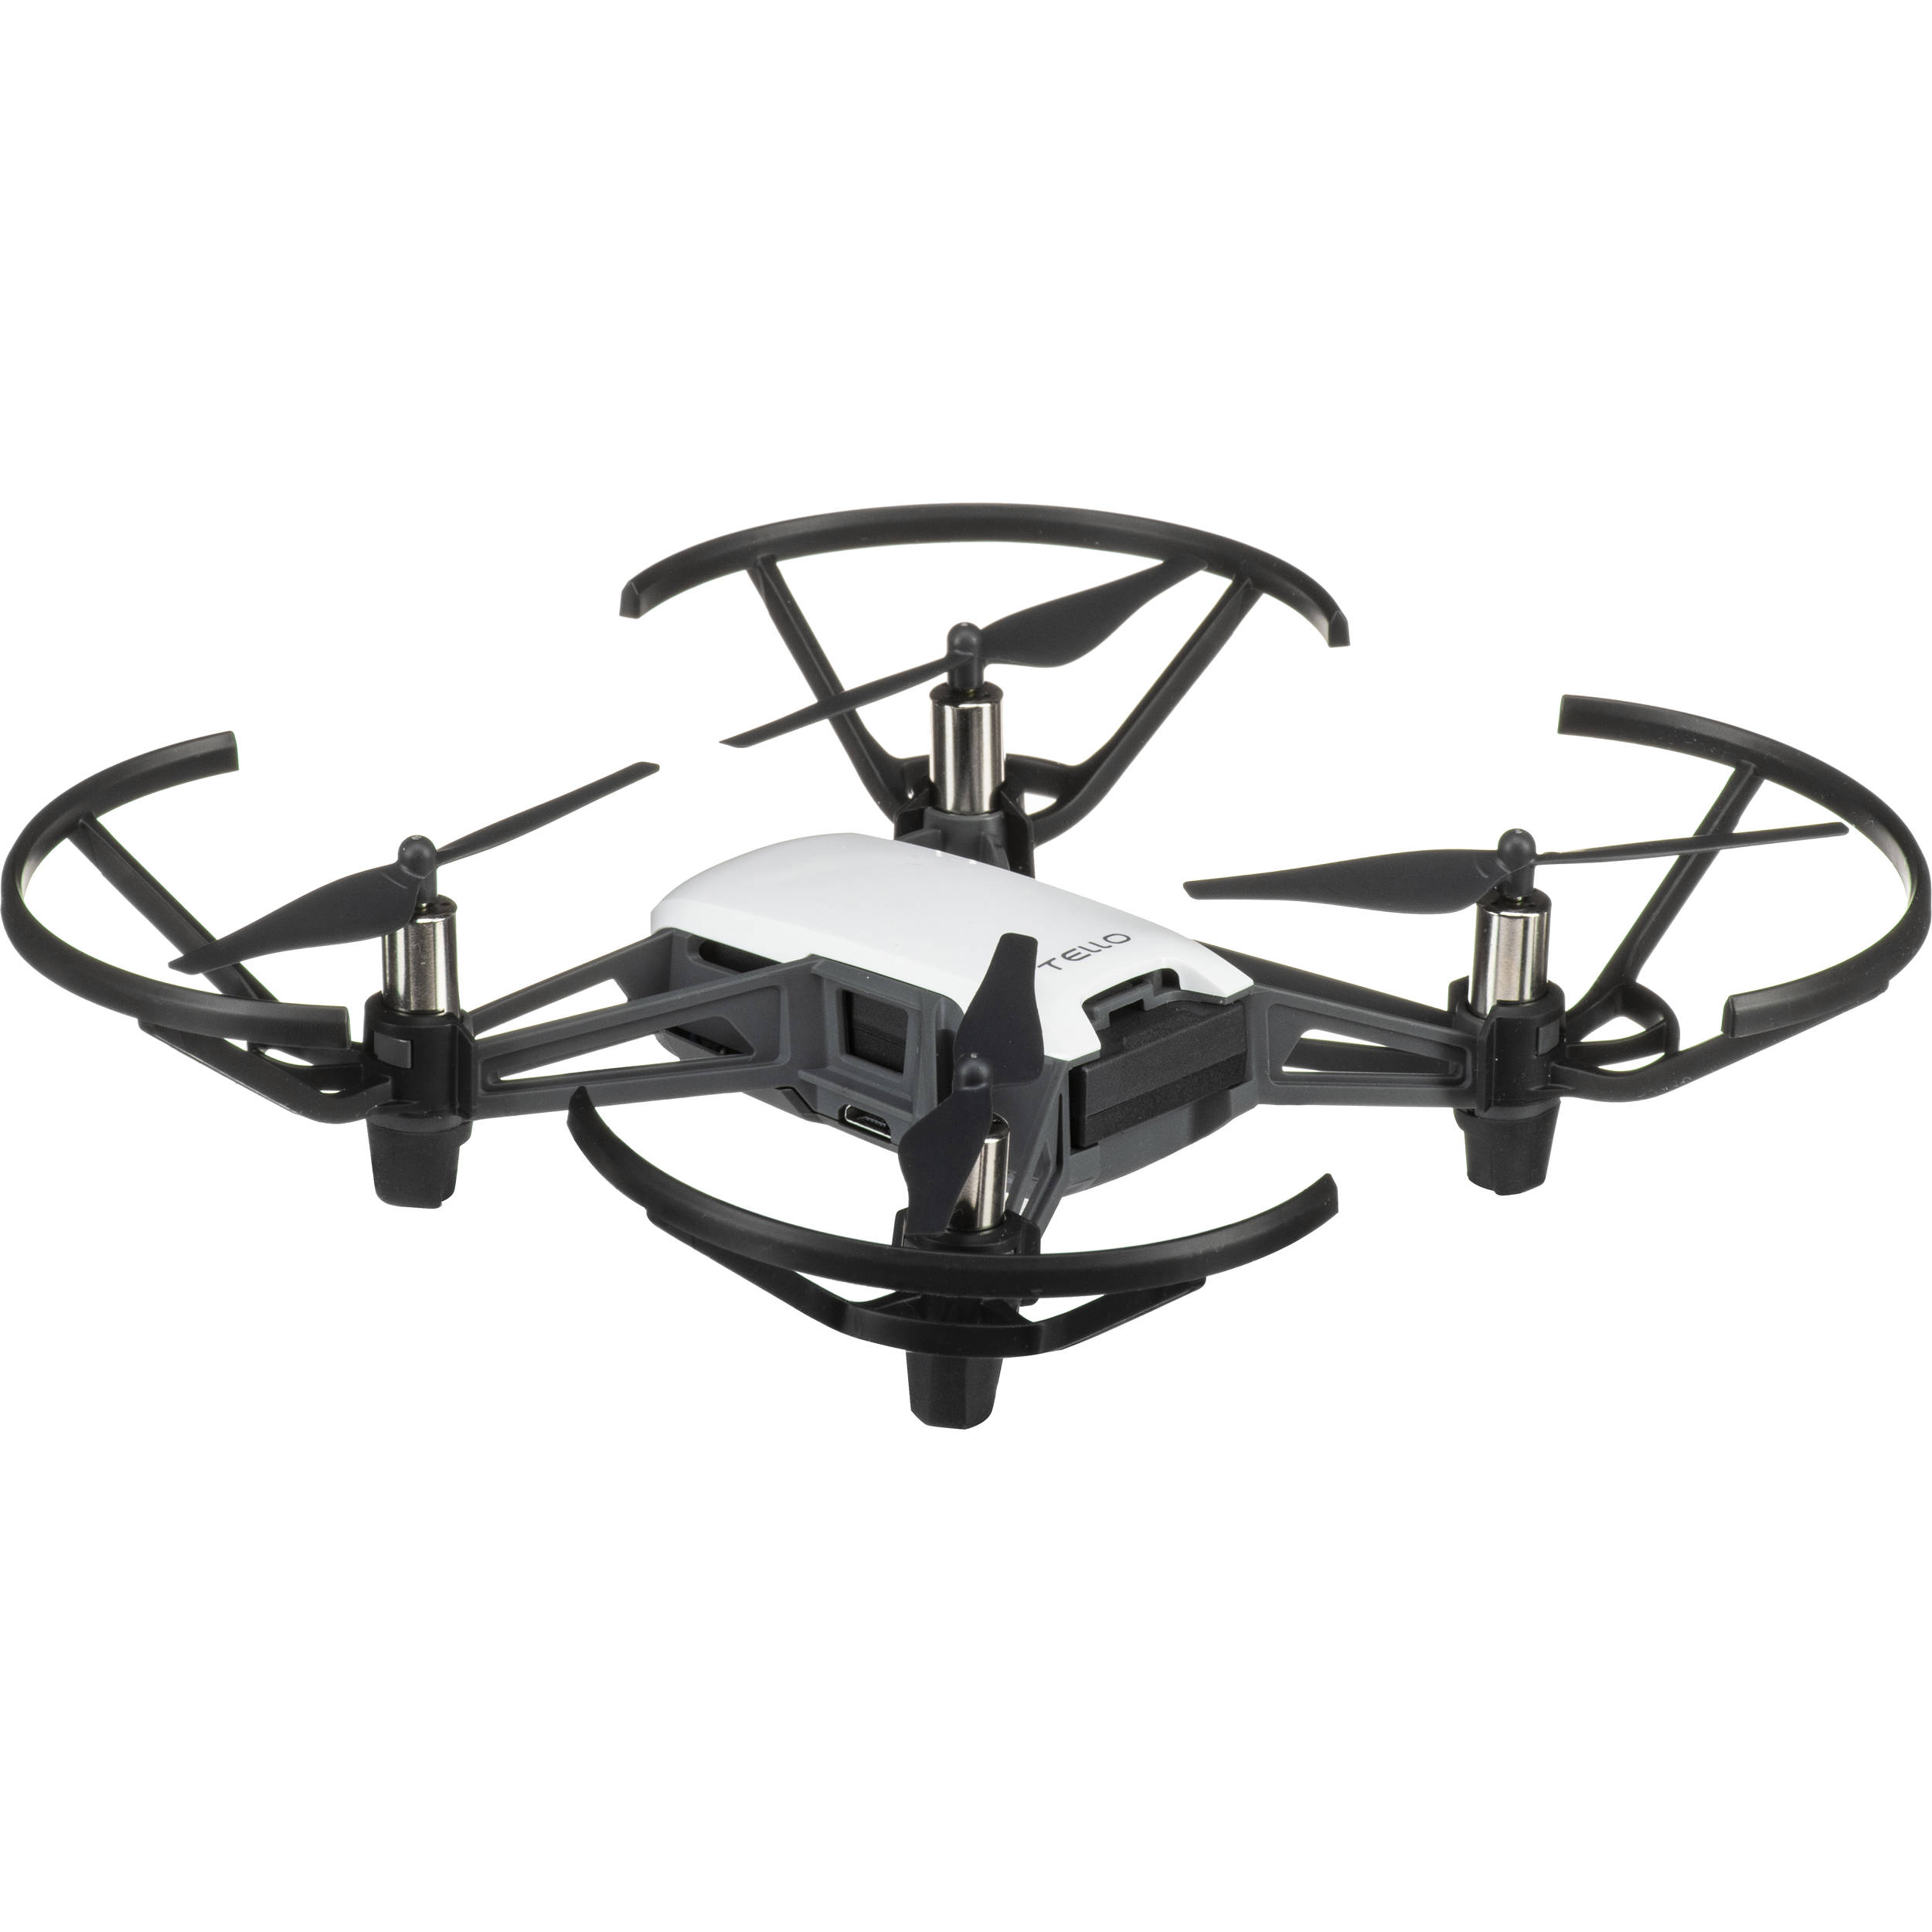
Tello Drone
by DJI
Program the DJI Tello in Synthiam ARC for computer vision tracking and movement using JavaScript, Python, EZ-Script, C++, or .NET.
Wi-Fi
Servos
✕
Camera
Audio
UART
✕
I2C
ADC
✕
Digital
✕
Espressif
2 platforms
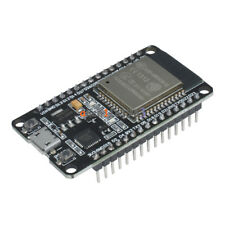
Esp32
by Espressif
Control ESP32 boards with Synthiam ARC: EZB-like firmware for GPIO, PWM/servos, serial, WiFi modes, safe pins, wiring and power tips.
Wi-Fi
Servos
Varies
Camera
Audio
UART
Varies
I2C
ADC
Varies
Digital
Varies
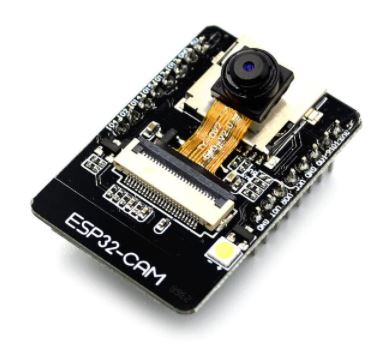
ESP32 Cam
by Espressif
ESP32-CAM as an EZB for Synthiam ARC: stream video, control GPIO/servos, AP/Client WiFi, and ARC D0-D23 to GPIO pin mapping.
Wi-Fi
Servos
Varies
Camera
Audio
UART
Varies
I2C
ADC
Varies
Digital
Varies
EZ-Robot
8 platforms
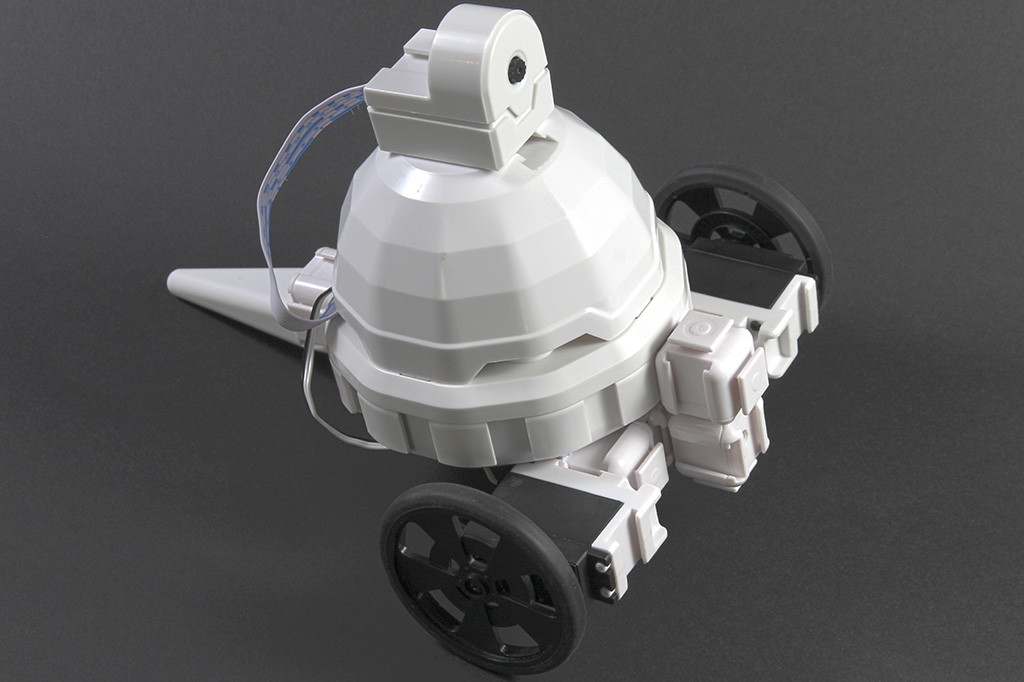
Adventurebot
by EZ-Robot
Two-wheeled WiFi robot with camera using EZ-B v4 brain-affordable, expandable AdventureBot kit built from EZ-Bits, sold by EZ-Robot.
Wi-Fi / USB
Servos
24
Camera
Audio
UART
3
I2C
ADC
8
Digital
24
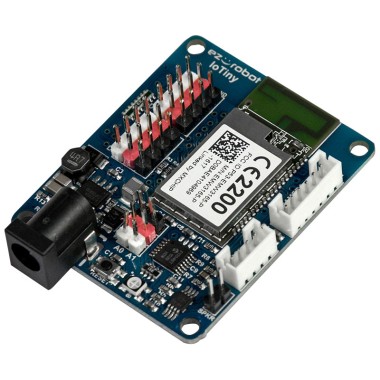
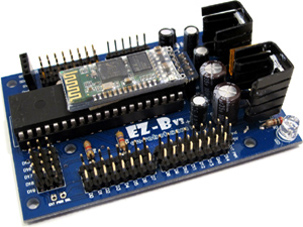
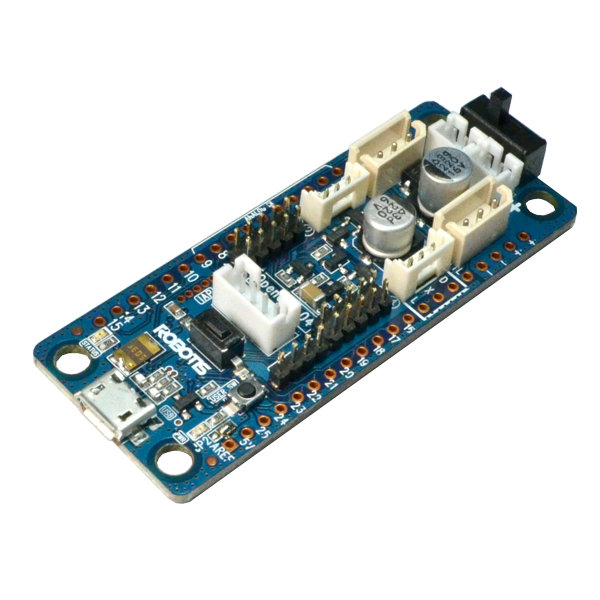
EZ-B Iotiny
by EZ-Robot
Control IoTiny with Synthiam ARC: 100MHz Cortex‑M4 Wi‑Fi IoT/robot controller-camera, servos, ADC, I2C and digital I/O for easy internet automation
Wi-Fi / USB
Servos
8
Camera
Audio
UART
✕
I2C
ADC
✕
Digital
✕
EZ-B V3
by EZ-Robot
EZ-B v3 Bluetooth robot controller supported by Synthiam ARC - features, specs and legacy connection tutorial
Bluetooth
Servos
24
Camera
Audio
UART
✕
I2C
ADC
8
Digital
24

EZ-B V4
by EZ-Robot
EZ-B v4/2 robot controller: dual Cortex ARM, Wi-Fi, audio/video, 24 servo/digital ports, I2C/UART, camera and Synthiam ARC control for custom robots
Wi-Fi / USB
Servos
24
Camera
Audio
UART
3
I2C
ADC
8
Digital
24
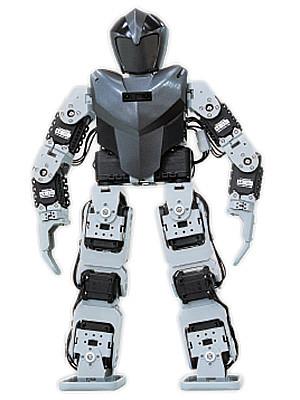
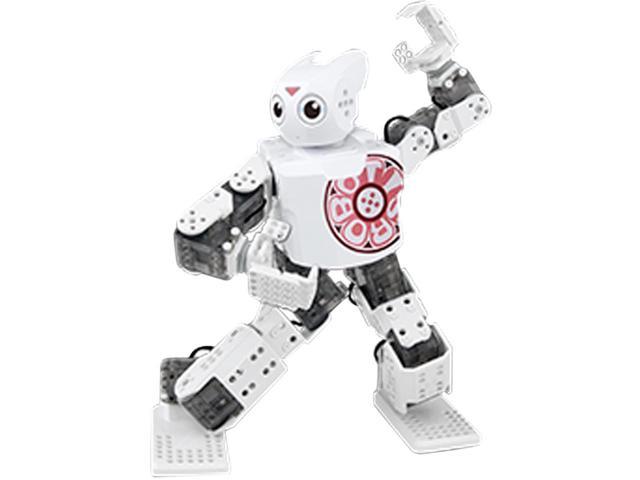
JD Humanoid
by EZ-Robot
JD humanoid robot kit - WiFi-enabled, 16 DOF with metal-gear servos; easy, fun, educational, available from the EZ-Robot online store.
Wi-Fi / USB
Servos
24
Camera
Audio
UART
3
I2C
ADC
8
Digital
24
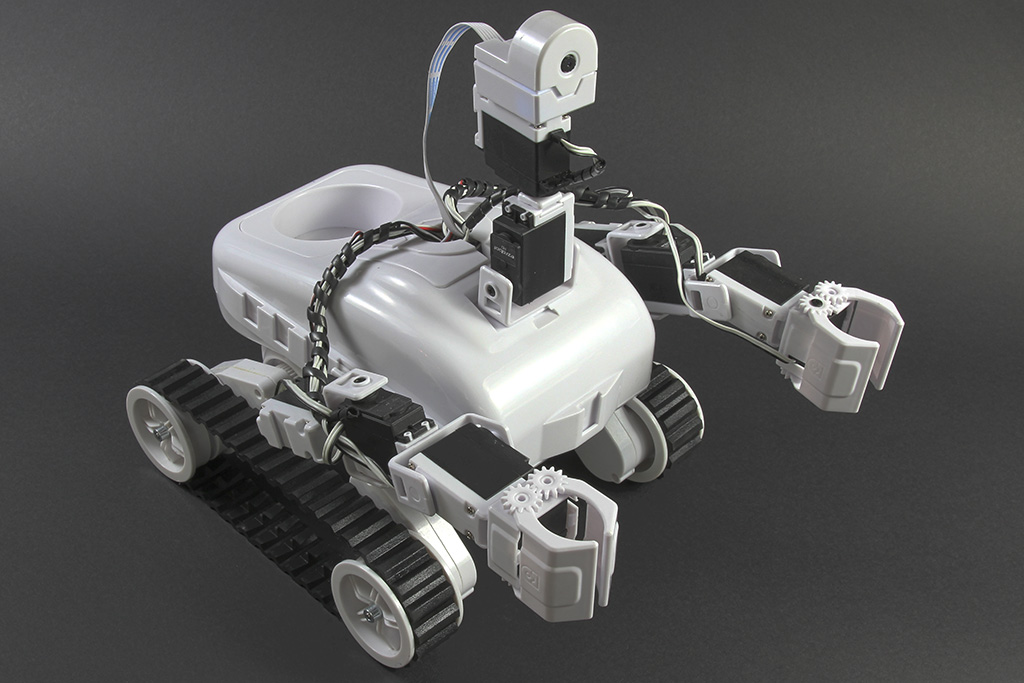
Roli Rover
by EZ-Robot
Roli WiFi planetary rover kit, customizable with 13 ez-bit ports for add-ons, built to traverse varied surfaces. Sold by EZ-Robot
Wi-Fi / USB
Servos
24
Camera
Audio
UART
3
I2C
ADC
8
Digital
24
Shell-E
by EZ-Robot
Build and customize robot pets with 3D printing using the Shell-E Kit and EZ-B IoTiny-teach STEAM, vision tracking, speech recognition, ML and VR
Wi-Fi
Servos
8
Camera
Audio
UART
✕
I2C
ADC
2
Digital
8
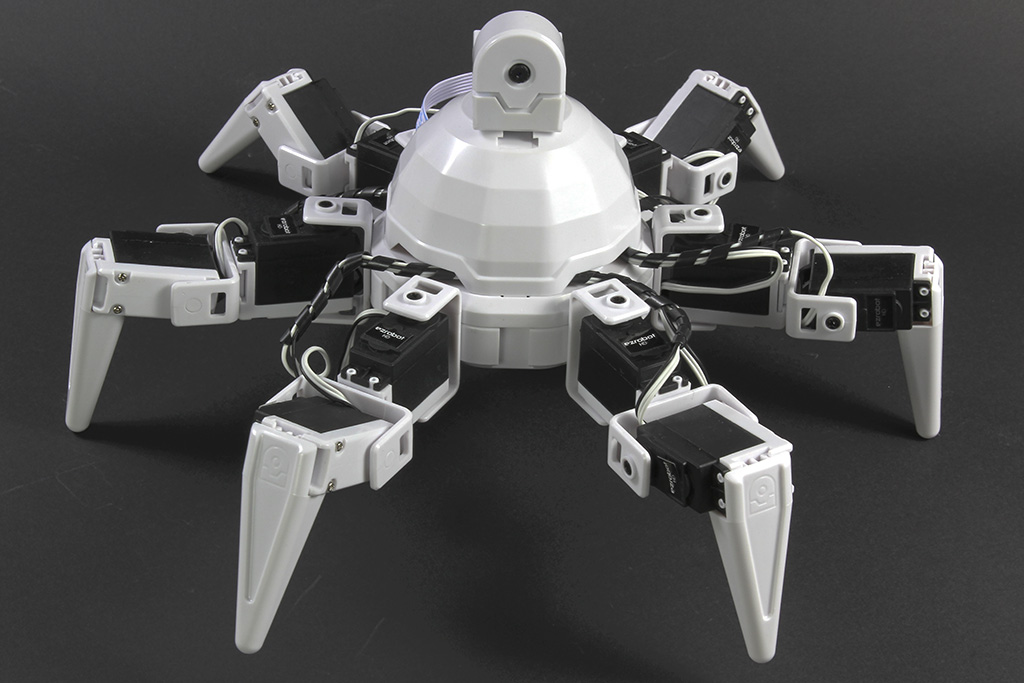
Six Hexapod
by EZ-Robot
Six hexapod robot kit: Canadian-designed, customizable WiFi 6-legged platform with 12 servos/12 DOF for dynamic motion. Available at EZ-Robot.
Wi-Fi / USB
Servos
24
Camera
Audio
UART
3
I2C
ADC
8
Digital
24
EZ-Robot & Gael Langevin
1 platform
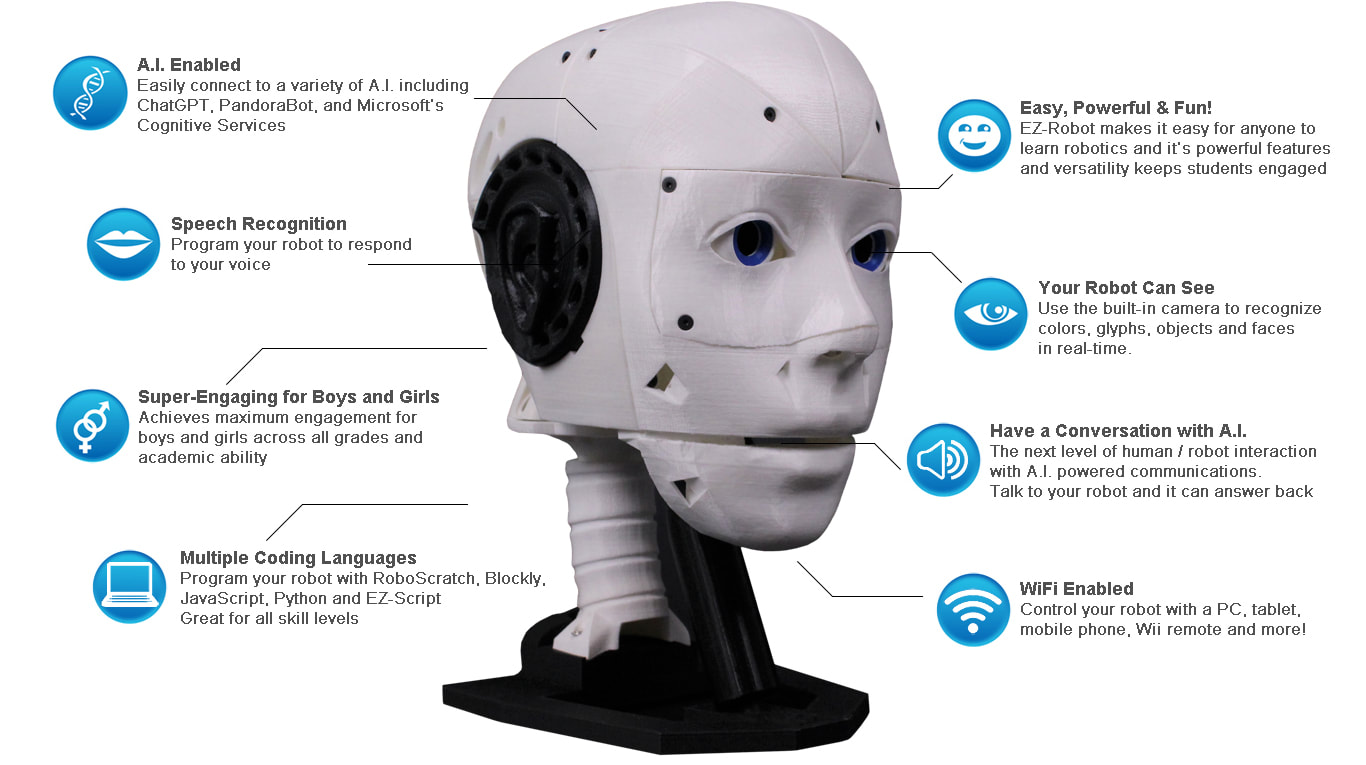
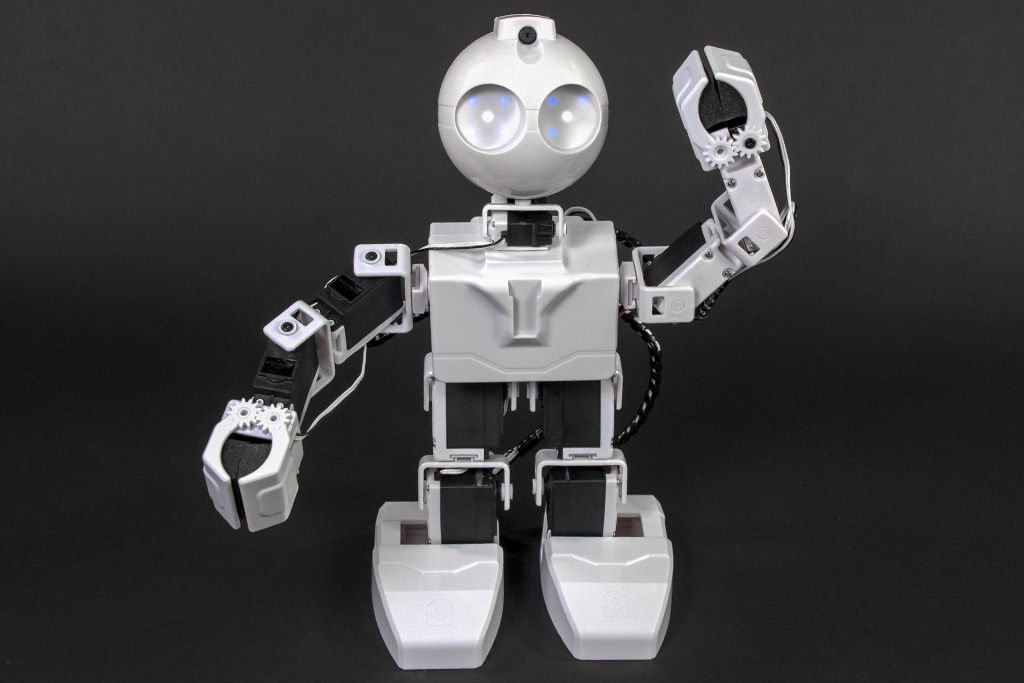
EZ-Inmoov Robot Head
by EZ-Robot & Gael Langevin
EZ-InMoov robot head-DIY educational humanoid kit powered by Synthiam ARC for vision tracking, speech, chatbot integration and mobile control
Wi-Fi
Servos
8
Camera
Audio
UART
✕
I2C
ADC
2
Digital
8
iRobot
1 platform
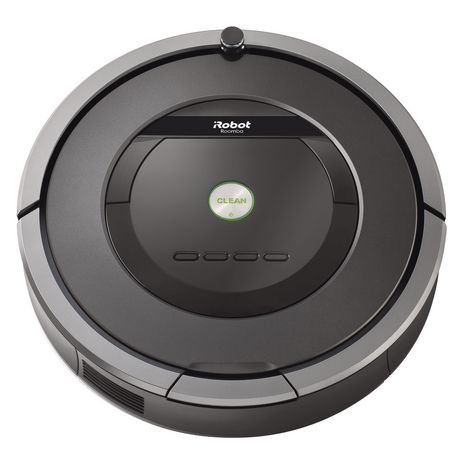
Roomba
by iRobot
Convert iRobot Roomba into a smart, fully featured personal robot with the EZ-Robot Complete Kit-movement control and Roomba manual included.
Controller Dependant
Servos
✕
Camera
Audio
UART
✕
I2C
ADC
✕
Digital
✕
Ohmnilabs
1 platform
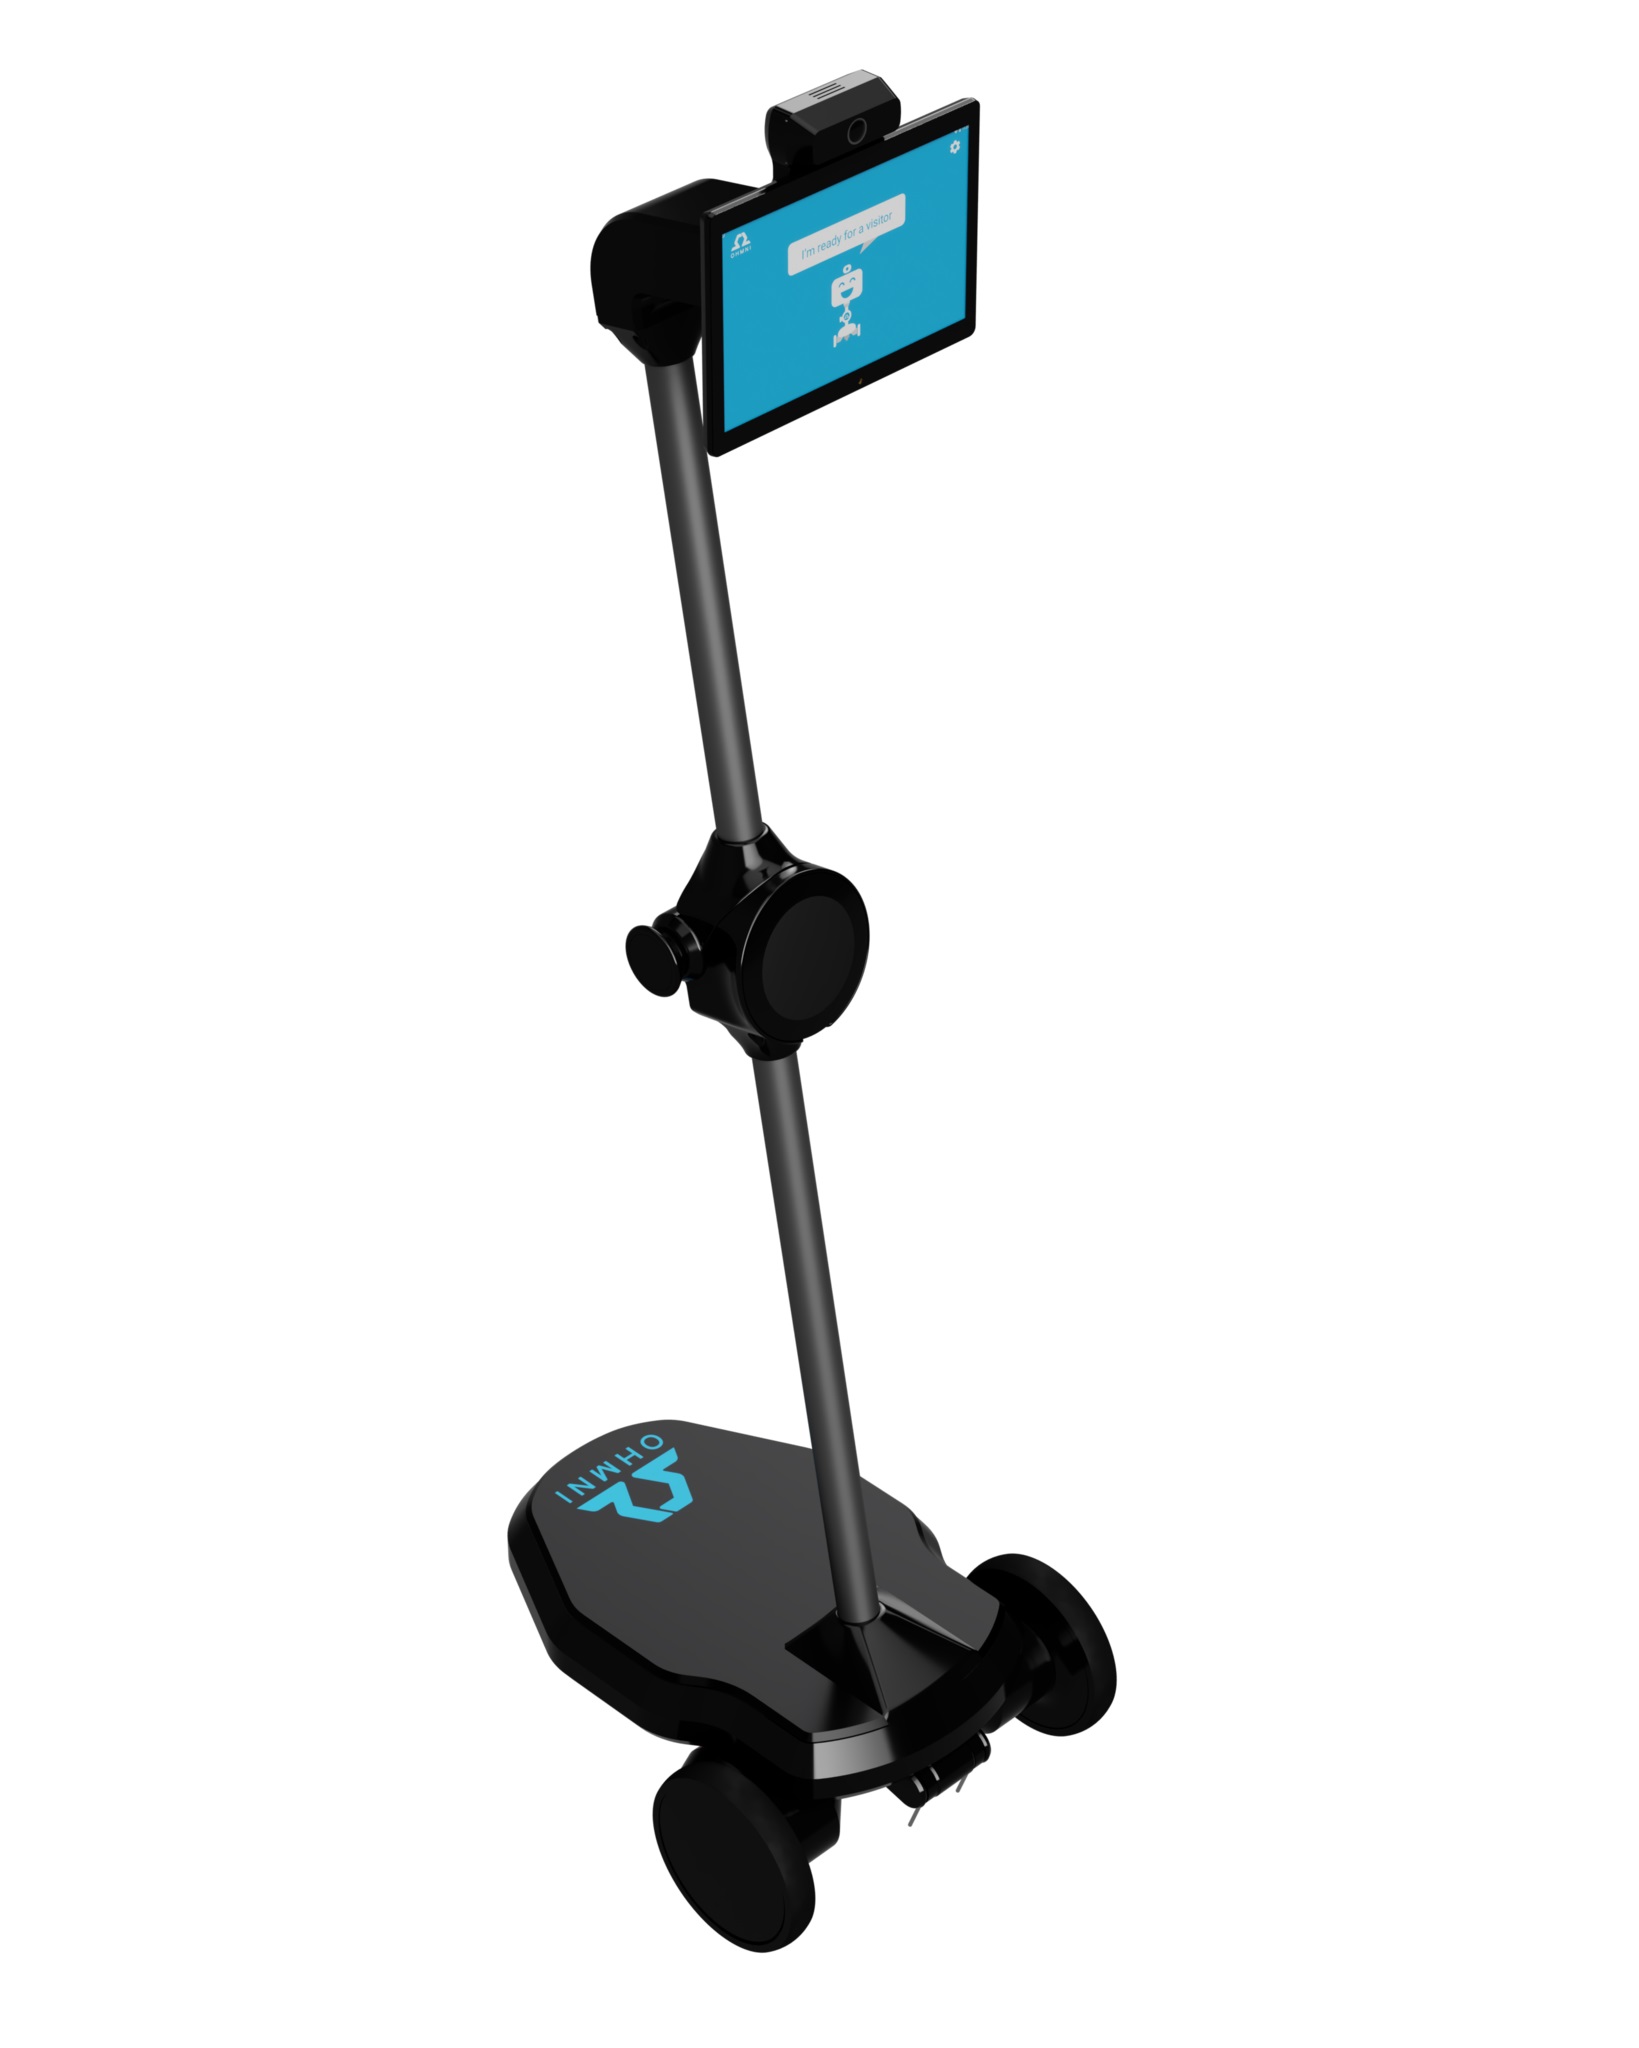
Telepresence Robot
by Ohmnilabs
Ohmni telepresence robot with 13MP Supercam and low-latency streaming; run Synthiam ARC on Windows 10, use Ohmnilabs Standalone Skill and Exosphere.
Wi-Fi
Servos
1
Camera
Audio
UART
✕
I2C
ADC
✕
Digital
✕
Parrot
1 platform
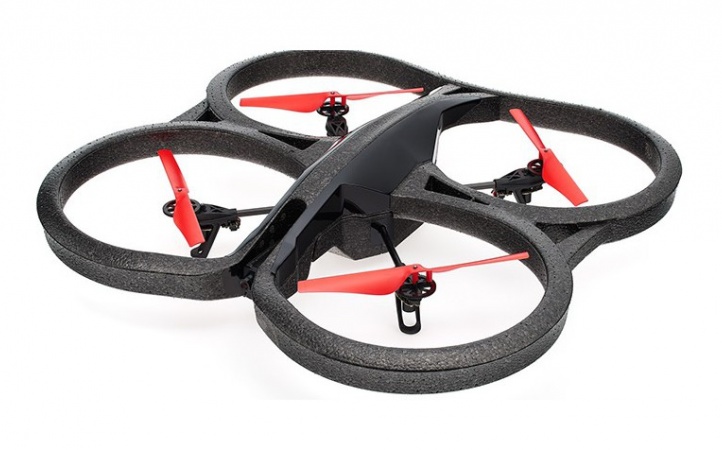
AR Parrot Drone
by Parrot
Control AR Parrot Drone via WiFi using Synthiam ARC's AR Drone Movement Panel skill; setup, movement control and manual access.
Wi-Fi
Servos
✕
Camera
Audio
UART
✕
I2C
ADC
✕
Digital
✕
Pi Foundation
1 platform
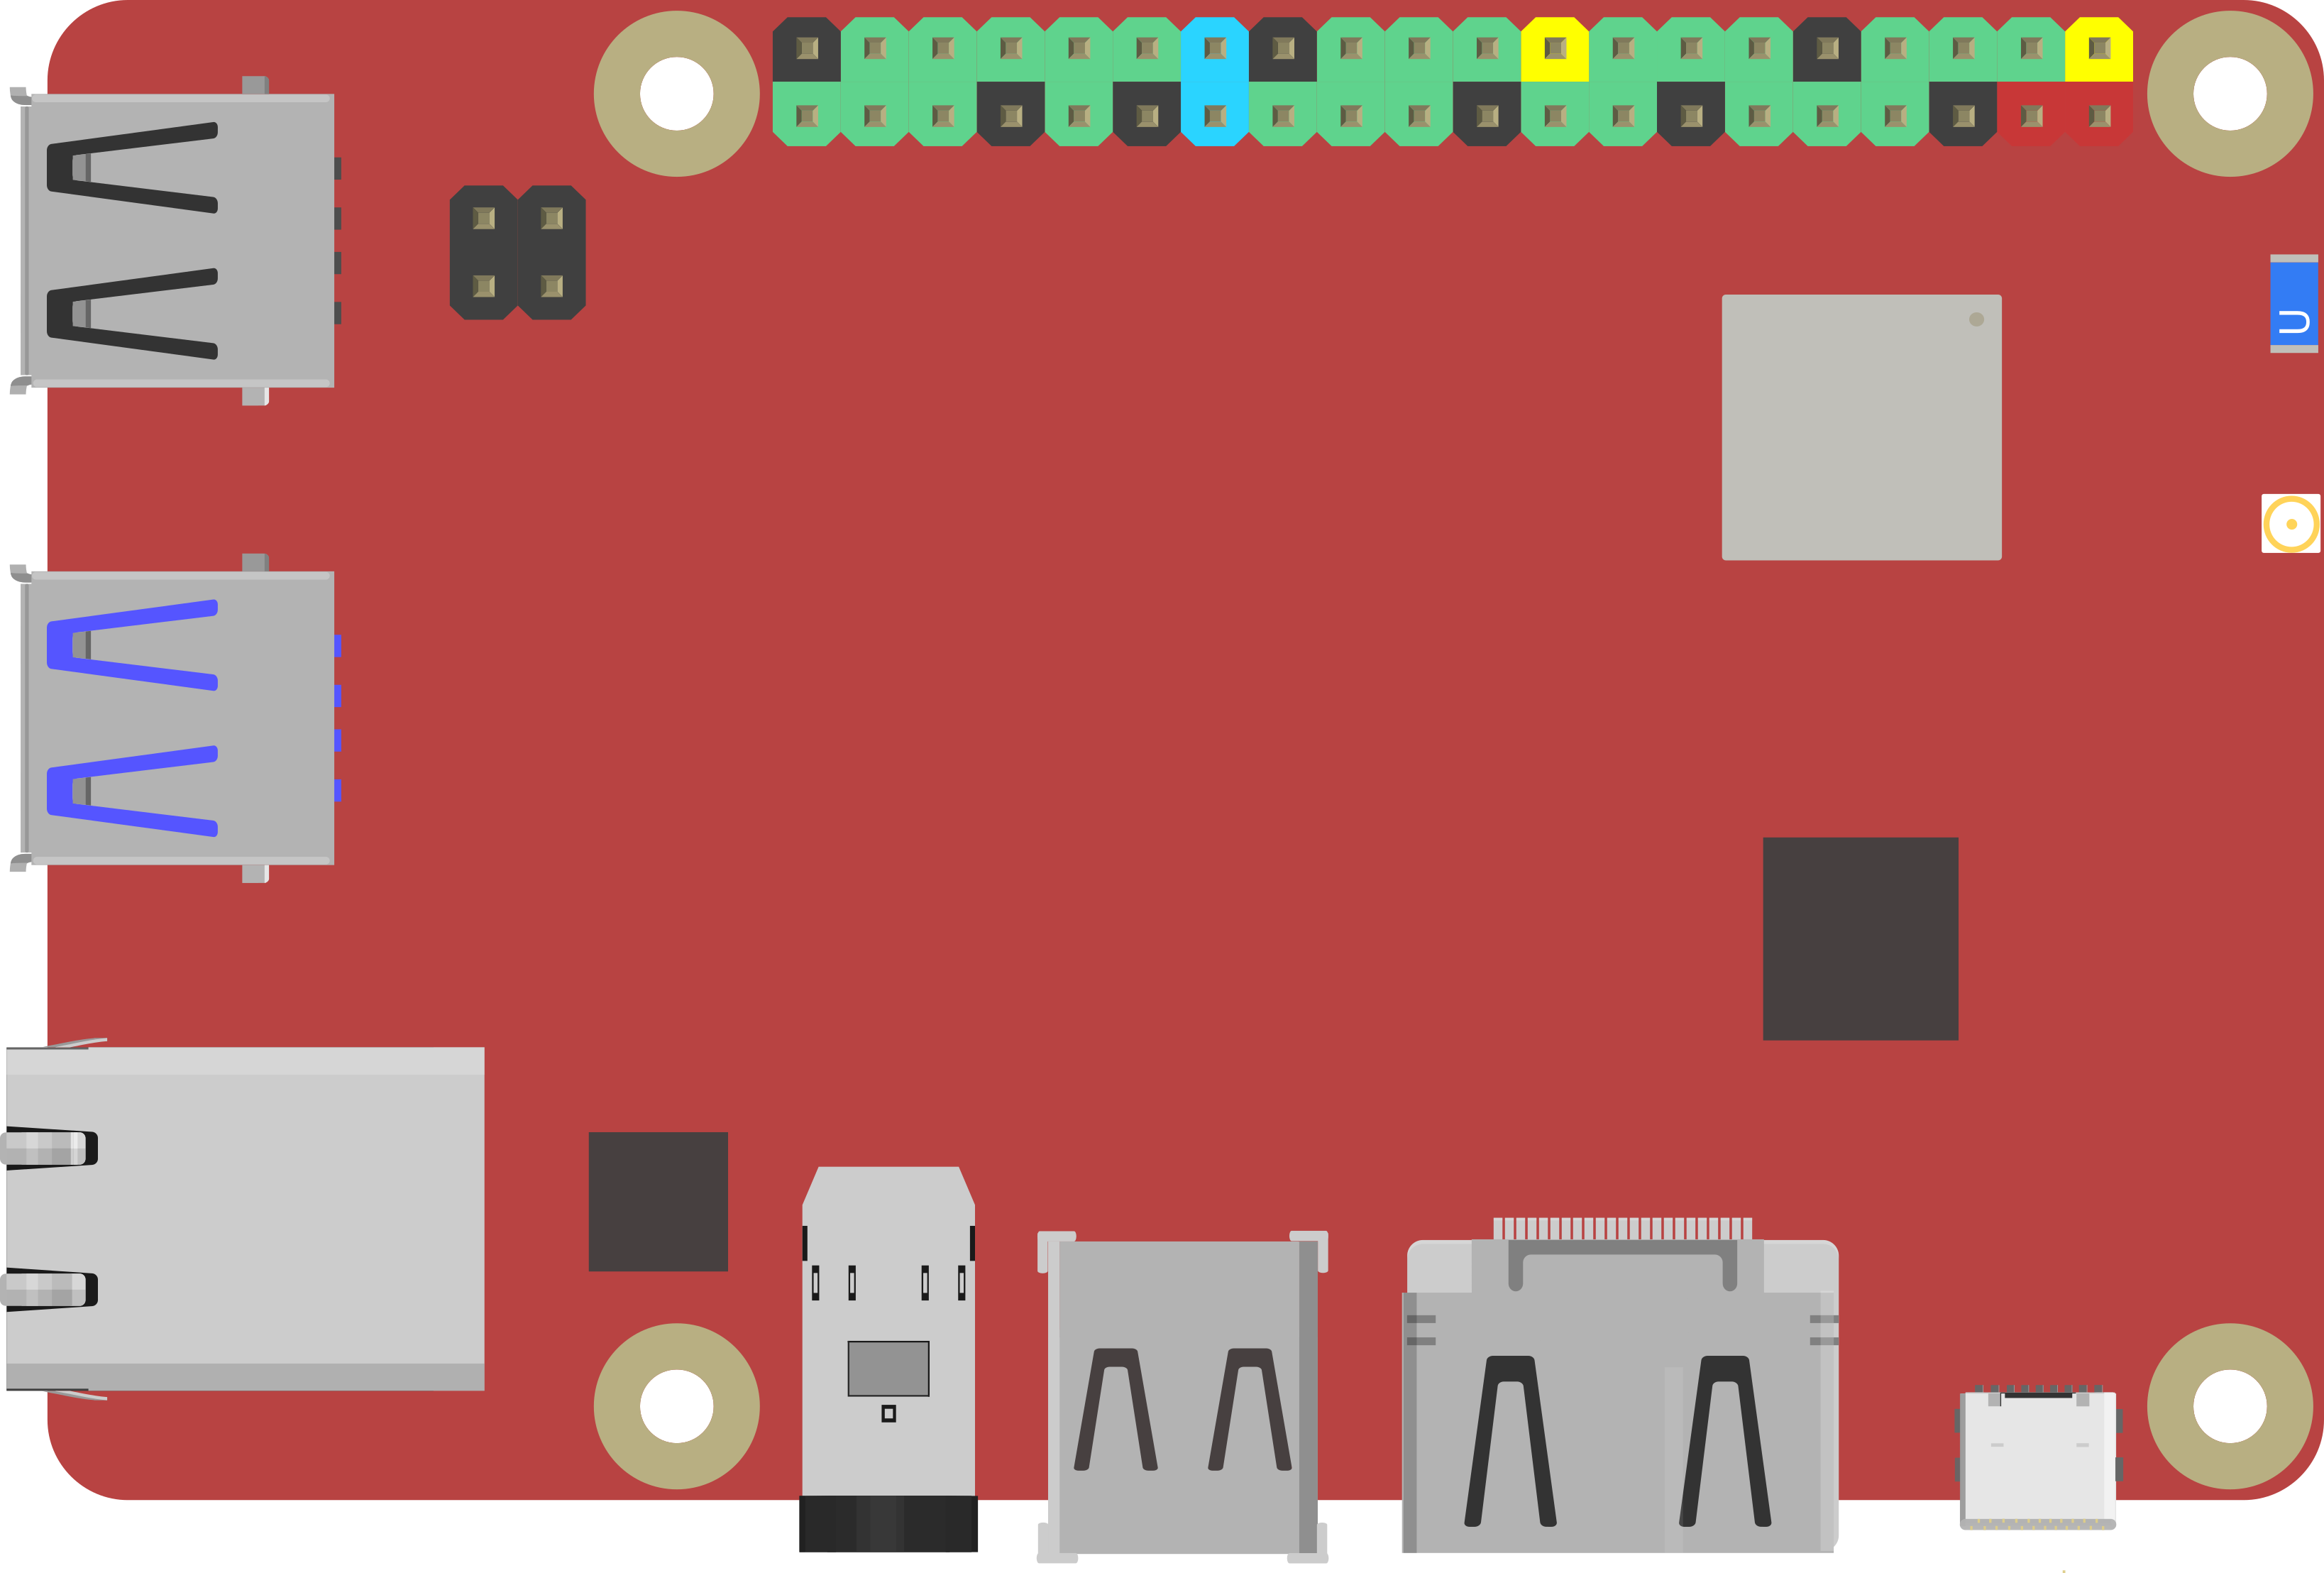
Raspberry Pi
by Pi Foundation
Run Synthiam ARC on Raspberry Pi 4+ with Windows 11 for robot control; use external EZB/Arduino for reliable I/O, SSD/USB storage recommended
Wi-Fi
Servos
✕
Camera
Audio
UART
✕
I2C
ADC
✕
Digital
✕
Radxa
1 platform
Rock Pi X
by Radxa
Control robots with Synthiam ARC on ROCK Pi X: affordable x86 SBC running Windows, Z8350 quad-core, 4K HDMI, Wi‑Fi, drivers and setup tips.
Wi-Fi / USB
Servos
✕
Camera
Audio
UART
✕
I2C
ADC
✕
Digital
✕
Robotis
5 platforms
Bioloid
by Robotis
Control Robotis Bioloid AX-12 servos with Synthiam ARC using OpenCM, OpenCR or EZ-B; add cameras, Kinect control, walking gaits and Raspberry Pi hacks
USB
Servos
200
Camera
Audio
UART
✕
I2C
ADC
✕
Digital
✕
Darwin Mini
by Robotis
ROBOTIS MINI for Synthiam ARC: 16 XL-320 servos, OpenCM9.04 controller, 3D-printable frame and Bluetooth/firmware setup tips.
USB / Bluetooth
Servos
16
Camera
Audio
UART
✕
I2C
ADC
✕
Digital
✕
Opencm 9.04
by Robotis
Control Robotis DYNAMIXEL servos with OpenCM9.04-C using Synthiam ARC - XL-320 TTL support, expansion board for AX/MX, UART0 or UART2 selectable
USB
Servos
200
Camera
Audio
UART
✕
I2C
ADC
✕
Digital
✕
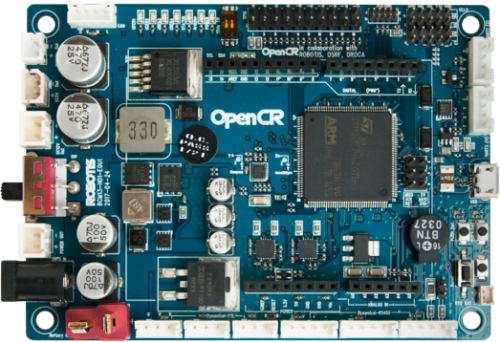
Opencr
by Robotis
OpenCR 1.0 ARM robot controller compatible with Synthiam ARC-Arduino firmware install, 921,600 baud, pin mapping, PWM & EZ-Script
USB
Servos
200
Camera
Audio
UART
✕
I2C
ADC
✕
Digital
✕
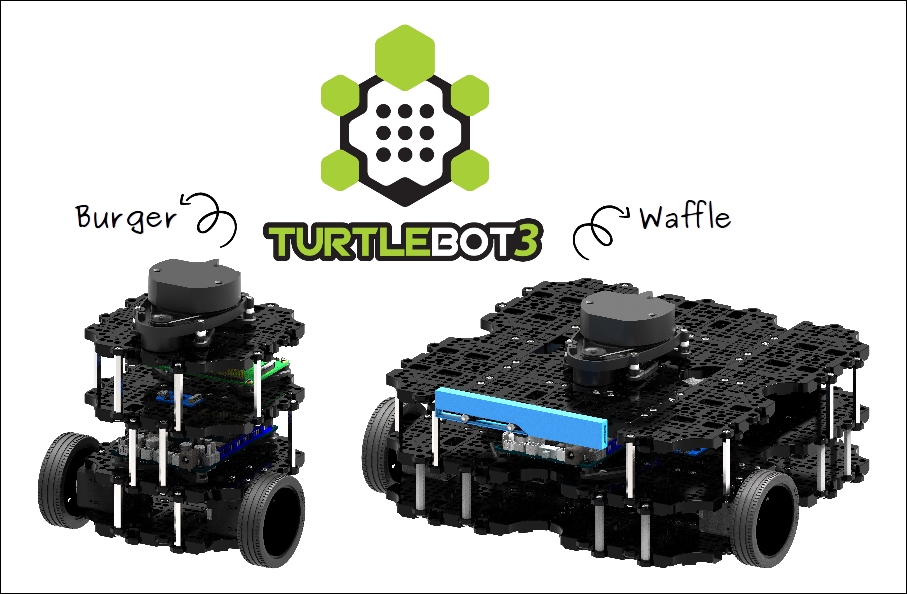
Turtlebot 3
by Robotis
TurtleBot3 with Synthiam ARC enables affordable, customizable mobile robots for education, Blockly/Python coding and 600+ addable robot skills.
Wi-Fi / USB
Servos
200
Camera
Audio
UART
Varies
I2C
ADC
Varies
Digital
Varies
Sain
1 platform
Balance Robot
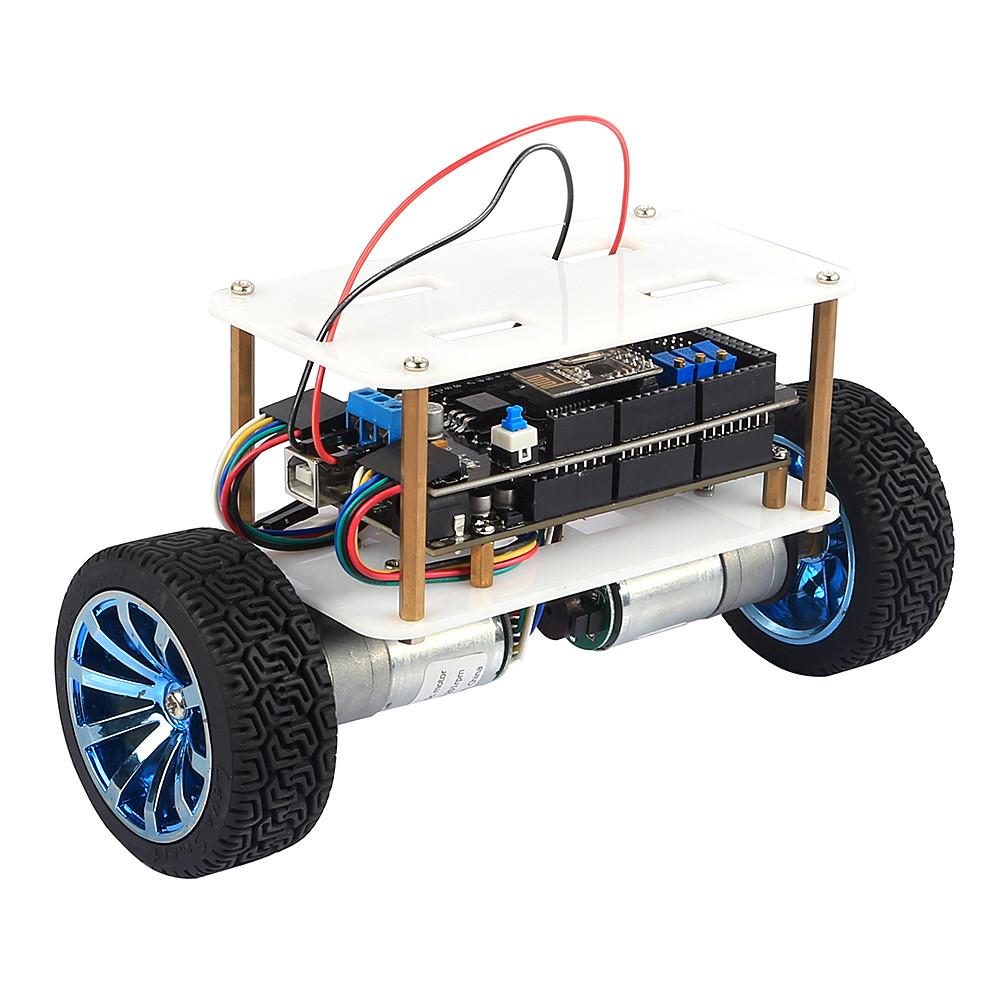
by Sain
Control Sain Smart v3 inverted-pendulum robot with Synthiam ARC using Arduino Mega + MPU6050 firmware; USB or Bluetooth connection and PID tuning.
USB
Servos
✕
Camera
Audio
UART
✕
I2C
ADC
✕
Digital
✕
Sphero
1 platform
Sphero
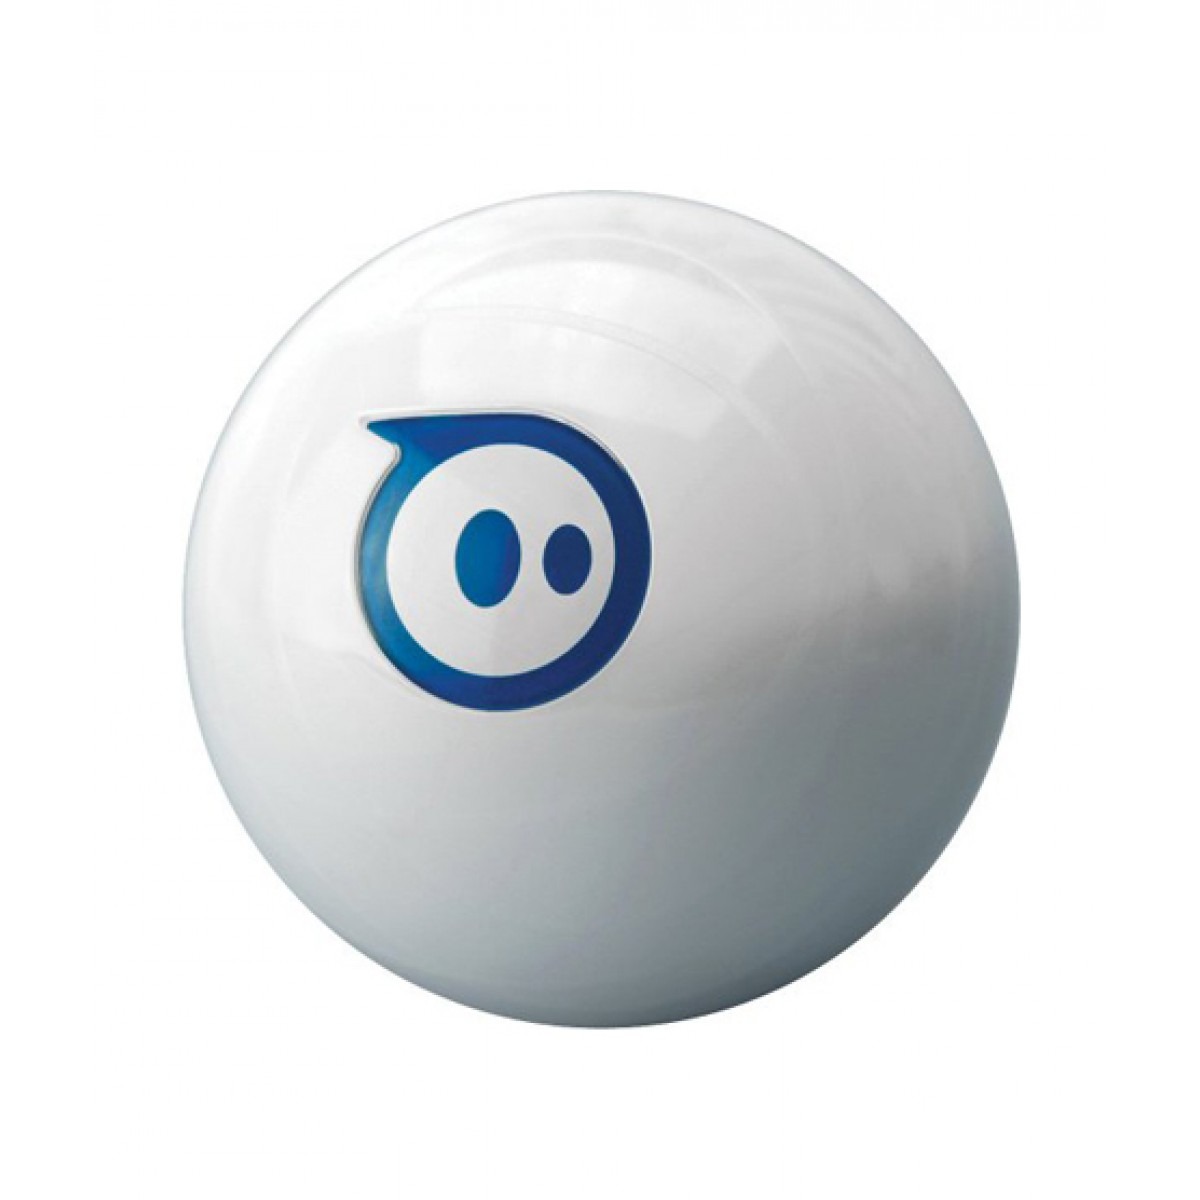
by Sphero
Control the Bluetooth Sphero with Synthiam ARC to add speech recognition, scripting and PandoraBot AI via the Sphero Movement Panel.
Bluetooth
Servos
✕
Camera
Audio
UART
✕
I2C
ADC
✕
Digital
✕
Team IoT
1 platform
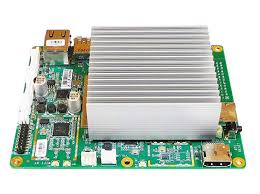
Atomic Pi
by Team IoT
Atomic Pi SBC: Intel board with 16GB eMMC, Wi-Fi, Bluetooth, USB3 for Windows/ARC robots, Windows 10 and Wi‑Fi drivers available.
Wi-Fi / USB
Servos
✕
Camera
Audio
UART
✕
I2C
ADC
✕
Digital
✕
Up
1 platform
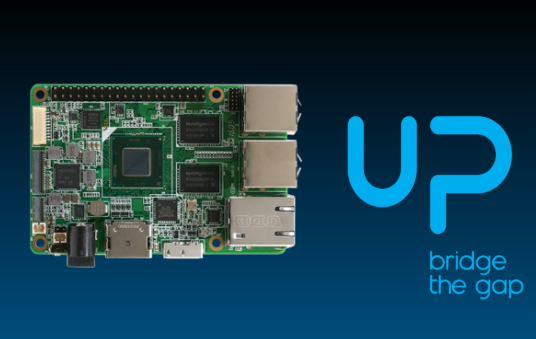
Up Board
by Up
Windows-powered credit-card SBC (Intel Cherry Trail) with 40-pin expansion, HDMI/audio, runs Synthiam ARC; includes Windows 10 drivers and install tips.
Wi-Fi / USB
Servos
✕
Camera
Audio
UART
✕
I2C
ADC
✕
Digital
✕
Don�t see your hardware? Tell us what board or robot controller you want supported.