 Hardware Info
How to add the RGB 8X8 Animator robot skill
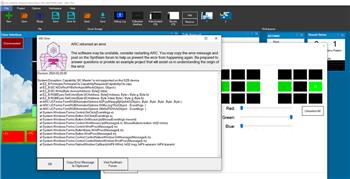
- Load the most recent release of ARC (Get ARC).
- Press the Project tab from the top menu bar in ARC.
- Press Add Robot Skill from the button ribbon bar in ARC.
- Choose the I2C category tab.
- Press the RGB 8X8 Animator icon to add the robot skill to your project.
Don't have a robot yet?
Follow the Getting Started Guide to build a robot and use the RGB 8X8 Animator robot skill.
How to use the RGB 8X8 Animator robot skill
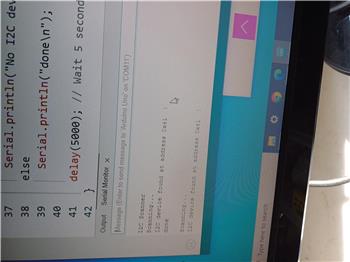
This animator controls the Synthiam RGB 8x8 display. The animator allows you to create multiple frames using the mouse, which can be played back at specified speeds. This operates much like a flip book.*Note: The RGB 8x8 Animator skill connects to the RGB 8x8 display through an i2c interface. If the RGB 8x8 display is not connected to the i2c interface, executing the RGB 8x8 Animator will lock up the EZB.
Main Window
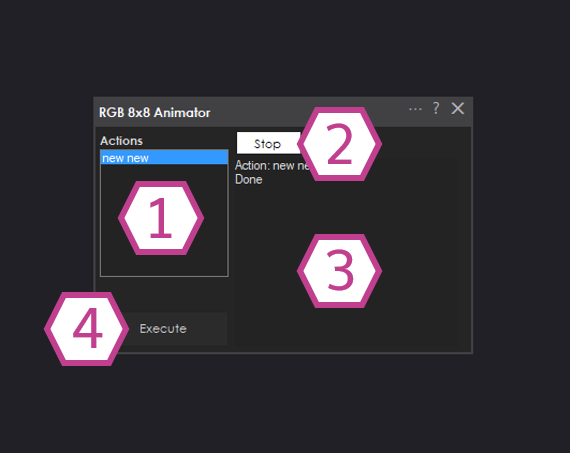
1. Action List
This section lists the animation actions you have created. Click on the desired action to highlight it for execution.
2. Stop Button
This button stops the running action. It's great for interrupting repeating actions.
3. Status Display
Displays the last event that happened within the skill.
4. Execute Button
This button executes the highlighted action in the Action list.
Configuration - Actions
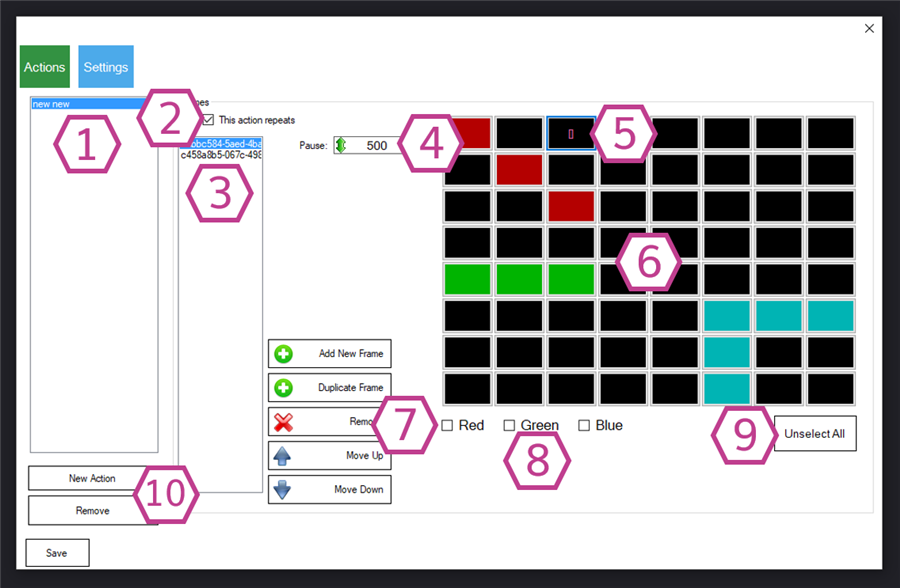
1. Action List
This section lists the animation actions you have created. Click on the desired action and add frames to it.
2. Action Repeats Checkbox
This checkbox enables the continuous repeating of the action when it's executed. It will loop forever until the stop button is pressed or another action is executed.
3. Frame List
This section lists the created frames for the selected action. Use the frame management buttons to modify the Frame List.
4. Pause Drop-down
This drop-down selects a delay in milliseconds between frames (0-5000 range in increments of 100). The default value is 500ms. Right-click to enter a custom number with your keyboard, 5000 or below.
5. Cursor
This cursor selects the RGB LED that the color checkboxes will modify. The color will change to display the combined color of all three checkboxes. Use multiple cursors to select more than one RGB LEDs to be modified at once. Use the "Unselect All" button as a shortcut to clear all the cursor selections.
6. LED Display
This display represents each 64 RGB LEDs on the RGB 8x8 Display in positional order. Use the cursor + color checkboxes to modify the colors.
7. Frame Management Buttons
These buttons modify the frame list. They allow you to add, duplicate, and remove frames and move them up and down the list (once selected).
8. Red/Green/Blue Checkboxes
These checkboxes work with the RGB 8x8 LED display and cursor to change the color of each 64 RGB LEDs.
9. Unselect All Button
Clears all the cursors.
10. Action Management Buttons
These buttons add and remove actions from the Action List.
Configuration - Settings
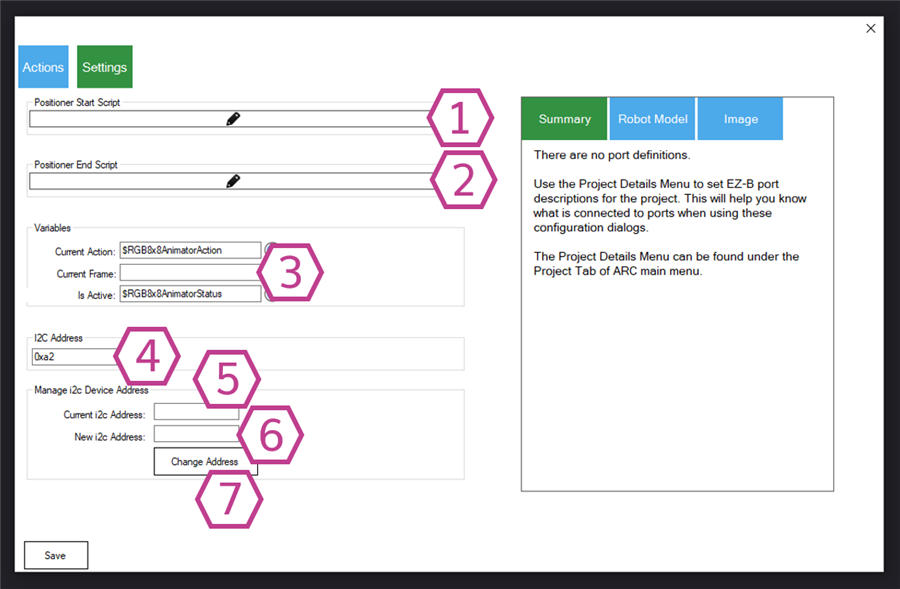
1. Animator Start Script
This script runs when any action is executed.
2. Animator Stop Script
This script runs when any action is stopped or ends.
3. Variable Fields
These variables represent the current action/frame that is being executed. There is also a variable for the animator status, which represents if the animator is running or not.
4. I2C Address Field
This is the single-byte I2C address of the RGB 8x8 Display. This address can be changed if you want to use more than one.
*Note: If you are only using one RGB 8x8 Display, we recommend that you do not change the I2C address.
5. Current I2C Address Field
This field is the I2C address you are switching from.
6. New I2C Address Field
This field is the I2C address you are switching to.
7. Change Address Button
This button executes the I2C address change.
*Note: Write down the new I2C address in case you delete the RGB 8x8 Animator skill or use a different project. Otherwise, you'll have to guess and test if you forget the new I2C address.
How to Use RGB 8x8 Animator
1) Add the RGB 8x8 Animator Skill to your ARC project (Project -> Add Skill -> I2C -> RGB 8x8 Animator).
2) In the Configuration menu, create a new action.
3) Add new frames to that action.
4) Modify the frames by using the cursor to select any number of the 64 black squares (RGB LEDs) and select the Red/Green/Blue checkboxes. Watch the RGB LEDs change in real time. Add pauses between frames if desired.
5) Save your action and in the main window, select the action you created and press the execute button.
Code Samples
This skill also accepts many ControlCommand(). Using EZ-Script, you may pragmatically draw on the canvas. The canvas is a memory buffer. While you draw to the canvas, the changes occur in memory. Once you are ready to display the canvas, use the CanvasUpdate ControlCommand, as demonstrated in the example below.
Here is an example of EZ-Script that creates a fun animated pattern...
$x = 0

: loop

ControlCommand("RGB 8x8 Animator", CanvasClear, false, false, false)

ControlCommand("RGB 8x8 Animator", CanvasDrawRectangle, 0, 0, ($x + 1) % 8, ($x + 1) % 8, true, false, true)
ControlCommand("RGB 8x8 Animator", CanvasDrawRectangle, 0, 0, ($x + 2) % 8, ($x + 2) % 8, false, true, true)
ControlCommand("RGB 8x8 Animator", CanvasDrawRectangle, 0, 0, ($x + 3) % 8, ($x + 3) % 8, false, true, false)
ControlCommand("RGB 8x8 Animator", CanvasDrawRectangle, 0, 0, ($x + 4) % 8, ($x + 4) % 8, true, false, false)
ControlCommand("RGB 8x8 Animator", CanvasDrawRectangle, 0, 0, ($x + 5) % 8, ($x + 5) % 8, true, true, false)
ControlCommand("RGB 8x8 Animator", CanvasDrawRectangle, 0, 0, ($x + 6) % 8, ($x + 6) % 8, true, true, true)
ControlCommand("RGB 8x8 Animator", CanvasDrawRectangle, 0, 0, ($x + 7) % 8, ($x + 7) % 8, false, false, true)
ControlCommand("RGB 8x8 Animator", CanvasDrawRectangle, 0, 0, $x % 8, $x % 8, true, false, false)

ControlCommand("RGB 8x8 Animator", CanvasUpdate)

sleep(250)

$x++

goto(loop)
Video
Resources
The hardware is open source and available HERE on GitHub.