
A joystick that controls any movement panel
How to add the Movement Joystick robot skill
- Load the most recent release of ARC (Get ARC).
- Press the Project tab from the top menu bar in ARC.
- Press Add Robot Skill from the button ribbon bar in ARC.
- Choose the Remote Control category tab.
- Press the Movement Joystick icon to add the robot skill to your project.
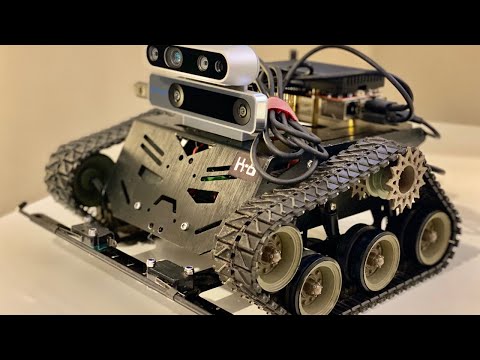
Don't have a robot yet?
Follow the Getting Started Guide to build a robot and use the Movement Joystick robot skill.
How to use the Movement Joystick robot skill
This analog joystick skill controls any movement panel. Rather than using the interface builder to create a custom interface, this can be used to provide an analog movement joystick to any movement panel.
Main Window
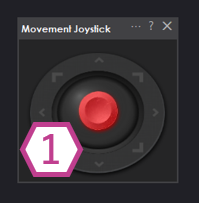
1. Analog Joystick This red analog joystick can be manipulated with the mouse cursor or a touch screen.
Configuration
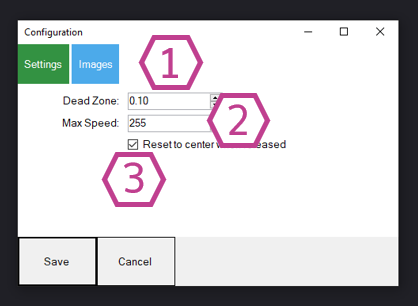
1. Dead Zone Field This value is the threshold the joystick must move by to be registered as a movement. The lower the value, the more sensitive the joystick will be.
2. Max Speed Field Default is already at the Maximum speed (255); you can adjust this value to be lower to slow down the speed of the controlled robot.
3. Reset to center when released Checkbox Leave this box checked if you'd like the joystick to spring back to the center like a physical joystick. Uncheck it if you'd like the joystick to keep its position when you move it.
How to Use Movement Joystick
Open a robot ARC project with a Movement Panel skill and connect to the robot.
Add the Movement Joystick skill (Project -> Add Skill -> Navigation -> Movement Joystick).
Configure the Movement Joystick.
Move the red analog joystick with a mouse or finger, which will move the robot.
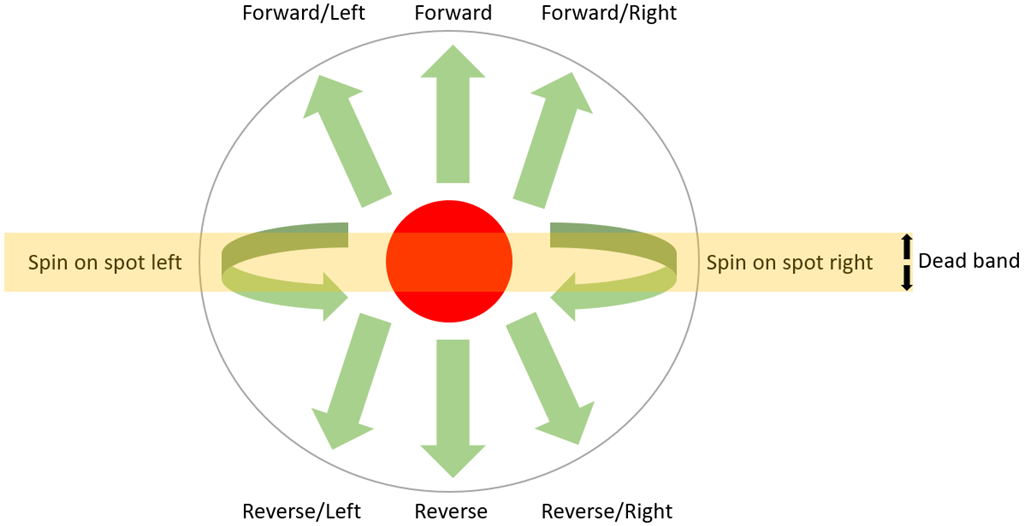
Movement Control
The joystick controls the current Movement Panel that has been added to the project. When a Movement Panel is being used that supports variable speeds, you will have the ability to move forward or reverse with a slight right or left turn. The analog stick can be moved to the right or left to rotate the robot or spin it on the spot.The dead band can be configured, determining how much the joystick must move before registering as a movement. It is also used to determine how large the spin-on-spot (right/left) band is.


Is there a way to get the JoystickX1 JoystickY1 coordinates from the Movement Joystick like you can from an external joystick. I have to send commands to my robot via websockets and it is really easy with a joystick I just send the X1 and Y1 Coordinates and works great although I have to feed through Movement Panel as I can't send direct from joystick. When I use the movement joystick the best I can do is send forward / backward and left right speed but I don't have forward or backward speed like I get with physical joystick.
I think it would be easier to have a new robot skill that creates those variables. I can whip something up tonight
cool thanks !!!
Yeah I am using custom Movement Panel but I just stick the same script in all directions.
Quick question. If you’re controlling the robot movement via web socket, can’t you use the custom movement panel?
I played around originally with customer Movement Panel but I had this mess. I could add the variables Left_Speed and Right_Speed but it just makes him spin around in circles unless I know forward_speed reverse_speed
Although now I think about it, I need this to eventually work with the better navigator. Maybe I need to think this through.
Try this one: https://synthiam.com/Support/Skills/Movement-Panels/Custom-Movement-Panel-v2?id=21148
Oh, and for the speed, use the Map function: https://synthiam.com/Support/javascript-api/Utility/map
Because you get the speed values as a variable. So you can map that to the floating point range that I see in your example