
Connecting Arduino To ARC
Program an Arduino and connect it to ARC to become an EZ-B.
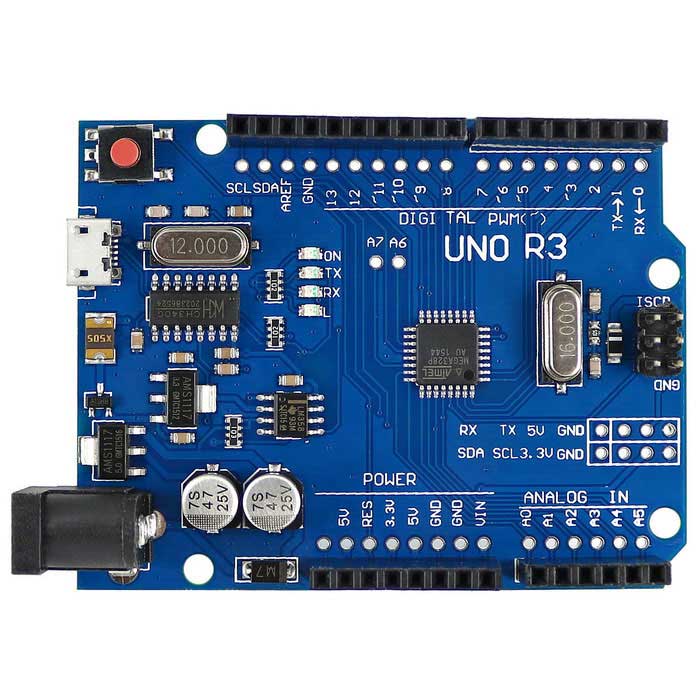
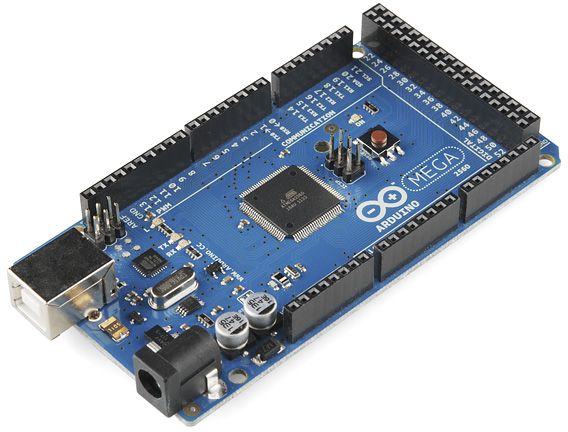
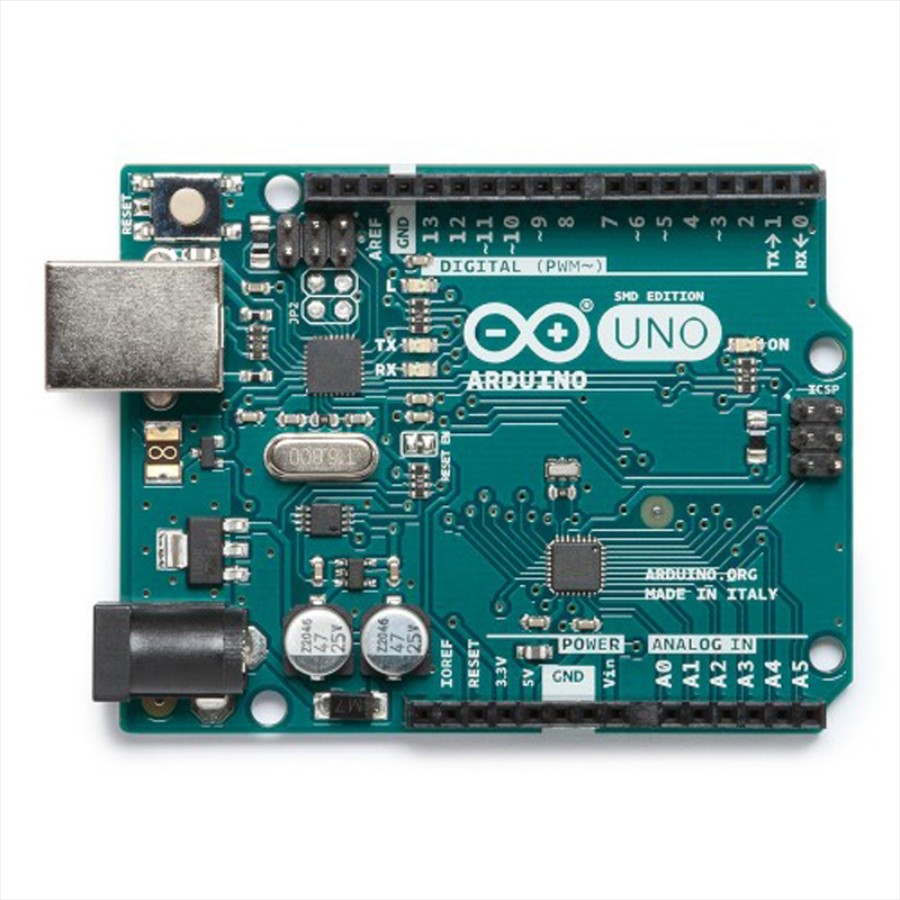
Compatible Arduinos
This tutorial currently covers what Arduino's are compatible with ARC, where to download the firmware, how to flash the Arduino and connect to ARC.
Once you follow this tutorial and program an Arduino, you will be able to connect an Arduino to ARC and control the Arduino. Essentially, you will be converting an Arduino into an EZB. The best part about this is having access to the source code means you can add new functionalities to the Arduino and extend the capabilities of ARC. The one item to note is each Arduino will have different capabilities or lacking capabilities (i.e. video, audio, etc.).
ARC Version
- This feature works with ARC 2019.01.31.00 Beta or newer
Arduino Capabilities Additionally, each Arduino model will have a different MCU (microcontroller) with different capabilities for servos, PWM, and Analog. Consult the datasheet/manual of the Arduino you're using to ensure you understand what ports are available for different commands. For example, some Arduino models only allow PWM/Servos on specific digital ports. Meanwhile, other Arduino's share I2C with Analog ports. You will have to determine what ports are available because we have no idea due to the number of Arduino versions out there. For example, servo ports on Arduino UNO must be PWM ports 3, 5, 6, 9, 10, and 11. These limitations are that of the Arduino libraries and hardware.
There's a significant number of Arduino's variations out there each with slight modifications. This means the base firmware provided in this tutorial can be modified for various Arduino configurations. Also, you are free to add new features to the Arduino firmware and register them as Capabilities to be used in ARC. But, that's a future edit of this tutorial .
.
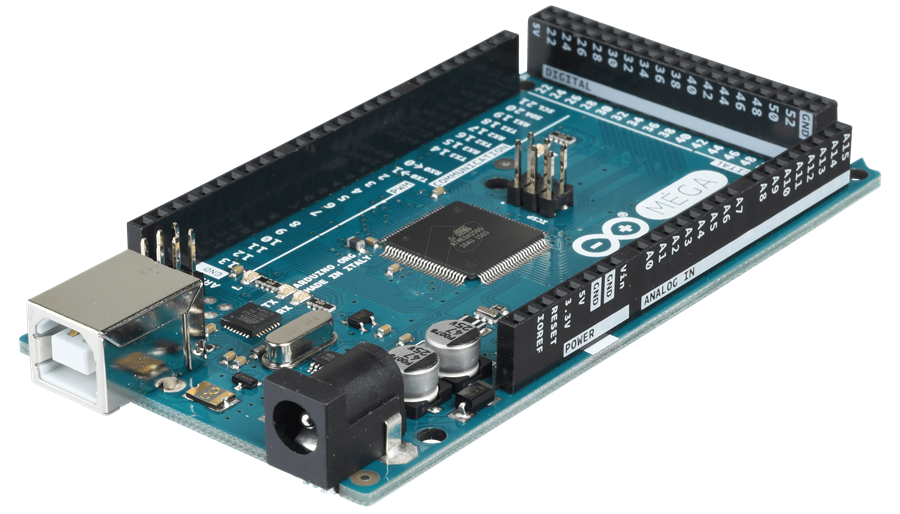
Compatible Official Arduinos The ARC software is compatible with a number of Arduino products, which the firmware can be found on their respective pages. Find your Arduino board and download the firmware from this page: https://synthiam.com/Support/Hardware/Hardware-Overview
Download the firmware source code for your Arduino version or compatible from the above link and continue to the next step of this tutorial. *Note: compatible or clone Arduino's will require a toolset and library installation to compile the firmware. Check the Arduino compatible product manual for instructions on adding libraries and tools to the Arduino IDE for clone hardware.

Thanks DJ, should prove a valuable tool!
:D
Wow. This is not what I was expecting when you said you were adding Arduino support. I thought you were going to have a pre-written application for connecting to an Arduino to extend the capabilities of ARC, or maybe the ability to compile scripts or autopositions into arduino apps that could run independently of an ARC computer for simple robots (still think either of those would be cool things) but this is a total surprise. Still processing what it all means, but I think you just dramatically reduced the price of entry for hobbyists.....
Alan
Double Wow! And I have only tried two digital and one PWM control. As soon as people see the power of ARC everywhere - well, I just hope I can keep up.
Thanks - good news is if you want to hard program sequences into the arduino, go ahead. The code is there so you can add your own commands or what ever you’d like to do. The capability firmware section of the website is being worked on. But essentially there will be a place where you can obtain a unique firmware ID that ARC recognizes and knows the capabilities. That way there’s an understanding between controls and hardware of what’s compatible when you make your own firmware with new features.
Another game changer from Synthiam! Nice job!
when i get home I will be al over this .....so cool...thanks DJ [font=OpenSans, -apple-system, BlinkMacSystemFont, "Segoe UI", Roboto, "Helvetica Neue", Arial, sans-serif, "Apple Color Emoji", "Segoe UI Emoji", "Segoe UI Symbol", "Noto Color Emoji"]Synthiam!
Pardon my ignorance. Does this mean that I can now operate one of these platforms directly with ARC without having to go through an EZB? Would I be able to use EZ Script commands?
Dave - best to read the first 2 paragraphs of this tutorial