
Open-source ARC plugin to control Robotis Dynamixel servos (XL-320, AX-12, XL430) via EZ-B, Arduino or Robotis. Supports position, speed, accel.
 Hardware Info
 Source Code
How to add the Dynamixel robot skill
- Load the most recent release of ARC (Get ARC).
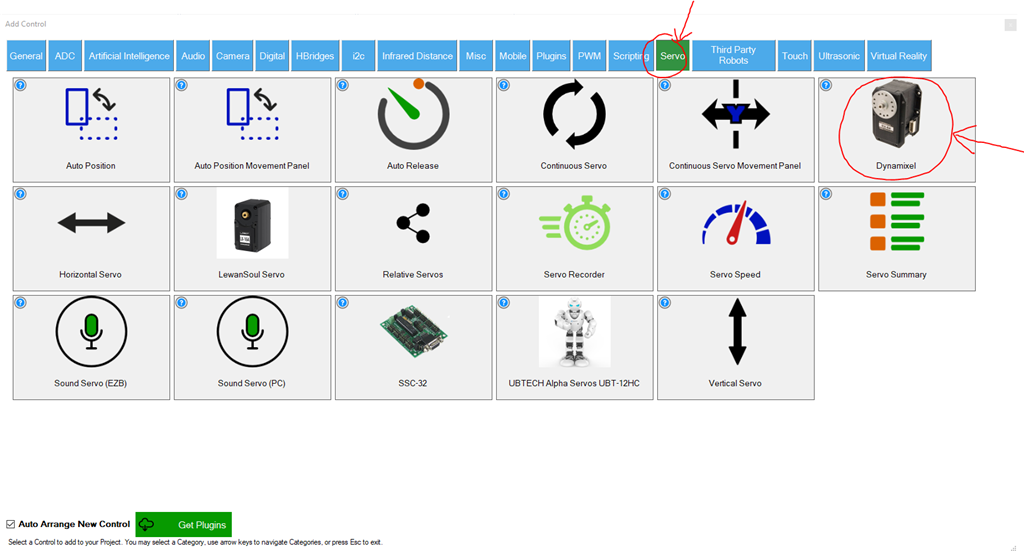
- Press the Project tab from the top menu bar in ARC.
- Press Add Robot Skill from the button ribbon bar in ARC.
- Choose the Servo category tab.
- Press the Dynamixel icon to add the robot skill to your project.
Don't have a robot yet?
Follow the Getting Started Guide to build a robot and use the Dynamixel robot skill.
How to use the Dynamixel robot skill
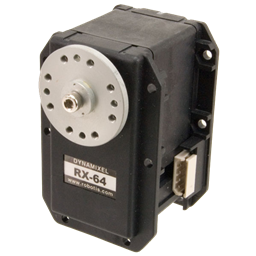
Connect and control Robotis Dynamixel Smart Servos with ARC, including Arduino and Robotis controllers. This open-source plugin converts the Virtual servo ports with any EZ-B (v0-v99) to control Robotis Dynamixel Servos. The servos supported are XL-320, AX-12, and XL430 compatible protocols. Dynamixel Servos are very different than regular hobby PWM servos. Firstly, they are considered much more professional due to their design, specifically for robotics use. Each Dynamixel servo contains a microprocessor. The microprocessor is told what position to move the servo into over TTL at the configured baud rate.
ARC Capabilities
ARC has many parameters that can be assigned to servo movements. When selecting a servo, these parameters are specified by script commands or in the Advanced menu of robot skills. This skill supports the following ARC parameters...- Servo position
- Speed
- Release
- Velocity
- Acceleration

Speed, Velocity, and Acceleration, etc.
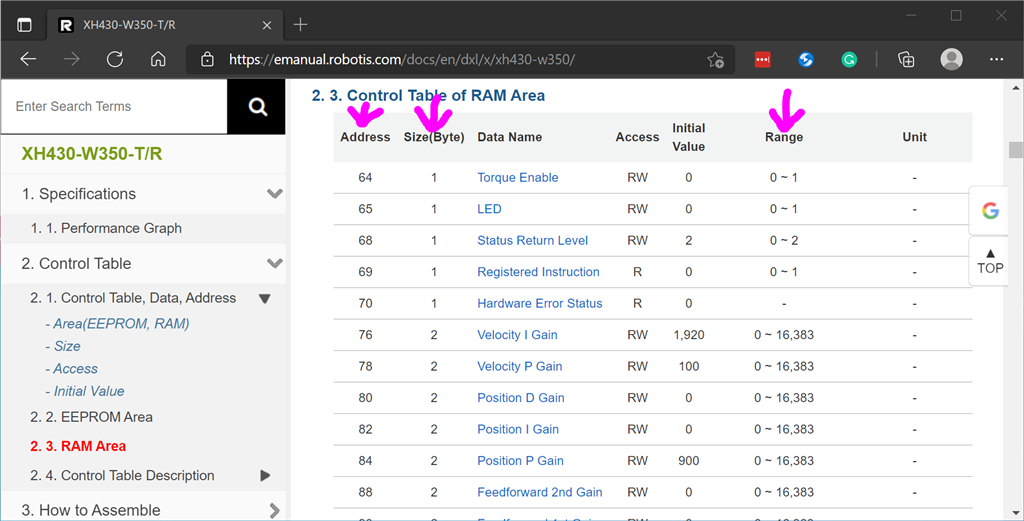
When configuring the speed, velocity, and acceleration settings, the manual for the dynamixel servo model should be referenced. Different servos will use specific settings and ranges for these parameters. Check the servo manual for the required parameters, such as Speed. To view the manual for your dynamixel model, look here: https://emanual.robotis.com/docs/en/dxl/Cable Accessory
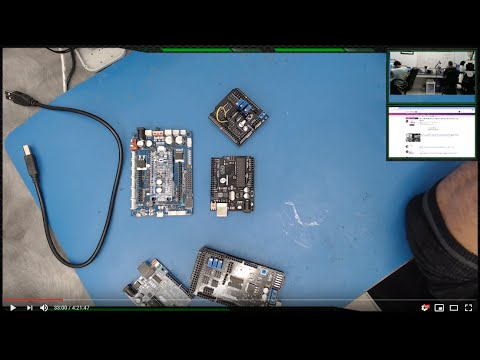
If you use this robot skill with an Arduino or EZ-Robot controller, you will require a modified cable to connect your servos to the microcontroller. If using a Robotis microcontroller, you do not need to make a specialized cable. The modified cable should connect the RX and TX to READ servo positions for bidirectional communication. Instructions for connecting the servo to READ positioning are below.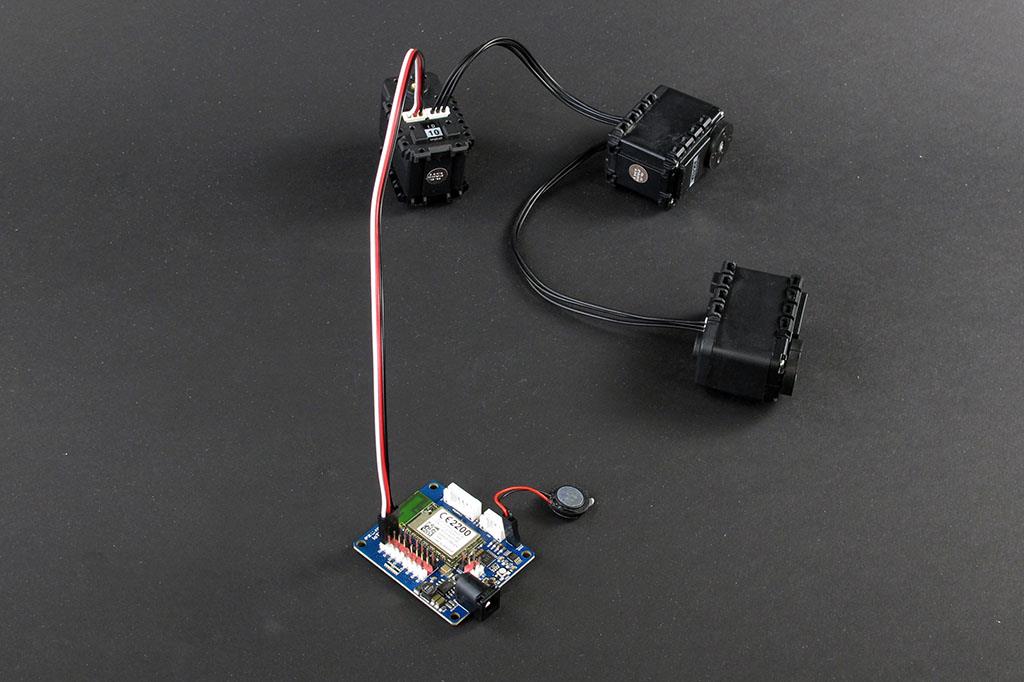
EZB Controller Types
There are several different EZB controllers, each with its own hardware configuration. Below, we cover the controllers and what UART should be used.EZ-Robot IoTiny The IoTiny does not have a hardware UART, so it cannot read servo positions. This means you can use any digital ports to transmit servo positions to the servo. Connect any digital port of the IoTiny to the signal wire of the dynamixel connector.
Arduino/EZ-Robot EZB v4 Wiring For Reading Positioning Using this diagram, you must wire the servo to these controllers manually. It would be best to connect the TX and RX ports to read servo data with bidirectional communication. On the EZ-Robot EZ-B v4, ports D5 (TX) and D6 (RX) are for UART #1.

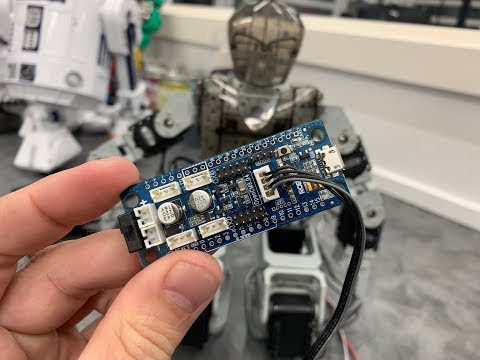
Robotis Open CM9.04 Controller The Robotis Open CM9.04 controller can support servos connected directly to itself or through the expansion board. If using only the controller, the UART #0 is used in ARC. If using the expansion board, UART #2 is used in ARC.
Robotis OpenCR Controller The Robotis OpenCR controller can support servos connected directly to the onboard connectors. This uses UART #2 in ARC, selecting UART #2 in the dynamixel robot skill config.
UART/Serial Port Overview
There are a few options for connecting the Dynamixel servos covered above. Here is a summary...EZB controllers without hardware UART (such as IoTiny) will use software serial pins to transmit servo positions only; they cannot read servo positions. With this setup, you can use any digital port.
EZ-Robot EZ-B v4 or Arduino Mega is UART #1 (port D5 & D6). But depending on how many UARTs EZB has, you can connect to any UART.
Robotis Open CM 9.04 without expansion board uses UART #0.
Robotis Open CM 9.04 with expansion board uses UART #2.
Robotis OpenCR uses UART #2.
Voltage
Most Dynamixel servo documentation states the operating voltage in the manual. Check the documentation for your dynamixel servo model to ensure your power source is sufficient. If you experience the unusual behavior of Dynamixel servos, the first standard issue is insufficient power.Servo ID
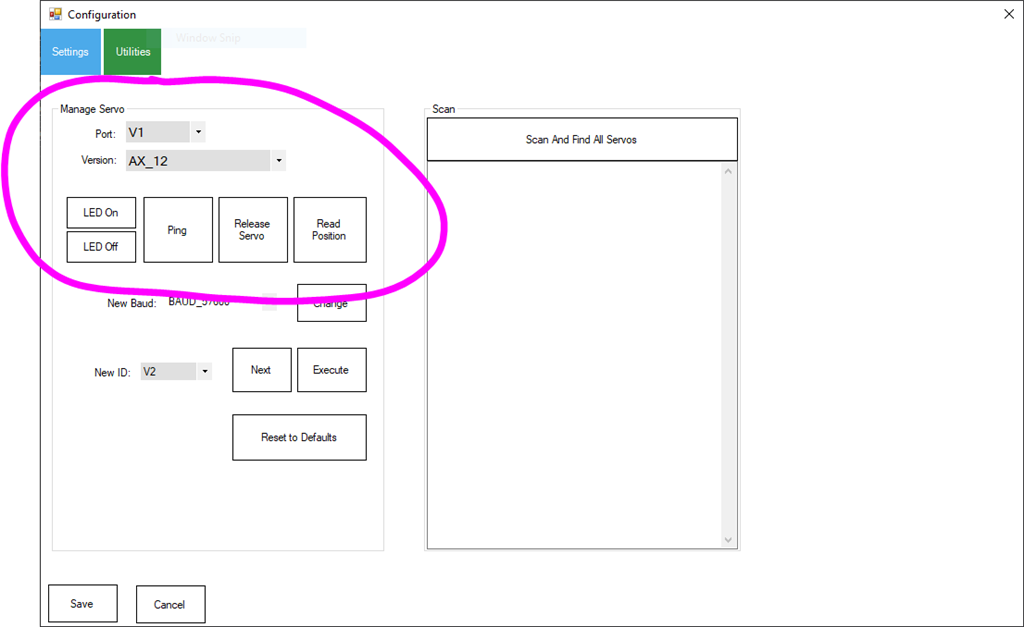
Each Dynamixel servo has a unique ID. Because they are chained together through one cable, each servo must be given a unique ID. Servos with the same ID will respond to the same commands and mirror their behavior. New Dynamixel Servos come pre-configured with the ID of 01. servo V0 relates to dynamixel ID:0, V1 is dynamixel ID:1, v2 is dynamixel ID:2, and so on...Using this configuration utility, you can assign new ID's to servos. You may also test the servo to ensure the ID was successful.
The address and value range are also displayed in the control tables.
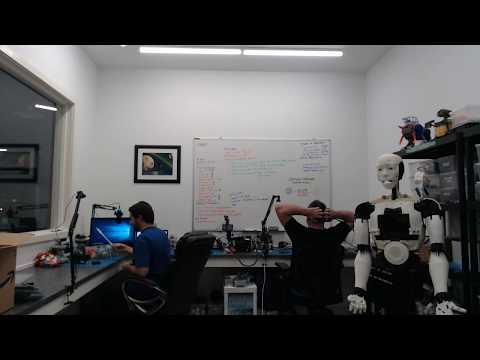
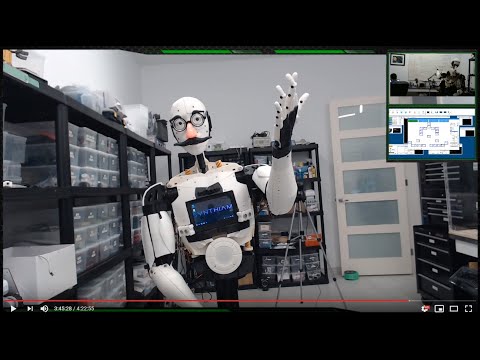
Video Demo With Robotis Arm
This video uses a Robotis Dynamixel arm and XM430 servos with an OpenCM9.04 controller.Troubleshooting Dynamixel Servos
If the servos are not responding, verify that the physical connection is correct. Next, confirm that adequate power is provided to the servo. Finally, verify that this robot skill config selected the servo ID and correct type.If the XL430 or similar type servo is not responding, the torque may be disabled. This can be force-enabled by using the ControlCommand or releasing the servo. When the servo is released, it will automatically allow torque once it is instructed to move.
The configuration window of this robot skill has some tools for diagnosing the connection. You can use these diagnostic tools to verify a bi-directional communication with the servo. For example, you can use the PING or READ servo POSITION to confirm that the servo communicates bi-directional with the EZB.
Step by Step Instructions
Once the servo is wired and sufficient power is provided, you can use any robot skill in ARC that uses servos. It will work with Auto Position, Camera, WiiMote, Joystick, and more. This example will show you how to move a dynamixel servo with generic servo robot skills. Before following these steps, ensure you have this plugin installed.Step 1 Load ARC
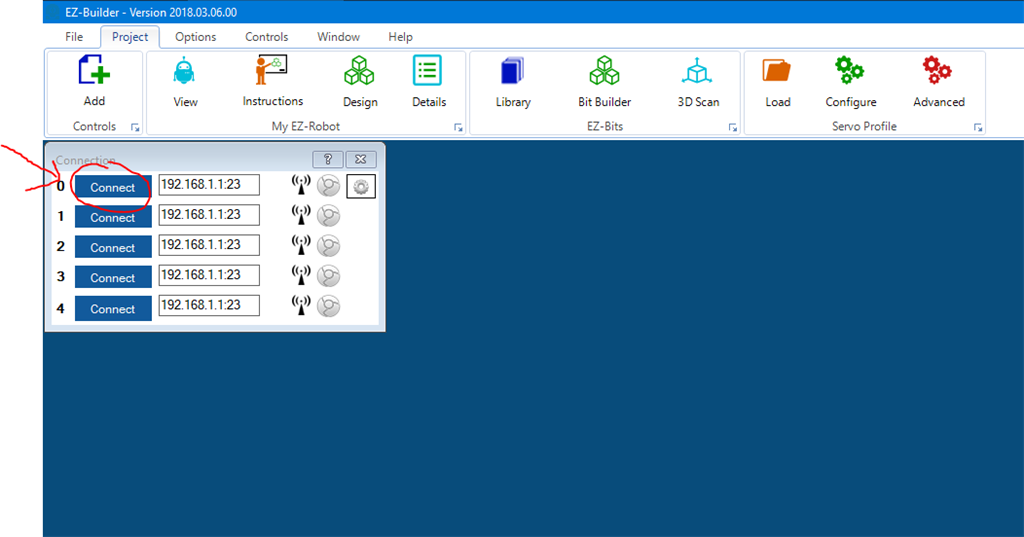
Step 2
Connect to your I/O controller.
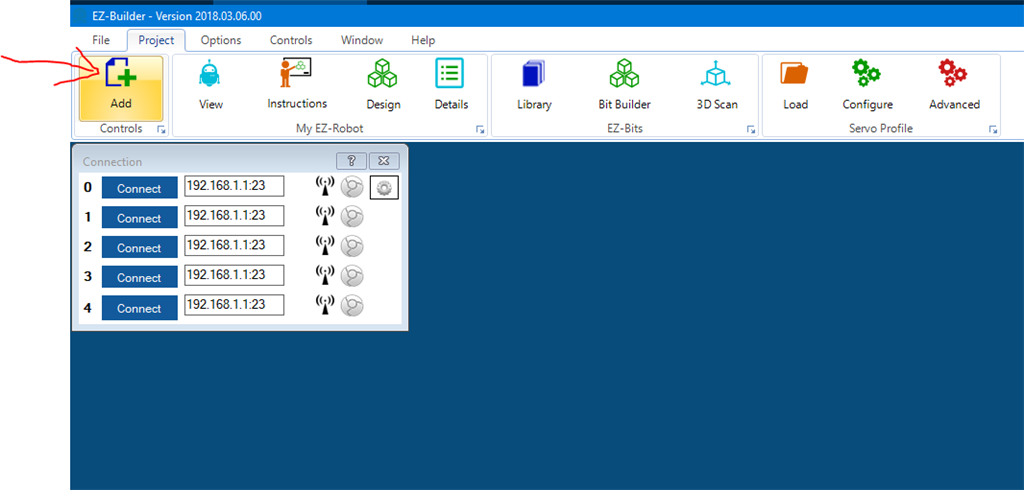
Step 3
Add the robot skill by selecting the Project tab and Add Robot Skill.
Step 4
Navigate to the servo tab and select Dynamixel. If the plugin has been successfully installed, you will see the Dynamixel plugin in the list.
Step 5
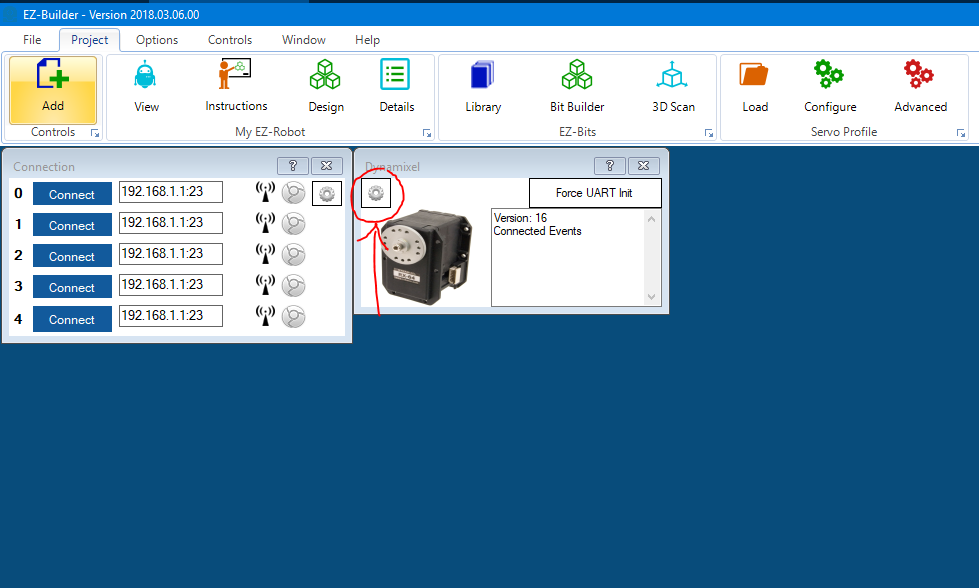
Your project will now have the Dyamixel robot skill. Press the Config gear icon to load the configuration screen.
Step 6
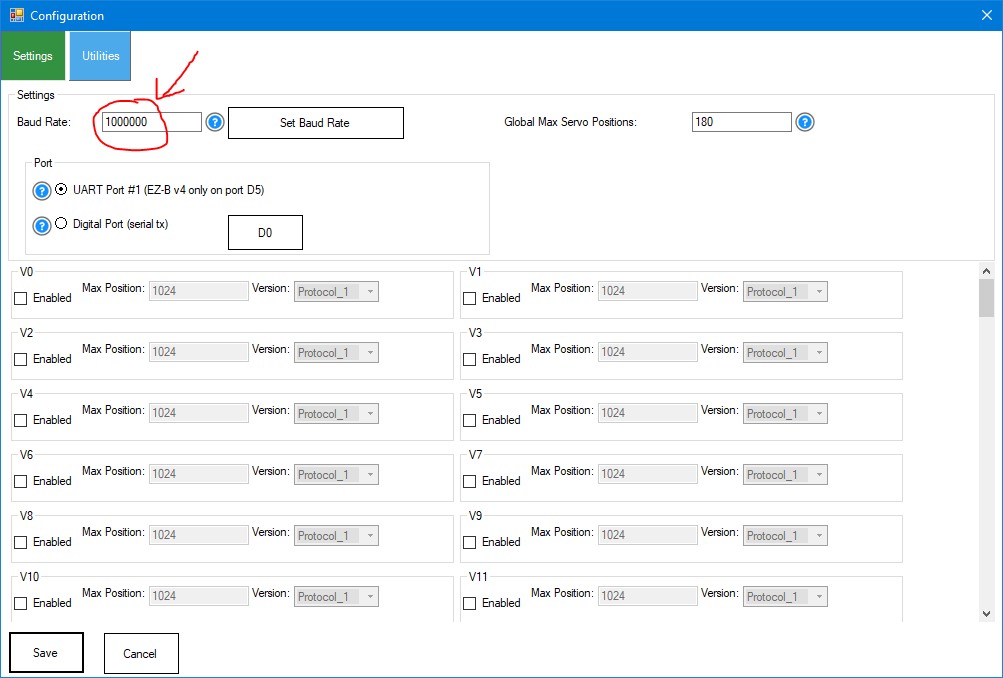
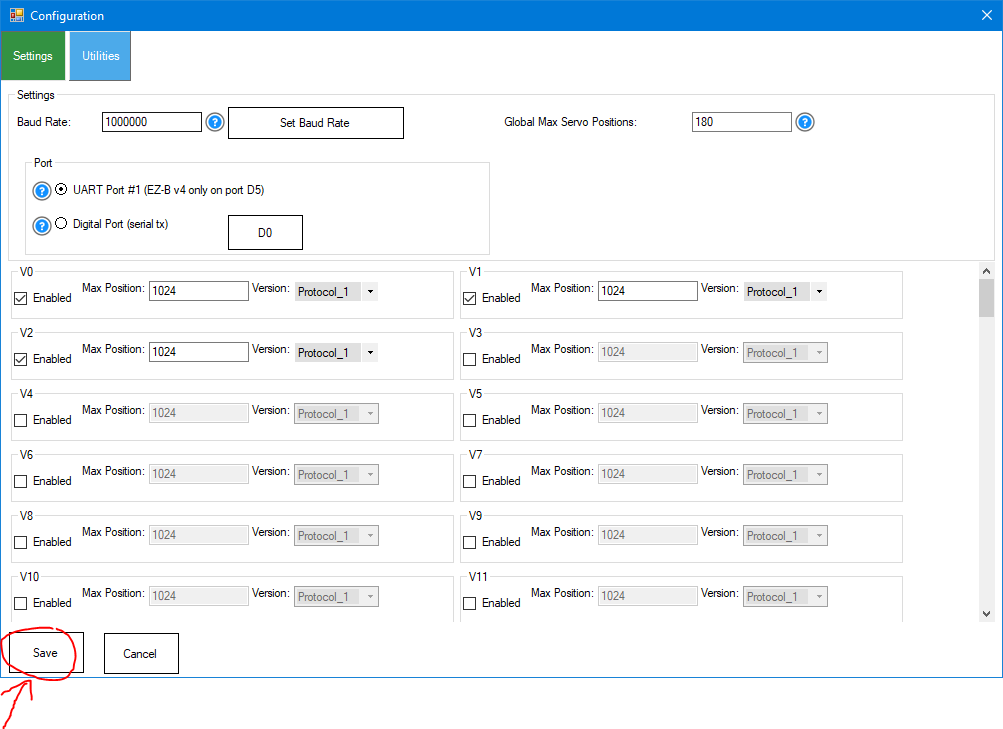
Enter the baud rate that matches your servo configuration. The servos have a baud rate specified or a default baud rate shipped from the factory. If you need to change the baud rate of the servo, use the Dyanmixel utility. You cannot change the baud rate of the servo in ARC. This value is the baud rate that the EZ-B will use to communicate with the dynamixel servo. This must match the baud rate of the servo.
Step 6a
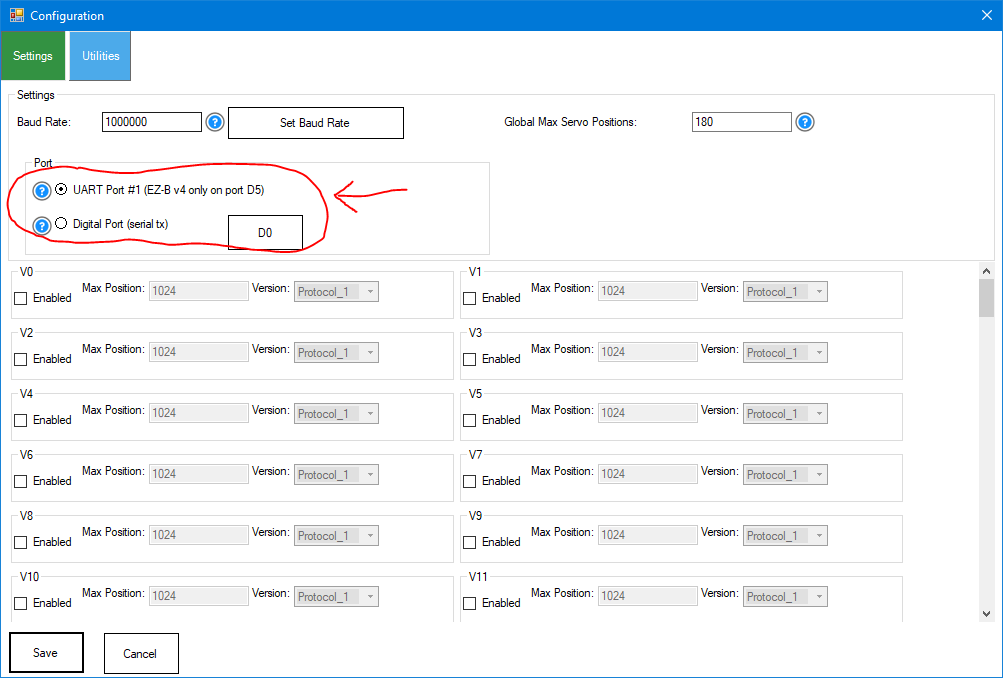
Specify what port the servo is connected to on the controller. Following this recommendation is essential. The plugin has blue question boxes (and throughout the ARC software) to assist your robot development. It is recommended that you use the blue question marks and read the content to understand what options do.
Step 7
Each dynamixel servo will have a unique ID. Enable each ID for the servos by checking the respective box. When an ID is checked, the ARC software will use the Vx (virtual servos) corresponding with that ID. For example, if you enable Dynamixel ID #2, the ARC V2 servo will control it. Also, specify the protocol version of the servo. Different dynamixel models will use one of the two protocols. Consult the datasheet of the dynamixel servo to know what protocol it uses -or- contact Robotis for more information on using their product. Ensure you have entered the MAX resolution for that servo model to get the servo's full resolution. Each model has different resolutions or can be configured using the Dyanmixel utilities.

Step 8
After you have enabled your servos, press Save
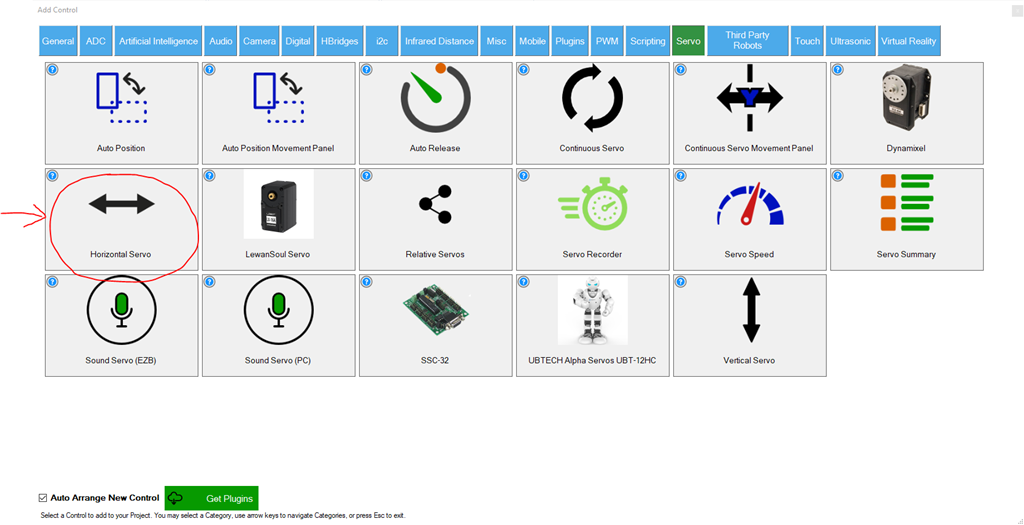
Step 9
We will show you an example of how the servo can be moved. We will do this by using a generic horizontal servo robot skill. Press Project -> Add robot skill to return to the Add robot skill menu. Navigate to servo and select Horizontal Servo. Remember, any robot skill in ARC that uses servos can now control dynamixel servos using the respective Vx (virtual) servo ID.
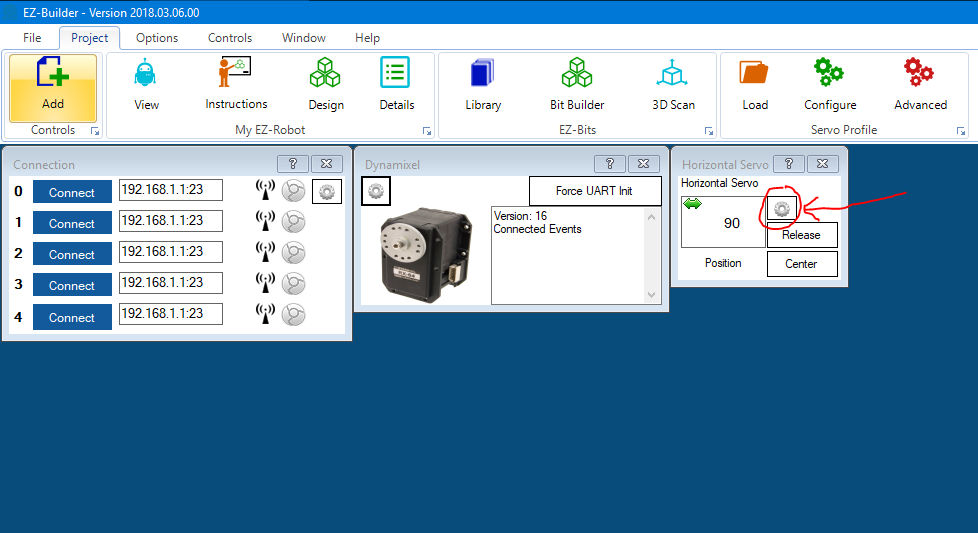
Step 10
Press the GEAR icon to configure the horizontal servo robot skill.
Step 11
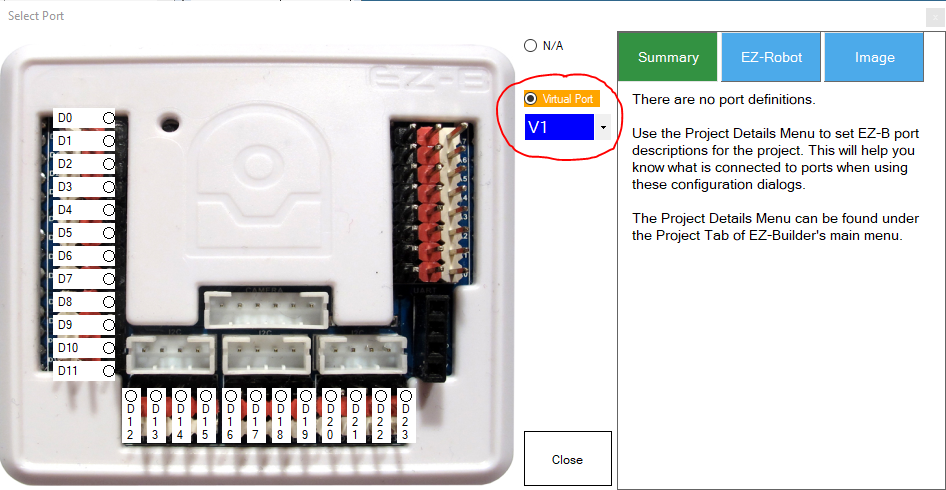
To configure this robot skill to use a virtual servo, select the servo to bring up the port dialog. This applies to all robot skills in ARC that use servos.
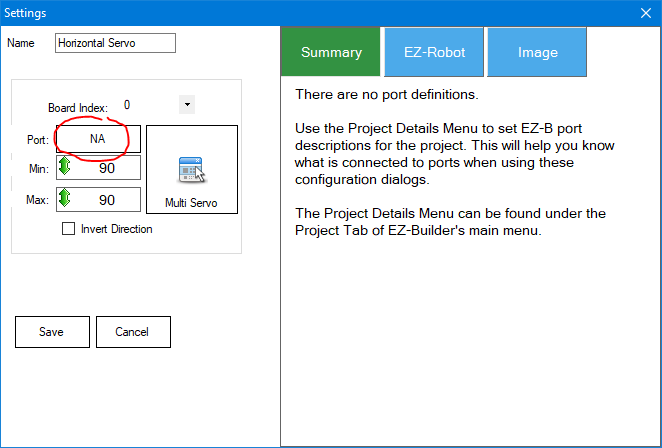
Step 12
Select the Virtual servo ID for your dynamixel servo from the list and press Close.
Step 13
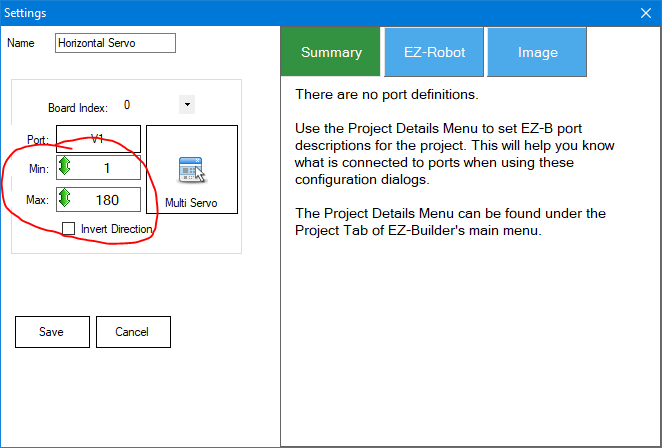
Now, use the sliders to specify the Minimum and Maximum position you wish this servo to move, and press Close.
Control Commands for the Dynamixel robot skill
There are Control Commands available for this robot skill which allows the skill to be controlled programmatically from scripts or other robot skills. These commands enable you to automate actions, respond to sensor inputs, and integrate the robot skill with other systems or custom interfaces. If you're new to the concept of Control Commands, we have a comprehensive manual available here that explains how to use them, provides examples to get you started and make the most of this powerful feature.
Control Command Manual// Set the LED state of the servo to on or off by passing true or false
- controlCommand("Dynamixel", "SetLED", "ServoPort", "true|false")
// Enable or disable the torque, which releases the servo if disabled
- controlCommand("Dynamixel", "TorqueEnable", "ServoPort", "true|false")
//Read the number of bytes from the specified address of the servo port.
- controlCommand("Dynamixel", "ReadRam", "ServoPort", "Address", "BytesToRead")
// read a byte from the specified address of the servo port.
- controlCommand("Dynamixel", "ReadRamByte", "ServoPort", "Address")
// read a uint16 from the specified address of the servo port.
- controlCommand("Dynamixel", "ReadRamUInt16", "ServoPort", "Address")
// read a int16 byte from the specified address of the servo port.
- controlCommand("Dynamixel", "ReadRamInt16", "ServoPort", "Address")
// read a int32 from the specified address of the servo port.
- controlCommand("Dynamixel", "ReadRamInt32", "ServoPort", "Address")
// write a value byte to the ram at the specified address
- controlCommand("Dynamixel", "WriteRamByte", "ServoPort", "Address", "Value")
// write a value unsigned int16 to the ram at the specified address
- controlCommand("Dynamixel", "WriteRamUInt16", "ServoPort", "Address", "Value")
// write a value signed int32 to the ram at the specified address
- controlCommand("Dynamixel", "WriteRamInt32", "ServoPort", "Address", "Value")
// Returns the temp of the dynamixel servo at the specified port. (Returns Integer [-2,147,483,648 to 2,147,483,647])
- controlCommand("Dynamixel", "GetDynamixelTemp", "ServoPort")
// Returns the load direction from the servo at the specified port. (Returns String)
- controlCommand("Dynamixel", "GetDynamixelLoadDir", "ServoPort")
// Returns the load value from the servo at the specified port. (Returns Integer [-2,147,483,648 to 2,147,483,647])
- controlCommand("Dynamixel", "GetDynamixelLoad", "ServoPort")
// Returns the ping result of the servo. (Returns Boolean [true or false])
- controlCommand("Dynamixel", "GetDynamixelPing", "ServoPort")
Related Tutorials
Related Hack Events
DJ's Third Hack Night
DJ's 4Th Hack Event (Arduino, Bioloid, Lewansoul, And More)
Hacking Robotis Opencm 9.04 With Bioloid
Dj's 5Th Live Hack Session
DJ's 9Th Live Hack - Raspberry Pi + Dynamixel... Together...
The Lattepanda Robot Hack
Related Robots

Related Questions

Dynamixel With Ezbpi Server
Leap Motion Combine With ARC To Control In Space
Controlling Speed On Dynamixels.

Upgrade to ARC Pro
Get access to the latest features and updates before they're released. You'll have everything that's needed to unleash your robot's potential!
The AX-12 servo controls are the same commands as the older servos.
I had tried earlier today with the robot heads, with no movement. User error. Once I figured out what went wrong, I tried again with the most recent updated plug in and the heads came to life.
I now have both types of servos working in the same environment. Thanks again for all the hard work. I never stop praising the time and effort you guys put in. Hopefully you can accept apologizes.
Thanks - there's no need for apologies. Eventually i have to draw a line on how far down the rabbit hole i go supporting a product that makes it impossible to support. In this case, i praise dynamixel servos for their robustness and quality but it's a full-time job maintaining the communication protocol differences between models. The only reason for not having a standard protocol across all models is poor planning. However, that's common with hardware companies because hardware people do not understand software and vice versa. Pick one thing to be good at and focus on that only.
Totally agree. Hopefully they don't change their products any further. Don't fix it if it ain't broke. I'll try and dump these $229 servos on ebay and stick with the $50 ones for now. Thanks again.
Hello from the ROBOTIS Customer Support team!
We were informed that there was some confusion regarding the Communication Protocols and firmware of DYNAMIXEL smart actuators and their implementations.
All DYNAMIXEL smart actuators communicate over a shared serial bus using asynchronous serial communication, over which users may send instruction packets with commands, or receive status packets with information. The method used to order the data contained in these packets is known as the DYNAMIXEL Communication Protocol.
Protocol 1.0 was the first Communication Protocol implemented in DYNAMIXEL firmware, and was used with all classic series of DYNAMIXEL including DX, EX, RX, AX, and MX models, and has seen well over a decade of use implemented in these models. This Communication Protocol works well for DYNAMIXELs in these series, and allows for simple packet construction and relatively simple validation via checksum.
Protocol 2.0 is the modern implementation of ROBOTIS' Communication Protocol for DYNAMIXELs and was recently released with DYNAMIXEL X-series and DYNAMIXEL PRO-series. Protocol 2.0 was developed to more effectively manage larger amounts of data while maintaining DYNAMIXELs' asynchronous serial communication through instruction and status packets. Protocol 2.0 includes an expanded set of packet instructions, as well as CRC-based packet validation to eliminate the need for (potentially huge) checksum calculations.
In addition to Communication Protocol, every DYNAMIXEL is operated using the Control Table. The Control Table contains every numbered firmware address that the user has access to and which may be referenced in instruction or status packets. Many models of DYNAMIXEL which used Protocol 1.0 utilized similar Control Tables, and this has been continued for DYNAMIXELs which use the newer Protocol 2.0 being associated with "Control Table 2.0". For a "Control Table 1.0" example, on AX-12A the firmware address for Goal Position is 30, which is identical to Goal Position for MX-106. "Control Table 2.0" is much the same- Goal Position on an XL430-W250-T is firmware address 116, which also matches the Goal Position address of XH540-W150-T.
ROBOTIS realizes that a change in Communication Protocol and firmware features can be an adjustment the DYNAMIXEL community, and for this reason ROBOTIS included a firmware parameter known as "Protocol Version" in Control Table 2.0 DYNAMIXELs. This value acts to switch the DYNAMIXELs' accepted communication format between Protocol 1.0 and Protocol 2.0 packet structures. In addition, users can upgrade their MX-series DYNAMIXELs to Control Table 2.0 for the new firmware features, new control table, and "Protocol Version" parameter for Communication Protocol flexibility.
If anyone has further questions about DYNAMIXEL actuators or ROBOTIS products feel free to reach out to our Customer Support team at [email protected], and we're excited to be a part of the Synthiam and ARC community!
Robotis - great to see you! The challenge we had experienced is not due to understanding the protocol difference, but the difference in the protocols between product models. However, we redesigned the robotis dynamixel plugin and it's working great now... continue reading
The Protocol 2.0 has different commands in the control table for different servo models. For example, the XL-320 with protocol 2.0 uses decimal 30 (16 bit value) in the control table for Set Goal Position and the XL430 uses decimal 116 (32 bit value) in the control table. So each servo uses the same "protocol" but different commands, which isn't entirely a protocol if they're different enough to have varying bit sizes and command values.
Also, the behavior of the servos are different. The XL430 requires Torque Enabled (decimal 64) to be set before the servo will move, while all other servos will move when they receive the goal position. This behavior added a number of hours of trouble-shooting because there's no documentation we came across stating the torque must be enabled before Set Goal Position would work.
We love your hardware and products, and will continue supporting them. However, documentation and standardization across servo models using the same protocol versions would be appreciated in future products . I enjoy working with you to achieve our mutual goal of robots helping society, together.
Thanks for responding and hope to see you around often
Hi DJ,
I hope that all is well with the ARC team and their families during this time. We have been conversing on another thread regarding an OpenCM9 + Exp Board. I have a cable coming that will allow me to use just the OpenCM and my AX12s and am hoping that resolves my issue there. Now I am trying to use my IoTiny with my AX12s. (I am using your cables). The tiny connects as long as I get my servo baud rate within the plugin set at an acceptable level for it. The AX12 seems to be a variable baud rate so thinking that part should be fine. (I have tried 9600 and 115,200 thus far.). Power is appropriate for the Dynamixel. I have set the virtual ports, etc. per the tutorials. I am only connecting one servo at this point to D0.
The servo is not responding to the horizontal control. It is receiving power and seems to be connected. Ping does not work with the Digital Port and the LED test doesn't do anything...
Your thoughts?
One more comment...there is a message in the Dynamixel plugin..."disable status packet.."
Hey there!
You have to program the dynamixel for the specified baud rate. It's not "Variable" as in it magically detects it. The dynamixel will need to be configured for the baudrate. There's a tool from robotis that does that. Otherwise, an EZ-B v4 can do it because it has variable baud rate. The opencm should also be able to adjust teh baudrate as well.
out of the box the AX12 Baudrate is set to 1000000 bps.