
Control LewanSoul LX-16A servos via ARC (EZ-B v4/IoTiny): assign virtual ports, read positions, set speeds, and enable continuous rotation.
 Hardware Info
 Source Code
How to add the Lewansoul Servo robot skill
- Load the most recent release of ARC (Get ARC).
- Press the Project tab from the top menu bar in ARC.
- Press Add Robot Skill from the button ribbon bar in ARC.
- Choose the Servo category tab.
- Press the Lewansoul Servo icon to add the robot skill to your project.
Don't have a robot yet?
Follow the Getting Started Guide to build a robot and use the Lewansoul Servo robot skill.
How to use the Lewansoul Servo robot skill
Control the LewanSoul Digital smart Servos (i.e., LX-16A) with ARC. The servos must be powered appropriately and connected to the EZ-B v4 or IoTiny with the respective port. Visit the Config menu of this plugin to view the port configuration. This plugin will only operate on EZB Index #0.
Demonstrated with IoTiny using Software UART
Details
ARC's Virtual Ports (V1..V99) can be assigned to the LewanSoul servos.This plugin requires the RX signal wire of the servo to be connected to the TX of the selected UART or digital port (if Software UART is selected) using a Dynamixel servo Cable provided by one of our hardware partners.
Hardware UART is available on the EZ-B v4 only and is recommended if using an EZ-B v4 with a Dynamixel servo Cable. View the EZ-B v4 datasheet to identify the UART ports (0, 1, or 2).
Software UART is available on both the EZ-B v4 and IoTiny. We only recommend using software UART on IoTiny and hardware UART on EZ-B v4.
The configuration menu also provides an option to select the Virtual Ports, which correspond with the ID's of the UBTech servos. If the LewanSoul servo ID #0 is connected, select V0. #1 = V1, #2 = V2, etc..
Default baudrate of LewanSoul servos is 115,200
Specify servo Port By servo ID
The servos are addressable, meaning they each have a unique address ID. The address ID is related to ARC's Vx servo (virtual servo). This means servo ID #1 is V1 in ARC. servo ID #5 is V5 in ARC. Etc. Specify the Vx ports to bind to using the configuration screen of this plugin. ID #1 (V1) is selected in the example image below. Any servo commands sent to V1 will move LewanSoul servo ID #1. You can choose as many Vx ports as necessary to bind in this plugin.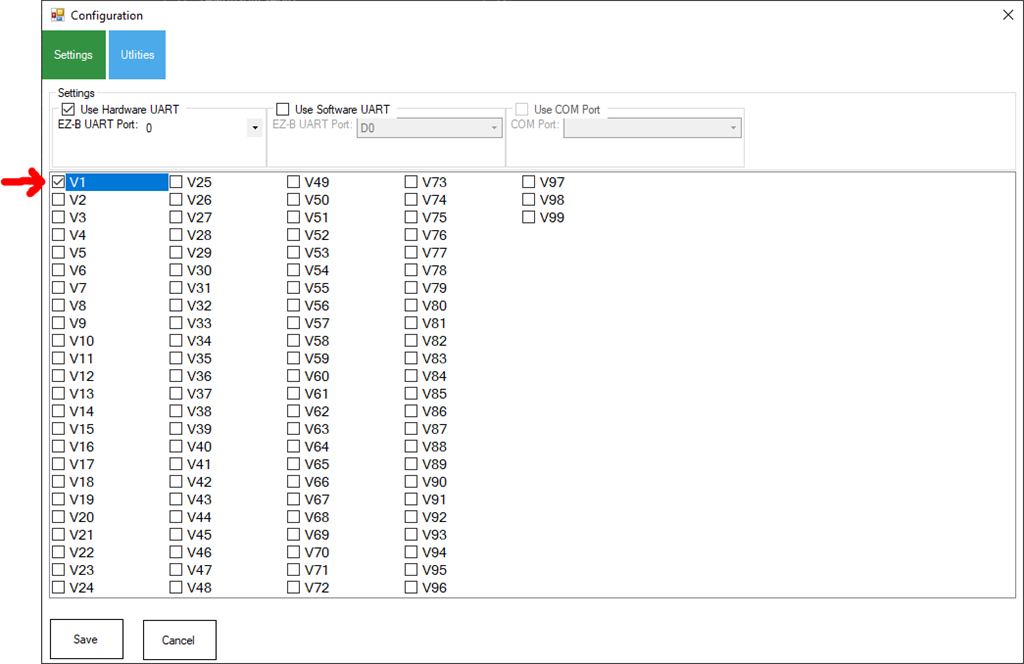
Use USB/TTL Debug Board This option in the configuration is if you are using the optional TTL/USB debug board, which changes the communication to the servo. With this unchecked, the packet length includes the sent packet because the Rx & Tx are crossed. When checked (using the ttl board), the Rx & Tx will only include the return values. Keep this unchecked if you are not using a USB/TTL Debug Board.
Continuous Rotation (Motor) Mode
The servos can be configured for Continuous Rotation (i.e., Motor Mode) using the EZ-Script ControlCommand()...ControlCommand("LewanSoul Servo", SetToContinuousMode, v1)
You can change the port (v1 in the above example) to whatever port you wish to be in continuous rotation mode. Once you do that, the servos will respond as regular, continuous rotation servos, where position 90 stops, 180 is fast in one direction, and 1 is fast in the other. The values further from 90 in either direction change the speed. This allows these servos to be used with the Continuous Rotation Movement Panel.
Servo Mode
If you switched the servo into Continuous rotation mode, you can use the ControlCommand() to change back to servo mode. This can be done with the following command...ControlCommand("LewanSoul Servo", SetToServoMode, v1)

ok, I actually bought a 6ft aluminum rod which i would need to cut, there is no way out of that lol. Im using an Xbox one controller which I was surprised that would work, many people were saying that the xbox 360 controller was the only that would work. in your code can you move the front wheels and back wheels independently?
this is the panel that is been used with the roverIf the English sounds a bit unusual, it's because of the translation tool (:-). I'm practically at the beginning of the programming process. At the moment all wheels are steered the same way (driving). When steering, the rear and front axles are integrated. The respective steering angles are mirrored.
The aluminium rods can be sawed quite well by hand. A stationary drilling machine is required for drilling. Otherwise the drill holes will be crooked.
Translated with www.DeepL.com/Translator
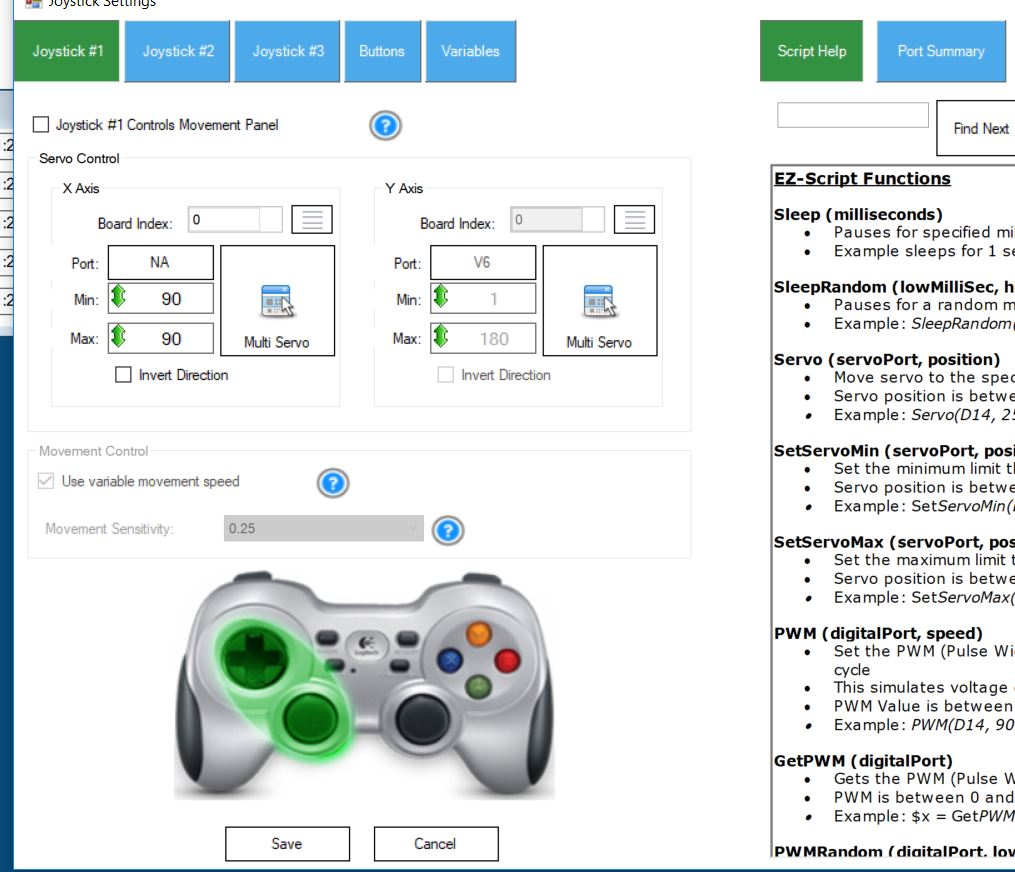
I see in the joystick control, that the servo positions are specified. I recommend using a Movement Panel and checking that option in the joystick configuration menu as well. The Movement Panel let’s the entire software know how to move the robot.
Click the word Movement Panel link here to read what it is and how it works.
I see, no worries i can understand you perfectly. For me the way I set them up with the joystick was the easiest way to make them move. Once I get the my battery replacement I will power up the servos and share the way have them set them up. The only problem I have so far is that I can only steer the front wheels left and right but not the back ones. Maybe we can figure out a way to make them move the way they are supposed to.
P.S.
I want to wait until I get my new battery just to make sure I share the correct set up that I have.
For the steering I currently used a slider (Min=60, Max=120, Default=90) in the "Mobile Interface". The value is passed to the variable $Steering_angle. If changed, the following code is executed:
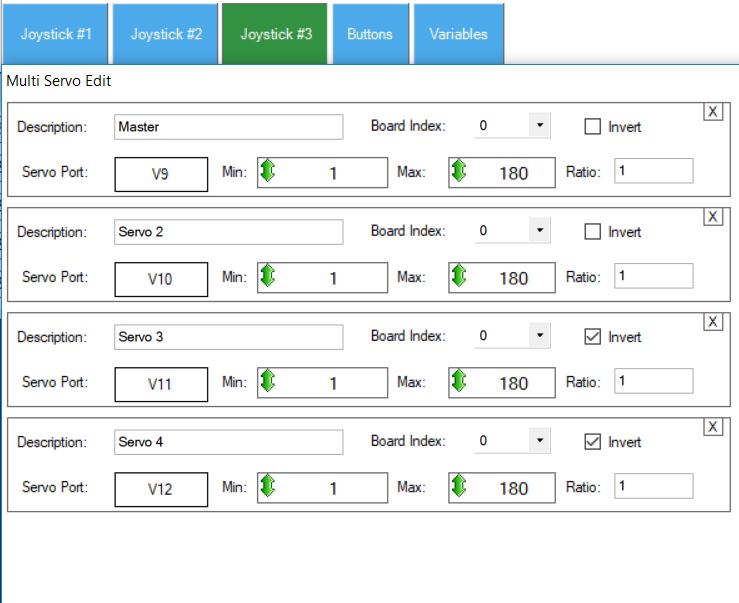
V1 and V2 steer the front axis and V2 and V3 steer the rear axis.
Great rover project and another great plugin!! This is very cool!!!
I have been rolling the idea of changing the servo setup in my robot for quiet some time, this seems to be a good option!! Daisychaining will be helping a lot to clean the wiring mess, and positional feedback is a very nice addon!!
I also found this over on GitHub, which is looking good
https://github.com/maximkulkin/lewansoul-lx16a
Alright, finally after a busy weekend and a few hiccups along the way I was able to open up my program. Here is what I have, the way I have it set up lets me move it in any direction I want with an xbox one controller. I still need to work on the steering, if you find a solution let me know.
This is the code.
Set up for joystick#2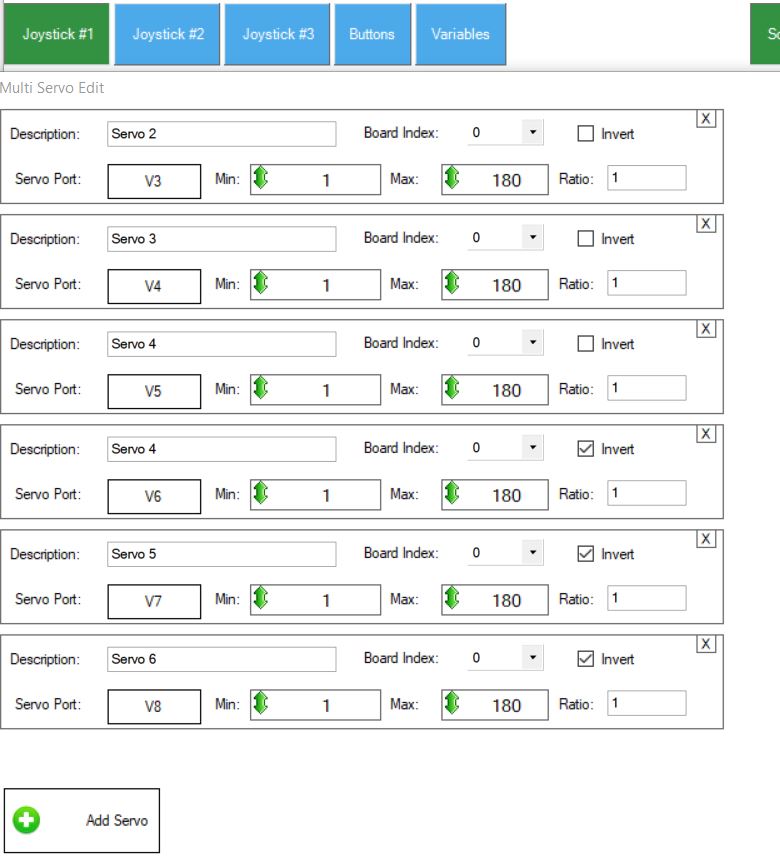
Set up for joystick #1