

Create touchscreen robot control panels with buttons, joysticks, sliders, camera views and scripts; multi-page fullscreen UIs for PC and mobile.
How to add the Interface Builder robot skill
- Load the most recent release of ARC (Get ARC).
- Press the Project tab from the top menu bar in ARC.
- Press Add Robot Skill from the button ribbon bar in ARC.
- Choose the Remote Control category tab.
- Press the Interface Builder icon to add the robot skill to your project.
Don't have a robot yet?
Follow the Getting Started Guide to build a robot and use the Interface Builder robot skill.
How to use the Interface Builder robot skill
The Interface Builder robot skill lets you create a touch-friendly control screen (a “user interface” or UI) for your robot. You can build your own control panel using items like buttons, labels, joysticks, servo pads, sliders, drop-down lists, checkboxes, and camera/video displays.
Interface Builder is designed to be simple: you place controls on a page, size them, and then configure what each one does. You can create multiple pages (full-screen layouts), and the user can switch pages using navigation buttons. Interfaces can be used on a PC and (in different ways) on mobile devices.
Ways to Use Interfaces
Interfaces you create can be shown in a few different places depending on how you want to control the robot. Most people design interfaces for ARC on a PC, but you can also use them with mobile apps.
- ARC on PC (Fullscreen Workspace View): Build interfaces and run them on the same computer that is running ARC. In ARC, you can open the Full-Screen workspace from the File menu.
- ARC Mobile app: A lightweight version of ARC that runs directly on a mobile device and connects to a robot controller. (This is legacy and has feature limitations—details below.)
- ARC Remote UI app: Your phone/tablet becomes a “remote screen” that connects to ARC running on a PC. The mobile device displays the interfaces you designed in Interface Builder.
ARC Mobile
ARC Mobile is a lightweight version of ARC for phones/tablets. It can load ARC projects and connect to the robot directly, which means it can replace a PC in simple setups.
However, ARC Mobile is limited and does not include many advanced features such as speech recognition, object tracking, and most plug-in robot skills. ARC Mobile is kept mainly for legacy use. For most new builds, it’s usually better to run ARC on a PC or an embedded computer (SBC) inside the robot.
Here is a list of currently supported robot skills and features for ARC Mobile:
- Auto Position (Movement Panel)
- Auto Position Real-time Pose
- Auto Position
- Camera
- Connection
- Continuous Rotation Servo Movement Panel
- Custom Movement Panel
- Desktop View
- Script (EZ-Script, Javascript, Blockly, and Python)
- Dual HBridge Movement Panel
- Dual HBridge w/PWM Movement Panel
- Microphone (ezb)
- Notepad
- RGB Animator
- RoboScratch
- Script Monitor
- Sound Board (ezb)
- WiiMote
Here are links to get the ARC Mobile app:
ARC Remote UI
ARC Remote UI lets a mobile device control a robot by connecting to ARC running on a PC. The app shows the Interface Builder screens you designed, and your touches/clicks are sent to ARC.
In simple terms:
- ARC runs on the PC and stays “in charge” of the robot.
- Your phone/tablet becomes the remote control screen.
- You can create multiple pages and multiple Interface Builder skills (multiple screens).
Here are links to get the ARC Remote UI app:
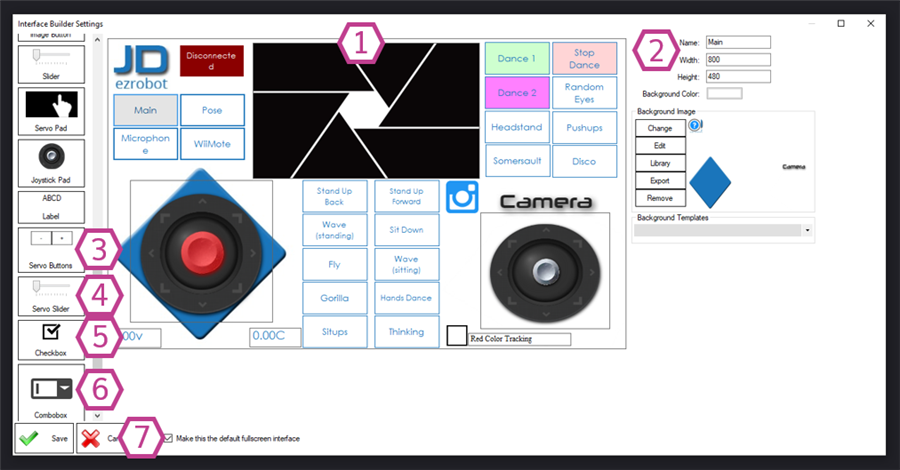
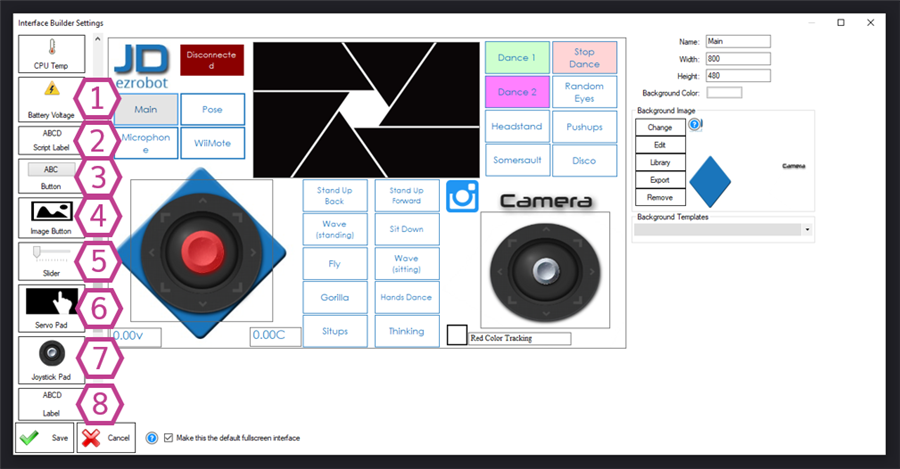
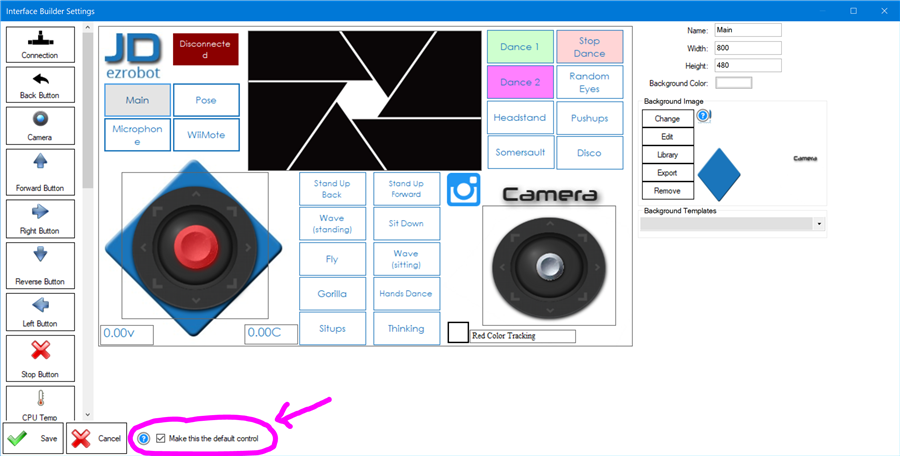
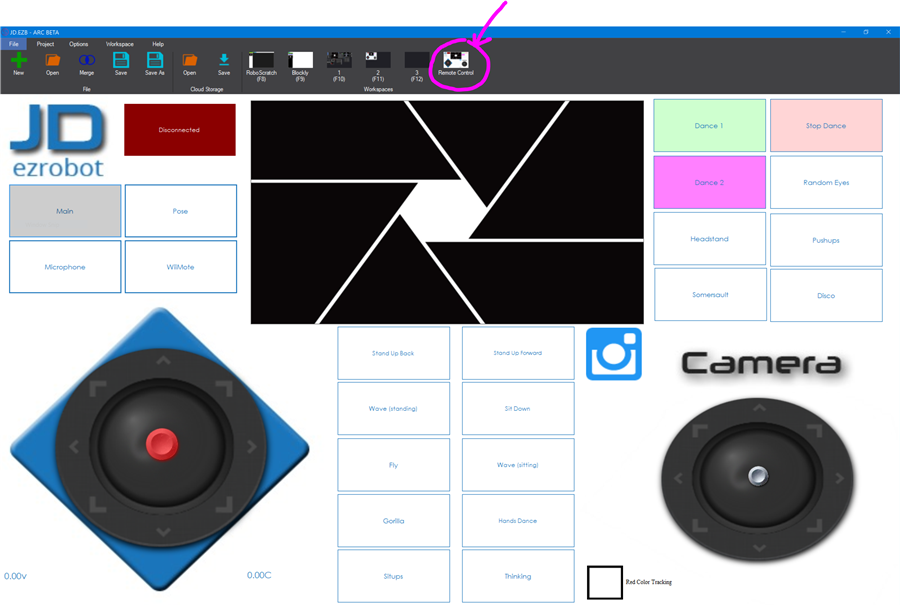
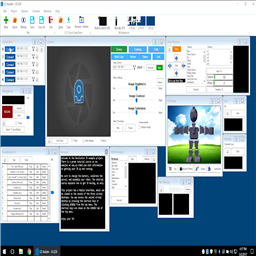
Main Window (Example Interface)
Below is an example of a custom robot interface. Each item on the page is an “element” you can add from Interface Builder. Some elements run your own script (like a button press), and some elements have built-in robot features (like a camera view or joystick movement control).

1. Connection Status Button
Shows whether ARC is connected to the controller and lets you connect/disconnect with a press.
2. Camera Display
Shows the live video stream from a camera skill configured in your ARC project.
3. Button
A standard button with text. Typically used to run a script when pressed.
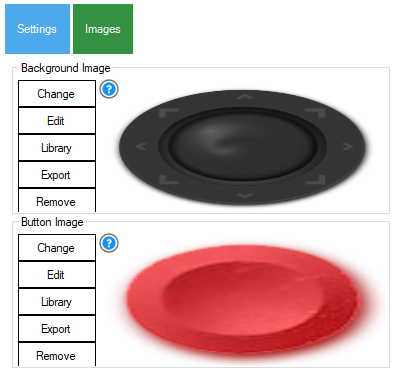
4. Image Button
A button that uses an image (useful for custom icons).
5. Joystick Pad
Touch joystick for driving a robot through a configured Movement Panel.
6. Servo Pad
Touch pad for controlling two servos (often pan/tilt, like a head or camera mount).
7. Voltage/Temp Display
Displays battery voltage and controller CPU temperature on supported controllers (ex: EZ-B v4). Updates once per second.
8. Checkbox
On/Off toggle (for example, enabling/disabling tracking features). Can store a variable value and run a script when changed.
Create a User Interface (Step-by-Step)
- Add the skill: In ARC go to Project → Add Skill → User Interface → Interface Builder.
- Open the skill settings: Click the gear/settings for Interface Builder to start designing your page.
- Add elements: Insert buttons, sliders, pads, labels, etc. into the editor area.
- Select an element to edit it: When you click an element, its settings appear on the right side (size, colors, scripts, ports, and more).
- Save and test: Save the project (local or cloud) and test using your mouse on PC or touch on a tablet/phone.
1. UI Display Area
This is your design canvas. You drag/place UI elements here and arrange them like a touchscreen control panel.
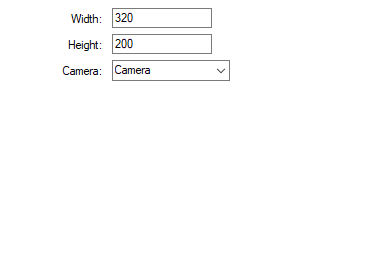
2. Display Area Settings
Change the interface size (default is 800×480), background color, or background image.
You can also choose from preset templates (helpful if you’re not sure where to start).
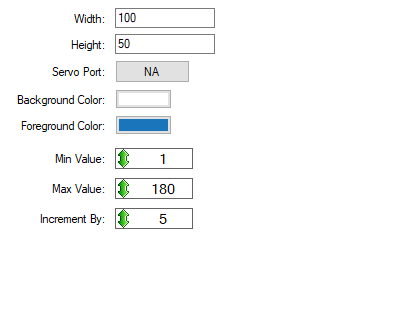
3. Servo Buttons
“+” and “–” buttons that nudge a servo position up/down by a set increment.
Configure: button size, servo port, min/max position, increment step, and colors.
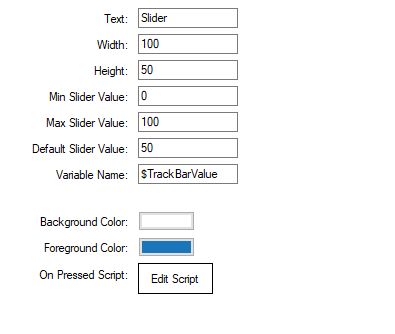
4. Servo Slider
A slider that sets servo position by dragging.
Configure: size, variable name, min/max positions, colors, and optional script.
5. Checkbox
An On/Off switch. It can store a variable and run a script when changed.
Configure: size, variable name, checked/unchecked images, and optional script.

6. Combobox (Drop-down)
Create a list of options. When the user selects an option, the $SelectedIndex variable is updated.
Index numbers start at 0.
Example: the 4th item has index 3.

7. Default Fullscreen Interface Checkbox
Makes this interface open in fullscreen instead of windowed mode.
Great for tablets or kiosk-style robot displays. On PC, ARC provides a fullscreen virtual desktop tab.
More Elements (What They Do)
1. Battery Voltage Display
Shows controller input voltage on supported controllers (ex: EZ-B v4). Updates once per second.
Configure: size, colors, font size, and optional script.
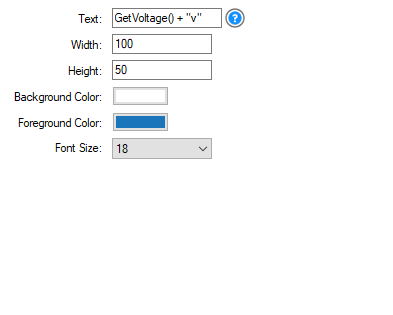
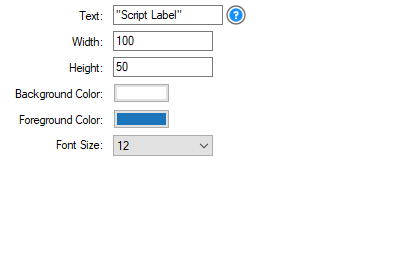
2. Script Label
A label that can show plain text or script output.
Example: "The Date is: " + $date
Configure: size, script/text, colors, and font size.
3. Button
A customizable button that can run a script.
Configure: size, font size, colors, border, and a “running” color shown while the script is executing.

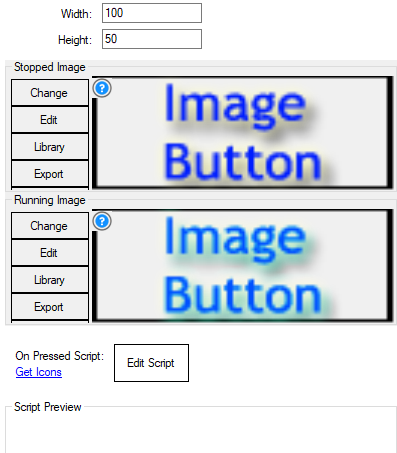
4. Image Button
Uses custom images for “stopped” and “running” states.
Configure: size, images, and the script that runs on press.
5. Slider
A general-purpose slider for quickly changing a value.
Often used for servos, but it can control any value by assigning a variable and optional script.

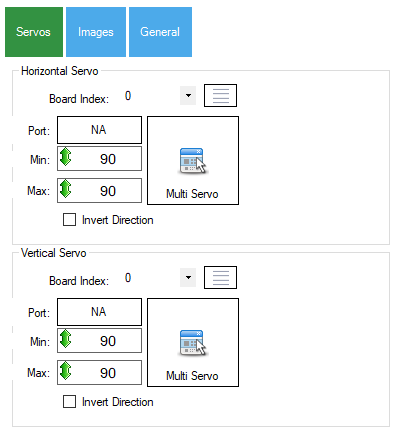
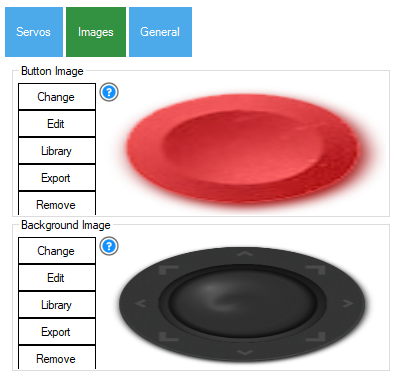
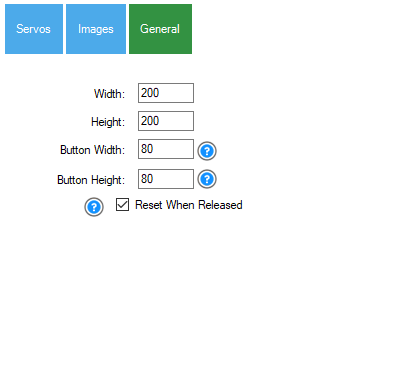
6. Servo Pad
A touch pad for controlling two servos (horizontal and vertical).
Configure: servo ports, min/max, pad size, images, and “return to center” behavior.
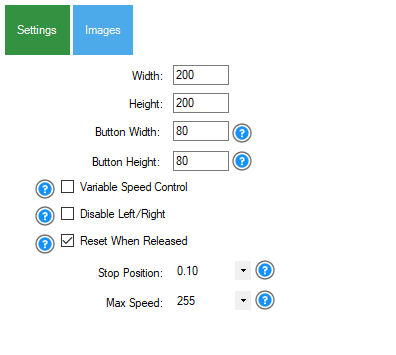
7. Joystick Pad
A touch joystick for a Movement Panel.
Configure: pad size, images, optional analog speed control, steering options, and “return to center” (stop) behavior.
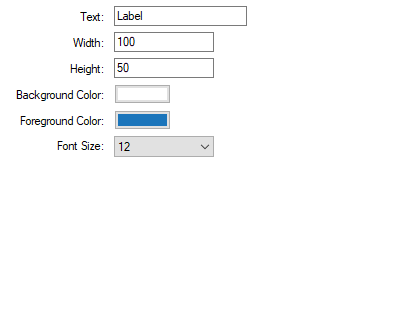
8. Label
A simple text label to describe controls (for example: “Head Pan” above a slider).
Configure: size, font size, and colors.
Movement + Connection + Camera Elements
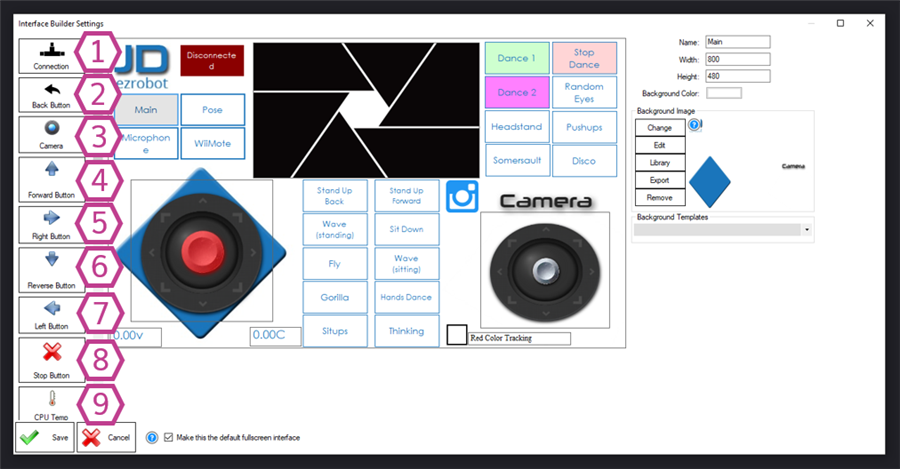
1. Connection Button/Display
Connects/disconnects ARC to your controller and shows status.
Commonly green when connected and red when disconnected (depending on theme/settings).

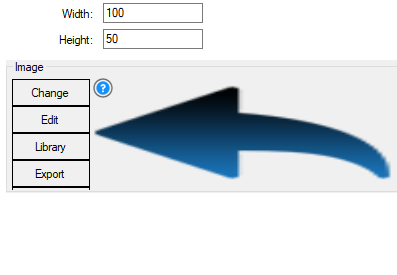
2. Back Button
Goes back to the previous interface screen (only useful if you have multiple Interface Builder skills/screens).
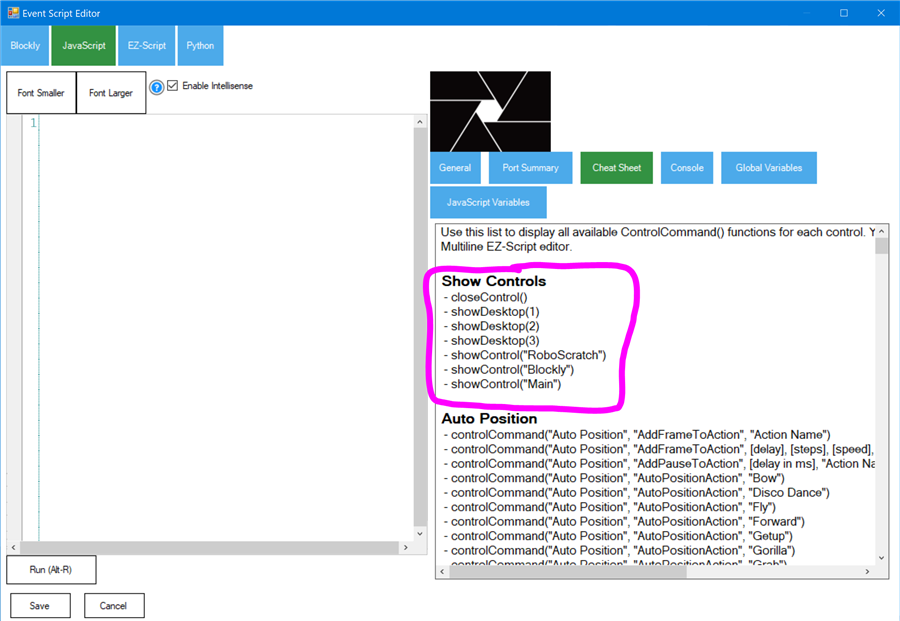
To switch to another interface by script, you can use:
ShowControl("User Interface 2")
3. Camera Display
Streams live video from a configured camera skill.
Configure: size and which camera skill to pull video from (default is the first camera skill in your project).
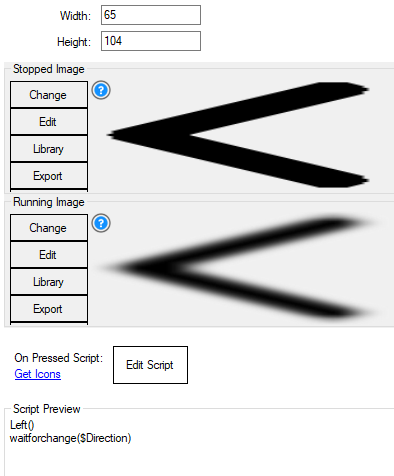
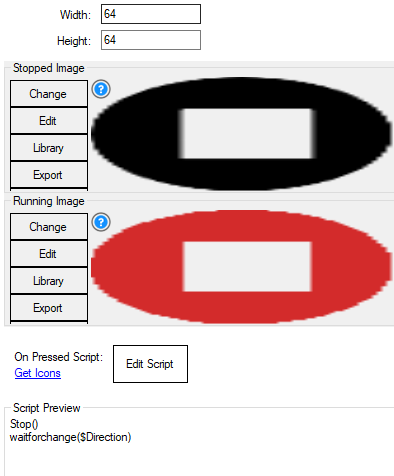
4–8. Direction + Stop Buttons
These buttons control a Movement Panel in your project (Forward, Right, Reverse, Left, Stop).
Configure: size, optional scripts, and images for stopped/running states.
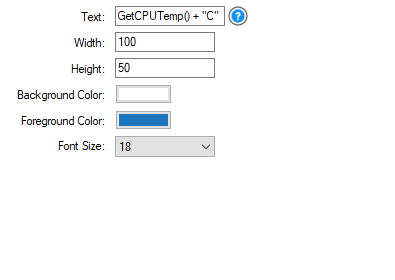
9. CPU Temp Display
Shows the controller CPU temperature on supported controllers (ex: EZ-B v4). Updates once per second.
Configure: size, colors, font size, and optional script.
Fullscreen UI (ARC on PC)
ARC on PC includes a special fullscreen interface view on the last virtual desktop tab. If you enable Make this the default fullscreen interface in Interface Builder, that interface will load in the fullscreen tab.
Select the last virtual desktop in ARC to view the fullscreen user interface.
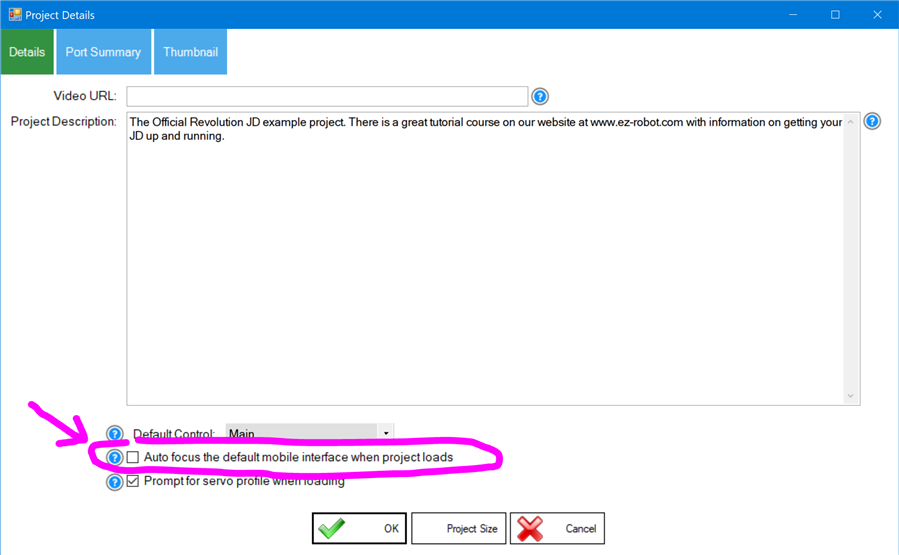
You can also make ARC automatically focus the default interface when the project loads: open Project Details and enable Auto Focus the Default skill When Loading.
Multiple User Interfaces (Multiple Screens)
You can add more than one Interface Builder skill to your project (for example: “Main Screen”, “Camera Screen”, “Settings Screen”). Only one interface can be displayed fullscreen at a time, but you can switch between them using scripts.
Navigation scripts:
ShowControl("User Interface 2")pushes the specified interface on top.CloseControl()returns to the previous interface (like a back stack).
You can find these commands in the Cheat Sheet while editing a script for events such as a button press.
Advanced Scripting (PC Only)
On ARC for PC, you can manipulate interface objects using control commands (for example: show/hide UI elements, change values, etc.). This advanced “control command” feature is not supported on ARC Mobile.
This video demonstrates using control commands to change the visibility of a UI object:
ARC Mobile Video
Related Tutorials
Mobile App Developer Tutorial
The Robot Program Episode 006: Introducing ARC
Related Hack Events
D-0 Droid Live Hack
D-0 Droid Live Hack Part 2
Related Questions

Upgrade to ARC Pro
Subscribe to ARC Pro, and your robot will become a canvas for your imagination, limited only by your creativity.
I try to add more than 1 button... but that seems not to work... If i copy the button and paste it... I tried to adjust the settings... But the setings will change to the same for every button...
I tested the interface builder this morning and it works.
The buttons do appear on top of each other at the top left starting position, have you dragged them away from each other? Could this be where your trouble is?
The settings do change and are saved when selecting each button individually. If you are still having trouble please reply with some screenshots.
OneDayFlie2 - it seems you wrote this message while using an outdated installation of ARC. In the future, please upgrade before posting - thanks! (And no double posting ). Your other duplicate post has been deleted.
Thank you for the great instructions!
Any chance I can run a script to change the background colors of buttons on the user interface e.g. if certain conditions appear. Or maybe ask it more pragmatically, the default connection button only shows 1 connection, I have 2 ez-b's connected and want to see from both if they are connected. Thought to create a work-aroud to test in a script if ez-b 0 resp 1 is connected and set a button or label on red/green.
Hi @Charel, you can have 2 EZB's connected you just can't use the standard connection button with a second EZB. It will only work with EZB index 0.
You'll have to use a button (like "button" or "image button") that can run a script to connect to another EZB index.
At the moment you can tell if the robot is connected with:
Where 1 is the EZB index, but you won't be able to change the color of the button based on the status.
You could ask for these features in the feature request section of our site.
Hi Jeremy,
Many thanks for the quick reply! Indeed, I am using "$status = IsConnected(1) " to figure out if the EZ-B is connected, Unfortunately I can't change a color of the button but will use a led or something to indicate it as a workaround. While we are on the subject, is there a SW command to power cycle an EZ-B? Reason why I ask is because when an EZ-B loses connection it is not enough to simply reconnect, will not work. You need to power cycle the EZ-B before it lets you connect again. Now I need to do that manually. Can I do that with a SW command?
Yes I believe we did implement a feature in the webserver that can activate a digital pin on disconnect. I can’t find the info at the moment but I’ll try to find it tomorrow. Go to 192.168.1.1 and search the advanced settings I believe. You can then activate a relay circuit to temporarily remove power (probably need a small timer circuit to turn it back on).