Sabertooth movement panel: control two motors via Simplified Serial with variable speed sliders, movement buttons, and serial port options.
How to add the Sabertooth Movement Panel robot skill
- Load the most recent release of ARC (Get ARC).
- Press the Project tab from the top menu bar in ARC.
- Press Add Robot Skill from the button ribbon bar in ARC.
- Choose the Movement Panels category tab.
- Press the Sabertooth Movement Panel icon to add the robot skill to your project.
Don't have a robot yet?
Follow the Getting Started Guide to build a robot and use the Sabertooth Movement Panel robot skill.
How to use the Sabertooth Movement Panel robot skill
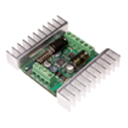
This skill supports the Sabertooth Motor Controller as a Movement Panel with variable speed in Simplified Serial mode. The Sabertooth Motor Controllers are high power. They come in many versions that range from 5Amp to 60Amp. The ARC software supports the Simplified Serial Mode at multiple baud rates on a configured software serial or hardware UART port.
Main Window
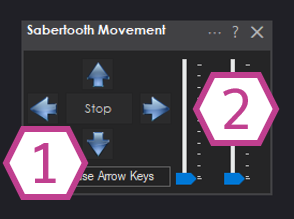
1. Movement Panel Buttons These buttons will allow you to control the motors attached to the Sabertooth Motor Controller (left, right, forward, and reverse).
2. Speed Sliders These sliders will allow you to control the speed of each motor attached to the Sabertooth. If the sliders are at the bottom the speed will be 0% (off) and the top is 100%.
Configuration
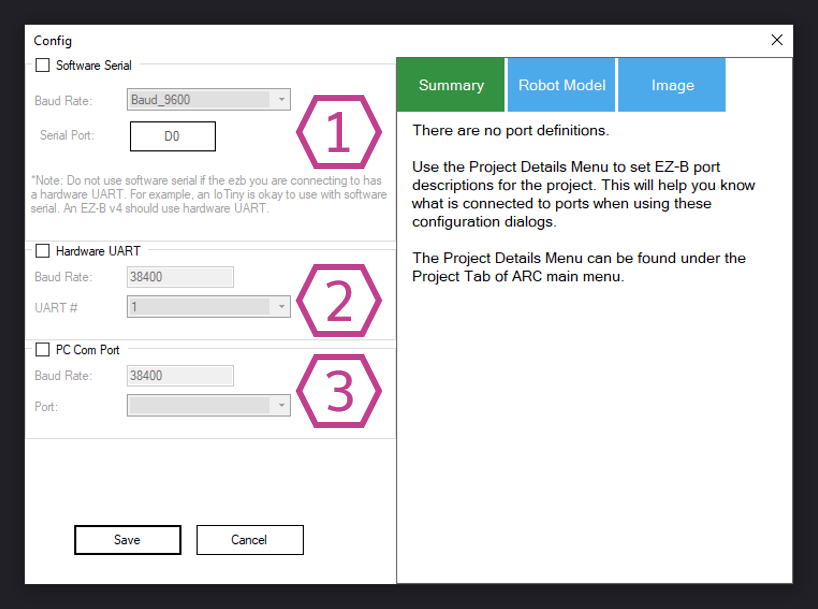
1. Software Serial Option Checkbox This uses any EZB digital I/O port to send a emulated serial signal to control the Sabertooth. This section includes a drop-down for the serial communication speed (baud rate) and a Button to change I/O ports. *note: Software serial should only be used if the ezb does not have hardware uart.
2. Hardware UART Option Checkbox This uses a EZB UART port to send a serial signal to control the Sabertooth. This section includes a drop-down for the serial communication speed (baud rate) and another drop-down to select the hardware UART number. *note: Use the ezb hardware uart if available over software serial.
3. PC COM Option Checkbox This uses a PC COM port (commonly a USB-to-Serial device) to send a serial signal to the Sabertooth to control it. This section includes a drop-down for the serial communication speed (baud rate) and another drop-down to select the COM port number. This option has the unique feature that allows you to connect the Sabertooth motor controller directly to a computer.
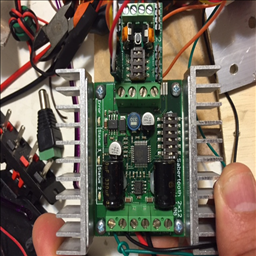
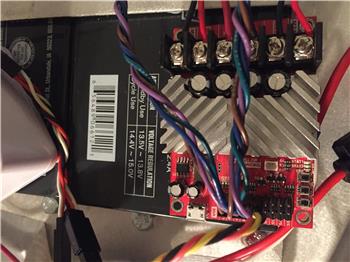
Wiring
The EZ-B connects to the GND and Signal to the Sabertooth. The Signal from the EZ-B connects to S1 on the Sabertooth, which is used for Simplified Serial mode. The Sabertooth will get its power from the Power terminals that you connect to the battery. The GND must be shared between the EZ-B and Sabertooth, even if the battery supply of each is different.How to Use Sabertooth Movement Panel
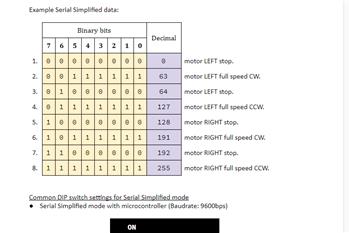
- Physically configure your dip switches on the Sabertooth Motor Controller.
DIP Switches Consult the Datasheet of your Sabertooth product for dip switch settings. The suggested Sabertooth setting is Simplified Serial at 38400 Baud. Lower baud rates can be used if interference or poor functioning is experienced. For the 2x25, here is recommended dip switch settings.
Add the Sabertooth Movement Panel Skill to your ARC project (Project -> Add Skill -> Movement Panels -> Sabertooth Movement Panel).
Configure the Sabertooth Movement Panel skill. Set the communication option and speed (baud rate) that matches the Sabertooth DIP switch setting.
Baud Rate It is important to understand how the EZ-B and Sabertooth communicate. This is done over a serial connection. Serial may seem simple enough in wiring, but the baud speed is a very important attribute that prevents the communication from working. The baud rate of the serial connection is the absolute most important property and must match between the EZ-B and Sabertooth. If the speed is not understood between the sabertooth and EZ-B controller, it won't work. Ensure both the EZ-B and Sabertooth are using the same baud rate.
Consult the manual for your Sabertooth model for the baud rate settings. The suggested baudrate is 38400, which much match the setting in the config menu of this control. Press the options menu on the Sabertooth control to view settings. Lower baud rates can be used if interference or poor functioning is experienced.
- Click the Sabertooth Movement Panel buttons to move your motors.
Video
Resources
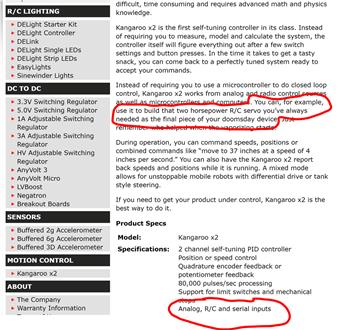
Here's a helpful community post: https://synthiam.com/Community/Questions/Fun-With-A-Kangaroo-sabertooth-8542/commentsCustomer Support For customer support of Sabertooth devices and understanding their datasheets, please contact them here: Dimension Engineering Support.
Product Documentation Dimension engineering has PDF manuals for all of their products. The most popular product is the 2X25, which you can find the product page here.
Product Details Sabertooth allows you to control two motors. You can build many different robots of increasing complexity for years to come with a Sabertooth. Sabertooth has independent and speed+direction operating modes, making it the ideal driver for differential drive (tank style) robots and more.
The operating mode is set with the onboard DIP switches so there are no jumpers to lose or complicated programming sequences. Sabertooth features screw terminal connectors - making it possible for you to build a robot without having to solder.
Sabertooth is the first synchronous regenerative motor driver in its class. The regenerative topology means that your batteries get recharged whenever you command your robot to slow down or reverse. Sabertooth also allows you to make very fast stops and reverses - giving your robot a quick and nimble edge.
Sabertooth has a built in 5V BEC that can provide power to a microcontroller or R/C receiver. It also features a lithium cutoff mode allowing Sabertooth to operate safely with lithium ion and lithium polymer battery packs - the highest energy density batteries available.
Related Tutorials
Sabertooth+Kagaroo+DC Motors As Servos
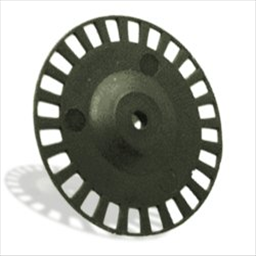
Use Arduino For Wheel Encoder Counter
Related Hack Events

Related Questions
Does Anyone Have A Cytron Smartdrive Duo 30 And What Are The...
Sabertooth 2 X 32
Sabertooth Movement Panel And A Kangaroo X2
Adjusting Encoders On A Roboclaw 2X15

Upgrade to ARC Pro
Experience the transformation – subscribe to Synthiam ARC Pro and watch your robot evolve into a marvel of innovation and intelligence.
Hi , they do indeed or rather did make a 2x10 im looking at it :-) , basically the 2x12 is the direct replacement for it.
I have run this direct form a battery and even tried a diferent arduino still the same ? its either something to do with the ARC software (unlikely if all you guys use it ok) , the sabertooth itself (possible it is quite old) or how the lattepanda communicates. I get no errors logged at all, its just the first keypress does nothing, all other after that are fine, it would not be such an issue but it also does it if i voicecomamnd it as well, or if i try and use navigation plugins , its commanded to move and doesnt unless i have pressed the button first.
Maybe i will try connecting it to a diferent pc and eliminate the lattepanda 1st , after that i would like to try pwn and set as servo but i cant see how i tell the sabertooth the pwn range , or indeed how i connect the continuous rotation panel to that particular port on the arduino.
I demonstrated a video of every command being sent. If it was ARC or us, I assure you we’d have it fixed. Fixing a bug is usually easier than participating in this many support replies hahaha
I really can’t understand what could be causing it. Maybe because it’s a discontinued version that they knew there was an issue? Is there a firmware update for it?
lastly, I have been providing advice to try rc mode. Can you look at your manual, read about rc mode, and try that? I supplied a link above for the robot skill that you’d use with it. It will work with the arduino. If that solution works, then you don’t need to buy a new ST
I hope you can figure this out.