Control LewanSoul digital smart servos from the EZ-B UART or PC COM Serial Port
 Hardware Info
 Source Code
How to add the Lewansoul Servo robot skill
- Load the most recent release of ARC (Get ARC).
- Press the Project tab from the top menu bar in ARC.
- Press Add Robot Skill from the button ribbon bar in ARC.
- Choose the Servo category tab.
- Press the Lewansoul Servo icon to add the robot skill to your project.
Don't have a robot yet?
Follow the Getting Started Guide to build a robot and use the Lewansoul Servo robot skill.
How to use the Lewansoul Servo robot skill
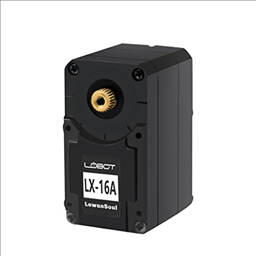
Control the LewanSoul Digital smart Servos (i.e., LX-16A) with ARC. The servos must be powered appropriately and connected to the EZ-B v4 or IoTiny with the respective port. Visit the Config menu of this plugin to view the port configuration. This plugin will only operate on EZB Index #0.
Demonstrated with IoTiny using Software UART
Details
ARC's Virtual Ports (V1..V99) can be assigned to the LewanSoul servos.This plugin requires the RX signal wire of the servo to be connected to the TX of the selected UART or digital port (if Software UART is selected) using a Dynamixel servo Cable provided by one of our hardware partners.
Hardware UART is available on the EZ-B v4 only and is recommended if using an EZ-B v4 with a Dynamixel servo Cable. View the EZ-B v4 datasheet to identify the UART ports (0, 1, or 2).
Software UART is available on both the EZ-B v4 and IoTiny. We only recommend using software UART on IoTiny and hardware UART on EZ-B v4.
The configuration menu also provides an option to select the Virtual Ports, which correspond with the ID's of the UBTech servos. If the LewanSoul servo ID #0 is connected, select V0. #1 = V1, #2 = V2, etc..
Default baudrate of LewanSoul servos is 115,200
Specify servo Port By servo ID
The servos are addressable, meaning they each have a unique address ID. The address ID is related to ARC's Vx servo (virtual servo). This means servo ID #1 is V1 in ARC. servo ID #5 is V5 in ARC. Etc. Specify the Vx ports to bind to using the configuration screen of this plugin. ID #1 (V1) is selected in the example image below. Any servo commands sent to V1 will move LewanSoul servo ID #1. You can choose as many Vx ports as necessary to bind in this plugin.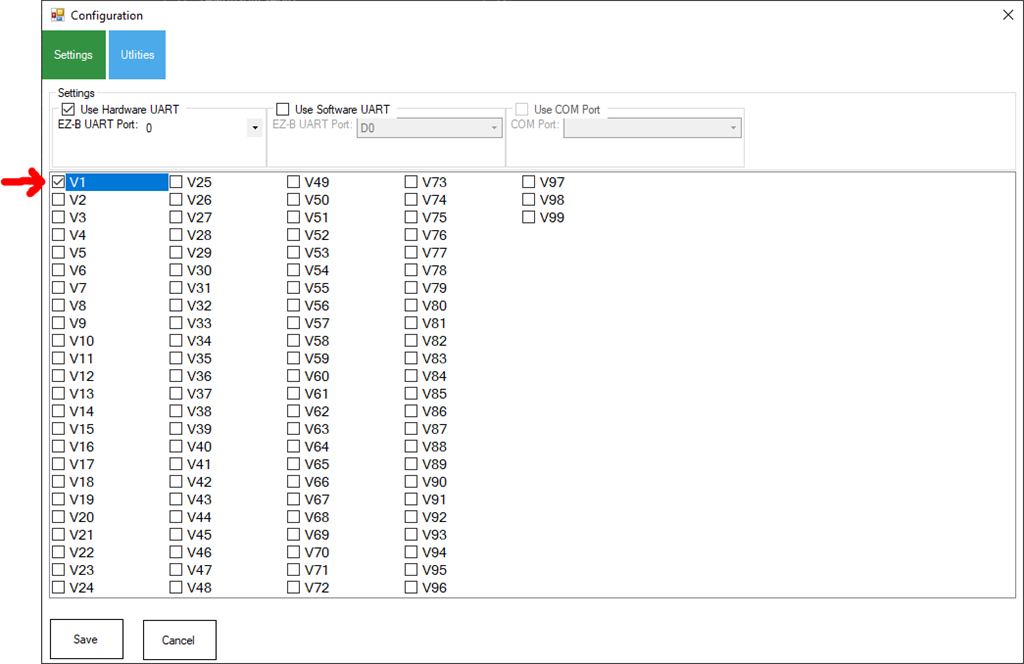
Use USB/TTL Debug Board This option in the configuration is if you are using the optional TTL/USB debug board, which changes the communication to the servo. With this unchecked, the packet length includes the sent packet because the Rx & Tx are crossed. When checked (using the ttl board), the Rx & Tx will only include the return values. Keep this unchecked if you are not using a USB/TTL Debug Board.
Continuous Rotation (Motor) Mode
The servos can be configured for Continuous Rotation (i.e., Motor Mode) using the EZ-Script ControlCommand()...ControlCommand("LewanSoul Servo", SetToContinuousMode, v1)
You can change the port (v1 in the above example) to whatever port you wish to be in continuous rotation mode. Once you do that, the servos will respond as regular, continuous rotation servos, where position 90 stops, 180 is fast in one direction, and 1 is fast in the other. The values further from 90 in either direction change the speed. This allows these servos to be used with the Continuous Rotation Movement Panel.
Servo Mode
If you switched the servo into Continuous rotation mode, you can use the ControlCommand() to change back to servo mode. This can be done with the following command...ControlCommand("LewanSoul Servo", SetToServoMode, v1)

Hello! Here's my problem. I want to run the LewanSoul LX-16A servos in motor mode. Unfortunately I haven't been able to do it yet.
The servos cannot be set explicitly to motor mode in the configuration software of LewanSoul. I integrated the servos in the ARC with the plugin "LewanSoul Servo". They can also be executed with the module "Continuous servo Movement Panel" only in servo mode.
According to the LewanSoul configuration software, the following value ranges apply in motor mode: 0 = Stop -1 to -1000 = counterclockwise rotation with increasing speed 1 to 1000 = clockwise rotation with increasing speed
I cannot set these values in the "Continuous servo Movement Panel".
Where and which settings have to be made in ARC?
Thank you in advance.
Get the latest version of this plugin - and read the description above. You can put the servos in Continuous Rotation mode by using the ControlCommand() and the Movement Panel will now work for your needs.
It's working. I am enthusiastic about the fast implementation. Thank you.
@dd_sn, would you mind sharing a screen shot of your panels and scripts that you used to make it a continuous rotation? im trying use the servos to move small wheels, I have been successful at adding a joystick to move them, but once it gets to 180 degrees it automatically kicks the rotation of the gears back in the opposite direction. Thank you in advanced.
Interesting enough I just received the Lewan saul LDX227 and LDX218 (Chinese Robot), When I ordered them I thought they were serial bus servo's like the LX-16A but sadly they are just normal servo's (No position feedback). Good news is they work just stick them in any port (Connector is exactly same as EZB) and they work fine using default servo driver.
I haven't tried those servos yet, were they more expensive that the LX 16A? I was actually able to get them working the way I want them to, it was there all along just had to stop making more complicated that it was, you know when you have something right infront of you and you do see it...well that was me lol, DJ Sures thank you for setting up the codes for LX 16A, this is awesome!
Came with the robot but you can find them for about $15 US I think I paid $260 for robot and it has 16 of them. You don't get all sensors and controller but that is what the EZ-B is for. Little disappointed they don't provide position feedback though - I just assumed since the LX16A's did and the description said "High Precision Potentiometer" but I assumed incorrectly.
I have half a dozen of the LX-16A I purchased but the controller burnt out and one of the servo's fried so I am also very thankful that DJ Sures completed the plugin in the hack show for the EZ-B. If you have found a 3D printed bracket for them so I can actually mount them to something like a robot arm, I would be grateful.
Here is the video I think I posted a while ago but to be honest I don't think it will be much different then a JD with extra servo's in the legs and a bunch of sensors.
This is what I am currently working on, it has some brackets for the LX 16A but I don't know if they might be functional for your purposes, check it out in this link for brackets, [color=#111111][size=3][font=Verdana, Arial, Helvetica, sans-serif]who knows and maybe you will also start the project yourself too.[/font][/size][/color]