
T265 VSLAM for ARC: SLAM-based mapping and precise way-point navigation, low-power tracking, and NMS telemetry.
 Hardware Info
How to add the Intel Realsense T265 robot skill
- Load the most recent release of ARC (Get ARC).
- Press the Project tab from the top menu bar in ARC.
- Press Add Robot Skill from the button ribbon bar in ARC.
- Choose the Navigation category tab.
- Press the Intel Realsense T265 icon to add the robot skill to your project.
Don't have a robot yet?
Follow the Getting Started Guide to build a robot and use the Intel Realsense T265 robot skill.
How to use the Intel Realsense T265 robot skill
With its small form factor and low power consumption, the Intel RealSense Tracking Camera T265 has been designed to give you the tracking performance for your robot. This ARC user-friendly robot skill provides an easy way to use the T265 for way-point navigation.
The T265 combined with this robot skill provides your robot a SLAM, or Simultaneous Localization and Mapping solution. It allows your robot to construct a map of an unknown environment while simultaneously keeping track of its own location within that environment. Before the days of GPS, sailors would navigate by the stars, using their movements and positions to successfully find their way across oceans. VSLAM uses a combination of cameras and Inertial Measurement Units (IMU) to navigate in a similar way, using visual features in the environment to track its way around unknown spaces with accuracy. All of these complicated features are taken care of for you in this ARC robot skill.
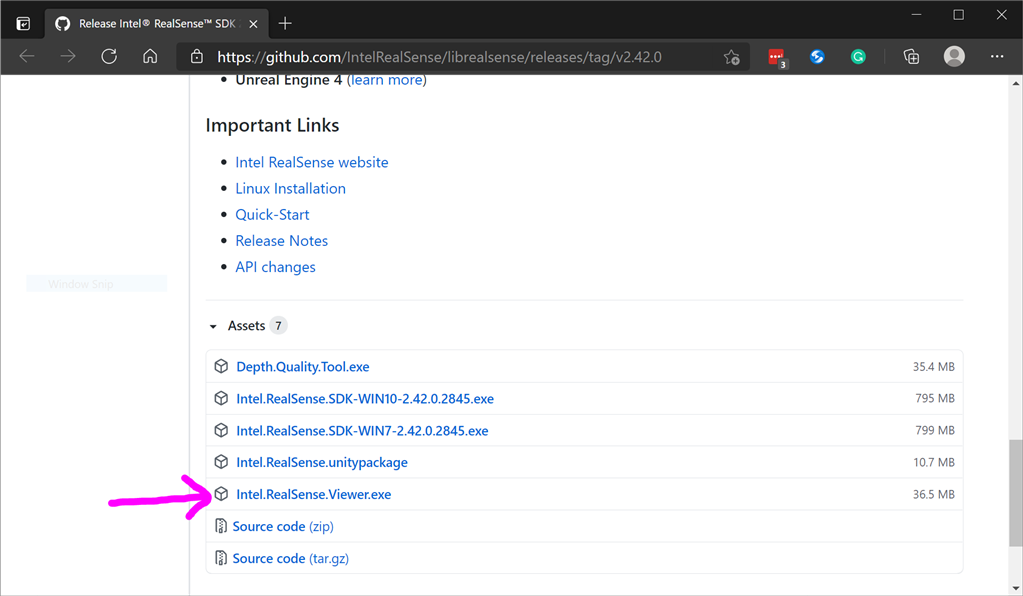
Update Firmware The device sensor may require a firmware update.
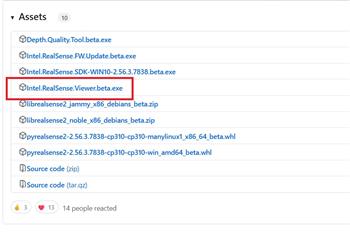
Visit the Realsense GitHub page, scroll to the bottom of the page, and install the Intel.Realsense.Viewer.exe from here: https://github.com/IntelRealSense/librealsense/releases/latest
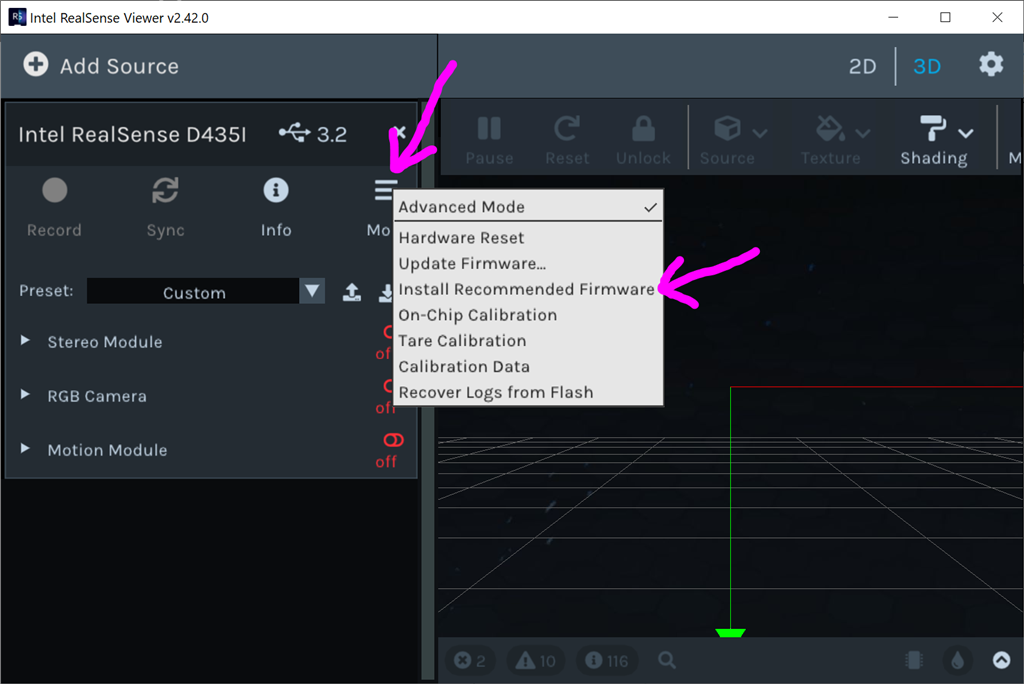
Click the hamburger settings icon and select Install Recommended Firmware
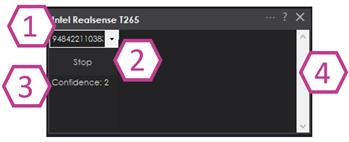
Robot Skill Window The skill has a very minimal interface because it pushes data in the NMS and is generally used by other robot skills (such as The Navigator).

Drop-down to select Realsense device by the serial number. This is useful if there are multiple devices on one PC.
START/STOP the Intel T265 connection.
The confidence of the tracking status between 0 (low) and 3 (highest). In a brightly lit room with many points of interest (not just white walls), the tracking status will be high. Tracking will be low if the room does not have enough light and/or detail for the sensor to track.
Log text display for errors and statuses.
Config Menu
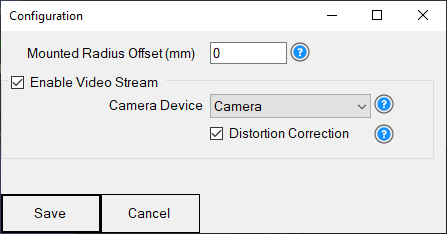
1) Mounted Radius Offset (mm) is the distance in mm of the T265 from the center of the robot. A negative number is toward the front of the robot, and a positive number is toward the rear. The sensor must be facing 0 degrees toward the front of the robot. The sensor must not be offset to the left or right of the robot.
Enable Video Stream will send the fisheye b&w video from the T265 to the selected camera device. The selected camera device robot skill must have Custom specified as the input device. Also, the camera device will need to be started to view the video.
Distortion Correction will use a real-time algorithm to correct the fisheye lens, which isn't always needed and is very CPU intensive.
Video Demonstration Here's a video of the Intel RealSense T265 feeding The Navigator skill for way-point navigation
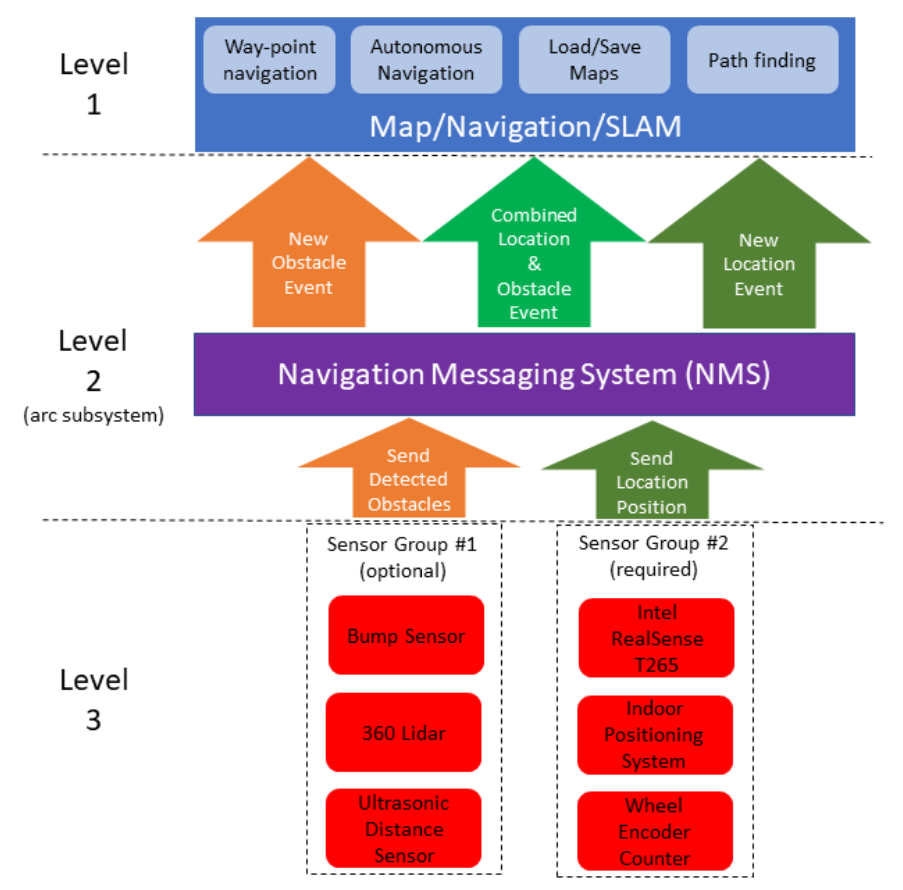
ARC Navigation Messaging System This skill is part of the ARC navigation messaging system. It is encouraged to read more about the messaging system to understand available skills HERE. This skill is in level #3 group #2 in the diagram below. This skill contributes telemetry positioning to the cartesian positioning channel of the NMS. Combining this skill with Level #3 Group #1 skills for obstacle avoidance. And for Level #1, The Navigator works well.
Environments This T265 will work both indoors and outdoors. However, bright direct light (sunlight) and darkness will affect performance. Much like how our eyes see, the camera will is also susceptible to glare and lack of resolution in the dark. Because the camera visual data is combined with the IMU, the camera must have reliable visible light. Without the camera being able to detect the environment, the algorithm will be biased to use the IMU and will experience drift, which greatly affects the performance of the sensor's accuracy.
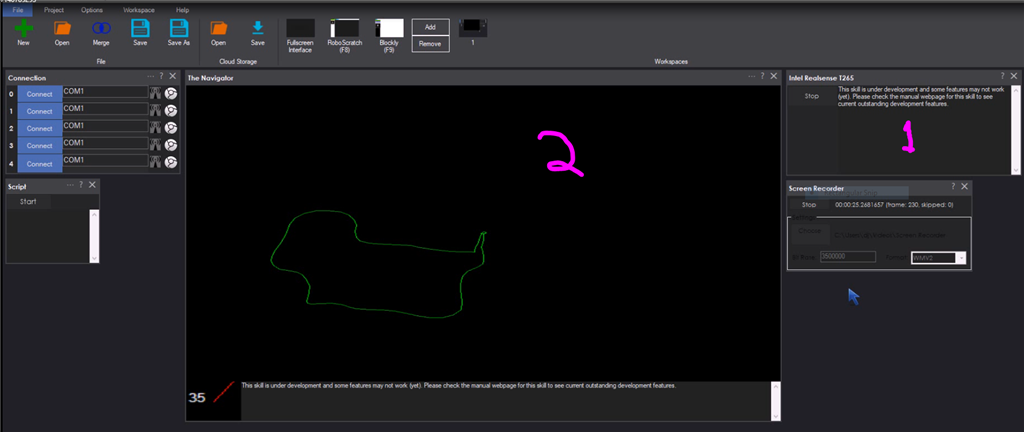
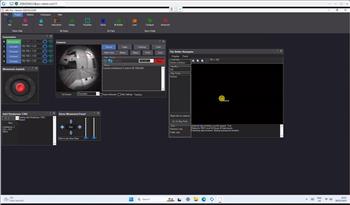
Screenshot Here is a screenshot of this skill combined with The Navigator in ARC while navigating through a room between two way points.
Starting Location The T265 does not include a GPS/Compass or any ability to recognize where it is when initialized. This means your robot will have to initialize from a known location and direction to reuse saved maps. Make sure you mark the spot on the ground with masking tape where the robot starts from.
How To Use This
Connect your Intel RealSense T265 camera to the computers USB port
Load ARC (version must be >= 2020.12.05.00)
Add this skill to your project
Now we'll need a Navigation skill. Add The Navigator to your project
Press START on the Intel RealSense skill and data will begin mapping your robot's position
How Does It Work? Well, magic! Actually, the camera is quite interesting and it breaks the world down into a point cloud of features. It remembers the visual features so it can re-align itself on the internal map. It uses a VPU, is what Intel calls it. Here's a video of what the camera sees.
Related Hack Events

A Little Of This, A Little Of That
DJ's K8 Intel Realsense & Navigation
Related Questions
T265 Realsence Viewer.Exe On An Upboard

Navigator With Mecanum (Omni) Wheel Robot Platforms
Questions Regarding Navigation
In The Better Navigator No Movement From The T265

Upgrade to ARC Pro
Elevate your robot's capabilities to the next level with Synthiam ARC Pro, unlocking a world of possibilities in robot programming.
When I get the hardware, before I start building the final home for it, I plan on making a trailer for my Roli to carry a small windows tablet and maybe a bigger battery for Roli too.
@will, The realsense doesn't use any CPU because the processing is done in the sensor using a VPU. The only processing will be ARC's navigation skills, which use 1 or 2% on my i7 home PC from 2012
@alan, a trailer eh? That'll be pretty fun to see! Hope that happens soon. You could easily fit a rock pi/x with an additional Lipo on the roli and run headless. Here's to links that will be useful
setting up windows for SBC (save performance and storage space): https://synthiam.com/Support/Install/free-space-with-windows-10
set up SBC for headless: https://synthiam.com/Support/Install/headless-robot-sbc
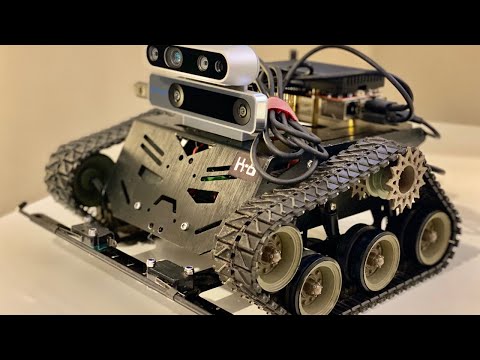
This beauty just arrived! Lets have some fun!!!!!
haven't received my Lidar or T265 yet :-). Santa must have Covid (hoping the neato XV11 works with NMS by the time it arrives).
T265 turned up. Testing my luck on the stairs. Need to strap some LIPO together so I can power my PC so doing it DJ style for now.
Nice!!! Using The Navigator with it?
Trying to work it out. Set the way points and moving between. Unfortunately don’t have a good open space. The 16 year old is in the basement playing video games (he yells really loud). Wife is on main floor reading wants quiet, daughter is tutoring via zoom up stairs so I found a quiet nook but lots of obstacles and I keep running into walls, bookshelves, tables etc. Need to write an obstacle avoidance script for sonar but my LIDAR will be here soon I hope. Roll is not exactly nimble either but I needed something I could build a platform on for PC and battery. May have to steal the rumba from telepresence robot.
BTW how do you get the fisheye camera to work in ARC?
No no
First drive your robot manually around. Drive to the first way point. Mark home. Mark each significant corner/turn. Then mark the end.
do that for each day point.
the key is to FIRST drive the robot TO the way point. Then mark the path.
also. Mark home on the ground. Use painters tape so you can reuse the maps.
instructions above will helpm