
Add Google DialogFlow NLP to ARC: conversational intents, parameter prompts, scripted responses, service-account setup and programmatic robot control.
How to add the Dialogflow robot skill
- Load the most recent release of ARC (Get ARC).
- Press the Project tab from the top menu bar in ARC.
- Press Add Robot Skill from the button ribbon bar in ARC.
- Choose the Artificial Intelligence category tab.
- Press the Dialogflow icon to add the robot skill to your project.
Don't have a robot yet?
Follow the Getting Started Guide to build a robot and use the Dialogflow robot skill.
How to use the Dialogflow robot skill
Google's DialogFlow is a chatbot NLP (natural language processor). Either manually enter conversational phrases into the input field, or send phrases programmatically using the ControlCommand(). This plugin requires an internet connection, which means your computer must be connected to both the robot and the internet at the same time.
The theory behind NLP is to have a conversation with a user to determine intent. The intents are defined by yourself in the DialogFlow configuration web console. The intent may require parameters, which can be prompted to the user until all of the required parameters are specified. Once all of the parameters are specified by the user, the intent can then be executed.
Here is an example of a conversational ChatBot that you can configure with DialogFlow and incorporate other ARC plugins, such as cognitive services for Vision and Emotion detection...
Programmatically send phrases using the following ControlCommand() syntax...
ControlCommand("DialogFlow", "Send", "Hello There")
The response from the server is stored in global variables. Additionally, a script can be configured to execute when the server responds.
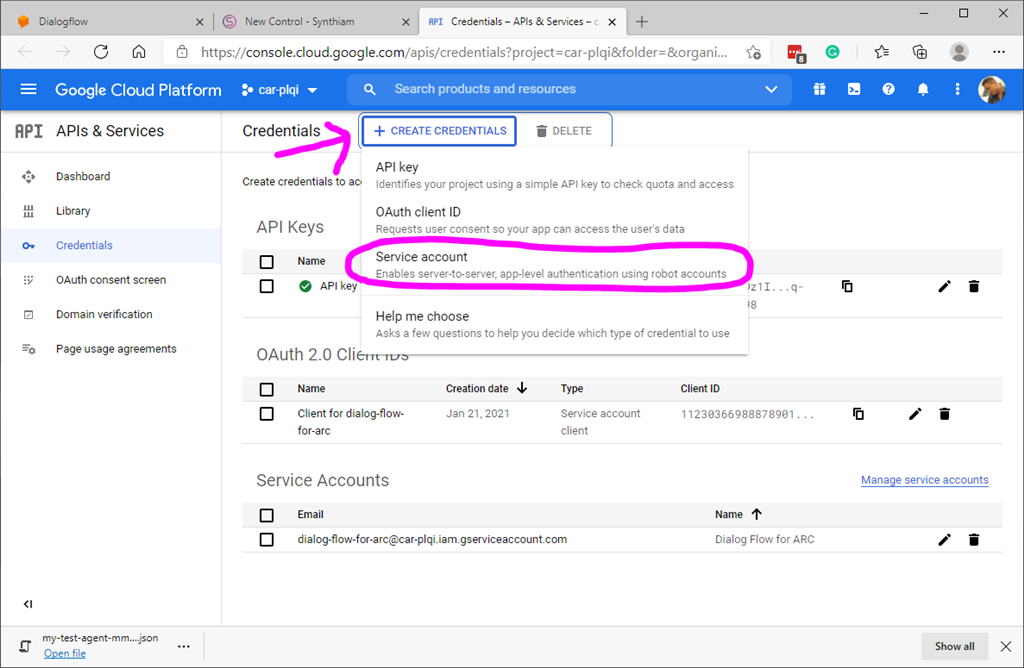
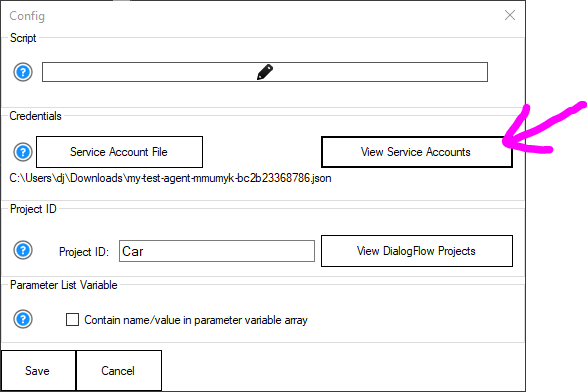
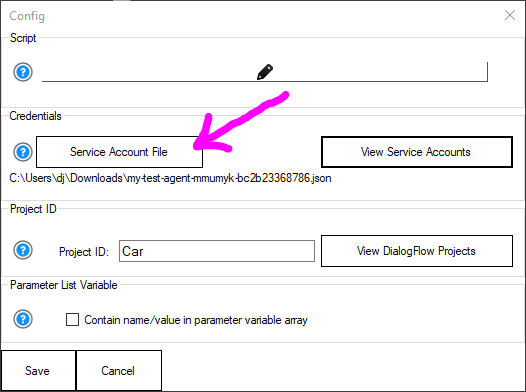
Google Credential Service Account DialogFlow uses a Google Credential Service JSON file, which can be downloaded and saved to your local hard drive. Reference the file using the config menu of this robot skill. See how to create a Google service account here. To visit the google cloud console directly, press the button on the config page.
Press the View Sevice Account button

Press the Create Service Account option. Fill out the required information to create the service account.
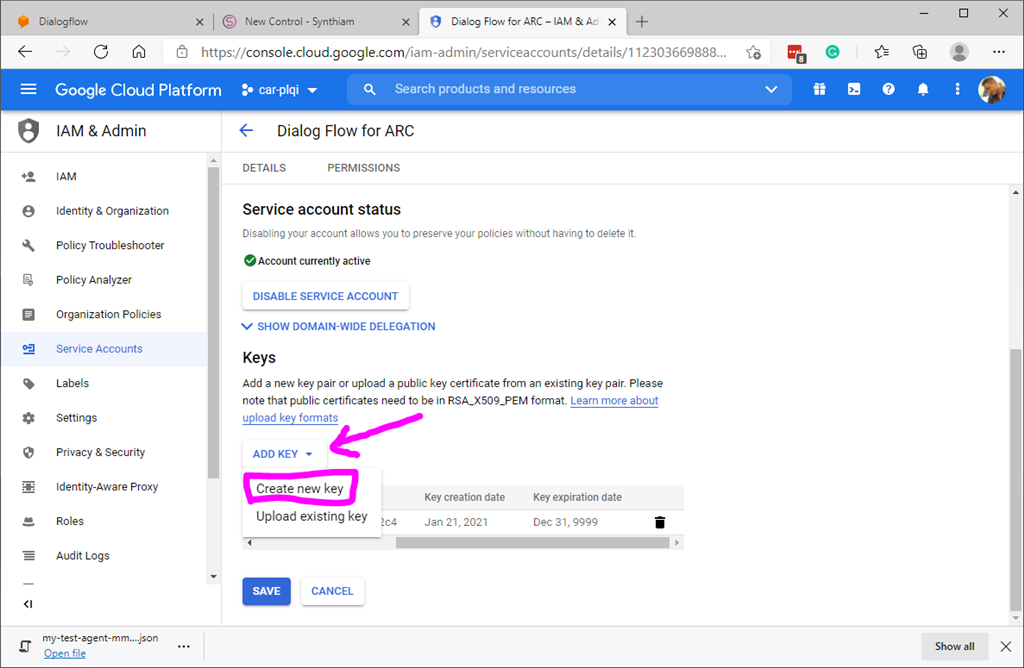
Download Service Account File
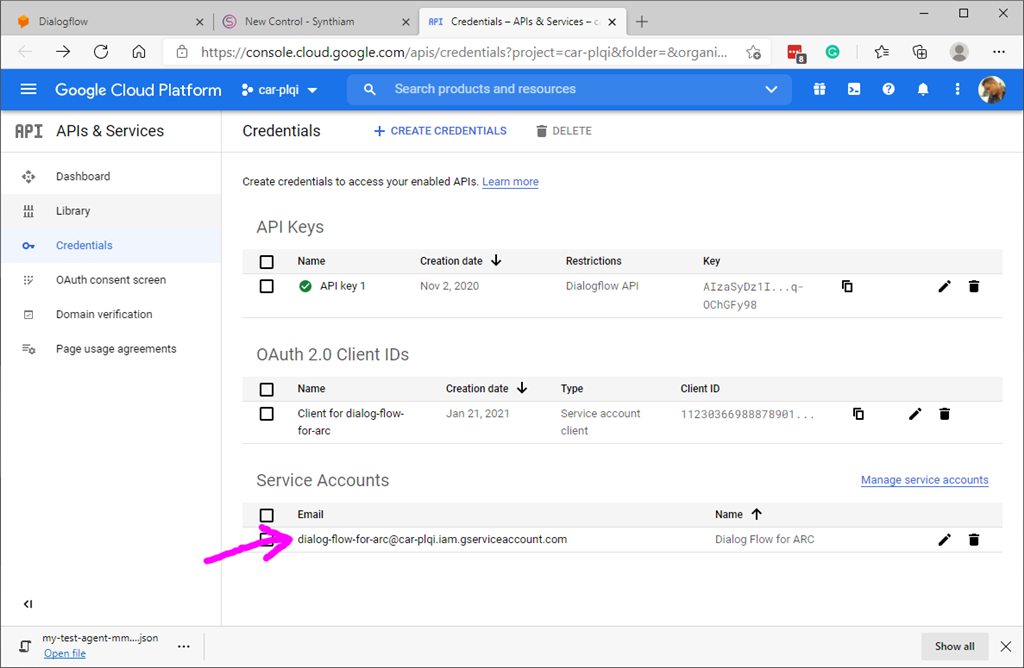
Click the View Services Account button in the robot skill's config menu
Click the selected service account.
Select Add Key and choose the Create New Key option. The JSON file will be downloaded.
Select the JSON file using the config menu option
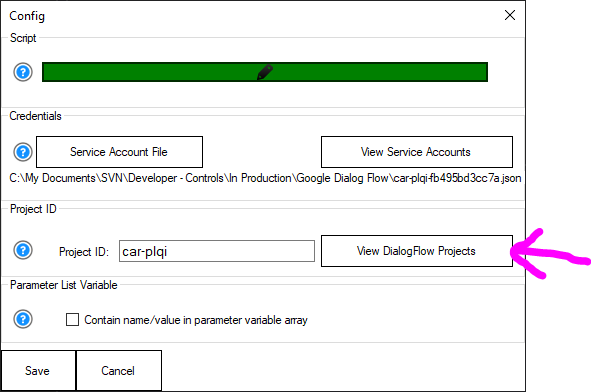
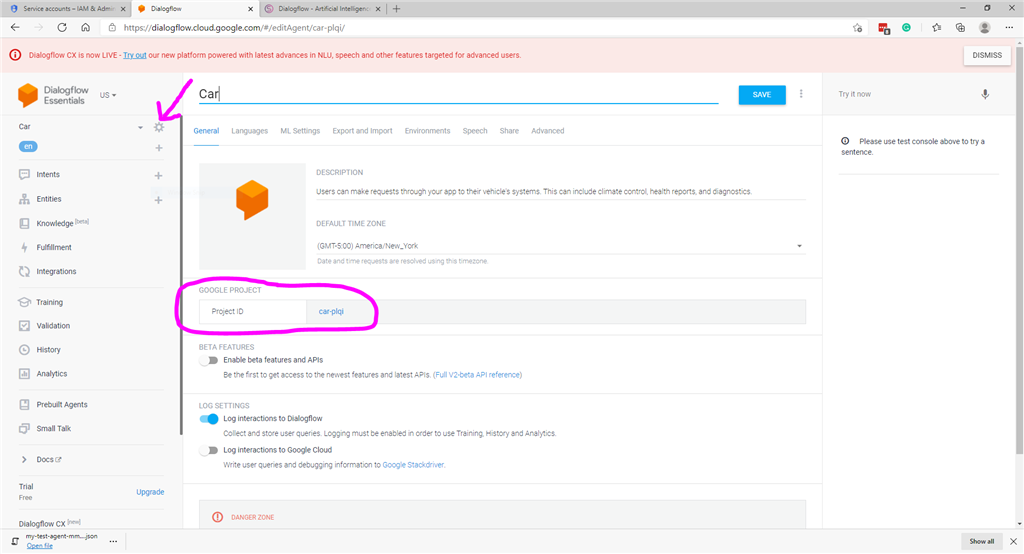
Google Projects Additionally, you can view DialogFlow projects directly by pressing the respective button on the config page. The Google project ID must be inserted into the respective textbox.
Press the "View DialogFlow Projects" button
Press the Gear Icon next to the drop-down list of projects to view the Project Id
Parameter Queries Some DialogFlow Intents may require parameters that will be configured to prompt the user. Checking the $APIComplete variable will determine if the intent has been successfully fulfilled and completed. If the intent has been completed, the array $APIParameters will contain a list of the user-defined parameters.
See this DialogFlow Intent configuration for "Add Numbers".
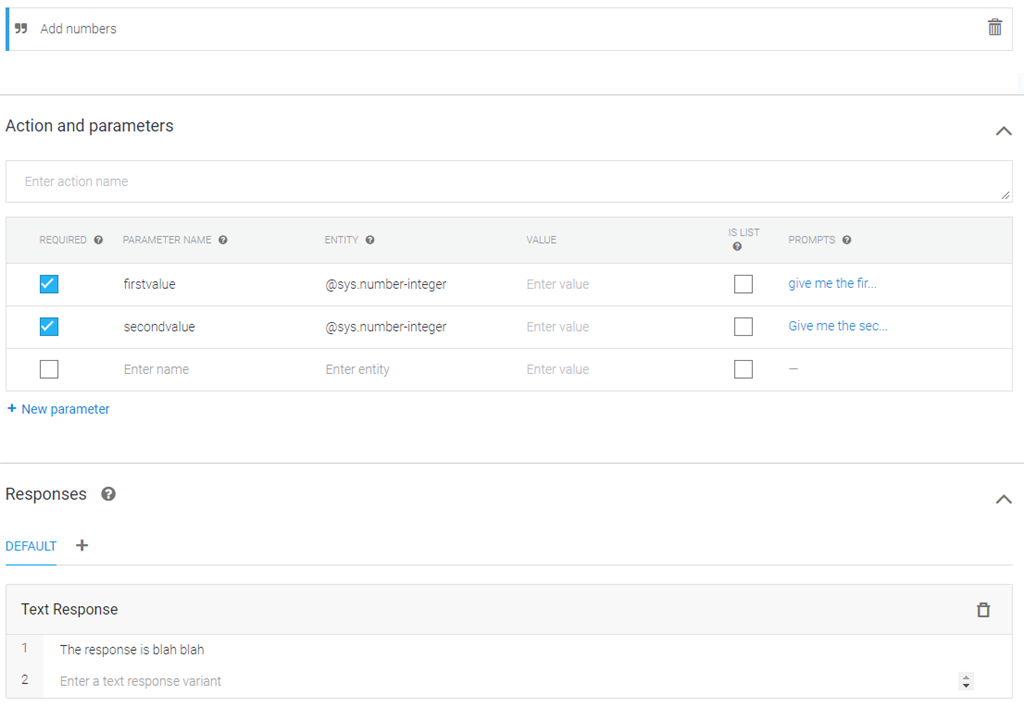
In this example javascript code will use an intent that requires 2 numbers and will add them together.
if (getVar("$APIIntent") == "Add numbers") {

   if (getVar("$APIComplete")) {

     var answer = getVar("$APIParameters[0]") + getVar("$APIParameters[1]");

     Audio.say(getVar("$APIParameters[0]") + " plus " + getVar("$APIParameters[1]") + " equals " + answer);

   } else {

     Audio.say(getVar("$APIResponse"));
   }
}
Example ChatBot - Create An Intent For Moving Once you have some familiarity with creating a new Agent and adding the key to this plugin, we can walk you through how to create an intent. The verbiage used by DialogFlow may not be clear from the beginning. However, once you understand what an Intent and Entity is, it begins to make sense.
The process that we will take in these steps will use text input to teach the bot by typing sentences around a specific action. In this case, we're going to teach the bot how to move a direction (forward or reverse) for a number of seconds. We'll do that by continually typing phrases into the Intent and the bot will create the necessary variables.
Step 1 Load ARC and add two controls to your project. We'll add VARIABLE WATCHER and DialogFlow plugin. Because we'll be having the robot move FORWARD and REVERSE, you'll want to add a movement panel to an existing project so you can actually see the robot move. If you add this robot skill to a blank project, such as this example shows, you'll never have the robot actually move.
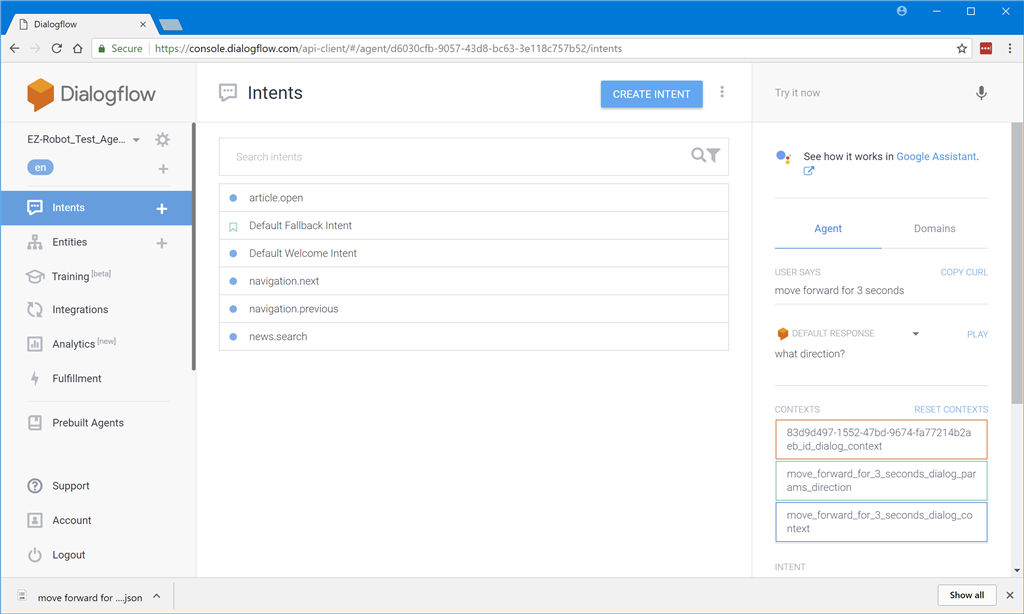
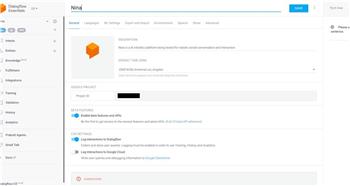
Step 2 Load your Dialog Flow agent in a web browser
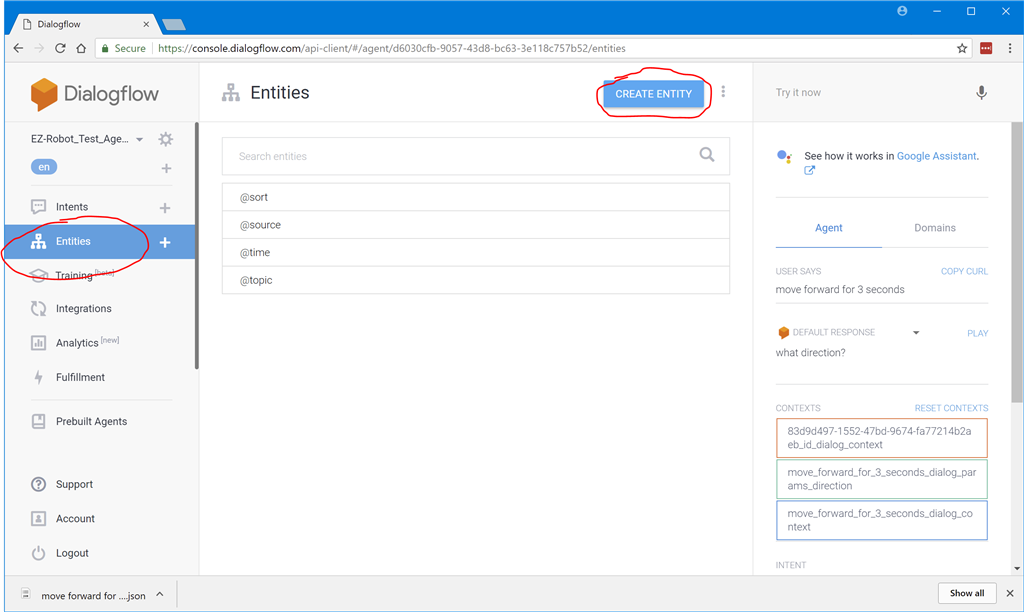
Step 3 We're going to create a new Entity. An entity is essentially a variable that contains a bunch of synonyms. For example, you will see in the next few steps that we will create an identity called DIRECTION which will have two variables FORWARD and REVERSE, but a bunch of synonyms of each. This is how the AI magic understands what inputs people may provide that mean what you expect. So go ahead and create a new Entity.
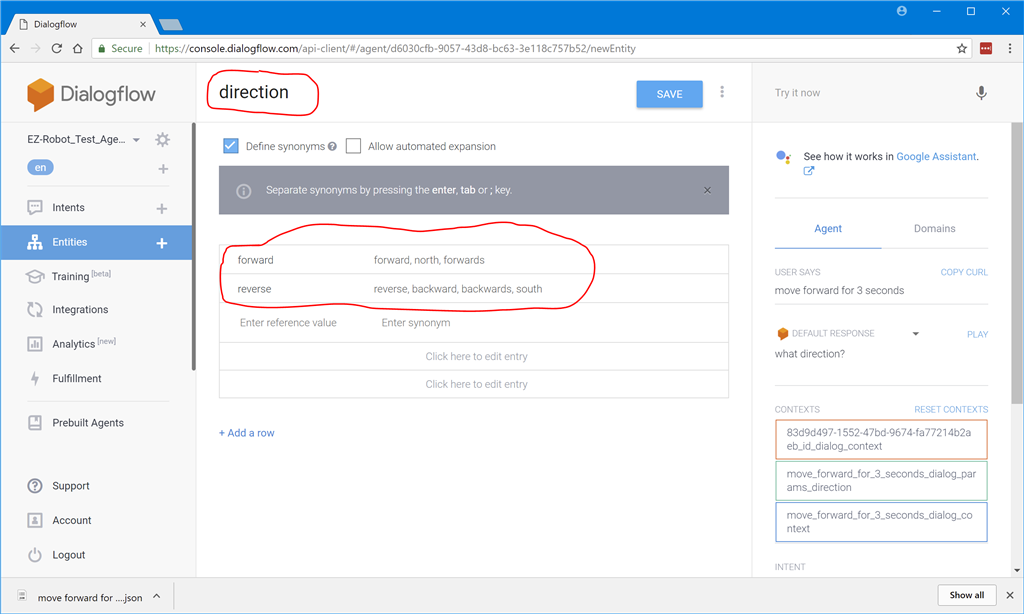
Step 4 Name this entity DIRECTION and create synonyms for each direction FORWARD and REVERSE as seen in the image below.
Step 5 Now we will begin creating an Intent. This is done by pressing the + on the side menu next to INTENT.
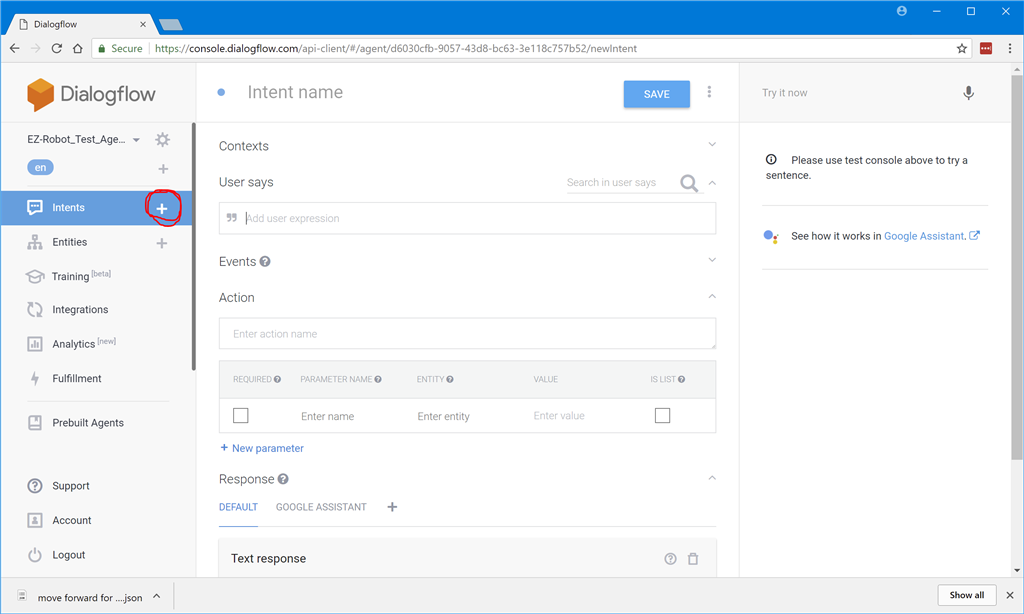
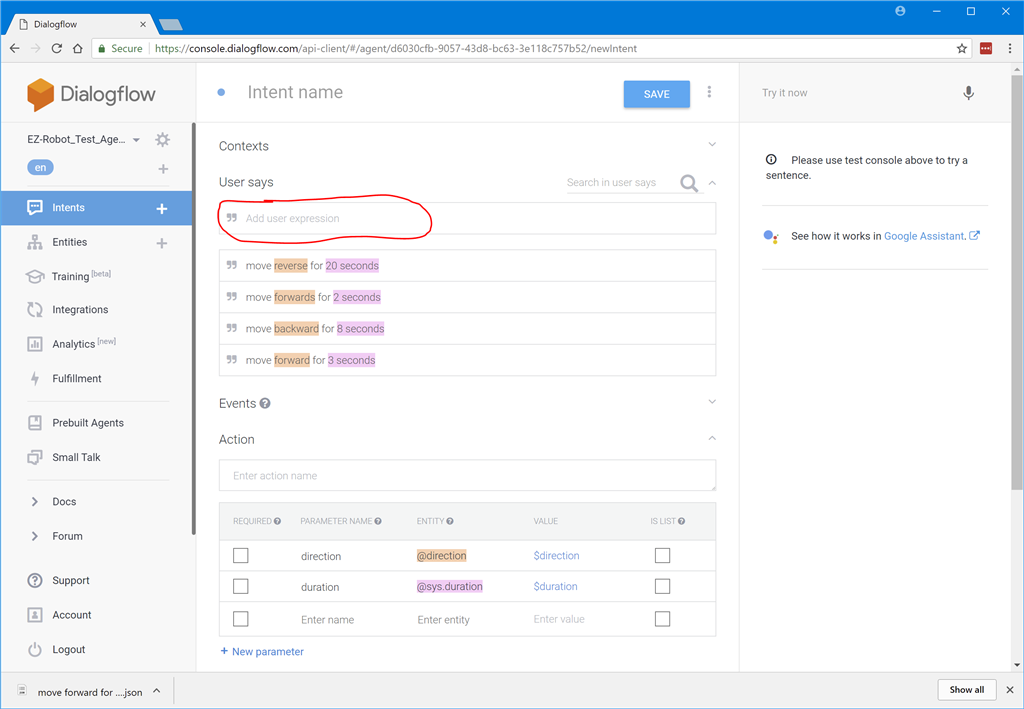
Step 6 Now begin adding phrases into the "User Says" box. This is the magic of AI, because the system will begin detecting the similarities of your statements and create an intent out of them. The sentences you enter must all be related to moving a direction (forward/reverse) for a number of seconds. See in this example the different entries I created. For best results, use the same entries that I did.
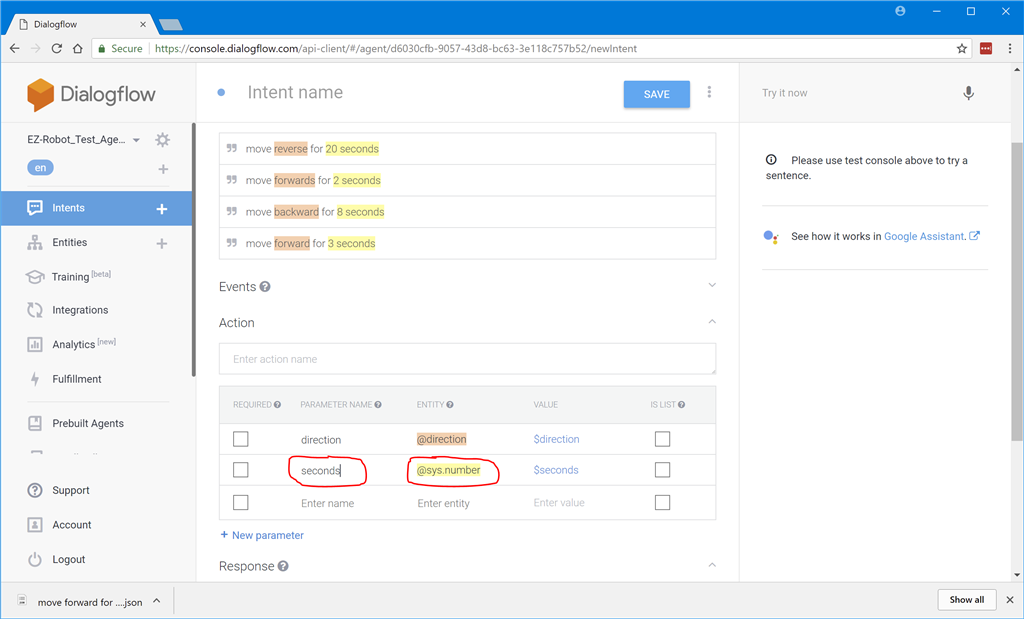
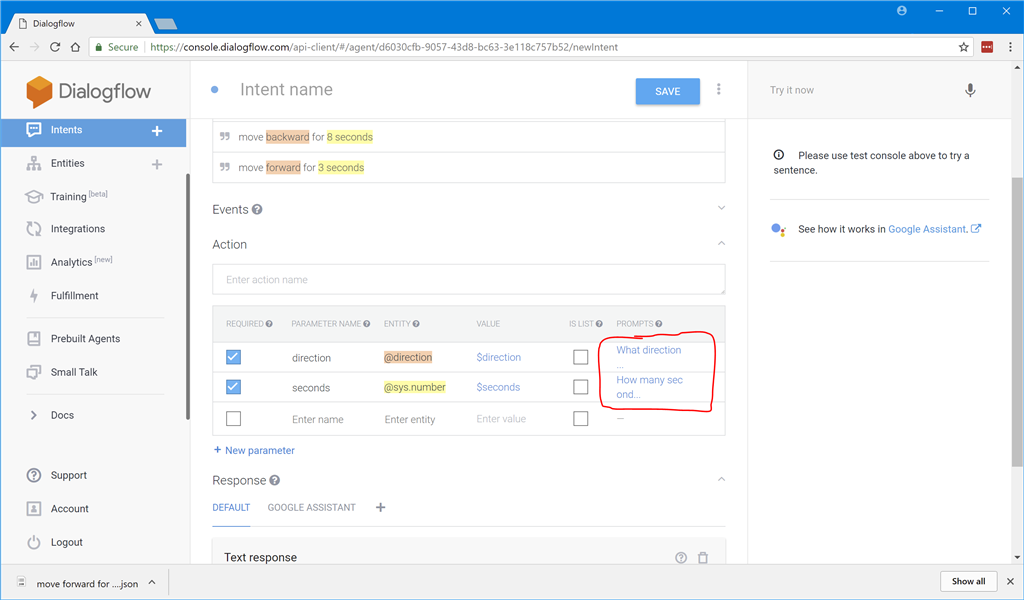
Step 7 The seconds will now be detected as a time parameter, which normally would be a good thing. However, in this case we only want seconds. So we're going to edit the parameter and rename it to SECONDS and set the type to SYS.NUMBER.
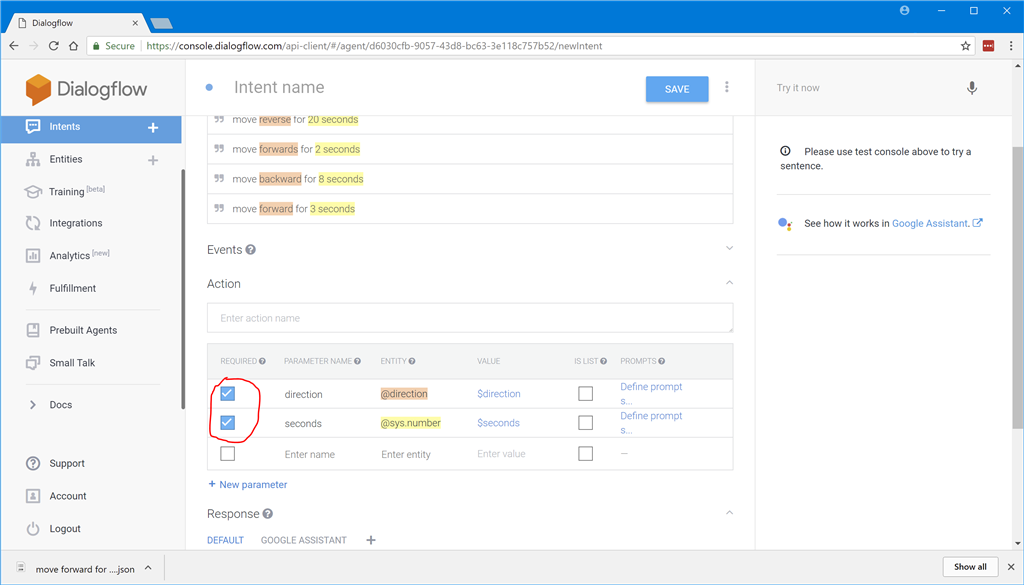
Step 8 Both parameters DIRECTION and SECONDS are required. So we'll need to set the checkbox for required on each parameter.
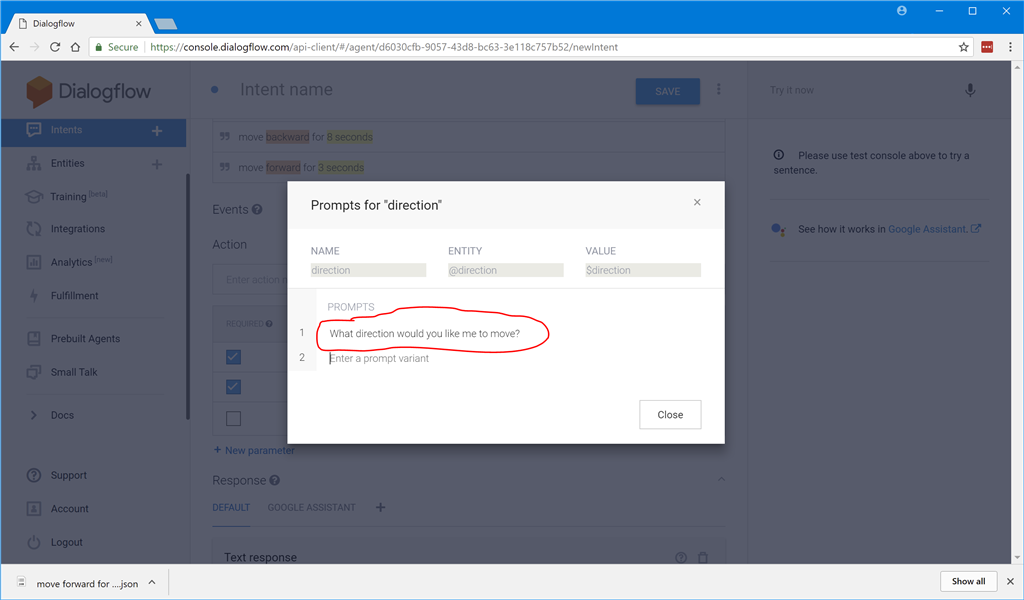
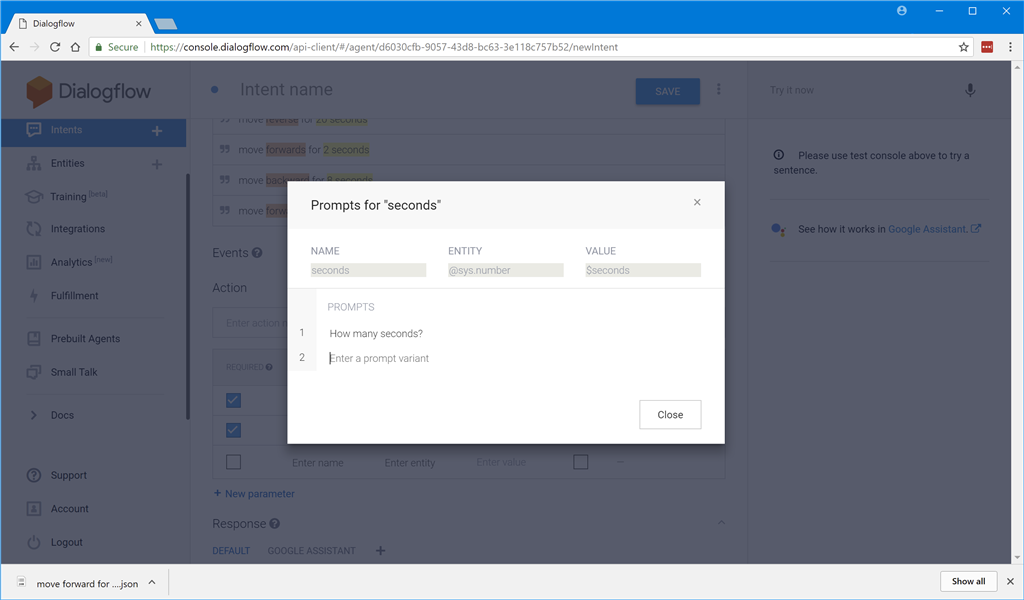
Step 9 Now that the parameters are required, this is where the AI magic can have conversations with the user to get more information. For example, if you asked the robot to move Forward and didn't supply a number of seconds, the dialog prompt that we'll enter here will ask the user for how many seconds.
Here is the prompt for DIRECTION
Here is the prompt for SECONDS
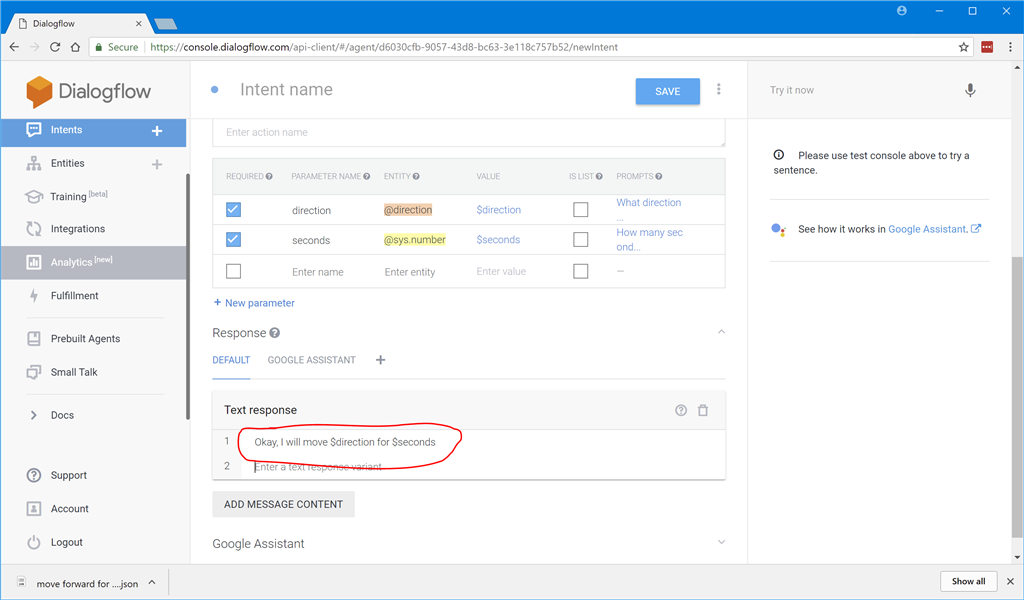
Step 10 Once all of the parameters have been provided to the bot during a conversation, the bot will respond. We can create our own response, which is friendly to the user. Here's an example response that uses the variables we created in the previous steps.
Step 11 When the intent is successful and we wish ARC to do something, we need a way to identify what this intent is. The intent has an Action that is unique. In this case, we'll call the action move.direction.time
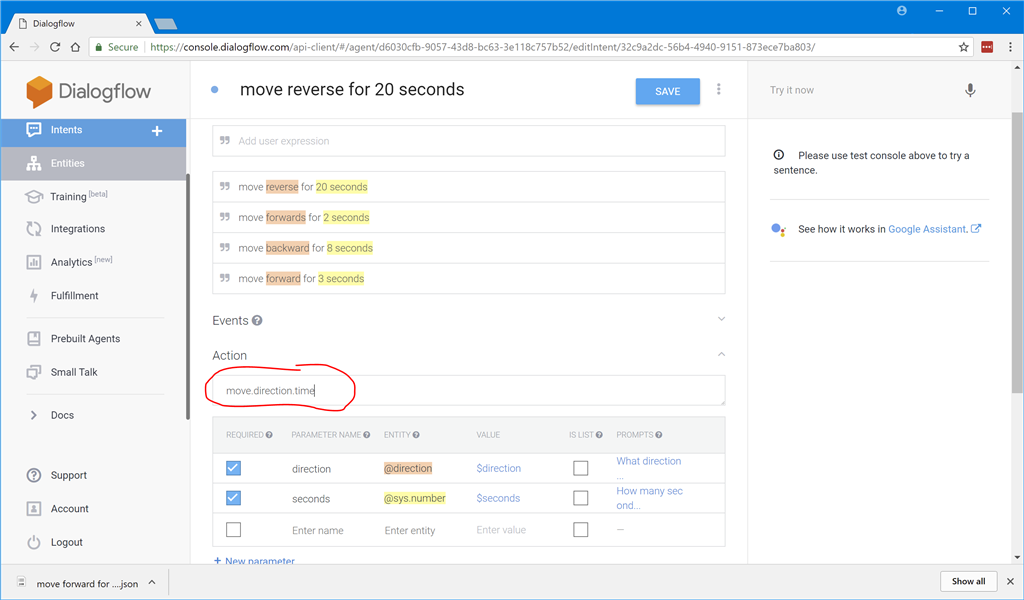
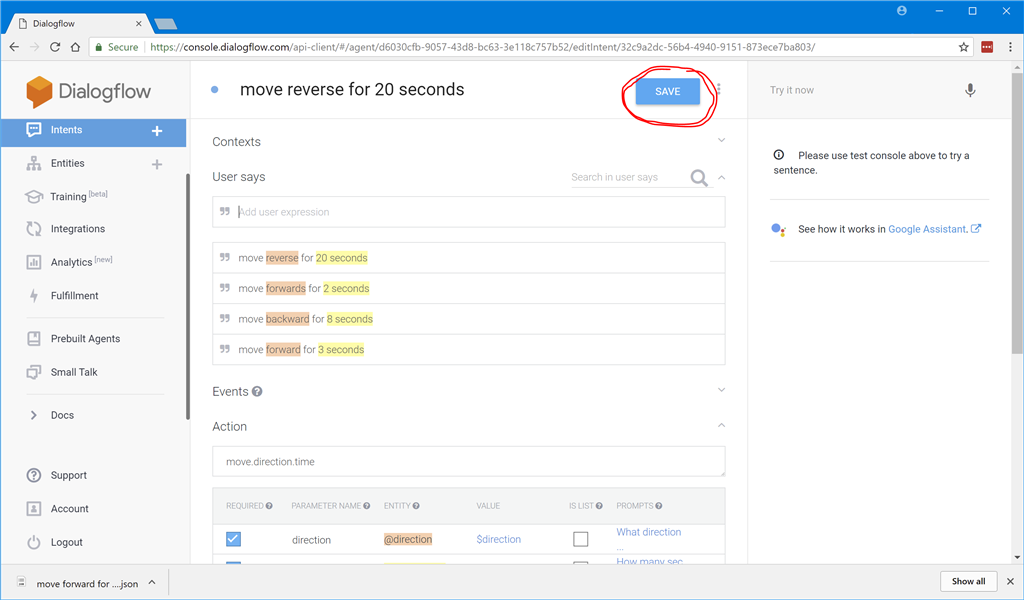
Step 12 Save this Intent and we're done with the Dialog Flow editor and will return to ARC
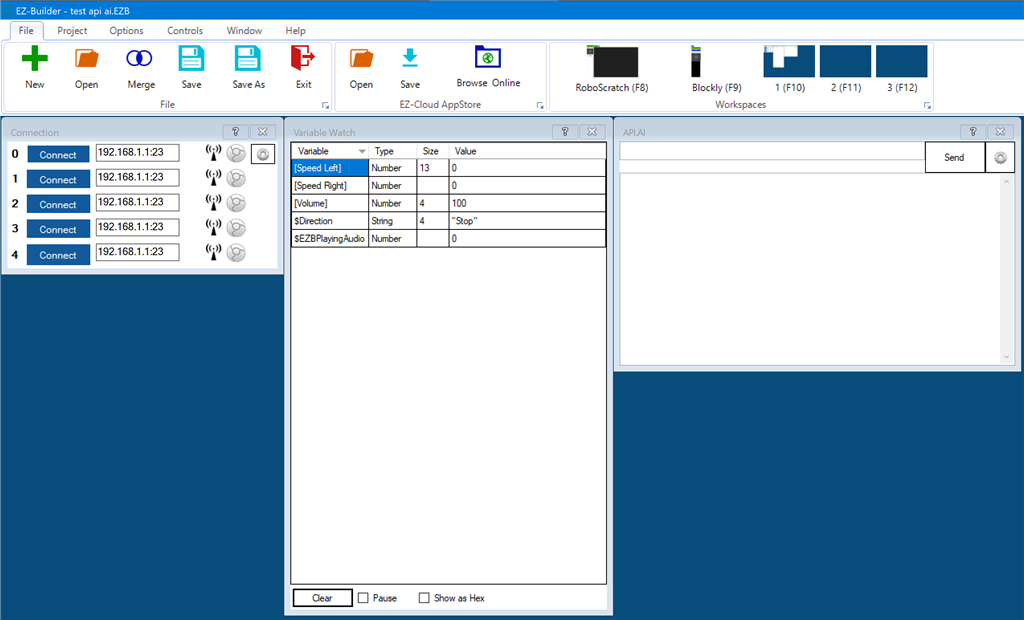
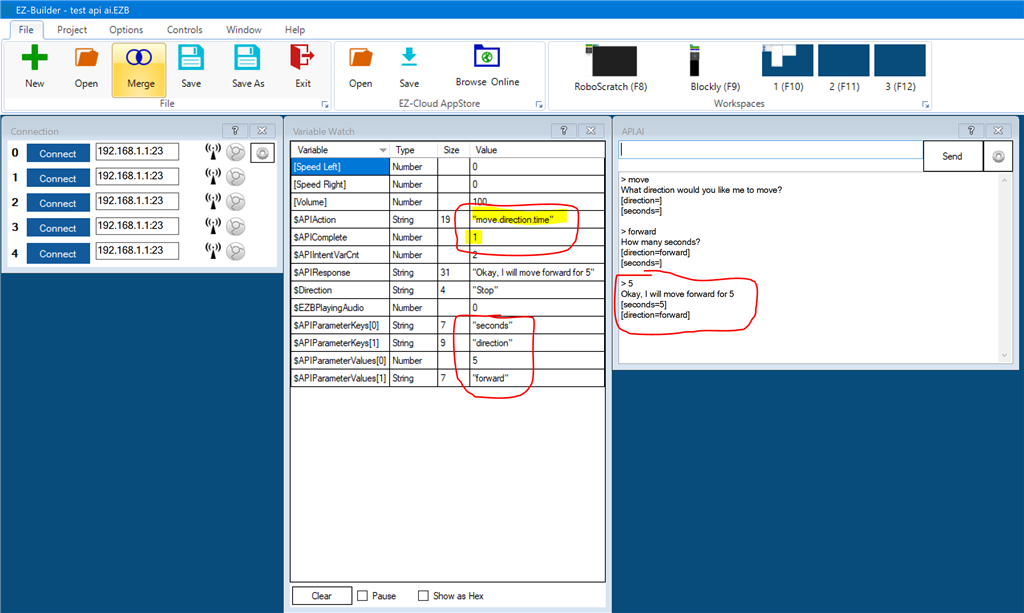
Step 13 Back in ARC. let's try out our Intent by typing MOVE and press ENTER in the DialogFlow plugin. Notice in the Variable Watcher that the $APIComplete variable is 0 (false). And, notice the Bot has asked us what direction to move? That is the bot executing the prompt we entered earlier because the parameter for direction is missing.
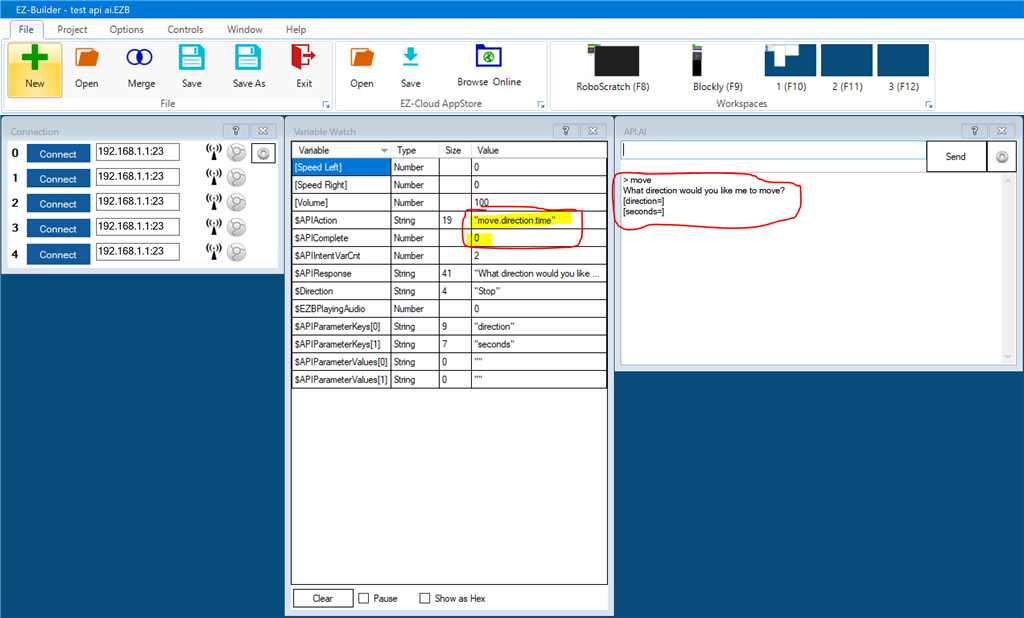
Step 14 Respond with FORWARD and you will see the prompt now asking for how many seconds. The $APIComplete is still 0 (false).
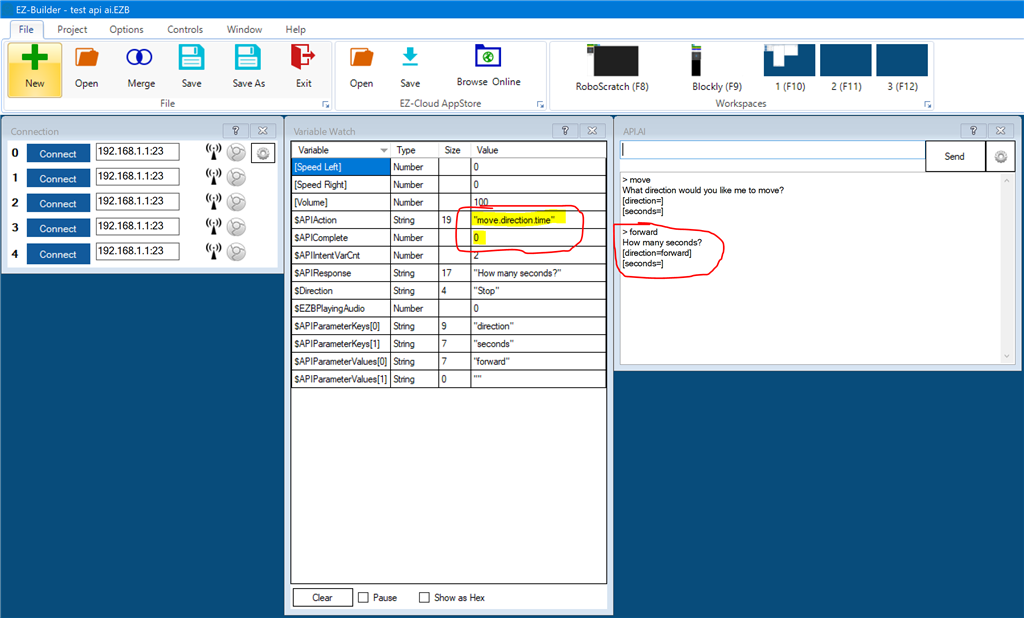
Step 15 Now enter a number of seconds. Notice the $APIComplete is now 1 (true) and the successful response is given.
Step 16 The system now knows how to determine the direction and number of seconds to move. But, the robot doesn't know what to do with that yet. We will create a script that will execute the movement commands based on these parameters.
Click the CONFIG menu button on the DialogFlow plugin
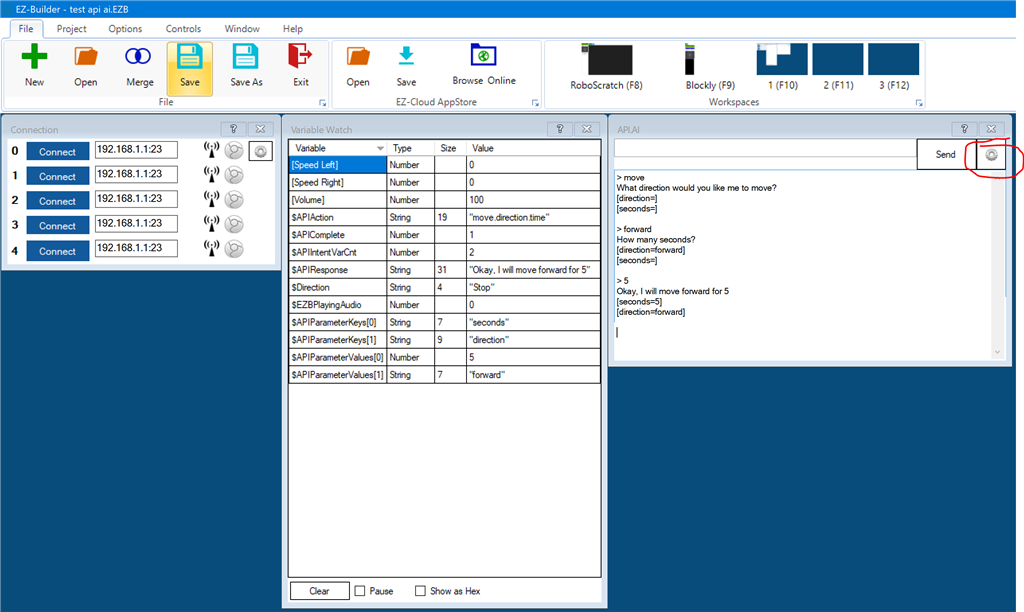
Step 17 Edit the SCRIPT
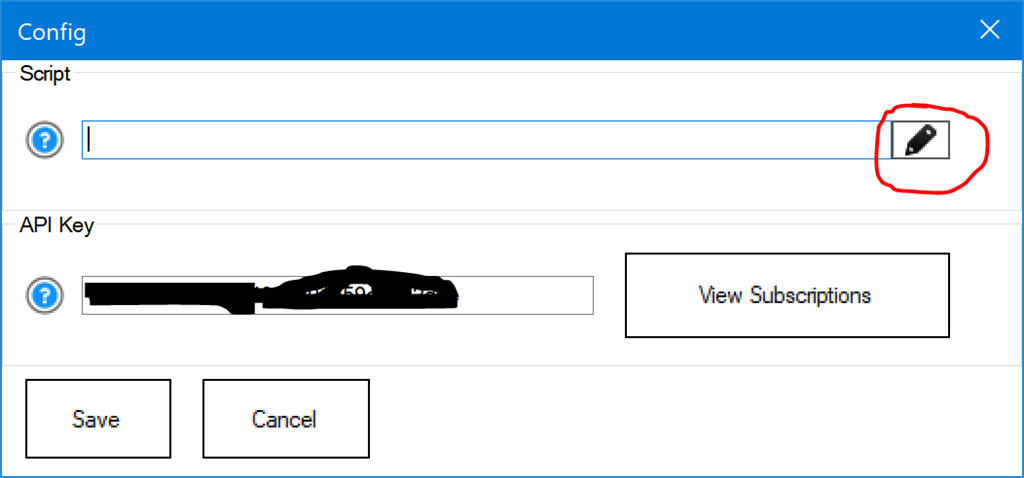
Step 18 Finally, let's paste in some javascript code that will be executed.
if (getVar("$APIIntent") == "move.direction.time") {

if (getVar("$APIComplete")) {

  Audio.say(getVar("$APIResponse"));

  if (getVar("$APIParameters[0]") == "forward")
    forward();
  else
    reverse();

   sleep(getVar("$APIParameters[1]"))

   stop();
  } else {

    Audio.say(getVar("$APIResponse"));
  }
}
Related Questions

Get Alexa To Access Jaw Movements
Dialogflow Skill Out Of Date And Poorly Maintained
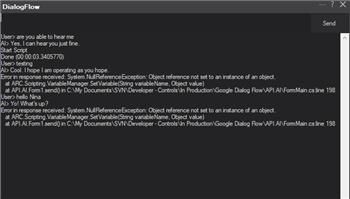
Dialogue Flow Error
Building A Humanoid Robot
Pandorabot With Bing Speech Recognition

Upgrade to ARC Pro
Experience the transformation – subscribe to Synthiam ARC Pro and watch your robot evolve into a marvel of innovation and intelligence.
Wow great info here, I was just about to start from scratch figuring out how I would do this and bang there it is at the top of the Forum,almost like you are a psychic ,DJ!:)
Hi, my question is about integrating EZ-Robot JD Humanoid with DialogFlow. In my DialogFlow scenario the agent has a French female voice (FR-Wavenet-A). The question is: with EZ-Robot JD Humanoid and DialogFlow integrated, is it possible to retain the same voice for the robot? Thanks.
Yes this is what I've been looking for. It all make sense to me. It is what I was describing without knowing there was something out there to do it. Thanks, Don
I started to test and it is working great.
I’ve been using this instead lately: https://synthiam.com/Support/Skills/Audio/Conversational-Menu?id=21091
Thanks DJ, good to know. I will check it also.