

Control robot servos with Microsoft Xbox 360 Kinect body tracking; map joints to upper/lower body servos with smoothing and pause control.
How to add the Kinect Body Control robot skill
- Load the most recent release of ARC (Get ARC).
- Press the Project tab from the top menu bar in ARC.
- Press Add Robot Skill from the button ribbon bar in ARC.
- Choose the Camera category tab.
- Press the Kinect Body Control icon to add the robot skill to your project.
Don't have a robot yet?
Follow the Getting Started Guide to build a robot and use the Kinect Body Control robot skill.
How to use the Kinect Body Control robot skill
This Skill enables you to control your robot's servos by moving the joints of your body, which are detected only by a Microsoft XBOX 360 Kinect. Servos can be assigned to each joint using the Settings window. Degrees to move the servos are automatically calculated for joints about the connecting joint. For example, the wrist position in degrees is calculated based on the elbow position. The elbow position, in degrees, is calculated from the shoulder position. Each joint can be assigned to control servo positions between 1 and 180 degrees of your robot.
Required Drivers
The SDK 1.8 can be installed from here, as you will need the libraries it includes: https://www.microsoft.com/en-ca/download/details.aspx?id=40278Main Window
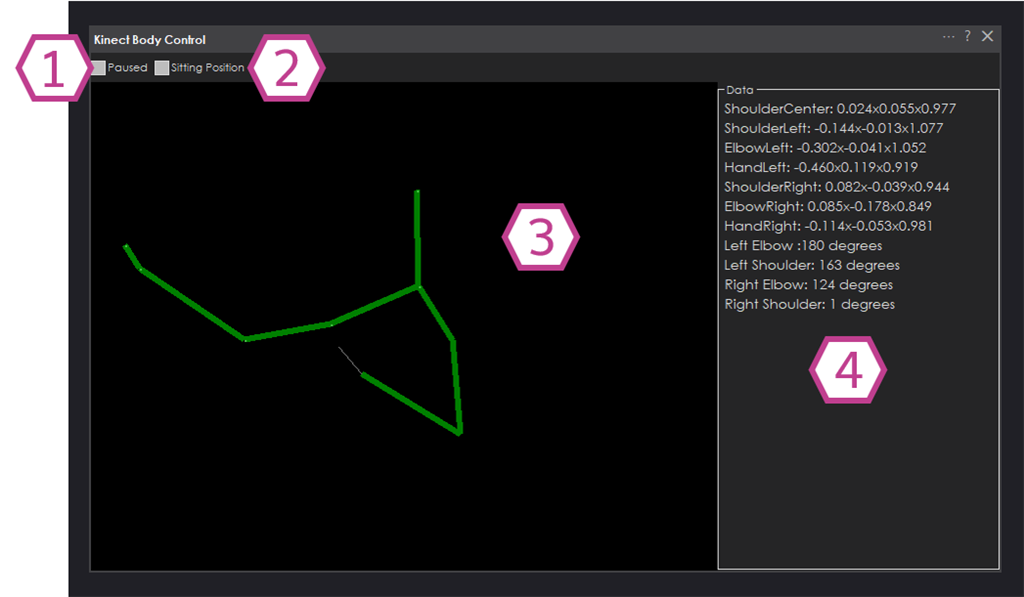
2. Sitting Position Checkbox When this is checked, only the Upper Body servos will be activated, and the lower body will not be detected. As a result, the lower body servos will not be active.
3. Kinect Body Joint Visualization This section shows a visual representation of the detected joint values.
4. Joint Data Output This section shows a numerical representation of the detected joint values.
Configuration - General Tab

1. Smoothing Value Drop-down This drop-down adjusts the smoothing value for servo movement. As the smoothing value increases, it removes the servo jitter. However, more servo delay will be introduced as the smoothing value increases.
Configuration - Upper Body Tab
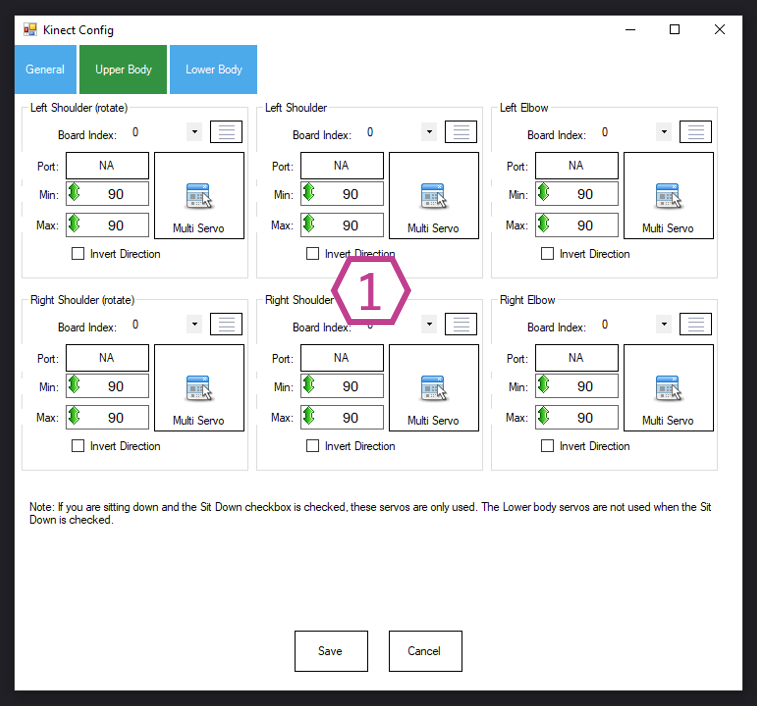
1. Upper Body servo Configuration This section of six servos allows you to configure servo movement parameters for the upper body, including servo port, board index, servo configuration, max/min degree limits, multiple-servo control, and inverted direction.
Configuration - Lower Body Tab
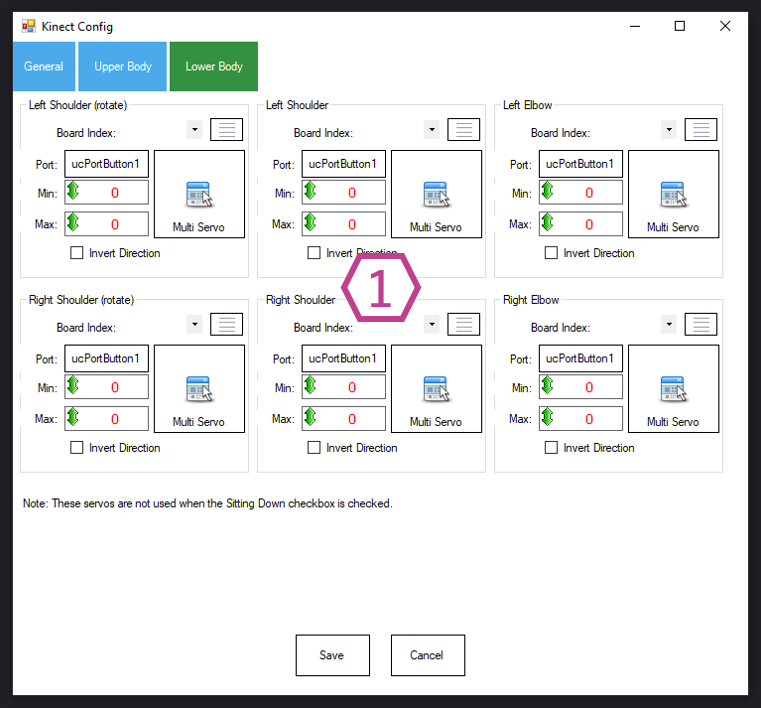
1. Lower Body servo Configuration This section of 6 servos allows you to configure the servo movement parameters for the Lower body, including servo port, board index, servo configuration, max/min degree limits, multiple-servo control, and inverted direction.
*Note: The Lower Body will not be detected when the Sitting Position checkbox is enabled (in the Main Window).
How to Use Kinect Body Control
Download and install the Kinect SDK (link in the "Required Drivers" section above).
Plug your Kinect sensor into the wall power and a USB port on your PC.
Add the Kinect Body Control skill to your ARC project (Project -> Add Skill -> Misc -> Kinect Body Control).
Use the Kinect Body Control Configuration tabs to set up any servos you want to move.
Connect ARC to the servos/robot you want to control.
Ensure your body is at least 3 feet from the Kinect sensor to be detected (the ideal distance is 6 feet) and start moving around.
If you are experiencing servo jitter, try adjusting the Smoothing value in the Configuration General tab.
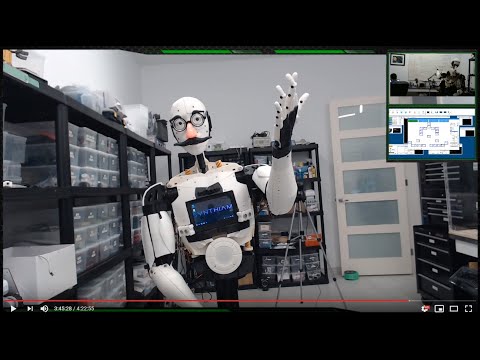
Video
Requirements
Kinect Compatibility We're unsure which Kinects work with the SDK on Windows due to limited information published by Microsoft (or at least information that's hard to find). There are multiple Kinect versions; the one we use is the Xbox 360 Kinect.Control Commands
There are two control commands to pause and unpause the Skill.- "PauseOn" will check the pause checkbox
- "PauseOff" will uncheck the pause checkbox
Work In Progress
- The servos for legs have not been implemented yet
- The shoulder rotation servos have not been implemented yet

Oh that's right I forgot there was a Kinect plugin ,I have one Kinect camera from Xbox 360 but it has the funny USB connector that won't fit standard computer USB ports. I guess I need to buy the special adapter to fit on computers,I saw them cheap on Ebay and Amazon. Not sure if it will work with EZ software but I do see articles online how to get it working on any windows 10 Laptops so will try both ways as the camera only cost me 13 dollars at one of those hock shops ,it looks brand new and hopefully will power up when I get the special USB adapter to Laptop kit.
Do I have to install the Developer tool kit, because I do not see any lines in the plugin box when i move around.
Did you install the stuff that is mentioned in the plugin description?
Yes I installed the 1.8sdk and the plugin for ARC
Great - then long as you’re using the correct 360 Kinect, it works as instructed in the video.
@Autiboy, just double checking, do you have the power supply for the Kinect plugged in? It cannot work with just USB.
Yes I have the usb ac power supply for the xbox 360. The problem is that I cannot see the xbox 360's camera in ARC when I move.
In the demo video above, what part is not working for you? You never see the 360’s camera output. It’s expected to see your skeleton when standing in front of the Kinect 360.
Next Friday I will demo how to use the Kinect with ARC.