
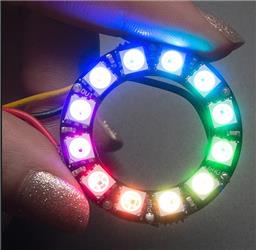
ARC UI for onboard computers to control NeoPixel rings via serial: test/run patterns, preview and copy Arduino serial commands, includes sample code.
How to add the Neopixel Ring robot skill
- Load the most recent release of ARC (Get ARC).
- Press the Project tab from the top menu bar in ARC.
- Press Add Robot Skill from the button ribbon bar in ARC.
- Choose the Misc category tab.
- Press the Neopixel Ring icon to add the robot skill to your project.
Don't have a robot yet?
Follow the Getting Started Guide to build a robot and use the Neopixel Ring robot skill.
How to use the Neopixel Ring robot skill
This plugin is for people with onboard computers to control the Neopixel ring from ARC
I will work on adding the ability to have this run from a script. All of this is doable through a script anyway, but I wanted to give a user interface to the work that has been done.
This update displays the command that needs to be passed via serial. you can copy and paste this command. Also, it allows you to either run the light or not based on a check box. It allows you to quickly test, and then copy the commands for the arduino sketch that runs the NeoPixel listed below.
At some point, I will put out an update that will allow this to run from an EZ-B port.
I have included the code for this project if anyone wants to modify it. The only requirement is that you share your code. This is common for development based on someone else's shared code.
There are a couple of bugs in this. I wanted to put this out for a friend who is trying to do something similar to what I am doing. This would be a good tool to use to allow you to quickly change settings so that you know what scripting commands to use and bypass this tool.
Your Arduino controller will run the code found at this forum post.
The code below works with Arduino IDE 1.6.3 with the 1.0.3 version of the Adafruit NeoPixel library,
To download this version of the Arduino IDE ==> (previous versions link)
To get the correct version of the NeoPixel library, in the Arduino IDE, choose Sketch, then Include Library, then Manage Libraries. Find Adafruit NeoPixel in the list and then set the version to 1.0.3 and choose the Install button.
Shared code = Neopixel.zip
This sketch fixes a minor bug that existed in the last code published by RobertL184. It works with Arduino 1.8.3 and the NeoPixel library v1.1.1
If you want to change the pin that the arduino is connecting to the NeoPixel on, change the 2nd parameter in line 321. If you want to change the number of NeoPixles in the ring or device, change the first parameter in line 321.
Example
NeoPatterns Ring1(24, 6, NEO_GRB + NEO_KHZ800, &Ring1Complete);
is for a 24 pixel NeoPixel that has its input pin connected to pin 6 on the Arduino.
/* real time Serial Controlled Neopixel Ring  -- Code not tested yet
/
/ Serial Commands
/     Cr1,g1,b1  - Set whole Ring to same color specified by r1,g1,b1
/     Rt,d  - Rainbow  with interval t and direction d
/     Tr1,g1,b1,r2,g2,b2,t,d - Theater Chase between color r1,g1,b1 and color r2,g2,b2 with interval t and direction d
/     Wr1,g1,b1,t,d - Color Wipe in  color r1,g1,b1 with interval t and direction d
/     Fr1,g1,b1,r2,g2,b2,s,t,d - Fade between color r1,g1,b1 and color r2,g2,b2 in s steps with interval t and direction d
/     Sr1,g1,b1,t  - Scanner with color specified by r1,g1,b1 and interval t
/     Pp,r1,g1,b1 - Set individual pixel p to color specified by r1,g1,b1
/
/    p = pixel number
/    r1 = 1st color red values 0 to 255
/    g1 = 1st color greern values 0 to 255
/    b1 = 1st color blue values 0 to 255
/    r2 = 2nd color red values 0 to 255
/    g2 = 2nd color greern values 0 to 255
/    b2 = 2nd color blue values 0 to 255
/    s = number of steps
/    t = interval time values 0 to 255
/    d = direction  0 = Forward 1 = Backward
*/

#include

// Pattern types supported:
enum  pattern { NONE, RAINBOW_CYCLE, THEATER_CHASE, COLOR_WIPE, SCANNER, FADE };
// Patern directions supported:
enum  direction { FORWARD, REVERSE };

// NeoPattern Class - derived from the Adafruit_NeoPixel class
class NeoPatterns : public Adafruit_NeoPixel
{
    public:

    // Member Variables:
    pattern  ActivePattern;  // which pattern is running
    direction Direction;     // direction to run the pattern

    unsigned long Interval;   // milliseconds between updates
    unsigned long lastUpdate; // last update of position

    uint32_t Color1, Color2;  // What colors are in use
    uint16_t TotalSteps;  // total number of steps in the pattern
    uint16_t Index;  // current step within the pattern

    void (*OnComplete)();  // Callback on completion of pattern

    // Constructor - calls base-class constructor to initialize strip
    NeoPatterns(uint16_t pixels, uint8_t pin, uint8_t type, void (*callback)())
    :Adafruit_NeoPixel(pixels, pin, type)
    {
        OnComplete = callback;
    }

    // Update the pattern
    void Update()
    {
        if((millis() - lastUpdate) > Interval) // time to update
        {
            lastUpdate = millis();
            switch(ActivePattern)
            {
                case RAINBOW_CYCLE:
                    RainbowCycleUpdate();
                    break;
                case THEATER_CHASE:
                    TheaterChaseUpdate();
                    break;
                case COLOR_WIPE:
                    ColorWipeUpdate();
                    break;
                case SCANNER:
                    ScannerUpdate();
                    break;
                case FADE:
                    FadeUpdate();
                    break;
                default:
                    break;
            }
        }
    }

    // Increment the Index and reset at the end
    void Increment()
    {
        if (Direction == FORWARD)
        {
           Index++;
           if (Index >= TotalSteps)
            {
                Index = 0;
                if (OnComplete != NULL)
                {
                    OnComplete(); // call the comlpetion callback
                }
            }
        }
        else // Direction == REVERSE
        {
            --Index;
            if (Index <= 0)
            {
                Index = TotalSteps-1;
                if (OnComplete != NULL)
                {
                    OnComplete(); // call the comlpetion callback
                }
            }
        }
    }

    // Reverse pattern direction
    void Reverse()
    {
        if (Direction == FORWARD)
        {
            Direction = REVERSE;
            Index = TotalSteps-1;
        }
        else
        {
            Direction = FORWARD;
            Index = 0;
        }
    }
//------------------------------------------------------------
//Completion Routines - get called on completion of a pattern
//------------------------------------------------------------

    // Initialize for a RainbowCycle
    void RainbowCycle(uint8_t interval, direction dir = FORWARD)
    {
        ActivePattern = RAINBOW_CYCLE;
        Interval = interval;
        TotalSteps = 255;
        Index = 0;
        Direction = dir;
    }

    // Update the Rainbow Cycle Pattern
    void RainbowCycleUpdate()
    {
        for(int i=0; i< numPixels(); i++)
        {
            setPixelColor(i, Wheel(((i * 256 / numPixels()) + Index) & 255));
        }
        show();
        Increment();
    }

    // Initialize for a Theater Chase
    void TheaterChase(uint32_t color1, uint32_t color2, uint8_t interval, direction dir = FORWARD)
    {
        ActivePattern = THEATER_CHASE;
        Interval = interval;
        TotalSteps = numPixels();
        Color1 = color1;
        Color2 = color2;
        Index = 0;
        Direction = dir;
   }

    // Update the Theater Chase Pattern
    void TheaterChaseUpdate()
    {
        for(int i=0; i< numPixels(); i++)
        {
            if ((i + Index) % 3 == 0)
            {
                setPixelColor(i, Color1);
            }
            else
            {
                setPixelColor(i, Color2);
            }
        }
        show();
        Increment();
    }

    // Initialize for a ColorWipe
    void ColorWipe(uint32_t color, uint8_t interval, direction dir = FORWARD)
    {
        ActivePattern = COLOR_WIPE;
        Interval = interval;
        TotalSteps = numPixels();
        Color1 = color;
        Index = 0;
        Direction = dir;
    }

    // Update the Color Wipe Pattern
    void ColorWipeUpdate()
    {
        setPixelColor(Index, Color1);
        show();
        Increment();
    }

    // Initialize for a SCANNNER
    void Scanner(uint32_t color1, uint8_t interval)
    {
        ActivePattern = SCANNER;
        Interval = interval;
        TotalSteps = (numPixels() - 1) * 2;
        Color1 = color1;
        Index = 0;
    }

    // Update the Scanner Pattern
    void ScannerUpdate()
    {
        for (int i = 0; i < numPixels(); i++)
        {
            if (i == Index)  // Scan Pixel to the right
            {
                 setPixelColor(i, Color1);
            }
            else if (i == TotalSteps - Index) // Scan Pixel to the left
            {
                 setPixelColor(i, Color1);
            }
            else // Fading tail
            {
                 setPixelColor(i, DimColor(getPixelColor(i)));
            }
        }
        show();
        Increment();
    }

    // Initialize for a Fade
    void Fade(uint32_t color1, uint32_t color2, uint16_t steps, uint8_t interval, direction dir = FORWARD)
    {
        ActivePattern = FADE;
        Interval = interval;
        TotalSteps = steps;
        Color1 = color1;
        Color2 = color2;
        Index = 0;
        Direction = dir;
    }

    // Update the Fade Pattern
    void FadeUpdate()
    {
        // Calculate linear interpolation between Color1 and Color2
        // Optimise order of operations to minimize truncation error
        uint8_t red = ((Red(Color1) * (TotalSteps - Index)) + (Red(Color2) * Index)) / TotalSteps;
        uint8_t green = ((Green(Color1) * (TotalSteps - Index)) + (Green(Color2) * Index)) / TotalSteps;
        uint8_t blue = ((Blue(Color1) * (TotalSteps - Index)) + (Blue(Color2) * Index)) / TotalSteps;

        ColorSet(Color(red, green, blue));
        show();
        Increment();
    }

    // Calculate 50% dimmed version of a color (used by ScannerUpdate)
    uint32_t DimColor(uint32_t color)
    {
        // Shift R, G and B components one bit to the right
        uint32_t dimColor = Color(Red(color) >> 1, Green(color) >> 1, Blue(color) >> 1);
        return dimColor;
    }

    // Set all pixels to a color (synchronously)
    void ColorSet(uint32_t color)
    {
        for (int i = 0; i < numPixels(); i++)
        {
            setPixelColor(i, color);
        }
        show();
    }

    // Returns the Red component of a 32-bit color
    uint8_t Red(uint32_t color)
    {
        return (color >> 16) & 0xFF;
    }

    // Returns the Green component of a 32-bit color
    uint8_t Green(uint32_t color)
    {
        return (color >> 8) & 0xFF;
    }

    // Returns the Blue component of a 32-bit color
    uint8_t Blue(uint32_t color)
    {
        return color & 0xFF;
    }

    // Input a value 0 to 255 to get a color value.
    // The colours are a transition r - g - b - back to r.
    uint32_t Wheel(byte WheelPos)
    {
        WheelPos = 255 - WheelPos;
        if(WheelPos < 85)
        {
            return Color(255 - WheelPos * 3, 0, WheelPos * 3);
        }
        else if(WheelPos < 170)
        {
            WheelPos -= 85;
            return Color(0, WheelPos * 3, 255 - WheelPos * 3);
        }
        else
        {
            WheelPos -= 170;
            return Color(WheelPos * 3, 255 - WheelPos * 3, 0);
        }
    }
};
void Ring1Complete();

// Define some NeoPatterns for the two rings and the stick
//  as well as some completion routines
NeoPatterns Ring1(24, 6, NEO_GRB + NEO_KHZ800, &Ring1Complete);

int red1 = 0;              // red value
int green1 = 34;           // green value
int blue1 = 12;            // blue value
int red2 = 0;              // red value
int green2 = 34;           // green value
int blue2 = 12;            // blue value
int my_pixel = 0;          // pixel number
int s = 5;                 // step value
int t = 10;                // interval time value
int d = 0;                  // direction indicator 0= Forward 1 = Backward

// Initialize everything and prepare to start
void setup()
{
  Serial.begin(9600);
  Serial.setTimeout(10);  // set serial timeout

    // Initialize all the pixelStrips
    Ring1.begin();
    Ring1.ColorSet(Ring1.Color(0, 0, 0));
}

// Main loop
void loop()
{
int inchar;

  if (Serial.available() > 0) {
    inchar = Serial.read();
    if ( inchar == 'C') {    // string should start with C
      red1 = Serial.parseInt();     // then an ASCII number for red
      green1 = Serial.parseInt();   // then an ASCII number for green
      blue1 = Serial.parseInt();    // then an ASCII number for blue
      Ring1.ActivePattern = NONE;
      Ring1.ColorSet(Ring1.Color(red1, green1, blue1));
    }
    if ( inchar == 'R') {    // string should start with R
      t = Serial.parseInt();     // then an ASCII number for interval
      d = Serial.parseInt();    // then an ASCII number for direction
      if (d ==0) {
         Ring1.RainbowCycle(t, FORWARD);
      } else {
         Ring1.RainbowCycle(t, REVERSE);
      }
    }
    if ( inchar == 'F') {    // string should start with F
      red1 = Serial.parseInt();     // then an ASCII number for red
      green1 = Serial.parseInt();   // then an ASCII number for green
      blue1 = Serial.parseInt();    // then an ASCII number for blue
      red2 = Serial.parseInt();     // then an ASCII number for red
      green2 = Serial.parseInt();   // then an ASCII number for green
      blue2 = Serial.parseInt();    // then an ASCII number for blue
      s = Serial.parseInt();        // then an ASCII number for steps
      t = Serial.parseInt();        // then an ASCII number for interval
      d = Serial.parseInt();        // then an ASCII number for direction
      if (d ==0) {
        Ring1.Fade(Ring1.Color(red1, green1, blue1), Ring1.Color(red2, green2, blue2), s, t, FORWARD);
      } else {
        Ring1.Fade(Ring1.Color(red1, green1, blue1), Ring1.Color(red2, green2, blue2), s, t, REVERSE);
      }
    }
    if ( inchar == 'T') {    // string should start with T
      red1 = Serial.parseInt();     // then an ASCII number for red
      green1 = Serial.parseInt();   // then an ASCII number for green
      blue1 = Serial.parseInt();    // then an ASCII number for blue
      red2 = Serial.parseInt();     // then an ASCII number for red
      green2 = Serial.parseInt();   // then an ASCII number for green
      blue2 = Serial.parseInt();    // then an ASCII number for blue
      t = Serial.parseInt();        // then an ASCII number for interval
      d = Serial.parseInt();        // then an ASCII number for direction
      if (d ==0) {
        Ring1.TheaterChase(Ring1.Color(red1, green1, blue1), Ring1.Color(red2, green2, blue2), t, FORWARD);
      } else {
        Ring1.TheaterChase(Ring1.Color(red1, green1, blue1), Ring1.Color(red2, green2, blue2), t, REVERSE);
      }
    }
    if ( inchar == 'W') {    // string should start with W
      red1 = Serial.parseInt();     // then an ASCII number for red
      green1 = Serial.parseInt();   // then an ASCII number for green
      blue1 = Serial.parseInt();    // then an ASCII number for blue
      t = Serial.parseInt();        // then an ASCII number for interval
      d = Serial.parseInt();        // then an ASCII number for direction
      if (d ==0) {
        Ring1.ColorWipe(Ring1.Color(red1, green1, blue1), t, FORWARD);
      } else {
        Ring1.ColorWipe(Ring1.Color(red1, green1, blue1), t, REVERSE);
      }
    }
    if ( inchar == 'S') {    // string should start with S
      red1 = Serial.parseInt();     // then an ASCII number for red
      green1 = Serial.parseInt();   // then an ASCII number for green
      blue1 = Serial.parseInt();    // then an ASCII number for blue
      t = Serial.parseInt();        // then an ASCII number for interval
      Ring1.ColorWipe(Ring1.Color(red1, green1, blue1), 50, FORWARD);
      Ring1.ColorSet(Ring1.Color(0,0, 0));
      Ring1.Scanner(Ring1.Color(red1, green1, blue1), t);
     }
     if ( inchar == 'P') {    // string should start with P
      my_pixel = Serial.parseInt();     // then an ASCII number for pixwel
      red1 = Serial.parseInt();     // then an ASCII number for red
      green1 = Serial.parseInt();   // then an ASCII number for green
      blue1 = Serial.parseInt();    // then an ASCII number for blue
      Ring1.ActivePattern = NONE;
      Ring1.setPixelColor(my_pixel, Ring1.Color(red1, green1, blue1));
      Ring1.show();
    }
 }

  // Update the ring.
    Ring1.Update();
}
// Ring1 Completion Callback
void Ring1Complete()
{
  if ((Ring1.ActivePattern == RAINBOW_CYCLE) || (Ring1.ActivePattern == FADE) ||
      (Ring1.ActivePattern == THEATER_CHASE) || (Ring1.ActivePattern == SCANNER)){
    Ring1.Reverse();
      }
}
This will work with the plugin still. The commands don't change so there is no modification to the plugin.
Related Hack Events
DJ's 7Th Live Hack (Neopixel, Arduino, Raspberry Pi Ezbpi...

DJ's 6Th Live Hack Event (Raspberry Pi & Neopixel With...
Related Questions

Upgrade to ARC Pro
Harnessing the power of ARC Pro, your robot can be more than just a simple automated machine.
Hi DJ Sures, my name is Mitch and I have an ezb tiny and an Arduino nano , i have a code for neopixel ring on my nano and im using d5 on tiny to send serial to RX on nano . after reading this tutorial where you entered COM6 do I put RX , my problem im having is I can see the tiny connected on my computer (I can see temp ,battery voltage etc) but when I try and send serial commands too change the colour nothing happens im sure the code on nano is fine and baud rate is set to 9600 as it also says in code on nano . so im not sure what I may be doing wrong . any help would be appreciated. regards mitch
Hi DJ, Mitch here, can i use an arduino nano with the ezb tiny . I have a code for neopixels on my nano and ezb serial from D5 to rx on nano but cant get it to communicate, not sure weather i was using wrong add on or its because im using a nano. Any help or links would be appreciated, I've looked at so many tutorials and videos but haven't found one using the rx as serial input. Regards mitch
Mitch - you can follow the instructions on this skill control for neo pixels
@Mitch
The IoTiny can't use the same code as the EZ-B when it comes to serial as it doesn't have a hardware UART. You can't use UARTwrite(). You will instead have to use the SendSerial() command.
Hi DJ Sures thanks for the tip I managed to get it working , ive uploaded it to the cloud and loaded it to mobile app but I cant control it on there ,is there a way of doing it with my sketch . https://synthiam.com/Community/Apps/working-neopixel-ring-for-inmoov-18175 regards mitch
You'll want to add a mobile interface control to your project. There's instructions here: https://synthiam.com/Software/Manual/Mobile-Interface-Builder-16063
Hi Jeremie, I have it working know on my computer I've uploaded it to the cloud to public, the only issue I have now is I wanted to use this on the mobile phone app but it doesn't seem to work with a touch screen
I checked out your app on my phone and I see where the issue is. The script manager control isn't supported in the mobile interface. This doesn't mean you can't activate your scripts with mobile, it just means you can't use the script manager to do it. What you want to do is add a "mobile interface control" to your ARC project and then you can make mobile buttons to activate your scripts. Once you save the app to the cloud again, select to have the mobile interface appear as default, that will make it easy to press the buttons (activate the scripts) you made.
Please spend some time looking into the mobile interface builder, I guarantee you'll have fun building your own app!