
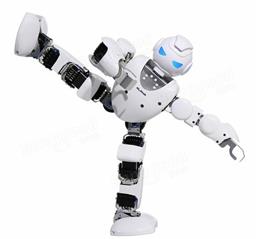
Bluetooth control for UBTech Alpha1 servos via ARC: map Vx to servo IDs, enable servos, and integrate with ARC movement & LEDs.
How to add the Ubtech Alpha 1 Bluetooth robot skill
- Load the most recent release of ARC (Get ARC).
- Press the Project tab from the top menu bar in ARC.
- Press Add Robot Skill from the button ribbon bar in ARC.
- Choose the Movement Panels category tab.
- Press the Ubtech Alpha 1 Bluetooth icon to add the robot skill to your project.
Don't have a robot yet?
Follow the Getting Started Guide to build a robot and use the Ubtech Alpha 1 Bluetooth robot skill.
How to use the Ubtech Alpha 1 Bluetooth robot skill
Control UBTech Alpha robot via bluetooth and control servos. The Virtual Servos in ARC will control the UBTech Alpha robot servos. Use the configuration button on this skill to configure what servos are to be used. The Vx servos in ARC correspond to the servo IDs of the UBTech Alpha robot.
For example:
Main Window
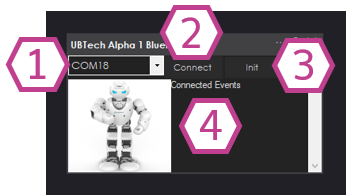
1. COM Port Drop-down Select the Bluetooth COM port that corresponds with the Alpha1 robot connected to your PC.
2. Connect Button Once the proper COM ports is selected, press the Connect button to connect ARC to the Alpha1 3. Init Button Initiates communication with the Alpha1 robot.
4. Status Display Displays text corresponding to what actions are happening with the skill.
Configuration
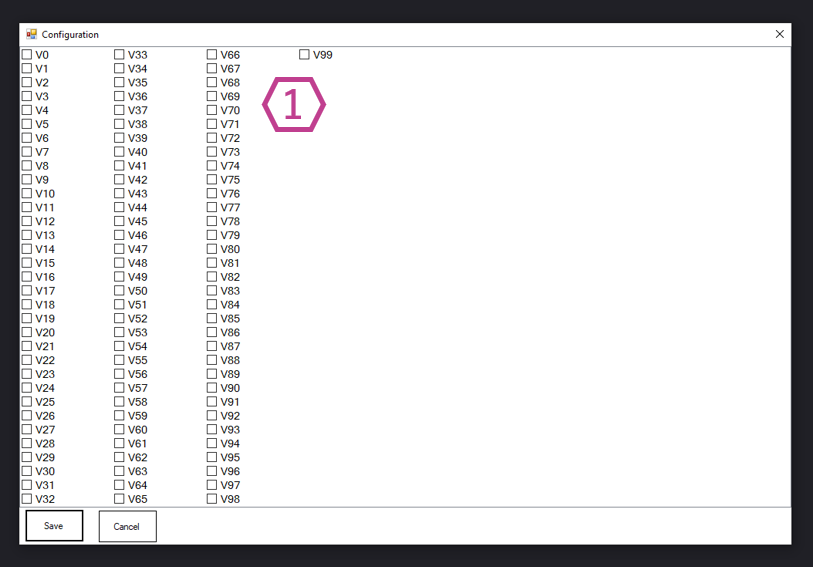
1. Virtual servo Checkboxes Check (enable) each virtual servo that corresponds to the servo ID's you have on your Alpha1. If you would like to control the servo, it will have to be enabled.
How to Use UBtech Alpha1 Bluetooth Skill
Connect your PC to the Alpha1 robot via Bluetooth.
Add the UBtech Alpha1 Bluetooth skill to your ARC project (Project -> Add Skill -> Movement panels -> UBtech Alpha1 Bluetooth).
Select the Bluetooth COM port for the Alpha1 robot and select CONNECT.
Use the configuration menu of this skill to select the servos you wish to control. Place a check in the box beside each servo to control.
Now that you have the skill configured, you may use any skills in ARC that support servos to move the Alpha1 robot. This includes Auto Position, Camera, Joystick, and more.
*Note: When editing scripts in other skills, use the Cheat Sheet or right-click in the editor to see available ControlCommand of this skill. You may connect, disconnect, and control LEDs.

Please send the calibration tool. I can test it and see what it can do. I had kind answers from Ubtech whenever I asked for explanation of their software and hardware problems for the Alpha 1S. I never asked for protocols etc.
Leonardo46, let me know your email and I will send it. Its 3.8Mb when zipped so should be ok.
Icy, you can attach the file to a message. Press the "file" button in the editor
Robot stuff.zip
Didnt see that, there you go.
Thank you. I'll try to understad what's for
Well the callibrator certainly hellped me getting his initial standing position correct, he was standing with one foot very slightly raised so have sorted that.
Anyway, Im not sure of the information you used to create this plugin but I found the attached file today and thought it might be usefull. It means nothing to me and may even be the info used to create your plugin.Alpha1 Series Bluetooth.pdf
That’s the information (protocol) used to create the robot skill.
Controlling a robot by sending commands is basic effort that we do everyday with tens of thousands of other robots. This causes us to believe that the ubtech alpha robot has a fundamental bug in the protocol design or servo firmware. Because it’s not upgradable, they discontinued the product following these issues. The internet is full of others experiencing the same issues. To the extent that there are people creating replacement PCBs (circuit boards) to make the robot operational by remote commands.
while the robot somewhat works with the command set they published, it seems to be about the best it does. Contacting the manufacturer for support with their product is the best advice. Otherwise, many other Synthiam users have simply sold their alpha robot and upgraded to more cost effective and powerful robots that include cameras and real robot features.
@icy8: I have the Alhpa 1s and I replaced the board with the EZ-B v4/2 Wi-Fi Robot Controller and I use the lewansoul servo addon to control it. I rewired the four connectors arms and legs to one connector and it works!!! Hope this wil help you if the cost is a problem you can try the EZ-B IoTiny
:D