Real-time 2D mapping from Neato XV-11 360° LIDAR via GetSurreal controller; exports $LIDARDistance/$LIDARIntensity, configurable angles, color, zoom.
How to add the XV11 LIDAR robot skill
- Load the most recent release of ARC (Get ARC).
- Press the Project tab from the top menu bar in ARC.
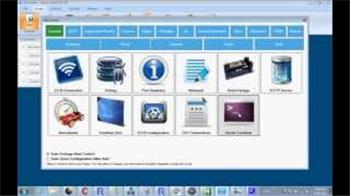
- Press Add Robot Skill from the button ribbon bar in ARC.
- Choose the Navigation category tab.
- Press the XV11 LIDAR icon to add the robot skill to your project.
Don't have a robot yet?
Follow the Getting Started Guide to build a robot and use the XV11 LIDAR robot skill.
How to use the XV11 LIDAR robot skill
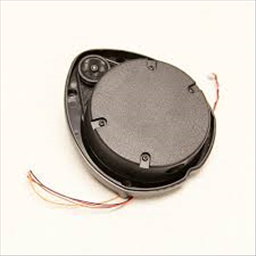
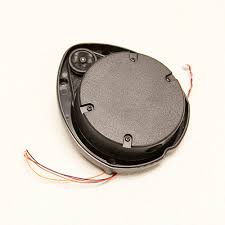
Run the Neato Robotics XV-11 LIDAR on your robot to generate a 2d distance map
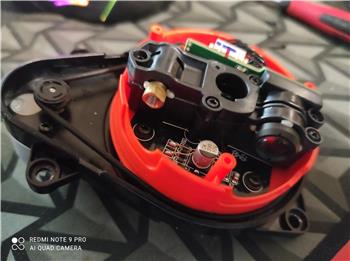
The XV-11 is an inexpensive 360 degree LIDAR sensor. This requires that you use a GetSurreal controller. I have a version 1.2 Get Surreal Controller.
You must download and install the Teensy Serial Driver
This plugin will generate an array variable called $LIDARDistance. Each element in the Array matches to the degree angle reported from the XV-11. The value of each element is the distance reported back by the sensor for that angle.
The GetSurreal controller connects to a usb port on your computer and also connects to the XV-11 LIDAR. Because of this, an onboard computer is the way that I use this plugin.
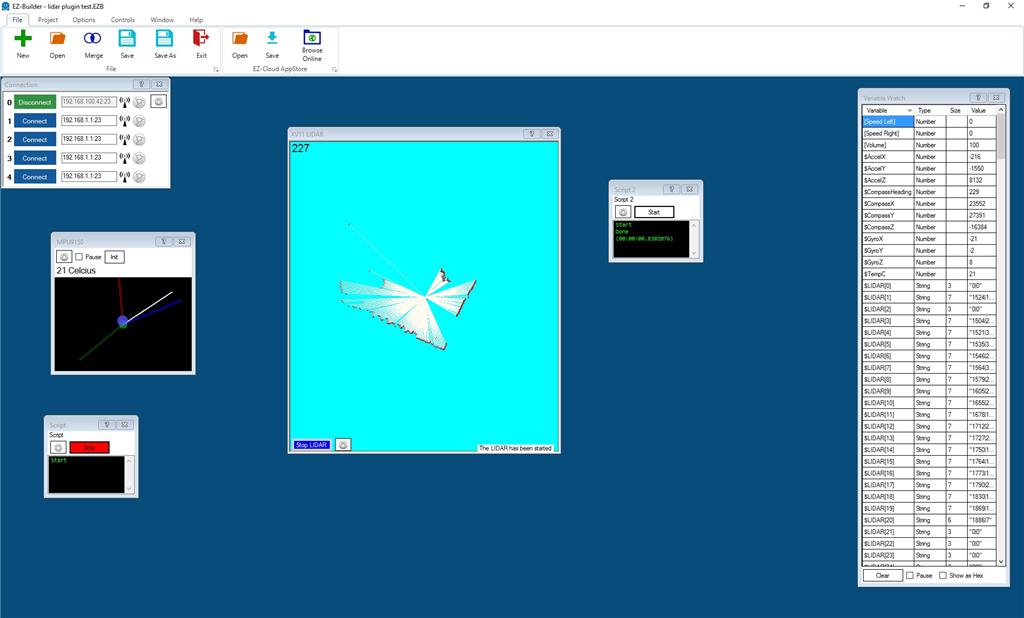
The first thing that you will have to do is identify which com port your GetSurreal controller is connected to. After your COM port is selected, you can click the Start Lidar button and things should start happening on the map. If you add a Variable Watcher control, you will be able to see the distances changing as you move the LIDAR.
Version 1 12/21/2015 12:00 CST If your robot has the LIDAR mounted in a way that would prevent it from seeing all 360 degrees clearly, you can choose the range of angles or degrees that are open for your robot to see. This corresponds to the angles that are reported back from the LIDAR. If you are using say angles 90 to 180 everything should run great as is. This would give you all values from 90 to 180 or 90 degrees total. If you want to use say 180 to 90 then you would set the first angle box to 90 and the second one to 180 and then click either of the check boxes just to the right of these ranges. This will give you 270 degrees of scanning or all values greater than 179 and then all values up to 90.
You can also rotate the map image by -90 to 90 degrees. This will allow you to turn the map to display in a direction of your liking.
Version 2 - 12/22/2015 4:00 PM CST You can now specify the size of the databuffer that is used when reading the LIDAR. This will allow the tool to use more or less memory as you decide for your project. Sometimes, increasing the data buffer will improve performance.
You can now save your configuration. This configuration will be loaded at the time that the control starts. Also, you can now stop the LIDAR which will prevent it from getting readings, release the com port and stops the motor on the LIDAR.
Version 3 - 12/23/2015 8:00 AM CST Also, you can set the map zoom distance which will just allow you to adjust the map to display the points at different zoom levels.
I made changes to use the EZ_Builder.Invoker class as recommended by DJ. I know that I didn't get all of them yet, but most are now covered.
I also double buffered the screen to make it a bit smoother. Hopefully this will improve performance a bit.
Version 4 - 12/23/2015 10:58 AM CST You can now set the background color and marker color on the map.
Version 5 - 12/23/2015 12:37 PM CST I added the ability to use the intensity reading from the sensor. This lets you try to determine what type of object is being detected. I also chose to include both the distance measurement value and the intensity value in the $LIDAR array element. I decided it was better to have a single value that then can be parsed by a script instead of two different arrays (one for distance and one for intensity). If people don't like this, I can change it to two different variable arrays. Here is how it works... If the reading is less than the first setting then the first color will be used. If the reading is greater than the first setting and less than the second setting, setting, the second setting will be used. If the reading is greater than the last setting, the last color is used.
Version 6 - 12/23/2015 4:47 PM CST
Last update for the day I think All of the config settings are moved to a panel which is displayable by selecting the Configure button.
Text from variables can now be displayed on the map. You can add up to 16 variables that you would like displayed. These will list down in the order that you have these configured on the configuration screen.
There is a bug that was introduced with this version. When you turn off the LIDAR and then try to turn it back on, sometimes it will lock up ARC. I am looking to see what is causing this issue and will push another version when it is identified and fixed.
You can change the color of the text that is displayed for these values from the color combo box that is below the list of variables. If there is an error in a name of a variable, this and all subsequent variables will not be displayed.
Version 7 Fixed bug in Version 6 that caused the LIDAR to stop working when repeated stop and start LIDAR button presses were done. Also added a bit of a delay to prevent this plugin from consuming too many clock cycles. I think I will make this value adjustable in a future release.
Version 8 12/23/2015 12:01 PM CST Added the ability to draw lines on the map to the points from the LIDAR location. This is a common feature in most software that I have seen for LIDARS.
Version 10 12/26/2:29 PM CST Version 9 was used to validate that things were working and then a change was made. Version 10 has a bit of a new look to it.
Instead of 16 variables being able to be added to the display, one variable can be added, but you can build multiple variables into this one variable. For example, you can use a script to add multiple variables in the order that you want them to be in with text describing what they are to a single variable. This variable is displayed across the top of the map.
The entire plugin now shows the map, with a start/stop button and configuration button on it, and an information line that tells you if the LIDAR is running or not.
The configuration variables are now working for everyone now. I think I got into compliance enough that there shouldn't be a reason to take down the plugin again. It seems to allow other controls in ARC to run without any issues now.
Version 11 02/18/2016 5:10 PM This version breaks out the variables that are being stored into 2 variable arrays. One is $LIDARDistance which holds the distance in mm to the object detected at the angle, and the other is $LIDARIntensity which is the intensity value of the returned IR beam. The ID of the array is the angle that the object is detected at. This allows you to associate the distance to the intensity based on the angle. This version is a bit slower due to having to create two arrays and update both arrays with the data. General info
Version 12 02/20/2016 5:47 PM This version allows you to disable using the $LIDARIntensity array of variables. It is accessible from the config screen. Without $LIDARIntensity everything runs better.
Attached is the project code. If you would like to modify it in any way, feel free to do so. The only requirement is that you also share your code. This is a standard practice when using code that has been prepared initially by someone else.
Version 13 02/21/2016 4:20 AM Only a small change to see if it solves the lockup issue that some were seeing with the plugin. I removed the creation of the array's from trying to use a background process and moved it into the calling function instead so that it ran in a single thread.
Version 14 02/24/2016 8:28 PM This version is quicker. Also all values that are not detected have a value of 5000 (with the assumption being made that the object is out of the range of the LIDAR). The LIDAR range is up to about 3500 mm. My hope is also that it will solve the issue that a couple of users are having with their installation of the plugin.
This video is old

Related Questions
I Found A Way To Control The Neato Xv-11
XV11 LIDAR And The Navigator

Upgrade to ARC Pro
Stay on the cutting edge of robotics with ARC Pro, guaranteeing that your robot is always ahead of the game.
Hello Community,
I have an XV11 LiDAR with the getsurreal v1.2b controller. I installed the latest xv11 LiDAR skill and cannot seem to make it work. I selected the correct com port and put in a buffer size of 3200. The LiDAR spins and is recognized by windows, but the skill says "the LiDAR has been stopped". I can confirm that the LiDAR is working. When I connect via the Arduino Serial monitor I see data, can send commands, etc. I tried emailing the skill’s creator, Cochran Robotics, but got a bounce back. Is anyone else experiencing this? Am I doing something wrong? Thanks!
I checked with the guys, and we don't have the XV11 hardware because a 3rd party developed this robot skill without our involvement. Usually, we work with the vender to obtain hardware and create the robot skill. In this case, Neato is a robot vacuum company and does not support their lidar component being used for DIY robotics. That makes it difficult for Synthiam to get involved.
Reviewing the XV11 lidar product's age and specifications, we recommend that you upgrade to a newer and higher quality lidar that ARC supports.
I have been looking for this for years. Is there a skill that is similar and works well with ARC. Having the 360 variables built in is sweet, then you can manipulate them as needed.