
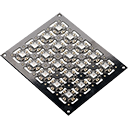
DIY NeoPixel Blaster for ARC - open-source controller for up to 8×80 LEDs (640), port‑0 onboard RGB, color control via ControlCommand
 Hardware Info
How to add the Neopixel Blaster robot skill
- Load the most recent release of ARC (Get ARC).
- Press the Project tab from the top menu bar in ARC.
- Press Add Robot Skill from the button ribbon bar in ARC.
- Choose the Misc category tab.
- Press the Neopixel Blaster icon to add the robot skill to your project.
Don't have a robot yet?
Follow the Getting Started Guide to build a robot and use the Neopixel Blaster robot skill.
How to use the Neopixel Blaster robot skill
The Synthiam NeoPixel Blaster is a small DIY (do-it-yourself) controller board that makes it easy for your robot to drive a lot of NeoPixels (addressable RGB LEDs such as WS2812/WS2812B). It can control up to 640 pixels total using 8 separate output ports (that’s up to 80 pixels per port).
NeoPixels require very precise, microsecond-level timing to communicate. Many robot controllers and PCs can’t reliably generate that timing while doing other tasks. The NeoPixel Blaster includes a dedicated microcontroller so your LED effects are stable and glitch-free.
After you add this skill to your ARC project, you will send it commands using ControlCommand().
You typically follow this pattern:
- DefineSize: tell ARC how many pixels exist on a port
- Set / SetAll: choose colors for one pixel or all pixels
- Update: push the changes to the LEDs (nothing changes until you call Update)
Hardware (DIY)
Reference page: Roll Out - Neo Pixel Blaster
Design files on GitHub: https://github.com/synthiam/E-21_Neopixel_Blaster
Ports and pixel limits
- 8 output ports: numbered 0 through 7
- 80 pixels per port (maximum)
- 640 pixels total across all ports (8 × 80)
Special note about Port 0 (onboard NeoPixel)
Port 0 includes an onboard RGB LED on the NeoPixel Blaster itself. That onboard LED is part of the NeoPixel chain for Port 0 and it uses the first pixel address.
What this means for beginners:
- If you connect a NeoPixel strip to Port 0, then Pixel #0 is the onboard LED.
- The first LED on your strip becomes Pixel #1, the next is Pixel #2, and so on.
- On Ports 1–7, the first LED on your strip is Pixel #0 (normal behavior).
Basic setup checklist (beginner-friendly)
- Connect the NeoPixel Blaster to your robot controller (the robot controller will communicate with the Blaster, and the Blaster drives the LEDs). In ARC, you will choose the digital port used for that connection.
- Connect NeoPixels to the desired Blaster output port (0–7). Keep track of which LED strip/ring is connected to which port number.
- Power considerations: NeoPixels can draw significant current, especially at bright white. Use an appropriate power supply for your LED count and wiring (common NeoPixel best-practice).
Using the skill in ARC
Once the NeoPixel Blaster skill is added to your ARC project, you control it from scripts using:
ControlCommand("NeoPixel", ...)
Command concepts (plain English)
DefineSize
Tells the skill how many pixels exist on a specific port.
Do this before using Set or SetAll on that port.
Set / SetAll
Set changes one pixel by index. SetAll changes every pixel on the port.
Colors are RGB values (Red, Green, Blue), typically 0–255.
Update
Sends the buffered color data to the LEDs on that port. If you forget Update,
the LEDs will not change.
Port number
Each command includes a port number (0–7) so you can control different strips independently.
DefineSize once at startup (or when your script begins),
and then repeatedly call Set/SetAll + Update for animations.
Examples (EZ-Script / C# style snippets)
Example 1: Set the onboard LED (Port 0, Pixel 0) to purple
This defines 1 pixel on Port 0 (the onboard LED) and sets it to purple using RGB values.
ControlCommand("NeoPixel", DefineSize, 0, 1)

ControlCommand("NeoPixel", SetAll, 0, 255, 0, 255)

ControlCommand("NeoPixel", Update, 0)
Example 2: Port 0 with 3 pixels total (onboard + 2 external)
This example assumes 3 pixels are on Port 0: Pixel 0 is the onboard LED, and Pixels 1–2 are on your connected strip. Each pixel is set to a different color.
ControlCommand("NeoPixel", DefineSize, 0, 3)

ControlCommand("NeoPixel", Set, 0, 0, 0, 0, 255) # blue onboard LED

ControlCommand("NeoPixel", Set, 0, 1, 0, 255, 0) # green second LED

ControlCommand("NeoPixel", Set, 0, 2, 255, 0, 0) # red third LED

ControlCommand("NeoPixel", Update, 0)
Example 3: Scrolling color pattern (Port 1, 64 pixels)
This creates a simple animation by shifting an $offset value each loop.
It targets Port 1, where Pixel 0 is the first LED on your strip (no onboard pixel on Port 1).
ControlCommand("NeoPixel", DefineSize, 1, 64)

$offset = 0

:loop

repeat ($x, 0, 63, 1)
  ControlCommand("NeoPixel", Set, 1, ($x + $offset) % 64, (64 - $x) % 12, $x / 2, $x % 38)
endrepeat

ControlCommand("NeoPixel", Update, 1)

sleep(100)

$offset++

goto(loop)
Example 4: “Matrix” style green trail (Port 1, 64 pixels)
This keeps red and green low and varies blue slightly to create a dim trailing effect.
Reduce or increase the sleep(10) value to slow down or speed up the animation.
ControlCommand("NeoPixel", DefineSize, 1, 64)

$offset = 0

:loop

repeat ($x, 0, 63, 1)
  ControlCommand("NeoPixel", Set, 1, ($x + $offset) % 64, 0, 0, (64 - $x) % 20)
endrepeat

ControlCommand("NeoPixel", Update, 1)

sleep(10)

$offset++

goto(loop)
Example 5: Sparkle Matrix (adds random sparkles)
This starts with the same trailing effect as Example 4, then picks a random pixel and assigns it a random RGB color to create “sparkles.”
ControlCommand("NeoPixel", DefineSize, 1, 64)

$offset = 0

:loop

repeat ($x, 0, 63, 1)
  ControlCommand("NeoPixel", Set, 1, ($x + $offset) % 64, 0, 0, (64 - $x) % 20)
#  ControlCommand("NeoPixel", Set, 1, ($x + $offset) % 64, (64 - $x) % 12, $x / 2, $x % 38)
endrepeat

  $i = getrandom(0, 63)
  $r = getrandom(0, 53)
  $g = getrandom(0, 53)
  $b = getrandom(0, 53)

  ControlCommand("NeoPixel", Set, 1, $i, $r, $g, $b)

ControlCommand("NeoPixel", Update, 1)

sleep(10)

$offset++

goto(loop)
Troubleshooting (common beginner issues)
- Make sure you called
DefineSizefor the correct port. - Make sure you called
UpdateafterSetorSetAll. - Verify you are using the correct port number (0–7).
- Confirm the skill is configured to use the correct digital port between ARC and the Blaster.
Port 0 includes an onboard NeoPixel that counts as Pixel 0.
- If you intended to control the first LED on your strip connected to Port 0, target Pixel 1, not Pixel 0.
- Also make sure your
DefineSizecount includes the onboard LED.
- This is often power-related (not enough current, voltage drop, or poor ground connection).
- Check wiring length/quality and make sure grounds are shared correctly between power and controller.
- Try lowering brightness (use smaller RGB values) to reduce power draw while testing.
For additional commands and parameters, refer to the skill’s Cheat Sheet inside ARC.
Video
Related Hack Events
DJ's 7Th Live Hack (Neopixel, Arduino, Raspberry Pi Ezbpi...
DJ's 6Th Live Hack Event (Raspberry Pi & Neopixel With...
Related Questions

Upgrade to ARC Pro
Experience early access to the latest features and updates. You'll have everything that is needed to unleash your robot's potential.