
Windows Storage & Performance Tips
Introduction
Single-board computers (SBCs) used for robotics (for example: LattePanda, UP Board, Atomic Pi, Rock Pi X) often have limited storage and CPU capacity. Many models ship with only 16 GB or 32 GB of storage, and a default Windows installation can consume a large portion of that space. The steps below explain practical ways to free disk space and optimize Windows 10 for use as a dedicated robot computer.
This guide covers:
- Creating a local setup account during installation
- Disabling startup applications
- Disabling hibernation
- Using Compact OS to compress system files
- Uninstalling preinstalled apps (bloatware)
- Preventing automatic Windows updates
- Improving Virus & Threat Protection performance (with caution)
- Setting power to Best Performance
- Disabling visual effects
- Preparing the system to run headless as an SBC
- Reducing camera render workload in ARC
- Disabling Blockly, RoboScratch and script help in ARC
- Using Sophia Script or Win-Lite for further automation/tweaks
1. Local Account Setup During Installation
For a robot PC that will usually be offline, create a local Windows account instead of using a Microsoft account. A local account avoids cloud sync, OneDrive, and other background services that use CPU and disk resources.
- Install Windows without any network connection (disconnect Ethernet and Wi‑Fi).
- When prompted to connect to a network, choose I do not have internet (usually in the lower-left).
- Create a local user account when prompted and continue the installation.
A local account reduces background traffic and storage used by cloud features.
2. Disable Startup Applications
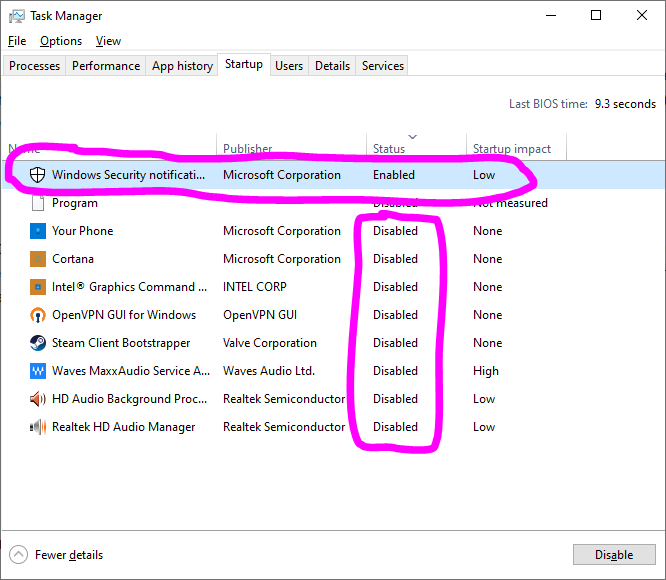
Many apps add themselves to startup. On a dedicated robot PC, keep startup items to a strict minimum — only essential services and applications. Keep the Windows Security Notification icon enabled so you can see if Windows re-enables protection.
- Open Task Manager with Ctrl+Shift+Esc.
- Click More details if necessary.
- Open the Startup tab.
- Select each nonessential item and click Disable. Leave Windows Security Notification enabled.
3. Disable Hibernation
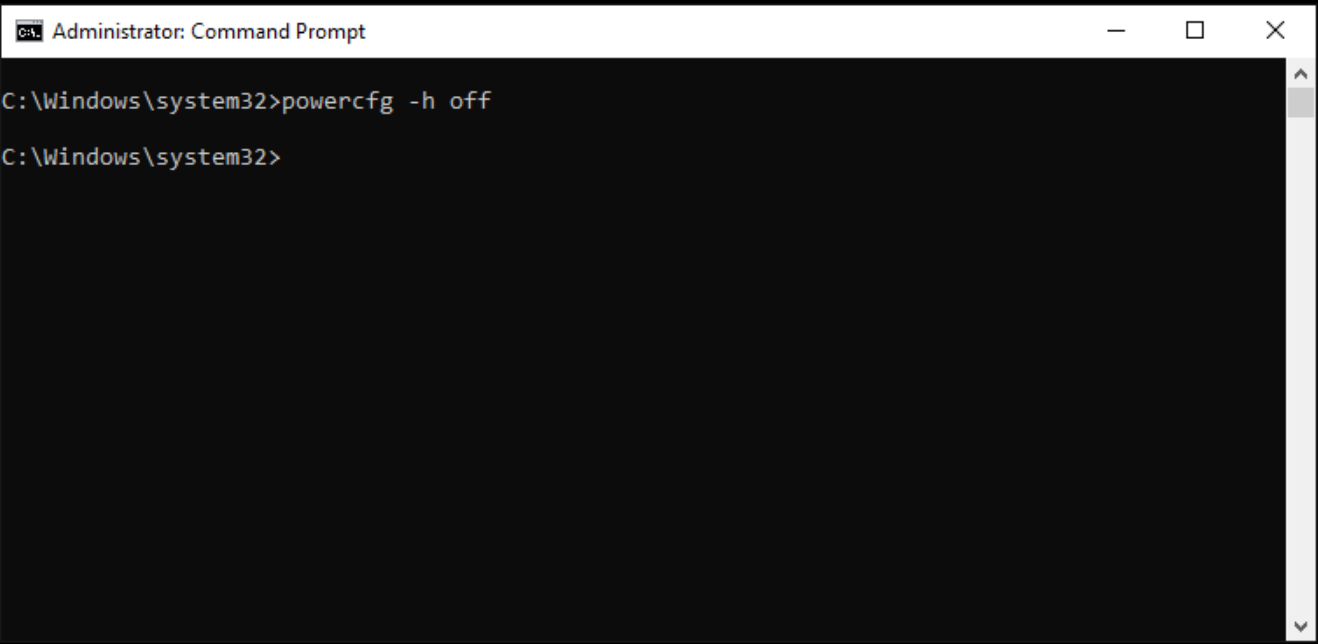
Hibernation reserves a file (C:\hiberfile.sys) roughly the size of your RAM. Robots generally do not need hibernation; disabling it frees that disk space.
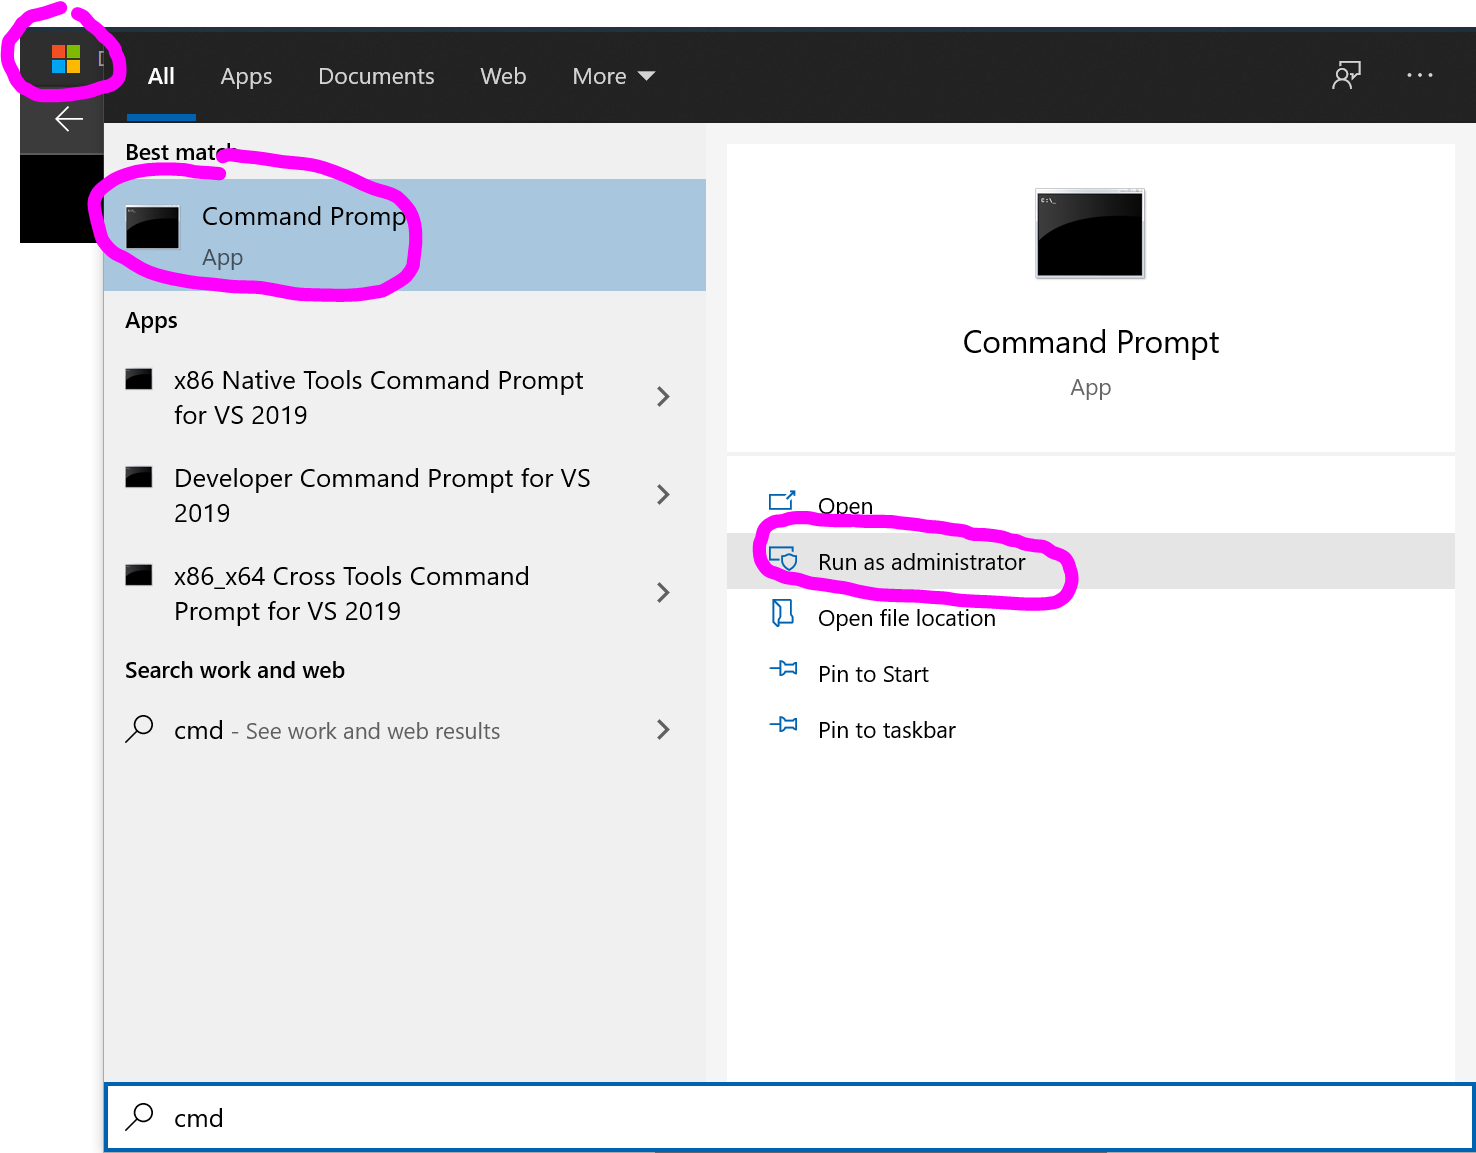
- Open the Start menu, type cmd.
- Right-click Command Prompt and choose Run as administrator.
- In the elevated prompt, run:
powercfg -h off
A successful run returns no message. If an error appears, the command did not complete.
4. Compact OS (Compress System Files)
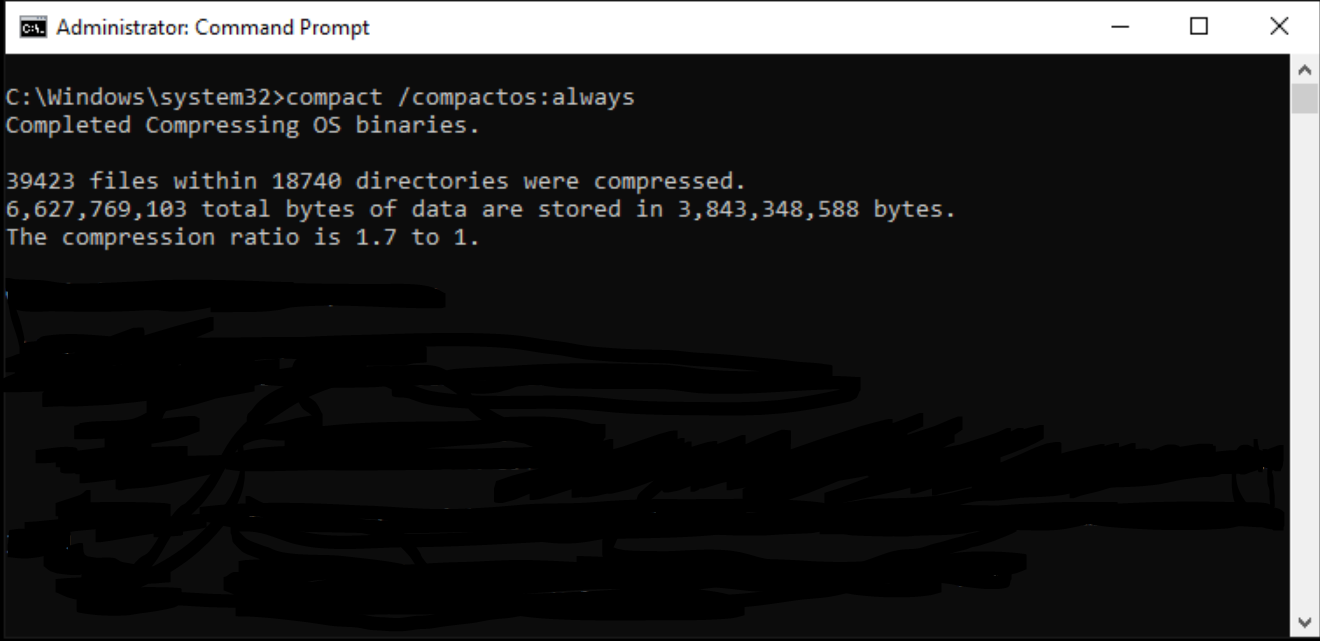
Compact OS compresses Windows system binaries to reclaim disk space. This is especially useful on small SSDs or eMMC storage.
- Open an elevated Command Prompt (Start → type cmd, Run as administrator).
- Run:
compact /compactos:always - Wait — the operation can take several minutes. When complete, a summary displays the disk space saved.
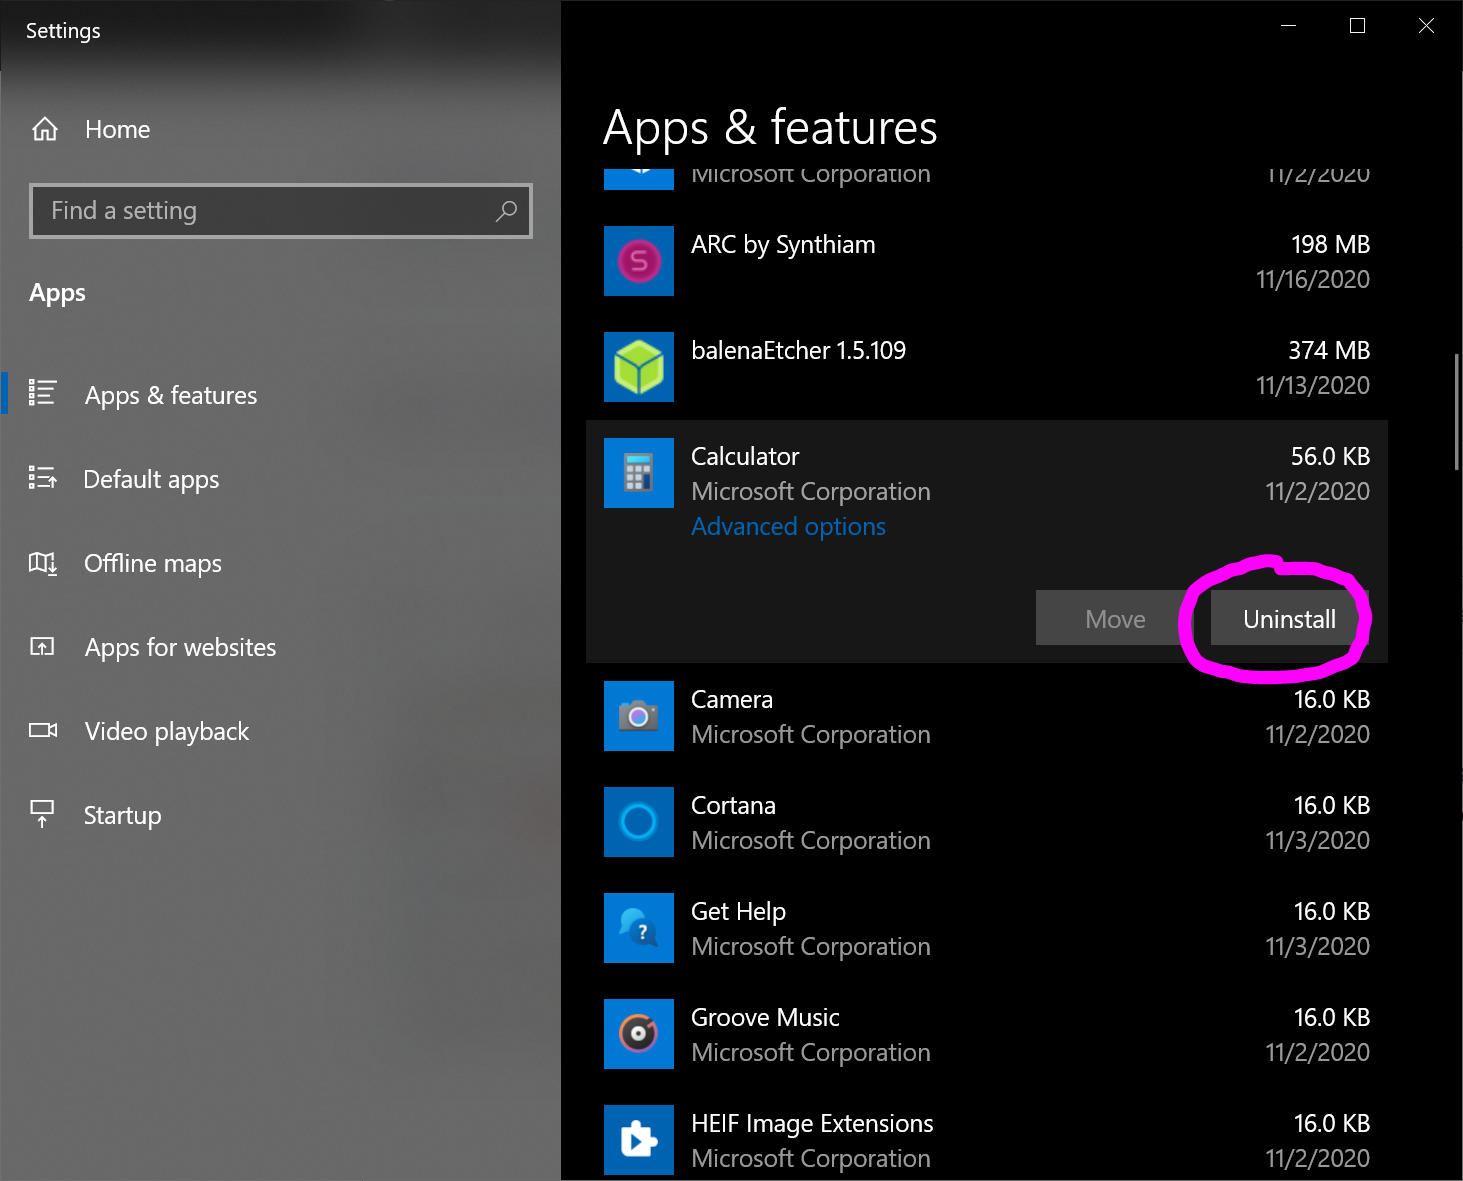
5. Uninstall Preinstalled Apps (Bloatware)
Windows 10 often includes many apps (Paint, Xbox, 3D Viewer, etc.) that are unnecessary on a robot PC. Removing these reduces disk usage and background services.
- Right-click the Start menu and choose Apps & Features.
- Click each preinstalled app you don't need and select Uninstall.
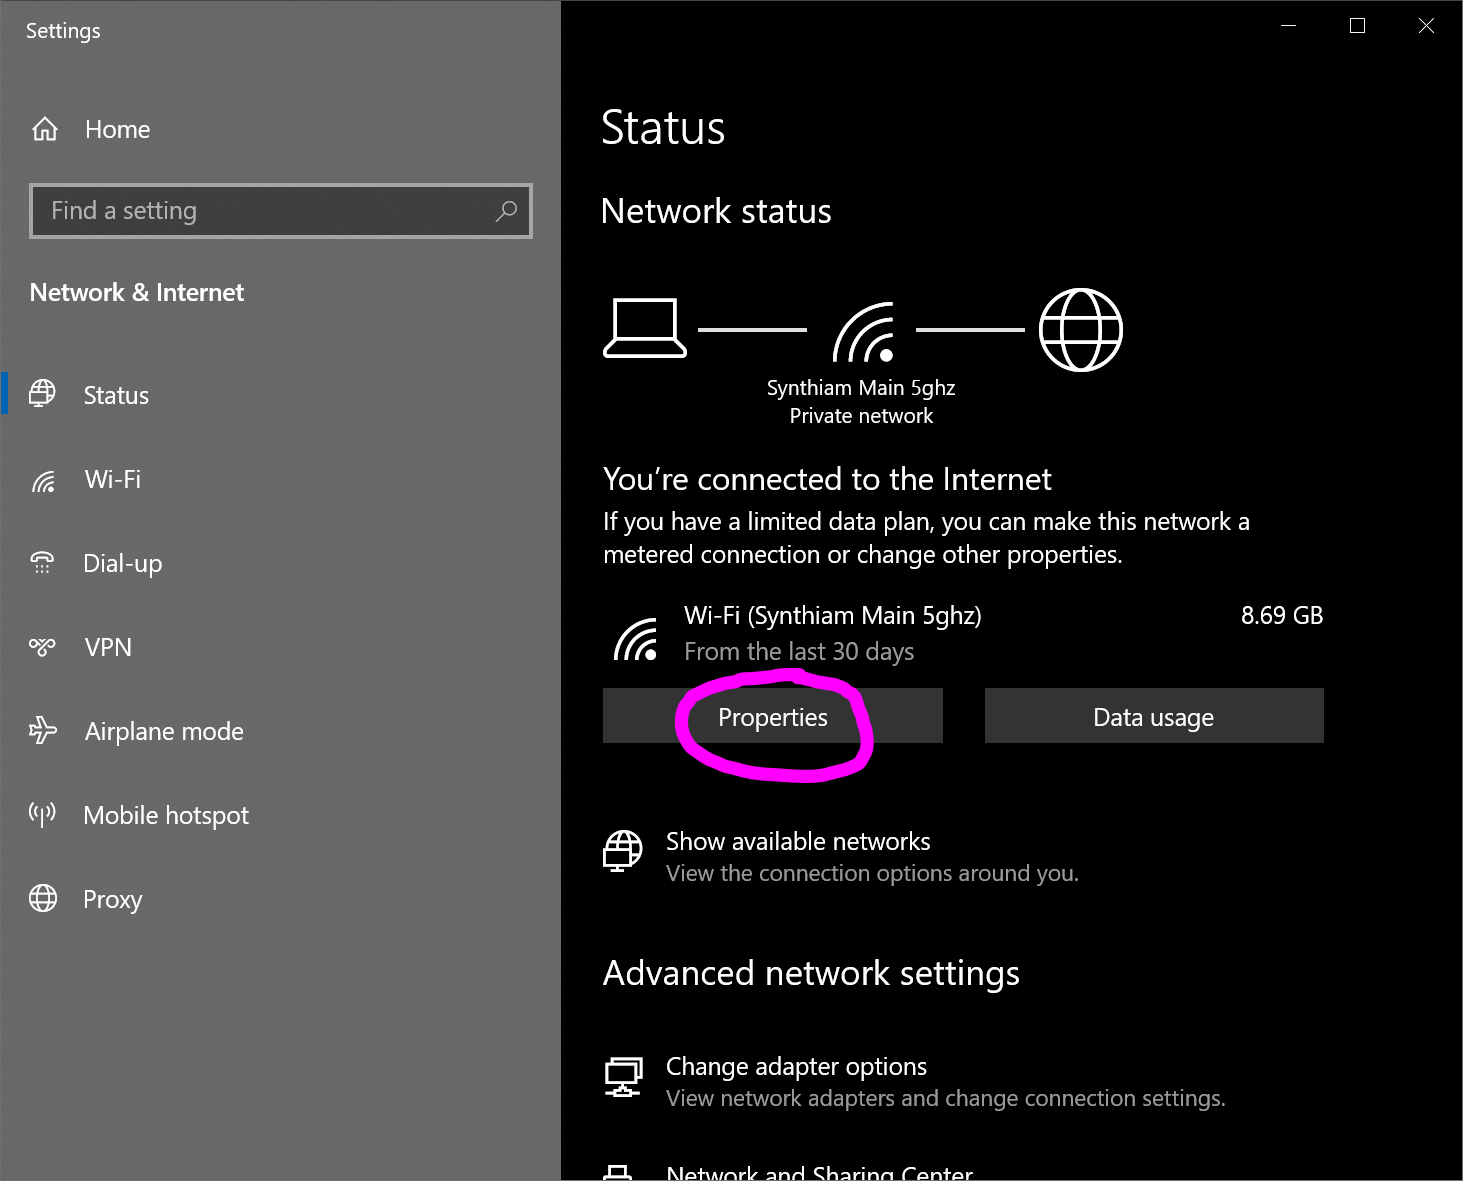
6. Prevent Automatic Windows Updates
Windows Update can download large packages that consume disk space and may interrupt robot operation. For dedicated robot machines, set your network connection as metered to delay automatic downloads and checks.
- Right-click the Start menu and choose Network Connections.
- Select the network adapter in use (Wi‑Fi or Ethernet) and click Properties.
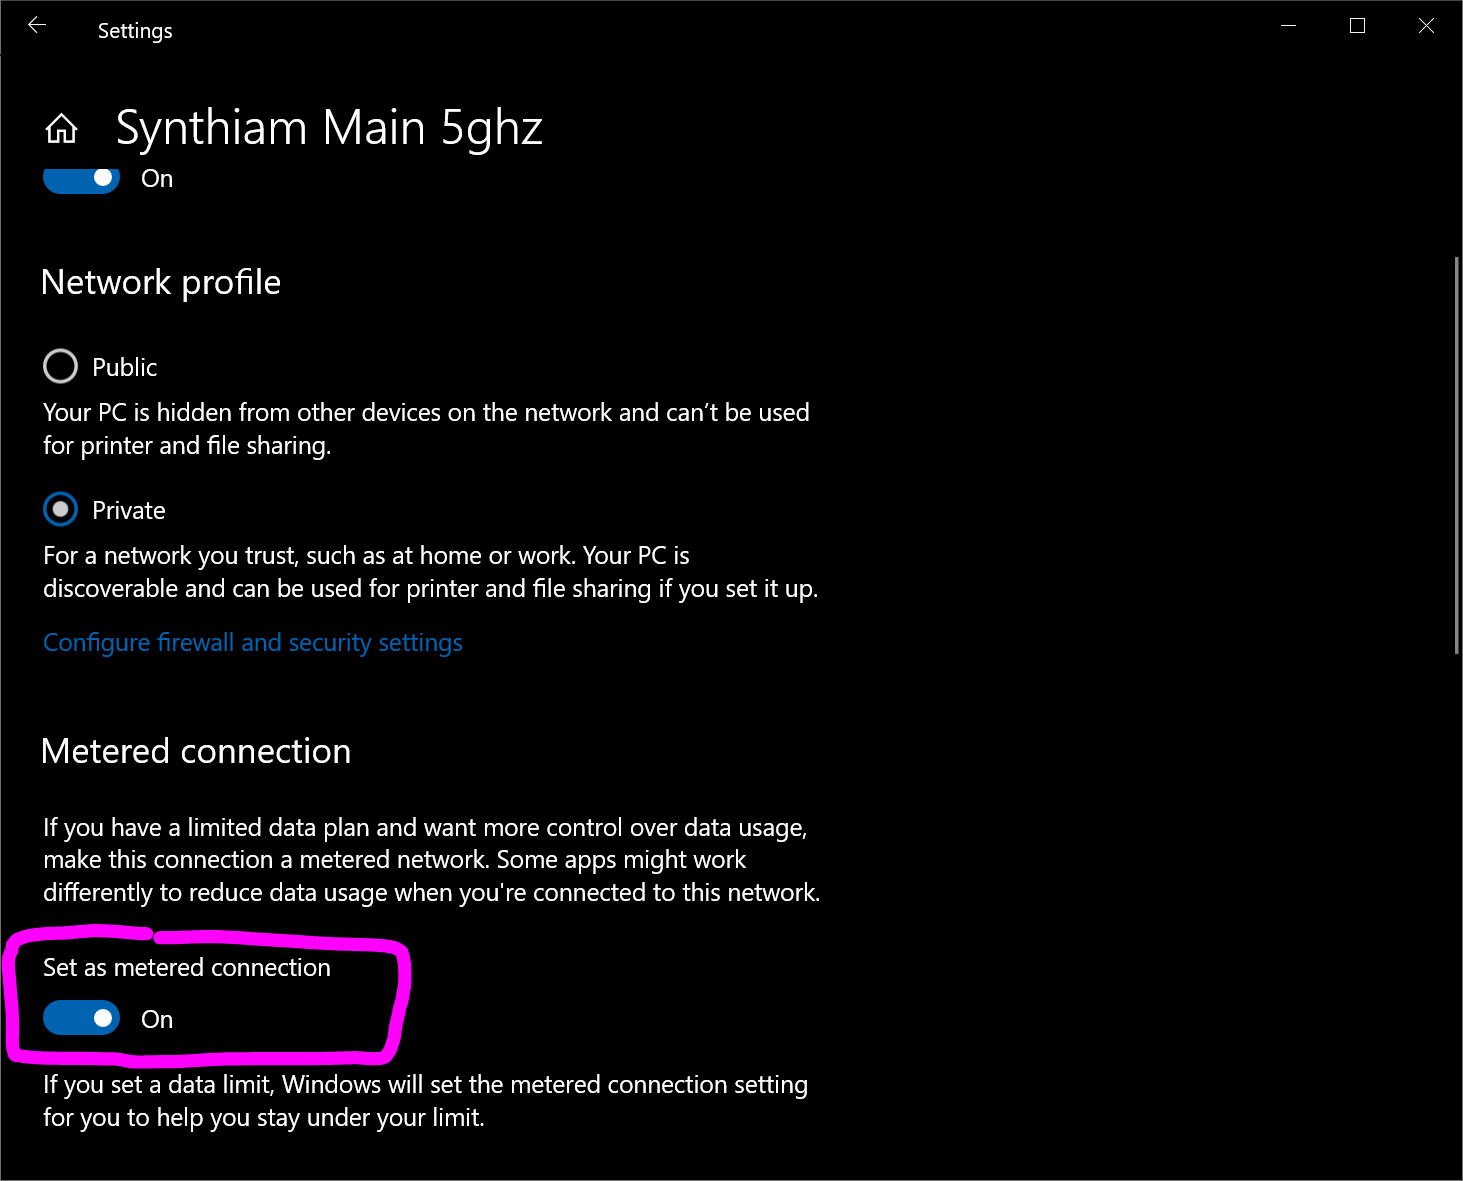
- Enable Set as metered connection.
Note: Metered connections reduce automatic downloads but do not fully disable updates; review Windows Update settings for additional controls.
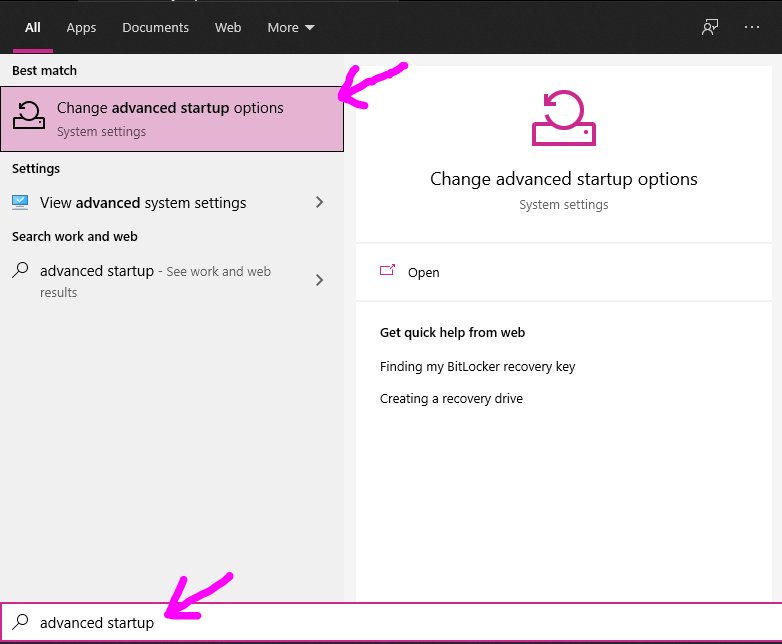
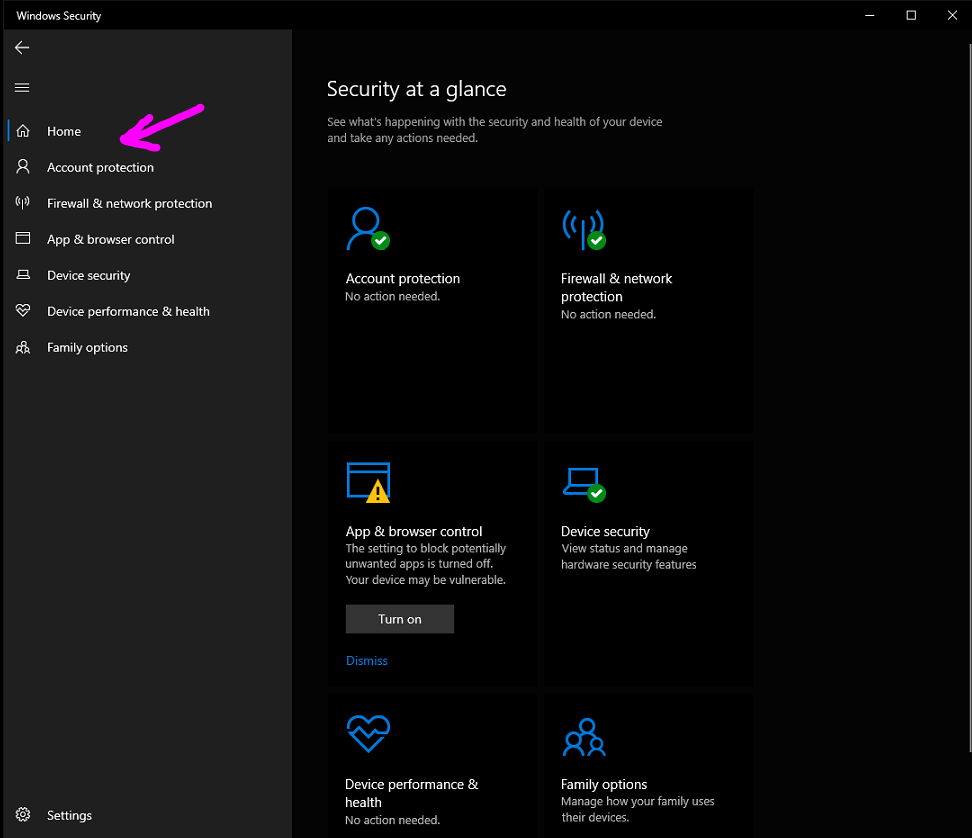
7. Virus & Threat Protection — Performance Considerations (Warning)
Windows Defender scans file I/O and can significantly slow installations and disk activity. The procedure below renames Defender folders from the Windows Recovery Environment so the service does not run. Re-enabling or reinstalling protection may be required if you later repurpose the machine.
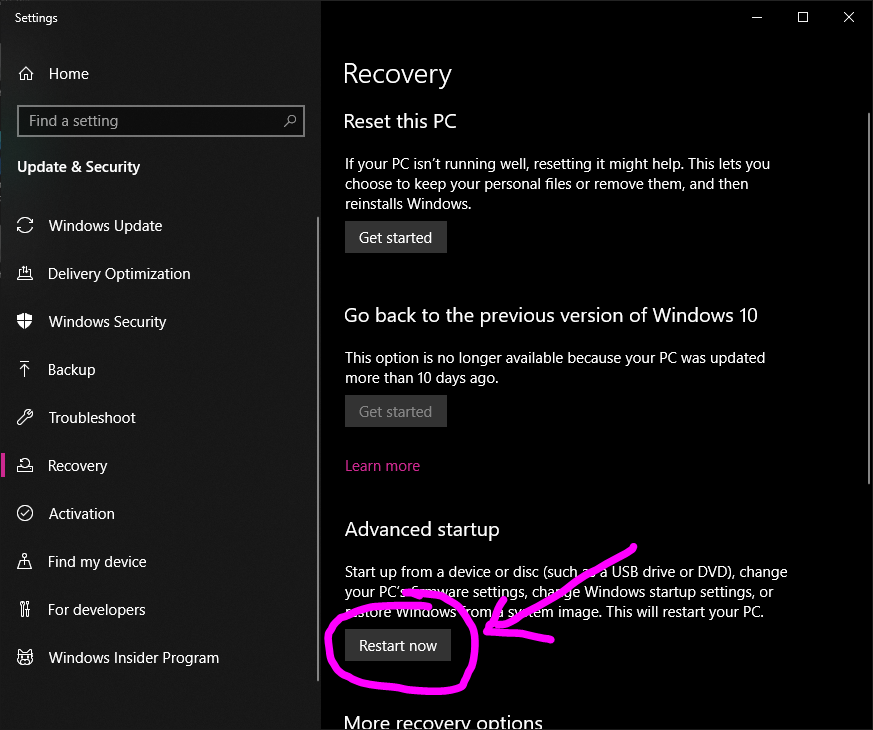
- Open Start and type Advanced Startup → select Change advanced startup options.
- Under Advanced Startup, click Restart now.
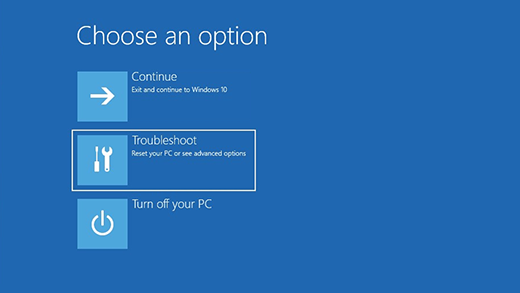
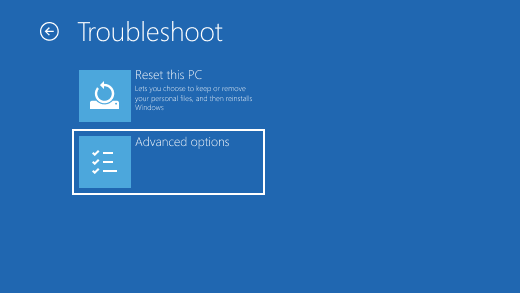
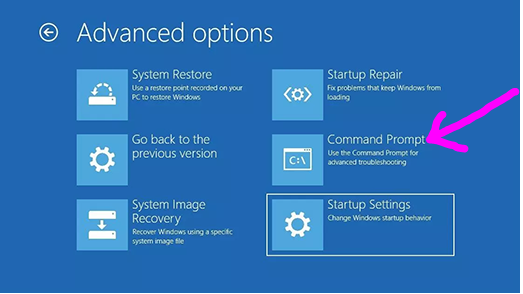
- After reboot, choose Troubleshoot → Advanced options → Command Prompt.
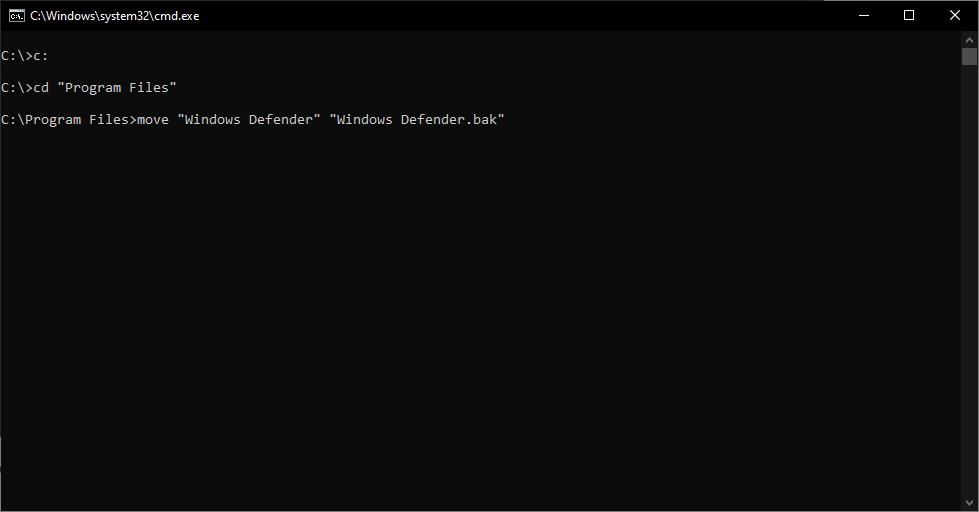
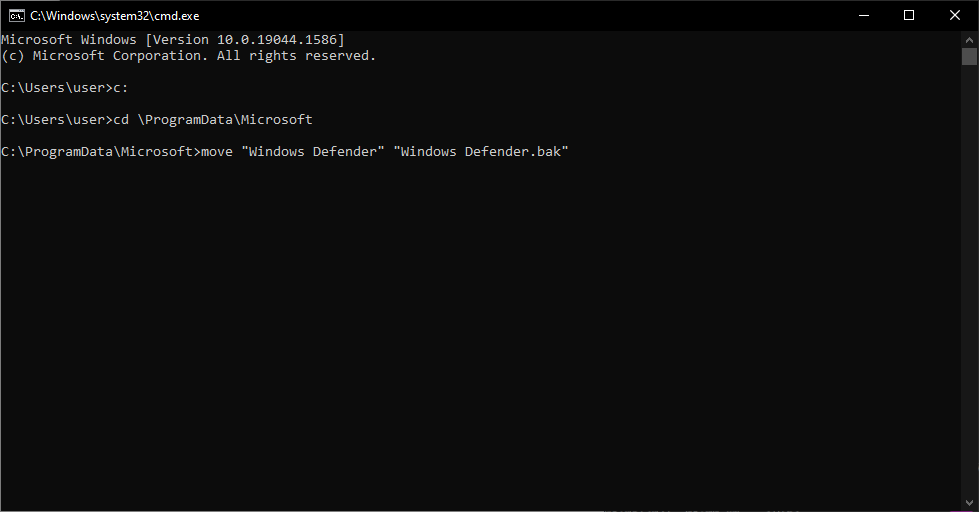
- In the recovery Command Prompt, change to the C: drive and rename Defender folders:
C: cd "C:\Program Files" move "Windows Defender" "Windows Defender.bak" cd "C:\ProgramData\Microsoft" move "Windows Defender" "Windows Defender.bak" - Exit and reboot. Windows Security will no longer show Virus & Threat Protection active.
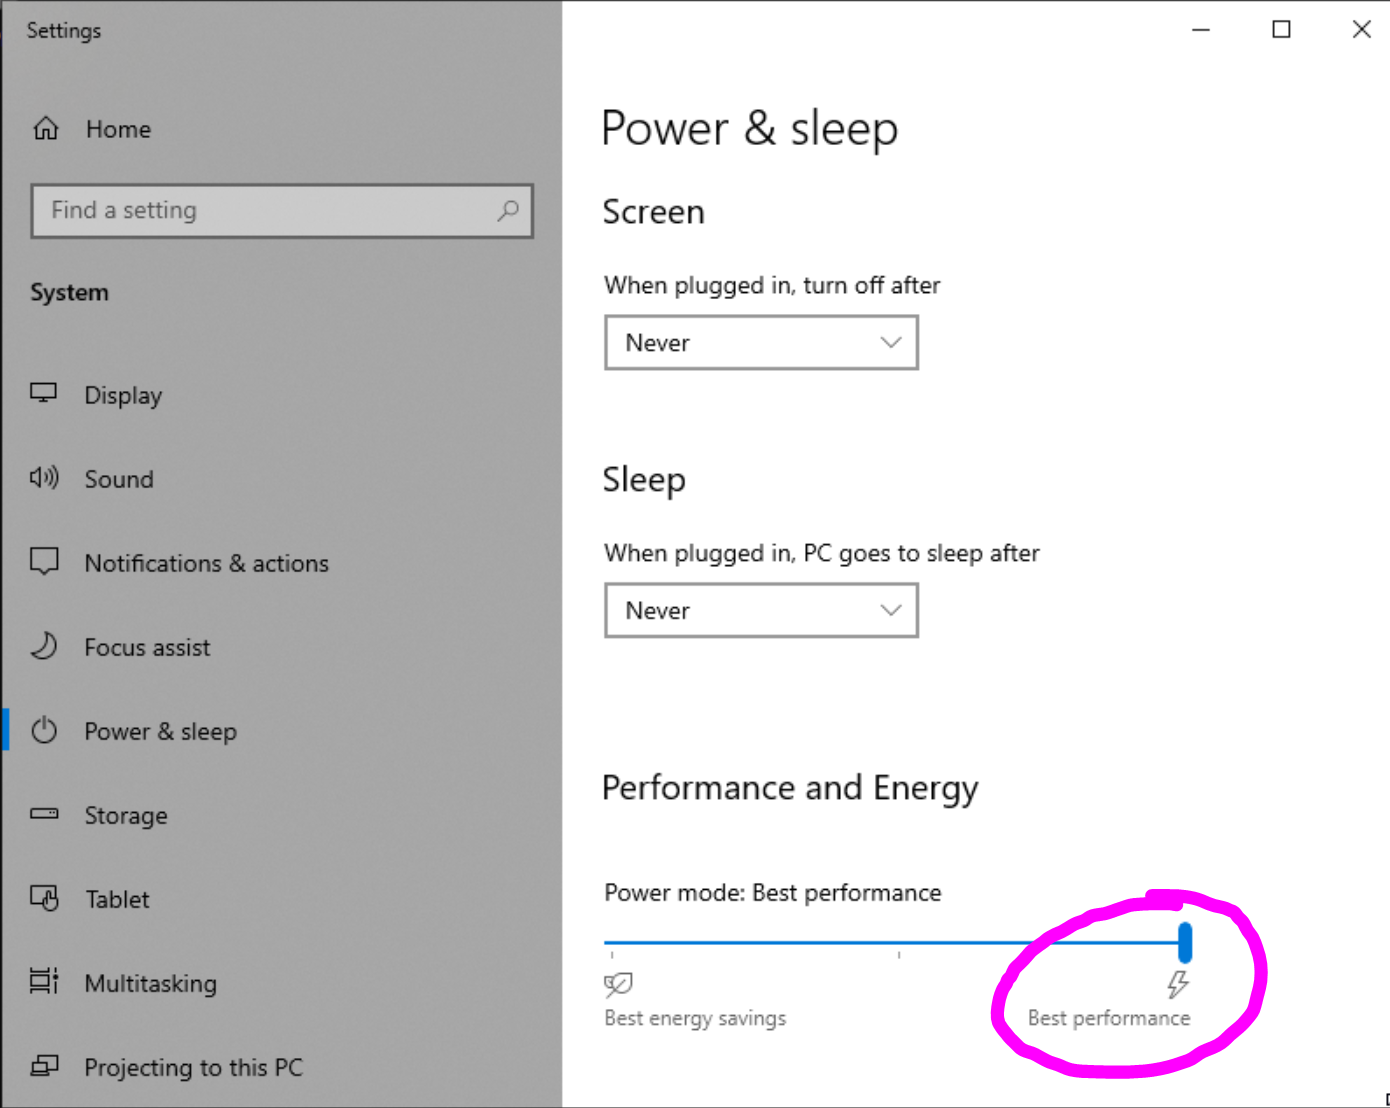
8. Power — Best Performance
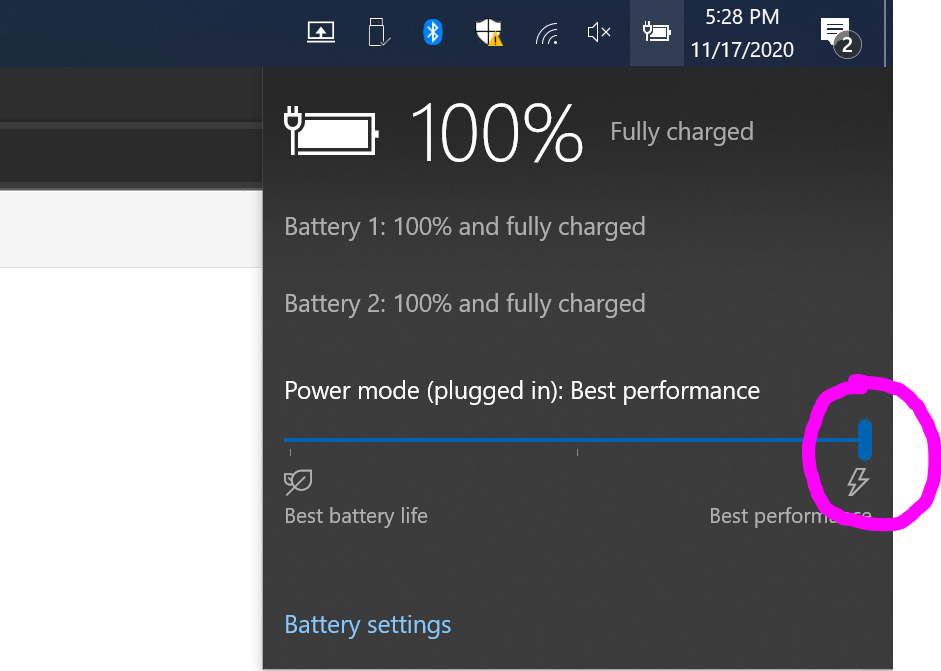
Set the power profile to Best Performance to avoid CPU throttling and background power-saving pauses.
System tray method
- If a battery icon exists in the system tray, click it and move the slider to Best performance.
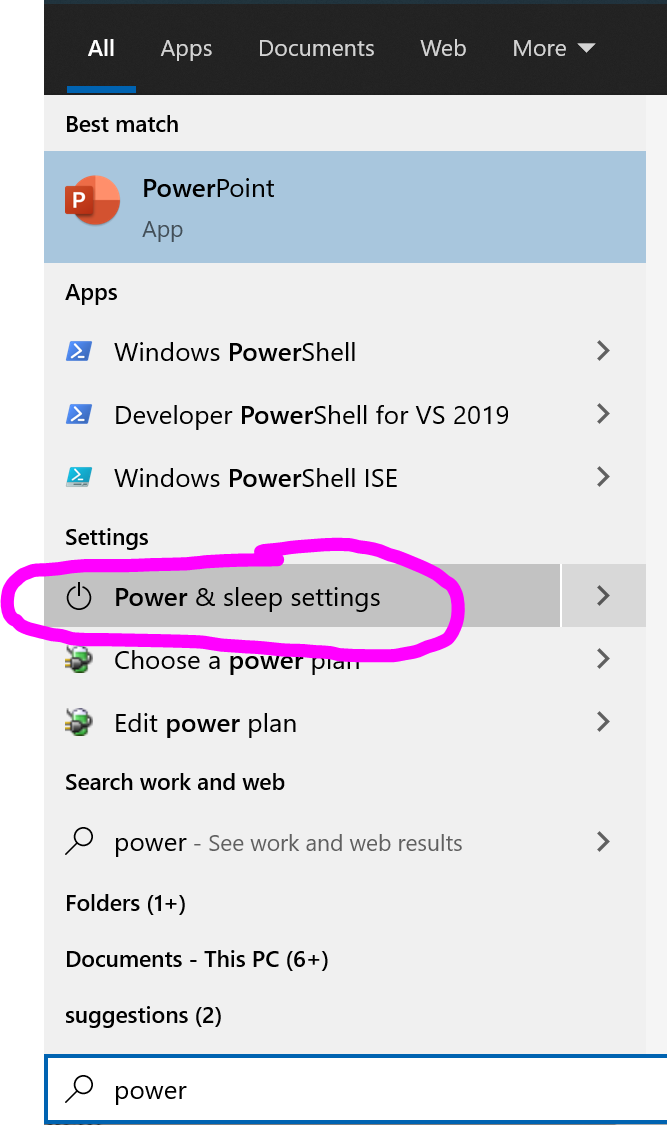
Power & Sleep Settings
- Open Start and search for Power.
- From Power & Sleep settings, move the slider (if present) to Best performance.
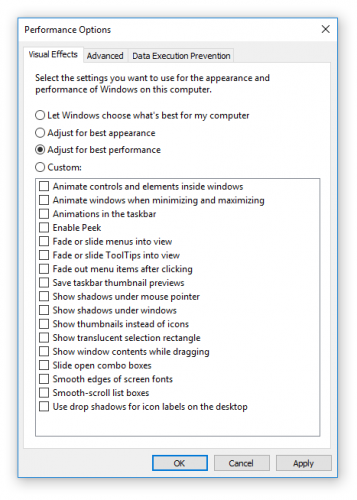
9. Display Visual Effects — Adjust for Best Performance
Turning off visual effects reduces GPU and CPU load and lowers memory usage.
- Open System → Advanced system settings.
- On the Advanced tab, under Performance, click Settings.
- Select Adjust for best performance to disable animations and effects.
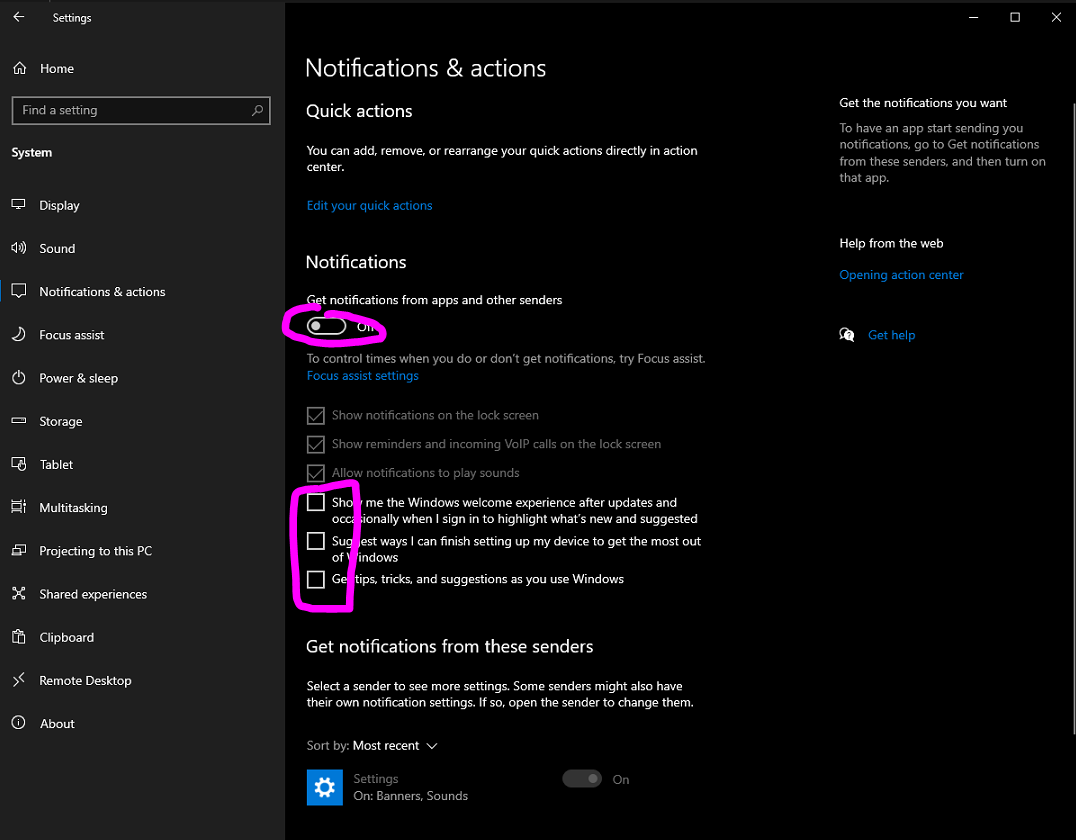
10. Disable Notifications & Actions
Disable Windows pop-ups (notifications and tips) so the robot is not interrupted by messages or prompts.
- Open Settings → System → Notifications & actions.
- Turn off notifications and uncheck tips/tricks options.
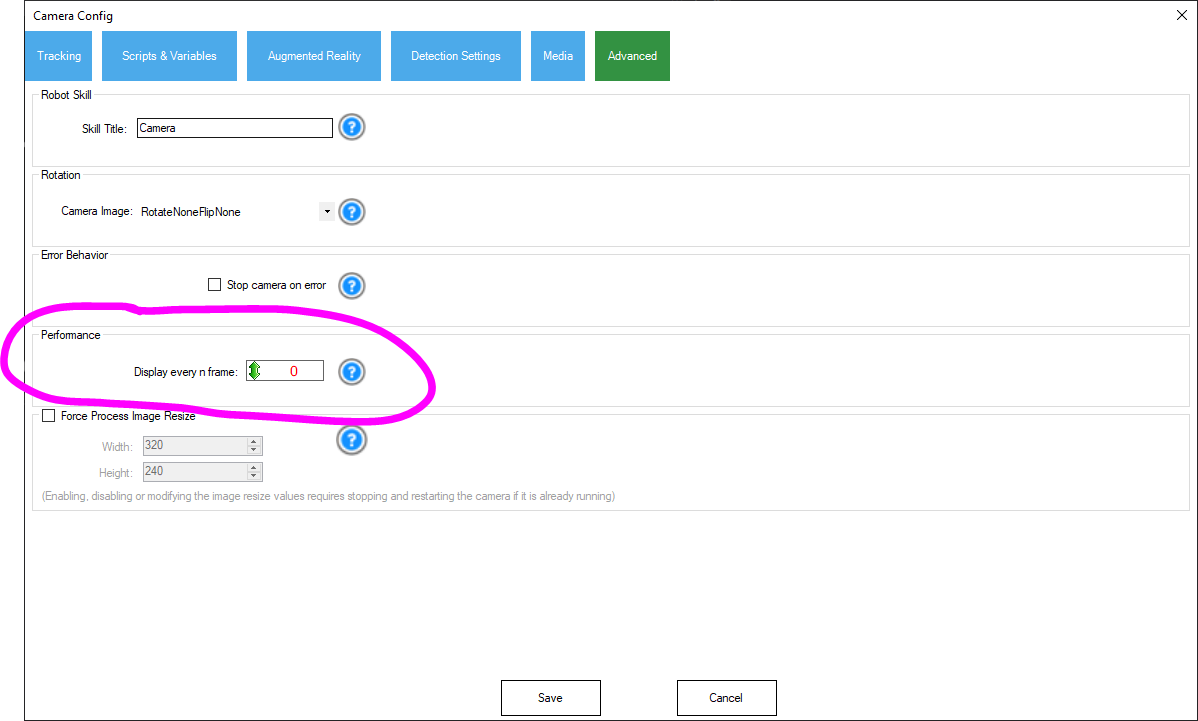
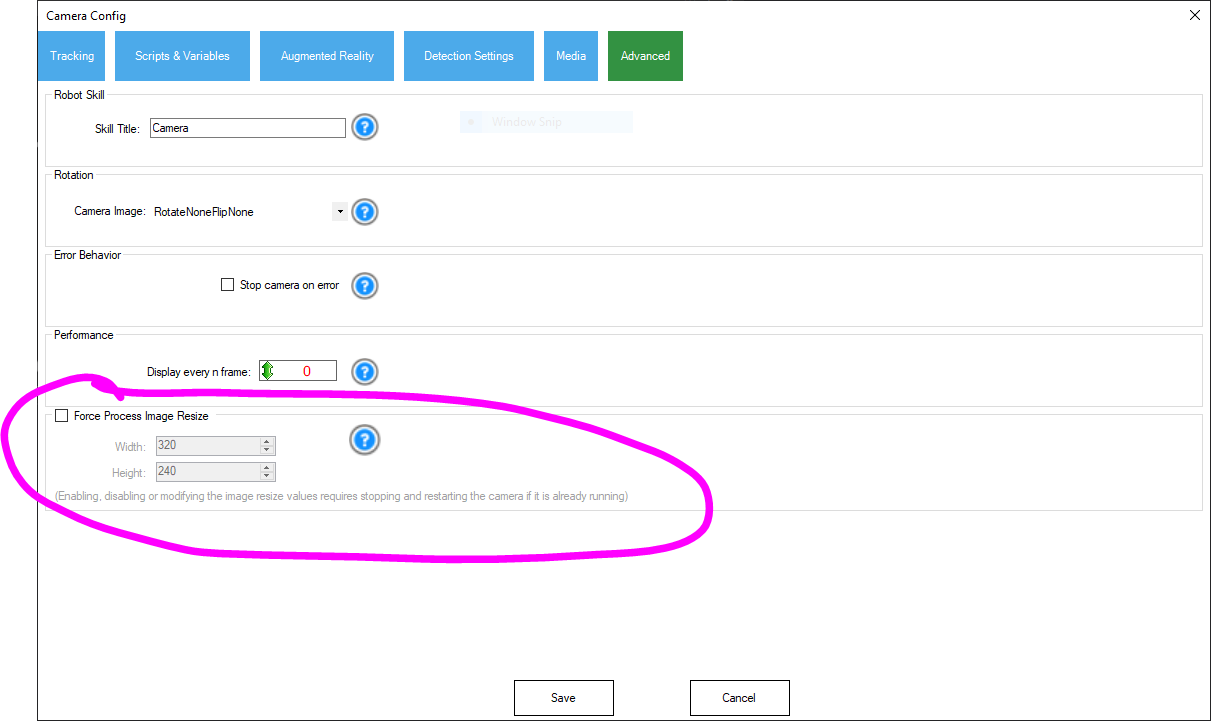
11. ARC Camera Render Performance — Save CPU
Displaying a high frame-rate camera feed on a low-power CPU consumes significant resources. ARC provides options to skip frames for display and to downsize images used for processing. These reduce CPU load without affecting tracking accuracy.
- Open the Camera Device configuration in ARC and go to the Advanced tab.
- Adjust the skip frames option so fewer frames are rendered on-screen (processing still receives frames as needed).
- If tracking is still heavy on the CPU, lower the processing output resolution to reduce per-frame computational cost.
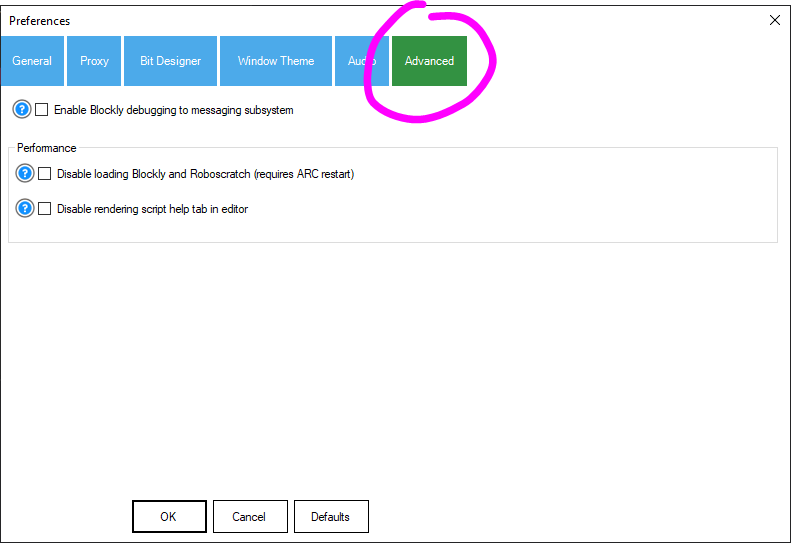
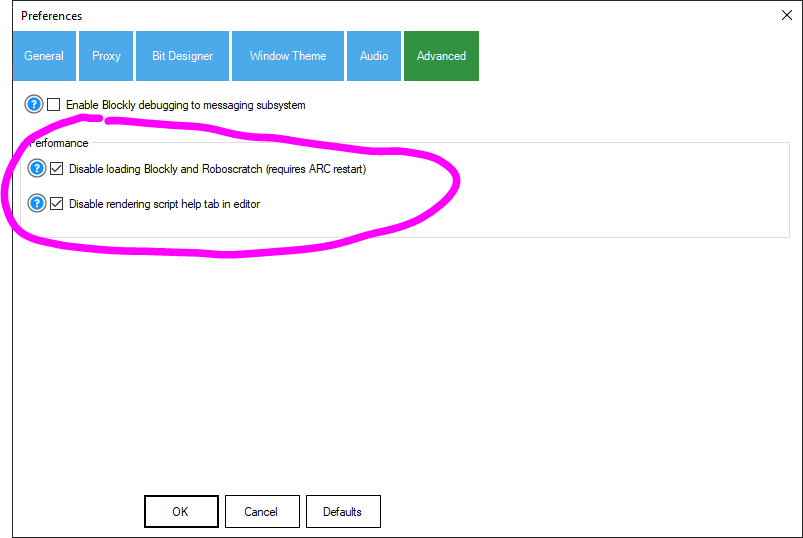
12. Disable Blockly, RoboScratch & Script Help in ARC
Blockly and RoboScratch rely on large browser engines and can be memory- and CPU-intensive. Disabling these UIs (and script help) reduces resource usage on embedded systems.
- Open ARC Preferences.
- Go to the Advanced tab.
- Enable the options to disable Blockly, RoboScratch, and script help.
- Restart ARC to apply the changes.

13. Prepare as a Headless Single Board Computer (SBC)
After storage and performance tuning, prepare the machine to run headless (without a monitor or keyboard). Headless operation is typical for deployed robot SBCs.
Follow the Synthiam Headless SBC guide: Headless SBC (Single Board Computer)
14. Optional: Delete Scheduled Tasks (Advanced)
Removing scheduled tasks can free resources but may break drivers or services that depend on them. This is an advanced option and should be used only when you understand the potential impact.
- Open an elevated Command Prompt (Run as administrator).
- Run:
schtasks /delete /tn * /f
15. Sophia Script for Windows (Fine-tuning)
Sophia Script for Windows is a comprehensive PowerShell collection of tweaks that can automate many fine-tuning tasks for Windows 10/11. It includes numerous safe configuration options and can automate many of the optimizations described above.
16. Win-Lite PowerShell Script (by Synthiam)
Win-Lite is a Synthiam-provided PowerShell script that disables several Windows features for single-purpose robot installations running only ARC. Do not run this on development or general-purpose PCs.
If you receive an error about scripts being disabled, run this command first. It allows scripts only within the current PowerShell session:
Set-ExecutionPolicy -Scope Process -ExecutionPolicy Bypass17. Disable Defender & Updates PowerShell Script (by Synthiam)
Disable-Defender-Updates-LTSC is a Synthiam PowerShell script intended to optimize Windows 10 Enterprise LTSC systems used as single-purpose robot deployments running Synthiam ARC.
The script disables non-essential Windows components including:
- Microsoft Defender (real-time protection and services)
- Windows Update and automatic update services
- Background telemetry and diagnostic tasks
- Delivery Optimization and related network activity
Warning: This script is intended only for dedicated robot or appliance-style systems. Do not run it on development machines, personal computers, or any system that requires regular security updates.
Download Win-Lite Script (disable-defender-updates-ltsc.ps1)
If script execution is disabled, run the following before executing the downloaded script (this applies only to the current PowerShell session):
Set-ExecutionPolicy -Scope Process -ExecutionPolicy BypassA system reboot is required after running the script for all changes to take effect.
18. View CPU / RAM / Energy Usage
To generate a report that analyzes CPU, energy, and memory usage (including problematic processes and drivers), run:
powercfg /energyThis command creates an HTML energy report detailing processes and drivers that impact power and performance; review it to find additional optimization opportunities.