Two Network Interfaces
Using an EZ-Robot product containing an EZ-B v4 or IoTiny, they have two tutorials on their website, depending on the type of connection needed. However, this tutorial may have more detailed information than what is available on their website
EZ-B USB WiFi Dongle EZ-B WiFi ModesWiFi-enabled EZBs may be put into one of two available modes (AP or Client). Some cloud-based robot skills require an internet connection, such as PandoraBot, Microsoft Cognitive Emotion, Microsoft Cognitive Vision, or Bing Speech Recognition. While connecting a WiFi EZB to a local network in Client Mode is possible, some users may prefer to add a second WiFi network adapter to their PC. Adding a dual WiFi adapter is the easiest solution to maintain an internet connection and the robot simultaneously.
Alternatively, some users may use an Ethernet cable plugged into their PC for internet access while using a WiFi connection to the EZB. While this tutorial covers how to connect with dual WiFi antennas, Ethernet users may find the "Possible Network Conflict" section helpful in diagnosing connection problems.
Adding a second WiFi adapter to the PC is great for traveling with their EZB. Using a dedicated WiFi adapter to connect to the EZB makes direct connecting easier than mucking about with client network passwords, etc.
What Kind Of WiFi Adapter?
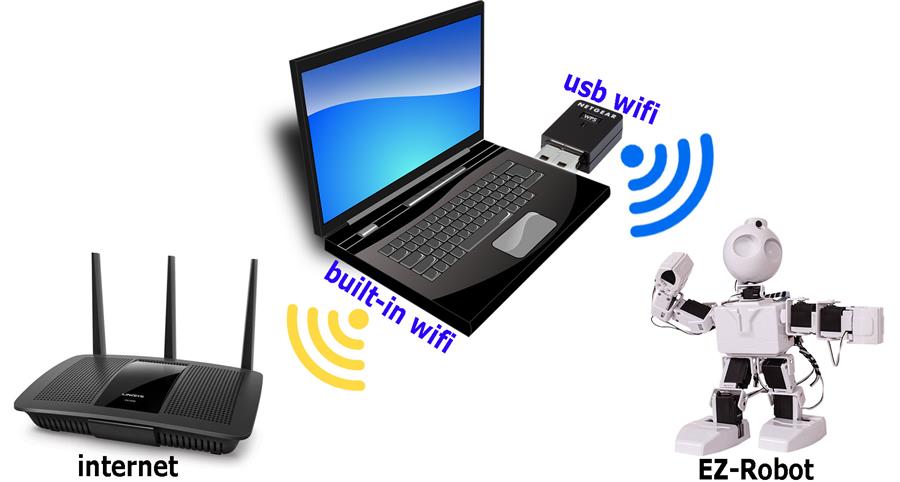
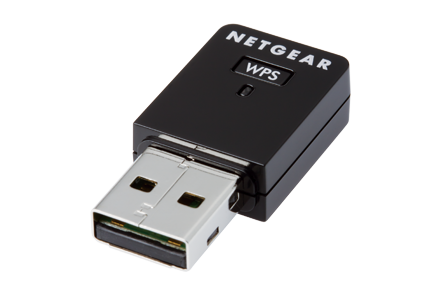
The most straightforward secondary WiFi adapter connects via USB. They are simple USB dongles that, once connected, provide a second WiFi network interface for your computer. This means you can connect to two WiFi networks at the same time... One to the internet via your router, and the second directly to the EZB. USB WiFi adapters can cost as low as new $1 from eBay or slightly more if purchased at your local computer store (staples, best buy, etc.). Here is an eBay search of new 802.11n USB WiFi adapters sorted by lowest price: Search eBay.
How Does It Work?
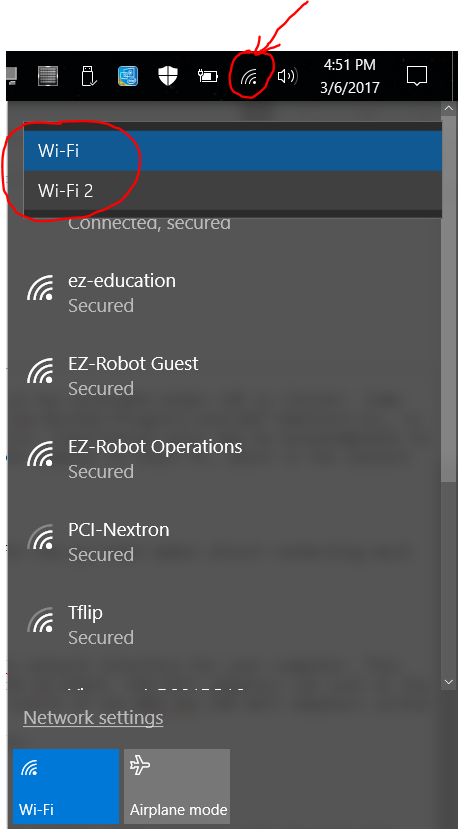
This is the easiest part - connect the WiFi adapter to your PC. Once the drivers are automatically installed by Windows Update, your computer will now have two wireless devices when the WiFi icon is selected from the system tray. The first WiFi device in the list will be the local WiFi adapter within the computer. The second WiFi device in the list will be the newly inserted USB device. I recommend using the second WiFi device for connecting to the EZB.
Possible Network Conflict
The EZB uses the default network of 192.168.1.0. There may be a slight chance that your home network and the EZB are configured for the same TCP/IP Network. There cannot be the same network across two or more adapters without getting into too much technical detail about TCP/IP Networking. Imagine two streets in your city with the same name and house number as yours. There would be no way for the mail service to know which physical house to deliver the mail. This means one of the two houses will get all of the mail. The same scenario applies when two WiFi devices have the same network.
You will know if a network conflict occurs because the ARC will not connect to the EZB even when the WiFi is connected -or- The computer will not reach the internet while connected to the EZB even though both WiFi devices are connected correctly. Also, you can view the IP Addresses of all network devices by typing the following in the CMD.EXE console window.
- Press WIN + R
- Type: cmd.exe and press enter
- In the console window, type: ipconfig and press enter.
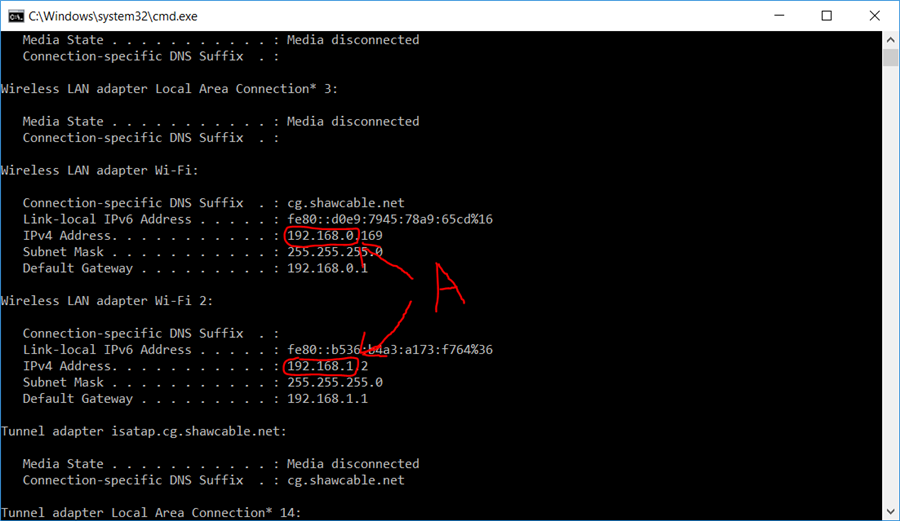
(click for full size)
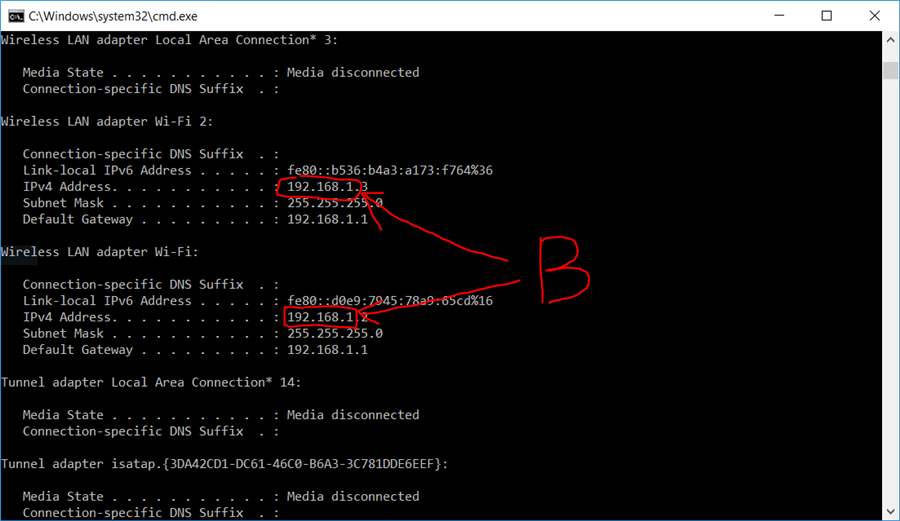
(click for full size)
The image above shows the addresses of two network devices with ipconfig. The red circle shows the network part of the address and is marked with A. These numbers must be different between network devices. They cannot be the same. There is no network conflict in the image marked with an A, as the network part of the address is different. However, the picture marked with B has a network conflict.
Change EZB IP Address
Depending on the type of Wi-Fi-enabled EZB, the method of changing the default IP address varies. It is most likely easier to change the IP address on your local router for the network to 192.168.0.1. However, if you wish to change the IP Address of the EZB, you can do that as well.
*NOTE: If you change the default IP Address of the EZ-B, you will also have to enter the new address in ARC when connecting -or- use the SCAN tool in both the Camera and Connection controls to discover the new IP Address of the robot.
ESP32
At the top of the ESP32 or ESP32Cam, the EZB source code is the default value. Edit the source code and change the default network. Re-upload the source file to the ESP, and the EZB will use the new IP Network.
Raspberry Pi
Raspberry Pi has a network configuration interface by launching sudo raspi-config from a command shell. Select the network settings and enter a new IP Address.
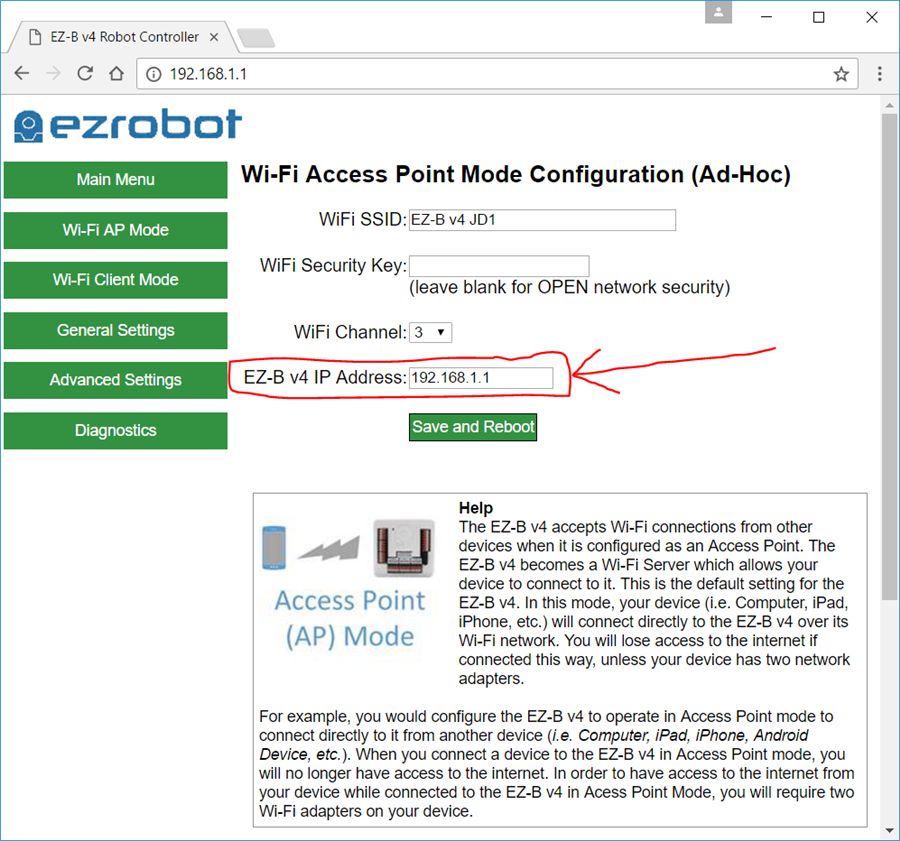
EZ-Robot EZB v4 or IoTiny
You may change the IP Address in the EZ-B v4 Web Configuration Interface on the EZ-B v4.x/2 or IoTiny. If you have an IP/Network Conflict, you will have to disconnect from the internet to remove the network conflict and reconnect to the EZ-B v4 to view its web server configuration. Once you have disconnected from the internet and reconnected to the EZBs WiFi, visit the default address of https://192.168.1.1 in a web browser, select WiFi AP Mode, locate the IP Address, change it to 192.168.10.1, and press SAVE.