

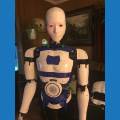
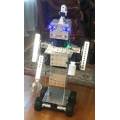






Welcome to my MRB1 (My Robot Buddy V1)
I have removed the post because it was corrupted somehow and all the pictures and formatting was lost.
This post needs to be deleted.
 Com Port Manager
— Displays local PC COM/Serial ports opened by scripts, showing open/closed status (no communication logs); not the EZ-B UART.
Try it →


Welcome to my MRB1 (My Robot Buddy V1)
I have removed the post because it was corrupted somehow and all the pictures and formatting was lost.
This post needs to be deleted.
OK here are some pictures of the new arm design post printing. With them being black it is hard to make them out unless you zoom in on them. I will be putting together the J2 (ADDUCTION/ABDUCTION) joint and the bicep J3 (INTERNAL/EXTERNAL ROTATION) joint as I have the servos for them. I am still waiting for the elbow J4 (FLEXION/EXTENSION), J5 (PRONATION/SUPINATION) forearm and wrist J6 (FLEXION/EXTENSION) servos to come in.
So far I think this is going to work out.... To install it I will need to cut out the piston base for the shoulders that I had installed in the frame of the torso for the normal arms, so before doing that I want to make sure this new arm is going to work as expected.
NOTE: PLEASE EXCUSE THE MESS!
Now that I have seen the new hand for inmoov I may use that rather than the Handi Hand like I was planning. I would need to design a new servo bed for the arm using the smaller servos seen below and also rework the new wrist joint I have been working on. Now I need to order more servo's. $$$
Here is a pictures of the Bicep Joint 3 done with the elbow Joint 4 getting ready to start being put together.
This is the planned J5 joint for the rotating forearm and J6 the wrist for the new arm. Looks more and more that I am going with the new Inmoov V2 hand. using the above servo bed for the smaller servos.
Well today was a productive day working on the robot. I was able to assemble the J1, J3, J4, J5 joints with the J2 joint for tomorrows schedule fun... I need to figure out how I want to run all the wires from the hands all the way back to the EZB4's
Below are some pictures of the completed work. J1 main shoulder join.
From left to right J5, J4, J3
Once I get J2 put together I will add another picture and video of it working.
This J2 Joint is going to be the death of me. I have had to reprint parts because I need to learn to measure twice and print once LOL. So I have another part I need to print as soon as the printer is free You would think I would also learn to lock the embed nuts so they can't fall out like they did to me last night in the J2 joint. So I need to take the hole thing apart again to address that That's what happens when you take short cuts.
On a good note the J2 drive seemed to work ok... The only thing I wish is I could do is get all the backlash out of everything. This is why I really want to make a better gearbox using stepper motors. I am working on a new box now to try with servos and see if I can improve things.
I just really would like to get the current redesign done and see how it works... and then move forward from there.
We call this prototyping. LOL. You are doing amazing work.
Dave, Thank you I just hope all this work and money I am putting into this design works. I have got a new design I am working on using a new zero backlash gear box to replace the J1 and J2 joints if I can make it work fast enough. Just busy work while the printer is making parts so I can complete testing of the first design version.
I did not realize how heavy the Inmoov arm is until now the J1 and J2 joints really need to be strong and powerful.