
smiller29
USA
Asked
— Edited

MRB1 (My Robot Buddy V1) Project
Welcome to my MRB1 (My Robot Buddy V1)
I have removed the post because it was corrupted somehow and all the pictures and formatting was lost.
This post needs to be deleted.

smiller29
that arm looks awesome . very solid and strong .
Yha! It works! So sweet! So Elegant! I'm so impressed. Nice work.
I like your drive to make it better. My motto is "Good enough isn't". Sounds like you feel the same.
I added his new Junk cup the other day.
smiller29
haha . hopefully it dont itches . or he will have not pla enough .
Vid looks great and +1 for the camera assistant. That's how I started out moving mine, one axis at a time. Now it is time for you to start learning the AutoPosition control so all axis move at once. It really makes the movement beautiful as it expands into 3D. It is an easy control to learn.
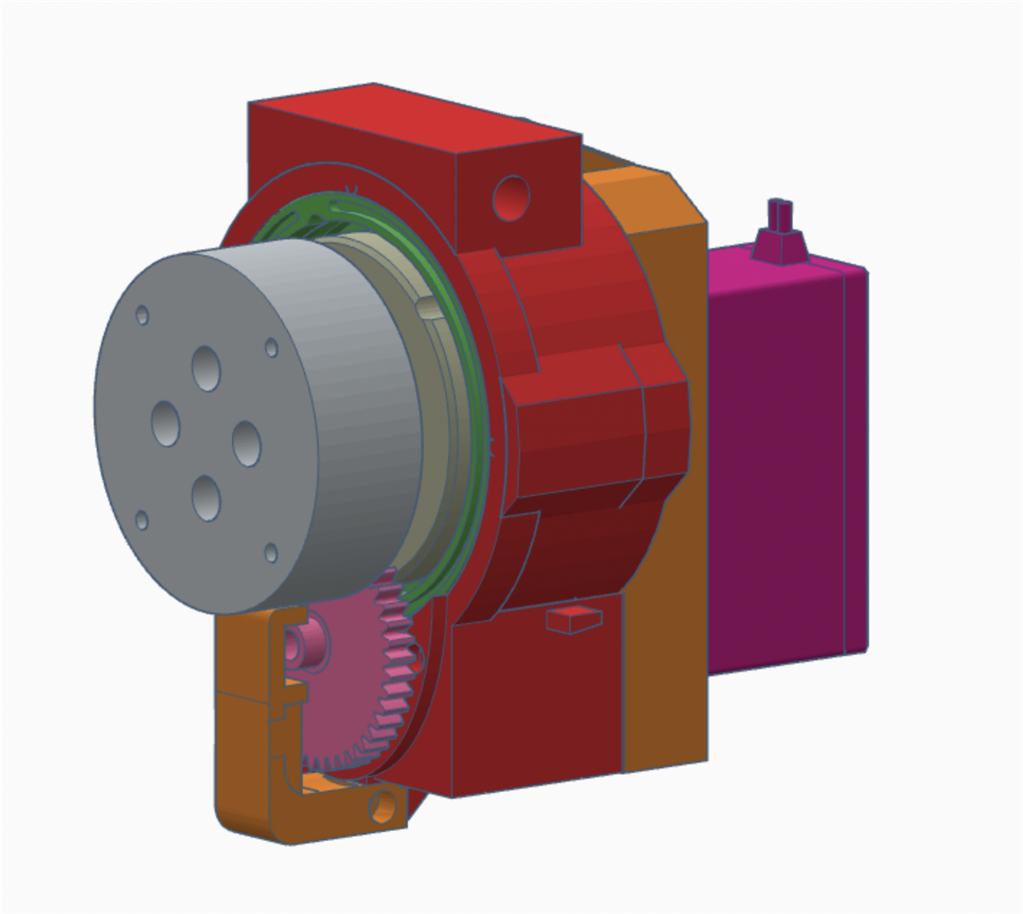
I was using a servo tester to drive the servos for a video. I did not like the look of it once it was on so I have been redesigning the two shoulder joints with a new gearbox. I just completed printing the J1 joint new gearbox need to build it and test it.
I have completed my new version 2 J1, J2 and J3 joints design and should be testing it soon. I have changed the gearbox on the J1-2 joints to allow me to make the smaller and to remove the backlash in them. If I did the math right they should be a little faster than the V1's. The goal was to lighten the arm if I could and also make it easier to print the parts. So I also redesigned the J3 joint. The below is some pictures of the new designs I am working on.
J1 Shoulder
J2 ShoulderJ3 Bicep
Looks like it all is coming together, great work EzAng