
Struggling With Autoposition
Not a fan of the autoposition, but I had to tackle it for the drink robot because unlike servo recorder, I needed the robot to precisely grab a cup and repeat positions over and over. Which he does.
First of all I have read every "?" by every button and slider and I still dont get most of whats happening.
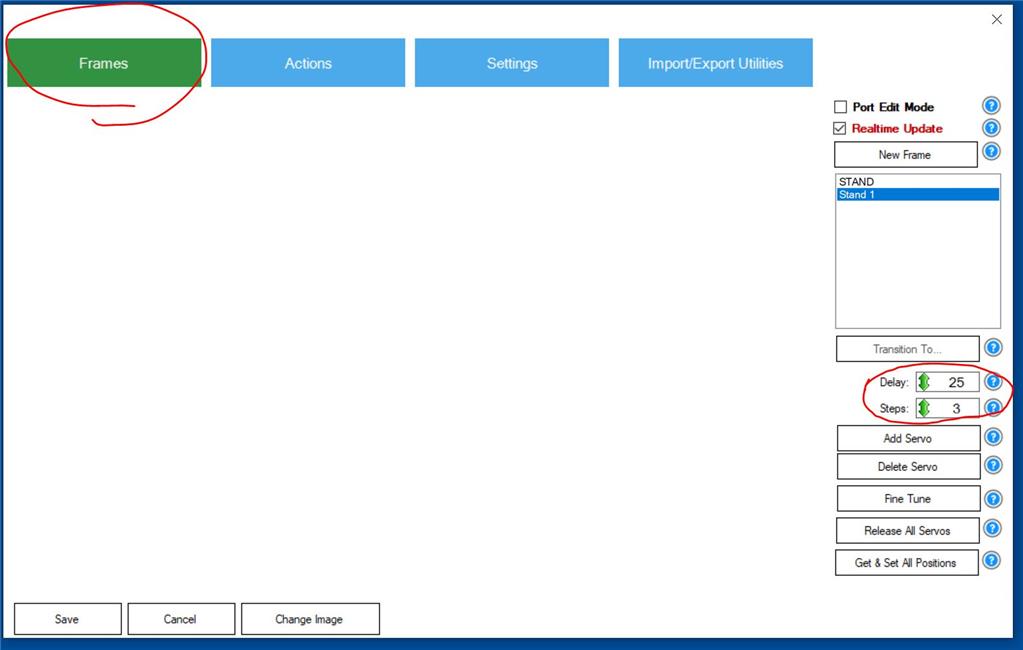
My issue is understanding the redundancy of different speeds and steps in all the windows and how that affects the servos in each one. Of the three windows I understand "Frames" window the best as this is where you begin and can see the effects on the servos.
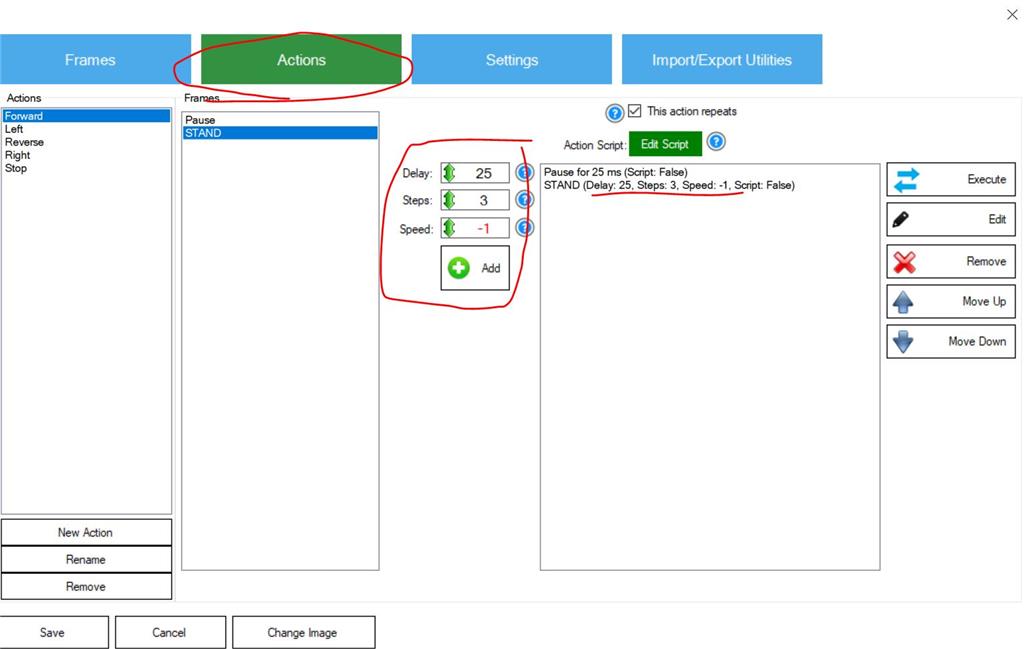
But as I move on to the "Actions" tab I am again shown delay and steps and now speed. The speed here goes from -1 to 20. I understand I can change this for each frame, but after I set the motions and then decide to go back and edit the speed button on the right, there is no noticeable speed change to my animation ( i also understand that the higher the number the slower the motion)
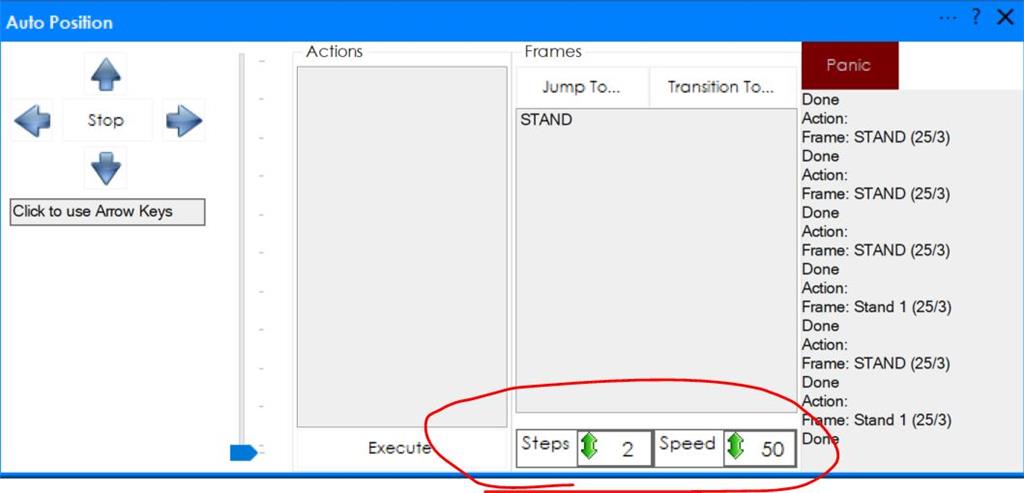
Finally, when actions are set up and you go to the main window for Auto Position I am again presented with another STEP and SPEED, this time the speed goes to 0-50. Why?
Yesterday I broke part of the drink robot because I am struggling with this animation system. Its ok if you are playing with a toy sized robot, but when programming a lifesized robot, things can go expensively wrong, when disaster strikes or worse someone gets hurt.
Please take the time to explain to me how this redundancy is supposed to work.
Related Hardware (view all EZB hardware)

Related Robot Skill (view all robot skills)


I had some severe head twisting motions on my full size Cylon that burned a servo,after first trying auto position. I then adapted the Hex 6 Auto Position skill to move head and arms using the different walking animations.Just modified the position and speed of each motion.Example Slow walk 1 2 3 4 converted to head rotation right,center,left and center. Gave a really natural looking left and right when ever forward motion ,turning or backwards ,head looks like it is searching when ever moving. Similar for arm movements.
That example and description of how it uses the values really helps!
Alan
Thank you for the addition to the manual. This really is much better and makes this concept much easier to understand.
Robot repaired and animated .....I grasped hold of the reins and took control. Thanks again for the extra explanation. Now to tie it into the scripts to finish it off. Then I gotta shoot all the videos and edit...hopefully, video soon!
Hey you can also train frames by moving the robot servos using a remote control or something. I know you like to use the servo recorder with touch controls. So you can move the robot into position and hit a button to create a frame from that position. Rather than doing it in the Auto Position editor.
im on my phone but there’s a tutorial I did to create custom frames with a wiimote and using vr headset.
Ah here it is: https://synthiam.com/Community/Tutorials/Create-Auto-Position-Actions-from-EZ-Script-16353
My brain melted.....completely missed this as an option!
OMG.....so I can use my finger pad controls and just trigger to record servo positions?